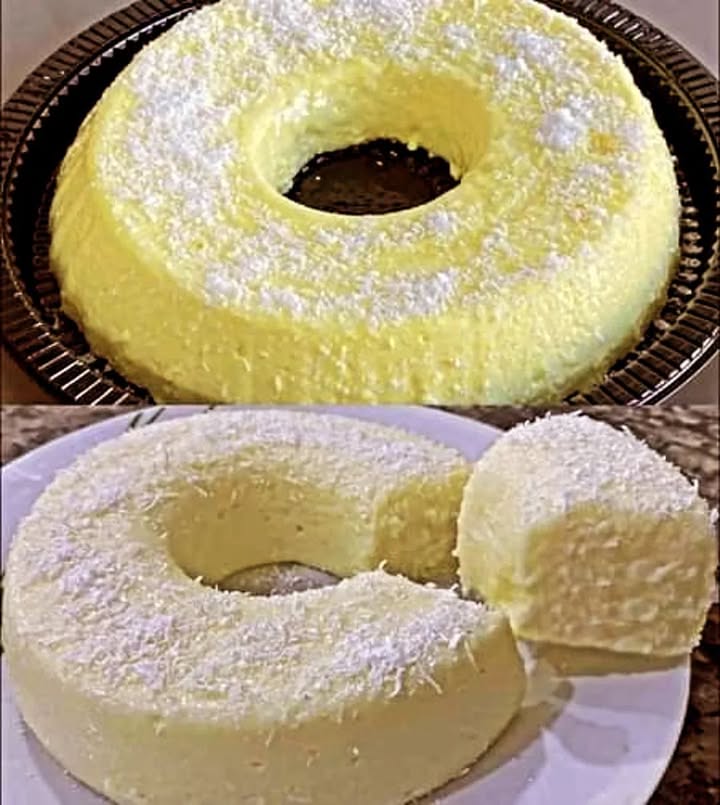
Coconut Pudding: Your New Favorite Creamy Comfort Dessert
Let me tell you about the day my fancy dinner was saved by a humble can of condensed milk. I was hosting my in-laws, a situation that calls for impressive but foolproof desserts. My famous coconut pudding, with its creamy texture and golden caramel crown, was the star of the night. This isn’t just a recipe; it’s my little jar of kitchen magic. It’s the perfect blend of simplicity and elegance, and today, I’m so excited to share it with you.
A Sweet Slice of History
This style of baked, caramel-topped Coconut Pudding has roots in Portuguese cuisine, known as “pudim de coco.” It traveled the world with explorers and settled beautifully into many cultures, especially in Latin America and the Philippines. My version is the one my Brazilian friend taught me, a beloved staple at every family gathering. The traditional method always uses a water bath for that signature silky-smooth texture. Modern twists might add lime zest or even a splash of rum, but this classic recipe is the heartwarming foundation.
Why You’ll Fall in Love With This Coconut Pudding
First, it’s incredibly forgiving. Unlike finicky custards, this pudding is sturdy and patient. Second, the flavor is pure tropical comfort. The richness of the condensed milk pairs perfectly with the sweet, chewy shreds of coconut. Finally, the dramatic unmolding is a true chef’s moment in your own kitchen. There’s nothing like the “oohs” and “aahs” when that perfect, glistening caramel dome is revealed. It feels fancy but is secretly simple.
Perfect Occasions for This Tropical Treat
This pudding is a versatile star! It’s a showstopper for holidays like Easter or Christmas. It’s a comforting end to a summer BBQ. I always make it for potlucks because it travels like a dream. Honestly, a regular Tuesday deserves a slice of this pudding, too. It turns an ordinary day into a small celebration.
What You’ll Need: The Ingredients List
Gather these simple items. The beauty is in their everyday nature:
- 1 can (395 g) of sweetened condensed milk
- 1 can of whole milk (use the empty condensed milk can to measure!)
- 1 cup of grated coconut (I use sweetened, but unsweetened works too)
- 2 tablespoons of cornstarch
- 1/2 cup of granulated sugar (for the caramel)
- 1 tablespoon of unsalted butter
- 3 large eggs
No Problem: Handy Substitution Options
Out of something? Don’t stress!
- Milk: Full-fat milk is best, but 2% works. For a dairy-free version, try canned coconut milk.
- Grated Coconut: Fresh, frozen, or desiccated coconut all work. Desiccated will give a more subtle texture.
- Cornstarch: This is our thickener. You can use an equal amount of all-purpose flour in a pinch.
- Butter: A dab of coconut oil would be a lovely tropical swap.
Let’s Make Some Magic: The Preparation Method
Put on some music and get ready to create something wonderful.
Step 1: Mixing the Pudding Base
First, preheat your oven to 180°C (350°F). Now, grab a medium saucepan. Pour in the condensed milk, the can of milk, the grated coconut, and the cornstarch. Whisk it all together until smooth and no cornstarch lumps remain. Turn the heat to medium. Cook this mixture, stirring constantly with a wooden spoon. You’ll feel it begin to thicken slightly and see gentle bubbles form. This takes about 5-7 minutes. It should coat the back of your spoon nicely. Pro tip: Constant stirring is key here to prevent any scorching on the bottom of the pan.
Step 2: Creating the Golden Caramel
While the base cools a bit, let’s tackle the caramel. Place your pudding mold (the one with the hole in the middle!) directly on the stove over low heat. Add the 1/2 cup of sugar. Watch it like a hawk. The sugar will melt, then clump, and finally turn into a beautiful liquid amber. Gently swirl the pan to help it melt evenly. Once it’s a deep golden color, remove from heat and immediately add the butter. Be careful, it might sizzle! Swirl again until the butter melts in. Chef’s tip: Use oven mitts! That mold handle gets very hot.
Step 3: Combining and Baking to Perfection
Let the base cool for about 10 minutes. Then, whisk in the eggs, one at a time, making sure each is fully incorporated before adding the next. This prevents the eggs from scrambling. Pour this creamy, fragrant coconut mixture into your caramel-lined mold. Place the mold inside a larger baking dish. Pour hot water into the larger dish until it comes halfway up the sides of the mold. This gentle water bath is the secret to the creamy texture. Bake for 50-60 minutes. The top will be golden and set, and a toothpick inserted should come out clean.
Step 4: The Grand Finale – Cooling and Unmolding
This is the hard part: patience! Let the pudding cool completely on a rack. Then, cover it and refrigerate for at least 4 hours, preferably overnight. This chilling firms it up perfectly. To unmold, run a thin knife around the edges. Place your serving plate upside-down on top of the mold. Hold them together firmly and flip! Give it a gentle shake and lift the mold. Behold your masterpiece with its glorious caramel waterfall!
Your Game Plan: Timing is Everything
Here’s your timeline to success:
- Prep Time: 20 minutes
- Cook Time: 60 minutes
- Cooling/Chilling Time: 4+ hours (overnight is best)
- Total Time (hands-off): About 5.5 hours
Chef’s Secret for the Smoothest Pudding
My best trick? After blending the cooked mixture with the eggs, I pour it through a fine-mesh sieve into the caramelized mold. This catches any tiny bits of cooked egg or coconut, guaranteeing an unbelievably velvety, restaurant-quality texture every single time.
A Little Extra Coconut Info
Did you know the “eyes” of a coconut (the three indentations on one end) are its natural germination pores? One is always softer than the others. That’s the one to poke through to drain the coconut water easily before cracking it open for fresh meat!
Necessary Equipment
- Medium saucepan
- Tube/Bundt pudding mold (with a hole in the center)
- Whisk and wooden spoon
- Large roasting pan or baking dish (for the water bath)
- Fine-mesh sieve (highly recommended for smoothness)
How to Store Your Coconut Pudding
Once unmolded, your coconut pudding can stay covered in the refrigerator for up to 4 days. The caramel will keep it moist and delicious. I find the flavor actually gets better on the second day as everything melds together.
For longer storage, you can freeze it. Wrap the whole pudding or individual slices tightly in plastic wrap and then aluminum foil. It will keep frozen for up to 2 months. Thaw it overnight in the refrigerator before serving.
Always store it in the fridge. Since it contains dairy and eggs, leaving it out at room temperature for more than 2 hours is not safe. The creamy texture also relies on being chilled, so keep it cold for the best experience.
My Best Tips and Advice
- Room temperature eggs blend into the warm base more smoothly and reduce the risk of curdling.
- If your caramel hardens too much in the mold before you add the batter, don’t worry! The baking process will re-liquify it.
- For an extra coconutty punch, toast the grated coconut in a dry pan for a few minutes before adding it to the base mixture.
Presentation to Impress Your Guests
Presentation is the final touch of love! Serve slices on pretty plates with a drizzle of the extra caramel from the plate. A dollop of lightly sweetened whipped cream is always welcome. For a fresh twist, garnish with a few toasted coconut flakes, a mint sprig, or even some fresh berries like raspberries or mango slices.
Healthier and Fun Variations to Try
Love the idea but want to mix it up? Here are six fantastic twists:
- Chocolate Coconut Pudding: Add 1/4 cup of unsweetened cocoa powder to the base mixture. You get a Mounds bar in pudding form!
- Pina Colada Pudding: Replace the milk with canned pineapple juice. Add 1/2 cup of crushed pineapple (well-drained) to the batter for tropical bliss.
- Vegan Coconut Pudding: Use full-fat coconut milk and vegan condensed milk. Swap eggs for a flax egg mixture (1 tbsp ground flax + 3 tbsp water per egg).
- Toasted Almond Coconut Pudding: Fold 1/2 cup of finely chopped toasted almonds into the batter for a wonderful nutty crunch.
- Lemon Coconut Pudding: Add the zest of two lemons to the base. The bright citrus cuts the richness beautifully.
- Individual Mini Puddings: Bake the batter in ramekins or a muffin tin (with caramel in the bottom!). Reduce baking time to 25-30 minutes. Perfect for portion control and cute serving.
Common Mistakes to Avoid
Mistake 1: Skipping the Water Bath (Bain-Marie)
This is the biggest error. Baking the pudding directly in the dry oven heat will cause it to cook too quickly. The outside will become rubbery and the inside might be undercooked or curdled. The water bath provides gentle, even heat. It’s like a warm hug that cooks the eggs slowly for that perfect silky texture. Always use hot water when filling the outer pan.
Mistake 2: Rushing the Unmolding Process
Impatience leads to pudding disaster! If you try to unmold the pudding while it’s even slightly warm, it will break and collapse. The structure needs time to firm up in the fridge. That 4-hour chill is non-negotiable. For the cleanest release, chill it overnight. The cold pudding will hold its shape perfectly against the warm caramel.
Mistake 3: Burning the Caramel
Caramel goes from perfect to burnt in seconds. Using high heat is a recipe for a bitter, dark mess. Always use low heat and be patient. Let the sugar melt slowly. Swirl the pan instead of stirring. Aim for a honey or amber color, not a dark mahogany. If you see smoke, it’s gone too far.
Mistake 4: Adding Eggs to a Hot Base
If you pour your eggs straight into the piping hot milk mixture, you’ll end up with sweet scrambled eggs in your pudding. Always let the cooked base cool for at least 10 minutes off the heat. Temper the eggs by whisking a small amount of the warm base into the beaten eggs first. Then, slowly whisk that egg mixture back into the main pot.
Your Coconut Pudding Questions, Answered
Can I make this pudding without a tube pan?
Yes, you can! A regular round cake pan or a loaf pan will work. The baking time may vary slightly. The tube pan helps the center cook evenly, but other pans are fine. Just make sure you still use the water bath technique. The unmolding will be less dramatic but just as tasty.
Why is my pudding watery or not setting?
A watery pudding usually means it needed more time in the oven or your water bath wasn’t hot enough. Always test with a toothpick; it should come out clean. Also, ensure you used the correct amount of cornstarch. If it’s still loose after chilling overnight, it likely needed 5-10 more minutes of baking time.
Can I use coconut milk instead of regular milk?
Absolutely! Using canned coconut milk (the full-fat kind) will give you an incredibly rich and intense coconut flavor. Just measure it with the empty condensed milk can as directed. Your pudding will be a coconut lover’s dream come true.
How do I prevent air bubbles in my baked pudding?
After pouring the batter into the mold, gently tap the mold on the counter a few times. This helps release any trapped air bubbles. You can also let the batter sit for a minute or two so bubbles rise to the surface, then pop them with a toothpick before baking.
My caramel hardened into a rock in the mold. What now?
Don’t panic! Simply pour your pudding batter right over the hard caramel. The long, moist baking process will melt it into a perfect sauce again. The heat and steam from the water bath will work its magic and liquefy that sugar by the time it’s done.
Is it necessary to use cornstarch?
In this recipe, yes. The cornstarch acts as a stabilizer alongside the eggs. It gives the pudding a lovely, sliceable yet creamy consistency. If you omit it, the texture will be more like a flan or crème caramel—still delicious, but less sturdy for clean slices.
Can I make this ahead of time?
This pudding is the perfect make-ahead dessert. In fact, I highly recommend making it the day before you need it. The long chill in the fridge allows the flavors to deepen and the texture to set perfectly. It takes the stress right out of entertaining.
What’s the best way to grate fresh coconut?
If you’re using a whole coconut, drain the water first. Crack it open and pry the meat out. Use a vegetable peeler to remove the brown skin. Then, grate the white meat on the fine holes of a box grater, or pulse it in a food processor until finely shredded. Fresh coconut adds amazing texture!
Can I use reduced-fat condensed milk?
You can, but the texture and richness will be different. Full-fat condensed milk gives that luxurious, creamy mouthfeel that makes this dessert so special. The reduced-fat version might result in a slightly less firm and less rich pudding.
How do I clean a caramel-coated pot?
The easiest way is to fill the dirty pot with water and bring it to a boil. The boiling water will dissolve the hardened caramel right off. Let it simmer for a few minutes, then wash as normal. No harsh scrubbing needed!
Ready to Enjoy Your Creation!
And there you have it—my trusted, crowd-pleasing Coconut Pudding recipe. It’s more than just a list of steps; it’s a story of comfort, sharing, and a little kitchen triumph. I’ve made this for birthdays, holidays, and just-because days. Every time, it brings smiles. So gather your ingredients, embrace the process (especially the caramel!), and get ready for the sweet reward. Now go on, make some memories, one creamy, coconutty slice at a time.
Lemon Cream Delight
Ingredients
Equipment
Method
- Preheat your oven to 180°C (350°F).
- In a medium saucepan, whisk together the condensed milk, whole milk, grated coconut, and cornstarch until smooth.
- Cook the mixture over medium heat, stirring constantly for 5-7 minutes until it thickens and coats the back of a spoon.
- Prepare the caramel by placing the pudding mold on low heat and adding the granulated sugar until it melts and turns golden.
- Remove from heat, and carefully add the butter to the melted caramel, swirling to combine.
- Let the pudding base cool for about 10 minutes, then whisk in the eggs one at a time.
- Pour the coconut mixture into the caramel-lined mold.
- Place the mold in a larger baking dish and fill the outer dish with hot water halfway up the mold.
- Bake for 50-60 minutes until the top is set and a toothpick comes out clean.
- Allow the pudding to cool completely on a rack, then cover and refrigerate for at least 4 hours, preferably overnight.
- To unmold, run a thin knife around the edges, place a serving plate on top, and flip gently to release the pudding.