RumChata Cheesecake: Your New Favorite Dessert Obsession
Have you ever had a dessert that made you close your eyes and just sigh with happiness? That’s this RumChata Cheesecake for me. I first made it for a girls’ night, and let me tell you, the silence that fell over the room was the best compliment I’ve ever received. It’s creamy, spiced, and has that magical RumChata flavor that turns a simple cheesecake into a celebration. If you want to be the star of the next potluck or family dinner, this is your secret weapon.
A Slice of Sweet History: From Horchata to Cheesecake
This recipe is a beautiful mash-up of traditions. Classic New York-style cheesecake meets the cozy, cinnamon-kissed flavors of horchata. RumChata itself is a modern creation, blending Caribbean rum with the essence of that beloved Mexican rice drink. My version is a tribute to that fusion. It’s not a centuries-old family secret, but it *feels* special. I’ve tweaked and tested it through many holiday seasons, and it’s now the dessert my friends text me about months in advance. It’s our new tradition.
Why You’ll Fall in Love With This RumChata Cheesecake
You will love this because it’s impressively easy but tastes like you spent all day in a fancy bakery. The RumChata does double duty. It adds a warm, vanilla-cinnamon flavor and makes the filling incredibly smooth and lush. The cinnamon graham cracker crust is the perfect crunchy contrast. It’s a dessert that feels indulgent and comforting all at once. Plus, that water bath method might sound fancy, but it’s the simple trick that guarantees a crack-free, perfectly set cheesecake every single time.
The Perfect Occasion for a Show-Stopping Cheesecake
This isn’t just a dessert; it’s an event starter. Here’s where it truly shines:
- Holiday Gatherings: Thanksgiving, Christmas, or New Year’s Eve. The spices fit right in.
- Birthdays: Skip the boxed cake! This feels much more personal and celebratory.
- Dinner Parties: It’s a guaranteed conversation piece and makes any meal feel special.
- “Just Because” Days: Sometimes, a Tuesday needs a little sparkle, and a slice of this does the trick.
Gathering Your Ingredients for RumChata Cheesecake Bliss
Let’s get everything on the counter! Using full-fat, room-temperature ingredients is key for that perfect creamy texture.
- Cooking spray
- 9 graham crackers, finely crushed
- 6 tablespoons melted butter
- 1/4 cup sugar
- 2 teaspoons of ground cinnamon
- Pinch of kosher salt
- 4 blocks (8 oz each) cream cheese, softened
- 3/4 cup sugar
- 1/4 cup brown sugar
- 4 large eggs
- 1 teaspoon vanilla extract
- 1/3 cup RumChata liqueur
- 3 tablespoons of cornstarch
- Cool Whip, for topping
- Cinnamon sugar and caramel sauce, for decorating
No RumChata? No Problem! Handy Substitutions
Don’t worry if you’re missing an item. Here are some easy swaps:
- RumChata: Mix 1/3 cup of milk or cream with 2 teaspoons of vanilla extract, 1 teaspoon of cinnamon, and a tiny splash of rum or rum extract (optional).
- Graham Crackers: Digestive biscuits, vanilla wafers, or even cinnamon teddy grahams work great.
- Cool Whip: Freshly whipped heavy cream sweetened with a little powdered sugar is divine.
- Cornstarch: All-purpose flour can be used in the same amount.
- Springform Pan: A deep 9-inch pie dish can work in a pinch, but serving is trickier.
Creating Your Masterpiece: Step-by-Step Instructions
Step 1: Preheat and Prep
Start by heating your oven to 325°F (165°C). This lower temperature is our friend for gentle, even baking. Take your 8 or 9-inch springform pan and give it a good coat of cooking spray. Get the sides and bottom really well. This little step is a lifesaver when it’s time to release your beautiful cheesecake later. Trust me, you don’t want any sticking!
Step 2: Make the Cinnamon Crust
Time for the foundation! In a medium bowl, combine the finely crushed graham crackers, melted butter, sugar, cinnamon, and salt. The smell is already amazing. Stir until it looks like wet sand. Pour this mixture into your prepared pan. Use a flat-bottomed cup or your fingers to press it firmly and evenly into the bottom and about halfway up the sides. A firm press now means a crust that holds together later. Set it aside while you make the filling.
Pro tip: For super fine crumbs, toss the graham crackers in a zip-top bag and roll with a rolling pin, or pulse them in a food processor.
Step 3: Whip Up the Dreamy Filling
In a large bowl, beat the softened cream cheese with the white and brown sugars. Use an electric mixer on medium until it’s completely smooth and no lumps remain. This is crucial! Now, add the eggs one at a time, beating just until each yellow yolk disappears into the pale mixture. Next, pour in the vanilla and that glorious RumChata. The aroma will fill your kitchen with sweet, spiced warmth. Finally, sprinkle in the cornstarch and mix on low until everything is perfectly blended and silky.
Step 4: Assemble and Prepare for the Water Bath
Carefully pour your creamy filling over the waiting crust. Smooth the top with a spatula. Now, here’s the secret weapon: tear off two large pieces of heavy-duty aluminum foil. Wrap them tightly around the outside bottom and sides of the springform pan. This foil jacket will keep water from seeping in during the bath. Place the wrapped pan into a larger roasting pan. Bring a kettle of water to a boil. Pour the hot water into the roasting pan until it comes about halfway up the side of the springform pan.
Step 5: The Gentle Bake and Cool Down
Slide the whole setup into your preheated oven. Bake for about 1 hour and 30 minutes. The edges should be set, but the center will still have a slight, gentle jiggle. Turn the oven off, crack the door open with a wooden spoon, and let the cheesecake cool slowly inside for 1 hour. This prevents shocking cracks. Then, remove it from the water bath, take off the foil, and let it cool to room temperature on a rack. Finally, refrigerate it for at least 5 hours, but overnight is best for the perfect slice.
Step 6: The Grand Finale: Decorating!
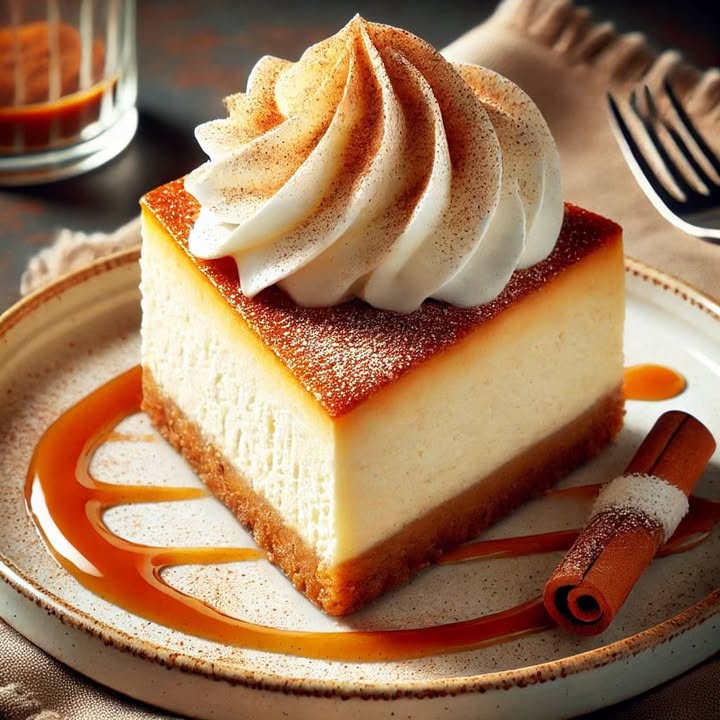
This is the fun part! Run a thin knife around the edge of the pan before unclasping the springform ring. Dollop or pipe Cool Whip over the top. Give it a generous dusting of cinnamon sugar. Then, artfully drizzle rich caramel sauce all over. Every slice becomes a beautiful, Instagram-worthy creation. The combination of cool topping, spiced cheesecake, and gooey caramel is pure magic.
Chef’s tip: For clean slices, dip your knife in hot water and wipe it dry between each cut.
Your Cheesecake Timeline
Plan ahead for the best results. Good things take time!
- Prep Time: 30 minutes
- Cook Time: 1 hour 30 minutes
- Cooling Time in Oven: 1 hour
- Chilling Time: At least 5 hours (overnight ideal)
- Total Time: About 8 hours (mostly hands-off)
My #1 Secret for Cheesecake Success
Room temperature is non-negotiable. Take your cream cheese and eggs out of the fridge at least 2 hours before you start. Soft cream cheese blends smoothly without lumps. Room-temperature eggs incorporate more easily and help prevent overmixing, which can add too much air and cause cracks. If you forget, you can gently warm the cream cheese blocks in the microwave at 10-second intervals, but be very careful not to melt them!
A Fun Fact About Your Key Ingredient
RumChata was invented in 2009, making it a relatively new kid on the block in the liqueur world. Its creators wanted to capture the taste of homemade horchata, a drink often enjoyed with cinnamon toast. They succeeded so well that it sparked a whole trend of dessert-inspired cocktails and baked goods. So when you bake with it, you’re part of a delicious, modern culinary tradition!
Kitchen Tools You’ll Need
You don’t need anything too fancy, just a few basics:
- 9-inch springform pan
- Electric hand mixer or stand mixer
- Large mixing bowls
- Roasting pan (for the water bath)
- Heavy-duty aluminum foil
- Spatula
- Measuring cups and spoons
Storing Your RumChata Cheesecake
Once decorated, your cheesecake is best enjoyed within 24 hours. Keep it covered in the refrigerator until you’re ready to serve. The Cool Whip topping can start to weep if left out too long.
For longer storage, hold off on the toppings. Cover the chilled, plain cheesecake tightly with plastic wrap or store it in an airtight container. It will keep beautifully in the fridge for up to 5 days. This makes it a fantastic make-ahead dessert for busy weeks.
You can also freeze this cheesecake for up to 2 months. Wrap the whole cheesecake (or individual slices) tightly in plastic wrap, then in foil. Thaw it overnight in the refrigerator before adding your toppings and serving.
Tips and Advice for Flawless Results
- Don’t overmix the batter after adding the eggs. Mix just until combined to avoid incorporating extra air.
- If you see small cracks forming on top during baking, don’t panic! The toppings will cover them perfectly.
- For the ultimate smooth filling, you can strain it through a fine-mesh sieve into the crust to catch any tiny cream cheese lumps.
- Always use full-fat cream cheese. Low-fat versions have more water and can change the texture and cause sinking.
Presentation Ideas to Wow Your Guests
- Serve each slice on a pool of caramel sauce with a sprinkle of toasted pecans or walnuts.
- Add a light dusting of cocoa powder over the Cool Whip for a pretty two-tone effect.
- Garnish with a cinnamon stick or a pirouette cookie on the side for an elegant touch.
- For a party, make mini cheesecakes in a muffin tin lined with parchment liners (adjust baking time down to 20-25 minutes).
Healthier & Dietary Twist Ideas
Love the flavor but want a different version? Try these spins on the classic.
- Gluten-Free RumChata Cheesecake: Simply use your favorite gluten-free graham crackers or cookies for the crust. Check that your cornstarch is certified GF.
- No-Bake RumChata Cheesecake: Use gelatin to set the filling with whipped cream folded in. Pour over the crust and chill until firm. Perfect for hot summer days.
- Lower-Sugar Version: Use a sugar substitute designed for baking in both the crust and filling. Opt for a sugar-free Cool Whip and caramel topping.
- Pumpkin Spice Fusion: Add 1 cup of pure pumpkin puree and an extra teaspoon of pumpkin pie spice to the filling for a fantastic fall dessert.
- Chocolate Swirl Cheesecake: Melt 1/2 cup of chocolate chips. After pouring the filling, dollop the chocolate on top and swirl with a knife for a marbled effect.
- Individual Jar Cheesecakes: Layer the crust and filling in small mason jars. Bake in a water bath for a shorter time for adorable personal desserts.
Common Mistakes to Avoid
Mistake 1: Using Cold Cream Cheese and Eggs
This is the biggest culprit for a lumpy filling. Cold cream cheese will never blend smoothly with the sugar. You’ll end up overmixing trying to beat out the lumps, which adds too much air. Cold eggs also don’t incorporate well. Always plan ahead and let your dairy and eggs sit on the counter until they are no longer cool to the touch. Your batter will be velvety and perfect.
Mistake 2: Skipping the Water Bath
I know it seems like an extra step, but please don’t skip it! The water bath creates a humid oven environment. This gentle, even heat is what cooks the cheesecake slowly. It prevents the edges from overcooking and pulling away from the center, which causes major cracks. If you’re worried about leaks, just double-wrap your springform pan with heavy-duty foil.
Mistake 3: Overbaking the Cheesecake
A cheesecake is done when the edges are puffed and set, but the center still has a slight wobble, like set Jell-O. It will firm up as it chills. If you bake it until the center is completely firm in the oven, it will be dry and dense later. Set your timer and trust the jiggle test. Remember, it continues to cook from residual heat as it cools in the turned-off oven.
Mistake 4: Not Letting it Chill Long Enough
Impatience is the enemy of good cheesecake! Pulling it from the fridge too soon means a filling that hasn’t fully set. It will be too soft to slice cleanly and the flavors won’t have melded properly. That long, slow chill is what gives it the perfect firm-yet-creamy texture. Make it the day before you need it. Your future self will thank you.
Your RumChata Cheesecake Questions, Answered
Can I make this cheesecake without alcohol?
Absolutely! The RumChata adds wonderful flavor, but you can easily make a non-alcoholic version. Simply replace the 1/3 cup of RumChata with 1/3 cup of whole milk or half-and-half. Then, add an extra teaspoon of vanilla extract and 1 1/2 teaspoons of ground cinnamon to the filling. You’ll still get that delicious horchata-inspired taste that everyone can enjoy, including kids.
Why did my cheesecake crack on top?
Cracks usually happen from a sudden temperature change or overmixing/overbaking. The most common cause is cooling the cheesecake too quickly after baking. That’s why we let it cool in the turned-off oven with the door open. Overbeating the batter after adding the eggs incorporates too much air, which expands and collapses, causing cracks. Also, overbaking makes the proteins tighten too much and split. Follow the water bath and cooling steps closely to avoid this.
Can I use a different size pan?
You can use either an 8-inch or 9-inch springform pan. An 8-inch pan will give you a taller, more dramatic cheesecake, and it may need 5-10 extra minutes of baking time. A 9-inch pan will yield a slightly wider, shorter cheesecake that bakes a bit faster. Do not use a regular cake pan, as you won’t be able to remove the cheesecake cleanly. The springform sides are essential for this recipe.
How far in advance can I make this?
This cheesecake is an excellent make-ahead dessert. You can bake and chill it (without toppings) up to 2 days before you plan to serve it. In fact, the flavor gets even better after a day in the fridge. Add the Cool Whip, cinnamon sugar, and caramel sauce the day you are serving it, ideally within a few hours. This keeps the toppings fresh and looking their best.
What can I use instead of Cool Whip?
Freshly whipped cream is a fantastic, and many would say superior, alternative. Just chill a metal bowl and your beaters. Whip 1 cup of heavy whipping cream with 2 tablespoons of powdered sugar and 1 teaspoon of vanilla extract until you get stiff peaks. It’s less sweet than Cool Whip and has a lovely rich flavor. You can also use a stabilized whipped cream with a little cream of tartar if you need it to hold its shape for longer.
Do I have to use cornstarch?
The cornstarch acts as a stabilizer. It helps the cheesecake set properly and gives the filling a little extra structure without making it taste starchy. If you don’t have it, you can substitute an equal amount of all-purpose flour. The result will be very similar. You could also leave it out entirely, but your cheesecake may be slightly softer and more prone to cracking.
My crust is soggy. What happened?
A soggy crust usually means water leaked into the pan during the water bath. Next time, be sure to use heavy-duty aluminum foil and wrap the springform pan in two separate layers, making sure there are no tears. Press the foil tightly up the sides. Also, make sure your springform pan has a tight seal. Letting the baked cheesecake cool completely on a rack before refrigerating also helps any steam escape.
Can I freeze the leftovers?
Yes, freezing works great! For the best texture, freeze slices or the whole cheesecake before adding the toppings. Wrap individual slices tightly in plastic wrap, then place them in a freezer bag or airtight container. To thaw, place a slice in the refrigerator for several hours or overnight. Add your toppings just before serving. Frozen cheesecake will keep for 1-2 months.
Is there a way to tell if it’s done without opening the oven?
It’s best to check near the end of the bake time. Open the oven door gently. The cheesecake should be set around the edges but still jiggle slightly in the center when you gently shake the pan. The center should look almost set but still soft, like gelatin. If it looks wet or liquidy, it needs more time. If the center is puffed and firm, it’s overdone. Rely on the visual and jiggle cues more than the clock.
Can I add fruit to this cheesecake?
You can, but be careful. Adding fresh fruit with high water content (like berries) directly to the batter can make it soggy and prevent proper setting. A better option is to make a fruit compote or sauce to serve on the side or drizzle on top. A raspberry coulis or a warm apple-cinnamon compote would be delicious with the RumChata flavors. You could also arrange fruit on top of the Cool Whip just before serving for a fresh, colorful finish.
Ready to Bake Some Memories?
There you have it, friends! My tried-and-true recipe for the most delicious RumChata Cheesecake. It might look like a lot of steps, but each one is simple and leads to something truly spectacular. This dessert has brought so much joy to my table, from quiet family nights to big, loud parties. I hope it does the same for you. So preheat that oven, soften that cream cheese, and get ready for the compliments to roll in. Happy baking!
Banana Nut Bliss
Ingredients
Equipment
Method
- Preheat the oven to 325°F (165°C) and coat a 9-inch springform pan with cooking spray.
- In a medium bowl, mix the crushed graham crackers, melted butter, sugar, cinnamon, and salt.
- Press the crumb mixture into the bottom and halfway up the sides of the prepared pan.
- Beat softened cream cheese with white and brown sugars until smooth, then add eggs one at a time.
- Mix in vanilla and RumChata, then sprinkle with cornstarch and mix until smooth.
- Pour the filling over the crust and smooth the top.
- Wrap the pan with heavy-duty aluminum foil and place it in a roasting pan filled with boiling water halfway up the sides.
- Bake for about 1 hour and 30 minutes until the edges are set but the center jiggles slightly.
- Turn off the oven and crack the door, letting the cheesecake cool inside for 1 hour.
- Remove from the water bath, unwrap the foil, cool to room temperature, then refrigerate for at least 5 hours or overnight.
- Serve with a topping of Cool Whip, cinnamon sugar, and caramel sauce.