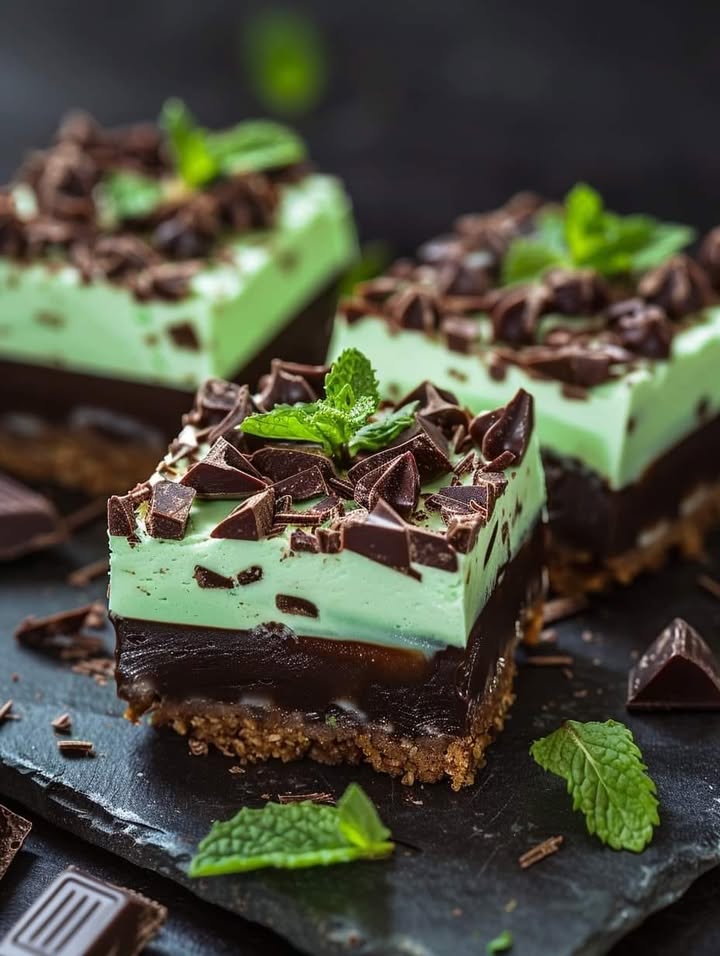
No-Bake Chocolate Mint Cheesecake Bites with Graham Cracker Crust
Have you ever wanted the magical taste of a chocolate mint patty, but in a creamy, no-bake cheesecake form? I created these little bites for a last-minute holiday party, and let me tell you, they vanished faster than the wrapping paper! They combine the nostalgic crunch of a graham cracker crust with a lush, minty chocolate filling that requires zero oven time. It’s the kind of treat that makes people ask for the recipe before they’ve even finished their first piece.
A Sweet Slice of History
The beauty of no-bake cheesecake is its wonderfully simple history. Traditional cheesecake baking can be intimidating, with worries over cracks and water baths. The no-bake version is a modern lifesaver, born from convenience and the invention of reliable refrigeration. I think of it as “cheesecake for everyone.” By swapping the mint extract for lemon juice and omitting the chocolate, you get a classic summer dessert. But for my family, the chocolate-peppermint combination is pure holiday joy. It reminds me of winters with my grandma, where a candy cane was the fanciest treat in the house. These bites are my way of dressing up that memory into a shareable, elegant dessert.
Why You’ll Love These Cheesecake Bites
You will adore this recipe because it’s incredibly forgiving and delightfully festive. The texture is smooth as silk, and the graham cracker crust adds that perfect sweet crunch. They are perfect for hot summer days when you don’t want to turn on the oven, or for the hectic holiday season when time is precious. Kids love helping to press the crust and drizzle the chocolate. Best of all, you get all the impressive flair of a gourmet dessert with minimal effort. It’s a guaranteed crowd-pleaser that lets you spend less time in the kitchen and more time with your guests.
Perfect Occasions for These Bites
These little squares are the ultimate party food. I always make a double batch for Christmas cookie exchanges—they stand out beautifully on a platter. They’re a hit at potlucks, baby showers (use pink or blue food coloring!), or as a sweet ending to a family dinner. Package them in cute little boxes tied with a ribbon for a heartfelt homemade gift. I’ve even served them as a fun after-school snack, much to my kids’ delight. Anywhere you need a pop of color and a burst of cool, creamy flavor, these bites are your answer.
What You’ll Need: The Ingredients
- For the crust: Graham cracker crumbs, granulated sugar, melted unsalted butter.
- For the filling: Softened cream cheese, powdered sugar, peppermint extract, green food coloring (optional), chocolate chips, heavy cream.
- For decoration: More melted chocolate for drizzling, crushed candy canes.
No Stress Substitutions
Don’t have every ingredient? No problem! Here are some easy swaps:
- Graham Crackers: Use digestive biscuits or vanilla wafer cookies.
- Peppermint Extract: Try 1/4 teaspoon of mint extract for a subtler flavor, or use vanilla extract for a plain chocolate cheesecake.
- Food Coloring: Skip it entirely, or use a different color to match your theme (pink for Valentine’s Day is lovely!).
- Chocolate Chips: Any good melting chocolate will work—dark, milk, or semi-sweet based on your preference.
- Candy Canes: Crushed peppermint candies or even a sprinkle of festive sprinkles work great.
Making Your No-Bake Chocolate Mint Cheesecake Bites
Prep Time: 20 minutes | Chill Time: 4 hours | Total Time: 4 hours 20 minutes | Servings: 16 bites
Step 1: Line Your Pan
Take a 9×9-inch baking dish and line it with parchment paper. Leave some paper hanging over the sides. This little trick is your best friend! It creates handy “handles” that let you lift the whole cheesecake out in one block later. It makes cutting perfect squares so much easier and saves on messy cleanup.
Step 2: Make the Graham Cracker Crust
In a medium bowl, mix your graham cracker crumbs and sugar. Pour in the melted, golden butter. The mixture will smell amazing—like buttery, toasty goodness. Stir until every crumb is evenly coated and looks like wet sand. Pour this into your lined pan and press it down firmly and evenly with the back of a spoon or a measuring cup. A firm press now means a crust that holds together later. Pop the pan in the fridge to chill and set while you make the filling.
Pro tip: For an extra-sturdy crust, you can let it firm up in the freezer for 10-15 minutes instead of the fridge.
Step 3: Whip Up the Cream Cheese Base
Using a hand mixer or stand mixer, beat the softened cream cheese until it’s completely smooth and fluffy. No lumps allowed! This might take a minute or two. Scrape down the sides of the bowl. Add the powdered sugar, peppermint extract, and a few drops of green food coloring if you’re using it. Beat again until everything is fully blended into a beautifully smooth, pale green cream. The scent of cool peppermint will fill your kitchen.
Step 4: Melt the Chocolate
Combine the chocolate chips and heavy cream in a microwave-safe bowl. Heat them in the microwave in 30-second bursts, stirring well after each burst. Watch as the chocolate melts into the cream, creating a shiny, dark, and luxurious ganache. Let this mixture cool for a few minutes. You don’t want it so hot that it melts the cream cheese when you mix them.
Step 5: Combine Chocolate and Cream Cheese
Pour the slightly cooled chocolate ganache into the minty cream cheese mixture. Gently fold them together with a spatula. You’ll see beautiful swirls of dark brown and mint green blend into a uniform, marbled chocolate-mint color. Keep folding until no white or green streaks remain. The filling will be thick, rich, and utterly tempting.
Step 6: Assemble and Chill
Pull your chilled crust from the fridge. Scoop the chocolate mint cheesecake filling onto the crust. Use your spatula to spread it into a smooth, even layer, reaching all the corners. Give the pan a gentle tap on the counter to settle the filling and remove any air bubbles. Now, the hardest part: patience. Cover the pan and let it chill in the refrigerator for at least 4 hours, or ideally overnight. This lets the flavors marry and the texture become perfectly sliceable.
Step 7: Slice and Decorate
Once fully set, use the parchment paper “handles” to lift the whole cheesecake slab onto a cutting board. Peel down the paper sides. Using a sharp knife, cut it into 16 bite-sized squares. Wipe the knife clean between cuts for pretty edges. Now for the fun part! Drizzle or zig-zag melted chocolate over the top of each bite. Immediately sprinkle with the crushed candy canes so they stick to the wet chocolate. The red and white specks on the dark chocolate look so festive.
Chef’s secret: For super-neat drizzling, put your melted chocolate in a small zip-top bag, snip a tiny corner off, and use it like a piping bag. You’ll have perfect control!
Storing Your Masterpiece
These cheesecake bites need to stay cold. Store them in a single layer in an airtight container in the refrigerator. They will keep beautifully for up to 5 days. If you need to stack them, place a piece of parchment paper between the layers to prevent sticking and smudging the decorations.
You can also freeze them for longer storage. Arrange the bites on a baking sheet and freeze until solid, then transfer to a freezer-safe container. They can be frozen for up to 2 months. Thaw in the refrigerator for a few hours before serving. The texture remains wonderfully creamy.
I don’t recommend leaving them out at room temperature for more than an hour, especially if your kitchen is warm. The cream cheese filling can become too soft.
Tips for the Best Bites
- Soft Cream Cheese is Key: Let your cream cheese sit on the counter for 30-60 minutes before starting. Soft cheese blends smoothly and prevents a lumpy filling.
- Chill Your Knife: For the cleanest cuts, run your knife under hot water, wipe it dry, and then make your cuts. The warm knife glides through the cold cheesecake.
- Crumb Control: To get fine, even graham cracker crumbs, pulse whole crackers in a food processor or seal them in a zip-top bag and roll with a rolling pin.
- Taste as You Go: Peppermint intensity varies by brand. After adding the extract, taste a tiny bit of the filling. You can add a tiny bit more if you want a stronger mint flavor.
Common Mistakes to Avoid
Mistake 1: Using Cold Cream Cheese
Starting with cold, hard cream cheese straight from the fridge is a top mistake. It will not blend smoothly with the other ingredients. You’ll end up with stubborn lumps no matter how long you mix. Always plan ahead to let your cream cheese soften on the counter. It should feel cool but yield easily when you press it.
Mistake 2: Not Pressing the Crust Firmly
A loosely pressed crust will crumble and fall apart when you try to cut and eat the bites. When you press the crumb mixture into the pan, really put some muscle into it. Use a flat-bottomed glass or measuring cup to press down evenly across the entire surface. A solidly packed crust is the foundation for perfect squares.
Mistake 3: Adding Hot Chocolate to the Filling
If you pour the melted chocolate ganache into the cream cheese while it’s still very hot, it can melt the cream cheese. This causes the filling to become too soft and it may not set properly. Always let the chocolate and cream mixture cool for 5-10 minutes after melting. It should be warm to the touch, not hot.
Mistake 4: Not Chilling Long Enough
Impatience is the enemy of no-bake desserts! Cutting into the cheesecake before it has fully set will result in a messy, gooey situation. The four-hour chill is a minimum. For the cleanest cuts and best texture, letting it set overnight in the fridge is ideal. Trust the process—the wait is worth it.
Frequently Asked Questions
Can I make these bites ahead of time?
Absolutely! These are the perfect make-ahead dessert. You can prepare them fully, including the decorations, and store them covered in the fridge for up to two days before serving. The flavors actually improve as they sit. Just add the candy cane sprinkle right before serving if you’re worried about it bleeding color or getting soft.
What can I use instead of peppermint extract?
If you want a different flavor, vanilla extract is a classic choice for a plain chocolate cheesecake. You could also experiment with almond extract or even a little orange extract for a chocolate-orange combo. Start with a smaller amount (1/2 teaspoon) of other extracts, taste, and add more if needed, as some flavors are stronger than peppermint.
My filling is too soft. What did I do wrong?
A soft filling usually has two main causes. First, the cream cheese may not have been full-fat, or the chocolate mixture might have been too warm when mixed in, softening the cheese. Second, and most common, it just needs more chilling time. Pop the whole pan back in the fridge for another few hours, or even the freezer for 30-45 minutes to firm up.
Can I use a different pan size?
You can, but it will change the thickness of your bites. A 9×9 pan gives you a perfect crust-to-filling ratio. An 8×8 pan will yield taller, thicker squares (and maybe fewer of them). A 9×13 pan will make a thinner layer, so you’d need to reduce the chill time slightly and you’ll get more, smaller bites. Adjust your expectations for the number of servings accordingly.
How do I get clean cuts when slicing?
The secret is a hot, clean knife. Run your sharp knife under very hot water, wipe it completely dry with a towel, and then make a cut. Repeat this process for each cut. The heat helps the knife glide through the cold, firm cheesecake and chocolate without dragging or smearing. Wiping ensures each cut starts clean.
Are there any nut-free alternatives for the crust?
The graham cracker crust is naturally nut-free. Just double-check your graham cracker box label if you have severe allergies, as manufacturing processes can vary. Other nut-free crust options include crushed vanilla wafers, gluten-free graham-style crackers, or even crushed pretzels for a sweet-and-salty twist.
Can I freeze these cheesecake bites?
Yes, they freeze wonderfully! Arrange the fully decorated bites on a parchment-lined tray and freeze until solid (about 2 hours). Then, transfer them to a freezer-safe bag or container. They’ll keep for up to 2 months. Thaw in the refrigerator for a few hours before serving. The texture remains fantastic.
Why did my chocolate drizzle harden with white streaks?
Those white streaks are called “bloom.” It happens when chocolate gets too warm or comes into contact with moisture. It’s still perfectly safe to eat, but it looks less shiny. To prevent it, make sure your cheesecake bites are completely cold before drizzling. Also, melt your drizzling chocolate slowly and gently, stirring often.
I don’t have a mixer. Can I make these by hand?
You can, but it will take some elbow grease. Ensure your cream cheese is very, very soft. Use a sturdy whisk and a determined hand to beat it until smooth before adding the other ingredients. A fork can help smash any remaining lumps. It’s a bit of a workout, but totally doable for a smaller batch.
What’s the best way to crush candy canes?
Place unwrapped candy canes in a sturdy zip-top plastic bag. Seal it, removing as much air as possible. Use a rolling pin or the bottom of a heavy pan to crush them. You can aim for a mix of fine powder and small pieces for great texture and visual appeal. Doing it in the bag contains the mess completely.
The Final Touch
These No-Bake Chocolate Mint Cheesecake Bites are more than just a dessert. They’re a little piece of holiday magic you can make any day of the year. They prove that impressive treats don’t need to be complicated. With a simple graham cracker crust, a foolproof filling, and a festive sprinkle, you create something truly special. I love seeing the smiles they bring to my family and friends. So grab your bowl, your mixer, and get ready for the easiest, most delicious baking project that isn’t really baking at all. Happy no-baking!
Cajun Creamy Rigatoni
Ingredients
Equipment
Method
- Line a 9x9-inch baking dish with parchment paper, leaving overhang for easy removal.
- In a bowl, mix graham cracker crumbs and sugar, then stir in melted butter until combined.
- Press the crumb mixture into the lined baking dish and chill in the fridge.
- Beat the softened cream cheese in a mixer until smooth, then add powdered sugar, peppermint extract, and optional food coloring and blend well.
- Melt chocolate chips and heavy cream together in the microwave, stirring until smooth, then let cool slightly.
- Pour the melted chocolate into the cream cheese mixture and fold gently until combined.
- Spread the filling over the chilled crust and refrigerate until firm, about 4 hours or overnight.
- Once set, slice into 16 squares and drizzle with melted chocolate and sprinkle with crushed candy canes.