Introduction to Chocolate Crinkle Cookies
There’s something magical about biting into a soft, gooey chocolate cookie with a perfectly crinkled, powdered sugar-dusted exterior. These Chocolate Crinkle Cookies are one of my all-time favorite treats to bake for family and friends. They’re not just cookies—they’re a hug in dessert form! I first made these for a holiday cookie exchange, and they were such a hit that I’ve been baking them ever since. Whether you’re a seasoned baker or a beginner, this recipe is simple, fun, and absolutely delicious.
The Origin of Chocolate Crinkle Cookies
The history of chocolate crinkle cookies isn’t as ancient as some desserts, but their charm lies in their simplicity. These cookies likely originated in the United States during the mid-20th century when home bakers started experimenting with cocoa powder and easy-to-make recipes. Over time, they became a staple at holiday gatherings and bake sales. I love how versatile they are—whether you’re making them for Christmas, Valentine’s Day, or just because, they never fail to bring joy. My kids even call them “snowy cookies” because of their festive, crackly tops.
Why You’ll Love This Recipe
What makes chocolate crinkle cookies so irresistible? First, the contrast between the rich, fudgy interior and the sweet, sugary coating is pure bliss. Second, they’re incredibly easy to make—even if you’ve never baked before. The ingredients are pantry staples, and the process is straightforward. Plus, the aroma of chocolate wafting through your kitchen is enough to make anyone fall in love with baking. Trust me, once you try these, they’ll become a permanent fixture in your recipe collection.
Perfect Occasions to Prepare Chocolate Crinkle Cookies
These cookies are perfect for any occasion! Bake a batch for a cozy family movie night, bring them to a potluck, or gift them during the holidays. I especially love making them for birthdays because they pair beautifully with ice cream for an impromptu sundae bar. They’re also a great treat to share with coworkers or neighbors—it’s hard not to smile when you’re handed a plate of these delightful cookies.
Ingredients for Chocolate Crinkle Cookies
- 1 cup all-purpose flour
- ½ cup unsweetened cocoa powder
- 1 teaspoon baking powder
- ¼ teaspoon salt
- 4 tablespoons unsalted butter, softened
- ¾ cup granulated sugar
- 2 large eggs
- 1 teaspoon vanilla extract
- ½ cup powdered sugar (for rolling)
Substitution Options
If you’re looking to tweak the recipe, here are some ideas:
- Use gluten-free flour instead of all-purpose flour for a gluten-free version.
- Swap the granulated sugar with coconut sugar for a slightly caramelized flavor.
- Replace the butter with coconut oil for a dairy-free option.
Preparation
Step 1: Mixing the Dry Ingredients
Start by whisking together the flour, cocoa powder, baking powder, and salt in a medium bowl. This ensures that the dry ingredients are evenly distributed, which is key to achieving that perfect crinkle texture. As you mix, take a moment to inhale the rich scent of cocoa—it’s like a preview of the deliciousness to come! Pro tip: Sift the cocoa powder to avoid lumps and ensure a smooth batter.
Step 2: Creaming the Butter and Sugar
In a separate bowl, cream the softened butter and granulated sugar until light and fluffy. This step is crucial because it incorporates air into the mixture, giving the cookies their soft, melt-in-your-mouth texture. I love watching the color change from pale yellow to almost white as I mix—it’s like magic happening right before my eyes. Be patient and let your mixer do the work for about 2-3 minutes.
Step 3: Adding Eggs and Vanilla
Next, beat in the eggs one at a time, followed by the vanilla extract. Adding the eggs individually helps create a stable emulsion, which is important for the cookie’s structure. The vanilla adds a subtle warmth that complements the deep chocolate flavor. As you mix, notice how the batter transforms into a glossy, fragrant masterpiece. It’s moments like these that make baking so rewarding.
Step 4: Combining Wet and Dry Ingredients
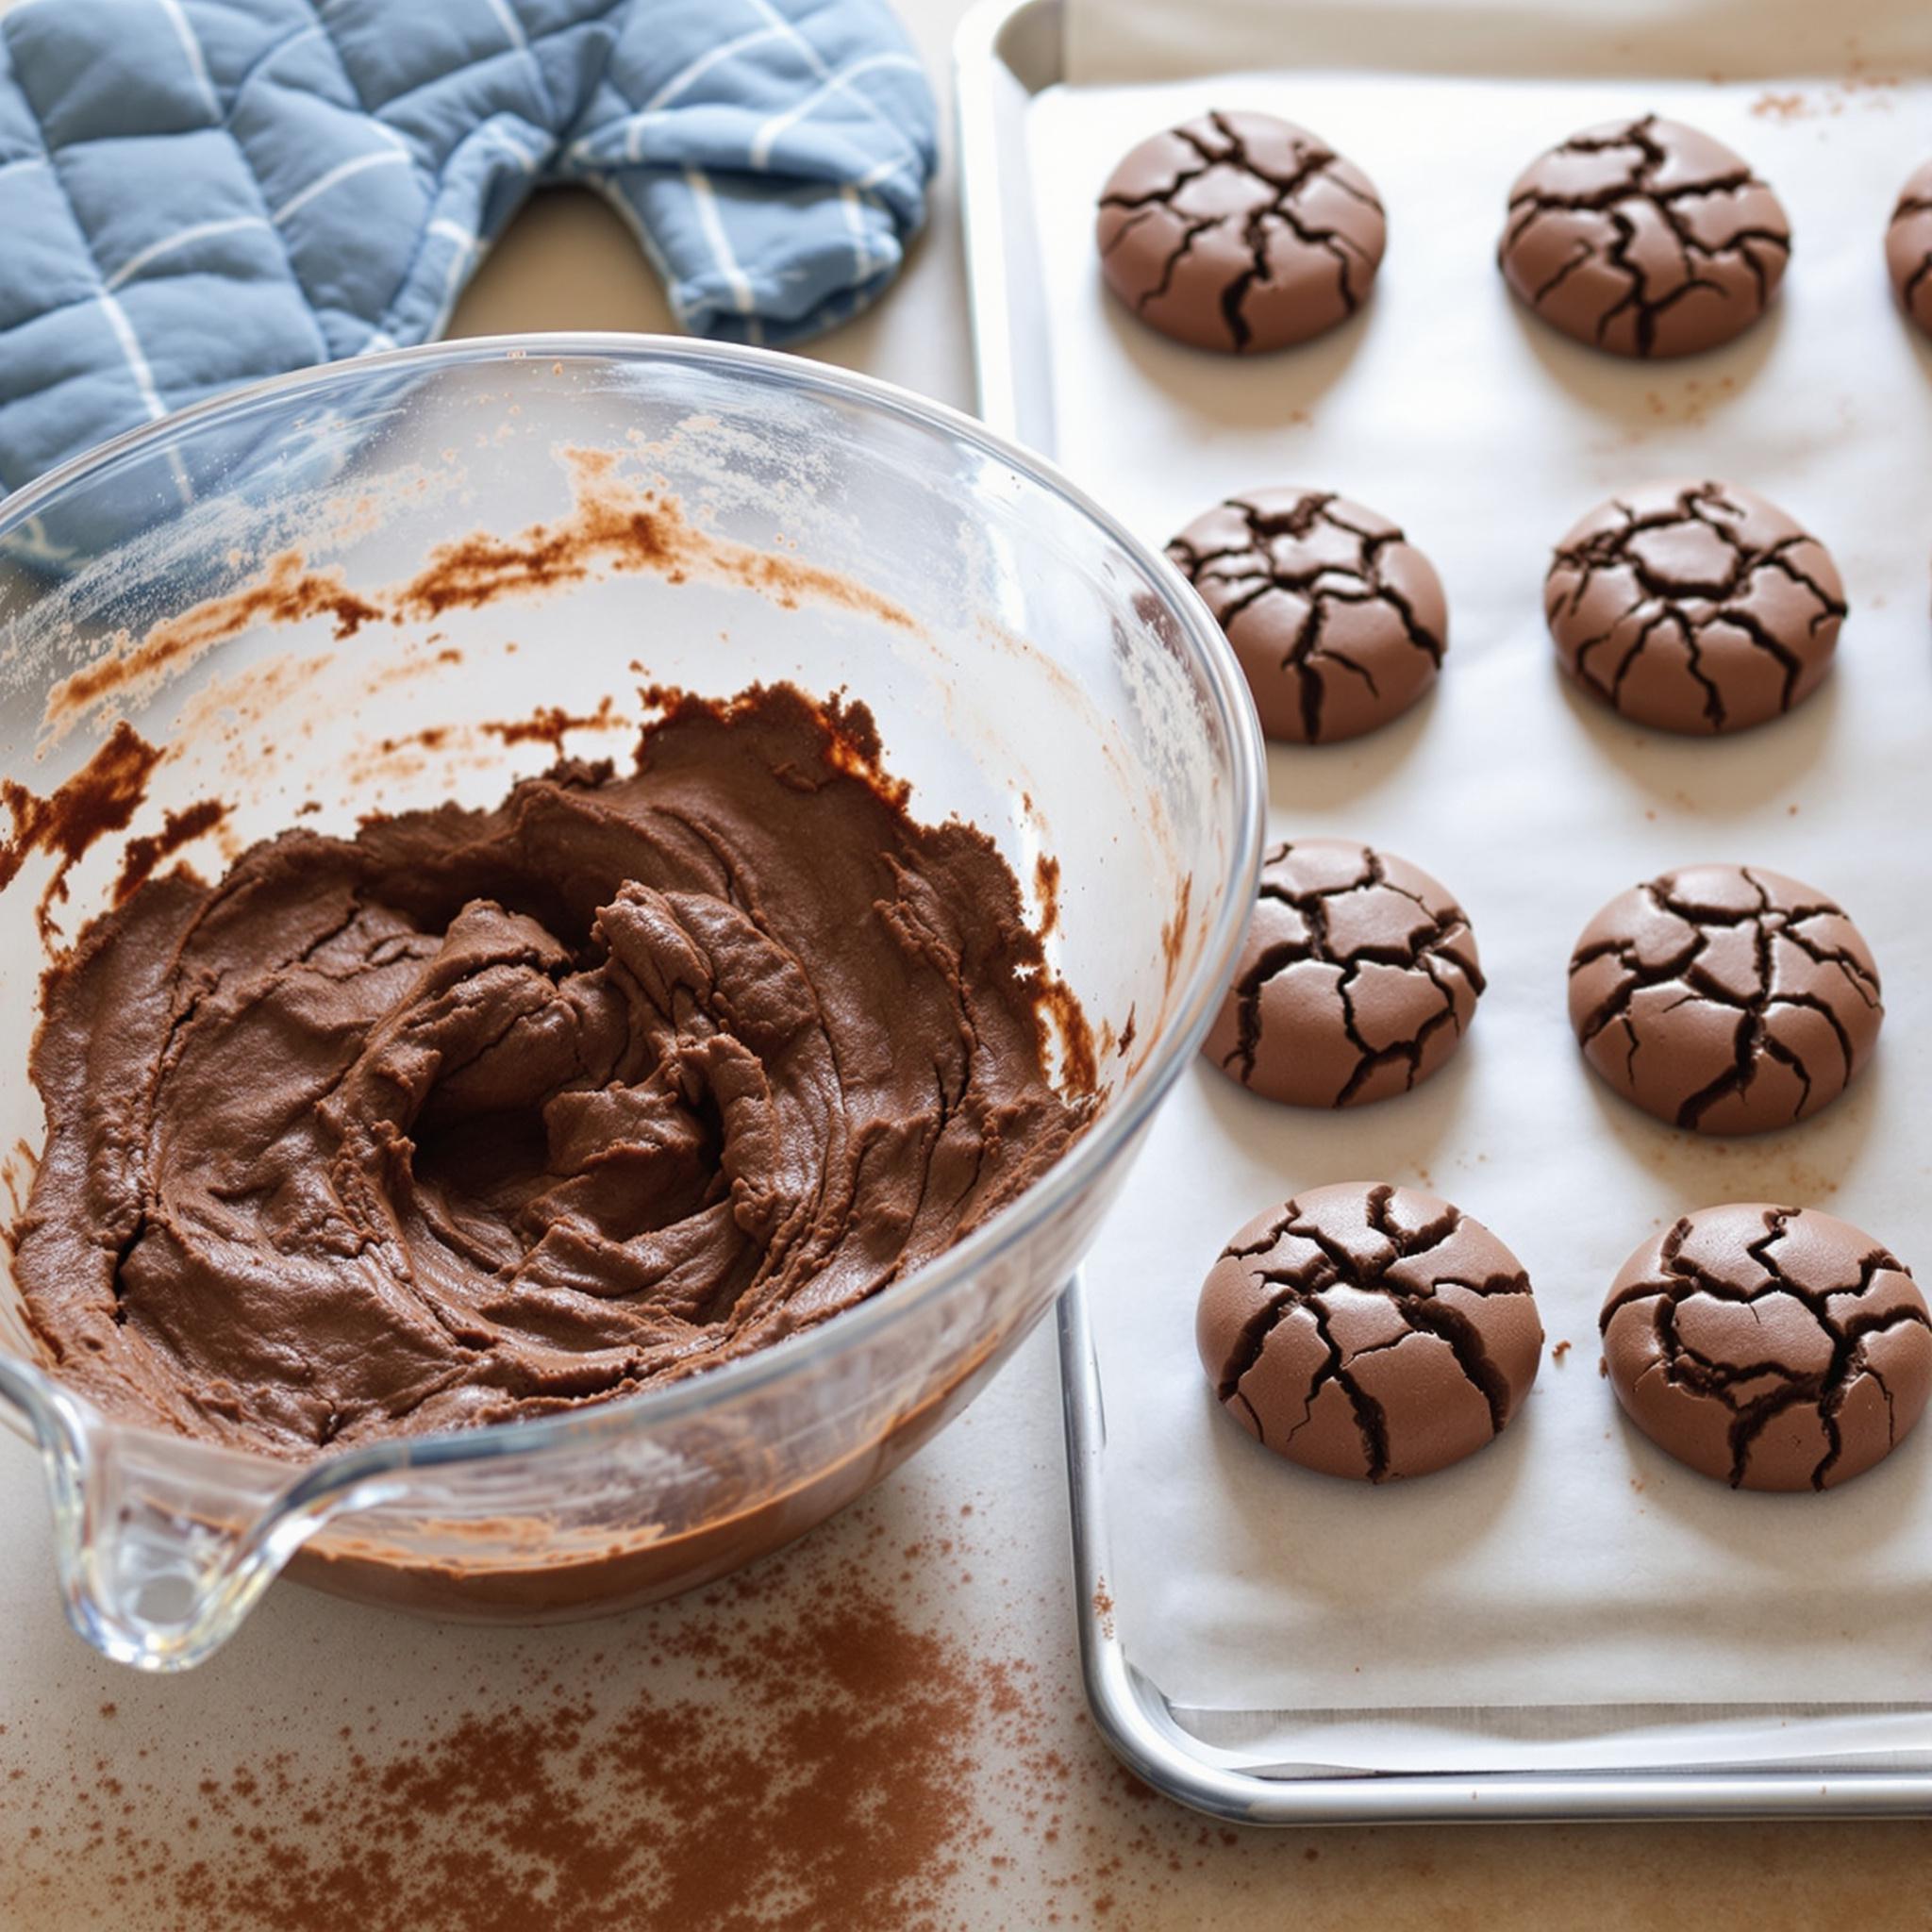
Gradually add the dry ingredients to the wet mixture, mixing just until combined. Be careful not to overmix, as this can make the cookies tough. The dough will be thick and sticky, almost like brownie batter. This is exactly what you want! Cover the bowl with plastic wrap and refrigerate the dough for at least 2 hours. Chilling is essential for preventing the cookies from spreading too much in the oven.
Step 5: Rolling and Baking
Preheat your oven to 350°F (175°C). Scoop out tablespoon-sized portions of dough, roll them into balls, and coat them generously in powdered sugar. Place them on a baking sheet lined with parchment paper, leaving space between each cookie. Bake for 10-12 minutes, or until the edges are set but the centers are still soft. Let them cool on the baking sheet for a few minutes before transferring to a wire rack.
Chef’s Tip
For extra-decadent chocolate crinkle cookies, fold in a handful of chocolate chips after mixing the dough. The pockets of melted chocolate add an extra layer of richness that pairs beautifully with the fudgy texture.
Time Required
- Prep Time: 20 minutes
- Chilling Time: 2 hours
- Baking Time: 10-12 minutes per batch
- Total Time: Approximately 3 hours
Nutritional Information
Each cookie contains approximately:
- Calories: 120
- Protein: 2g
- Fat: 5g
- Carbohydrates: 18g
- Sugar: 12g
Extra Information
Did you know that cocoa powder is packed with antioxidants? Using unsweetened cocoa powder not only enhances the flavor of these cookies but also adds a healthful boost. It’s a win-win!
Necessary Tools
- Mixing bowls
- Electric mixer
- Measuring cups and spoons
- Baking sheets
- Parchment paper
Storage Instructions
Once your chocolate crinkle cookies have cooled completely, store them in an airtight container at room temperature. They’ll stay fresh for up to 5 days. If you live in a humid climate, consider adding a silica gel packet to the container to prevent the powdered sugar from melting. For longer storage, freeze the baked cookies in a single layer on a baking sheet before transferring them to a freezer-safe bag. They can last up to 3 months in the freezer.
To reheat frozen cookies, simply pop them in the oven at 300°F (150°C) for 5-7 minutes. They’ll taste as good as new!
Tips and Tricks
- Don’t skip the chilling step—it’s what gives the cookies their signature crinkles.
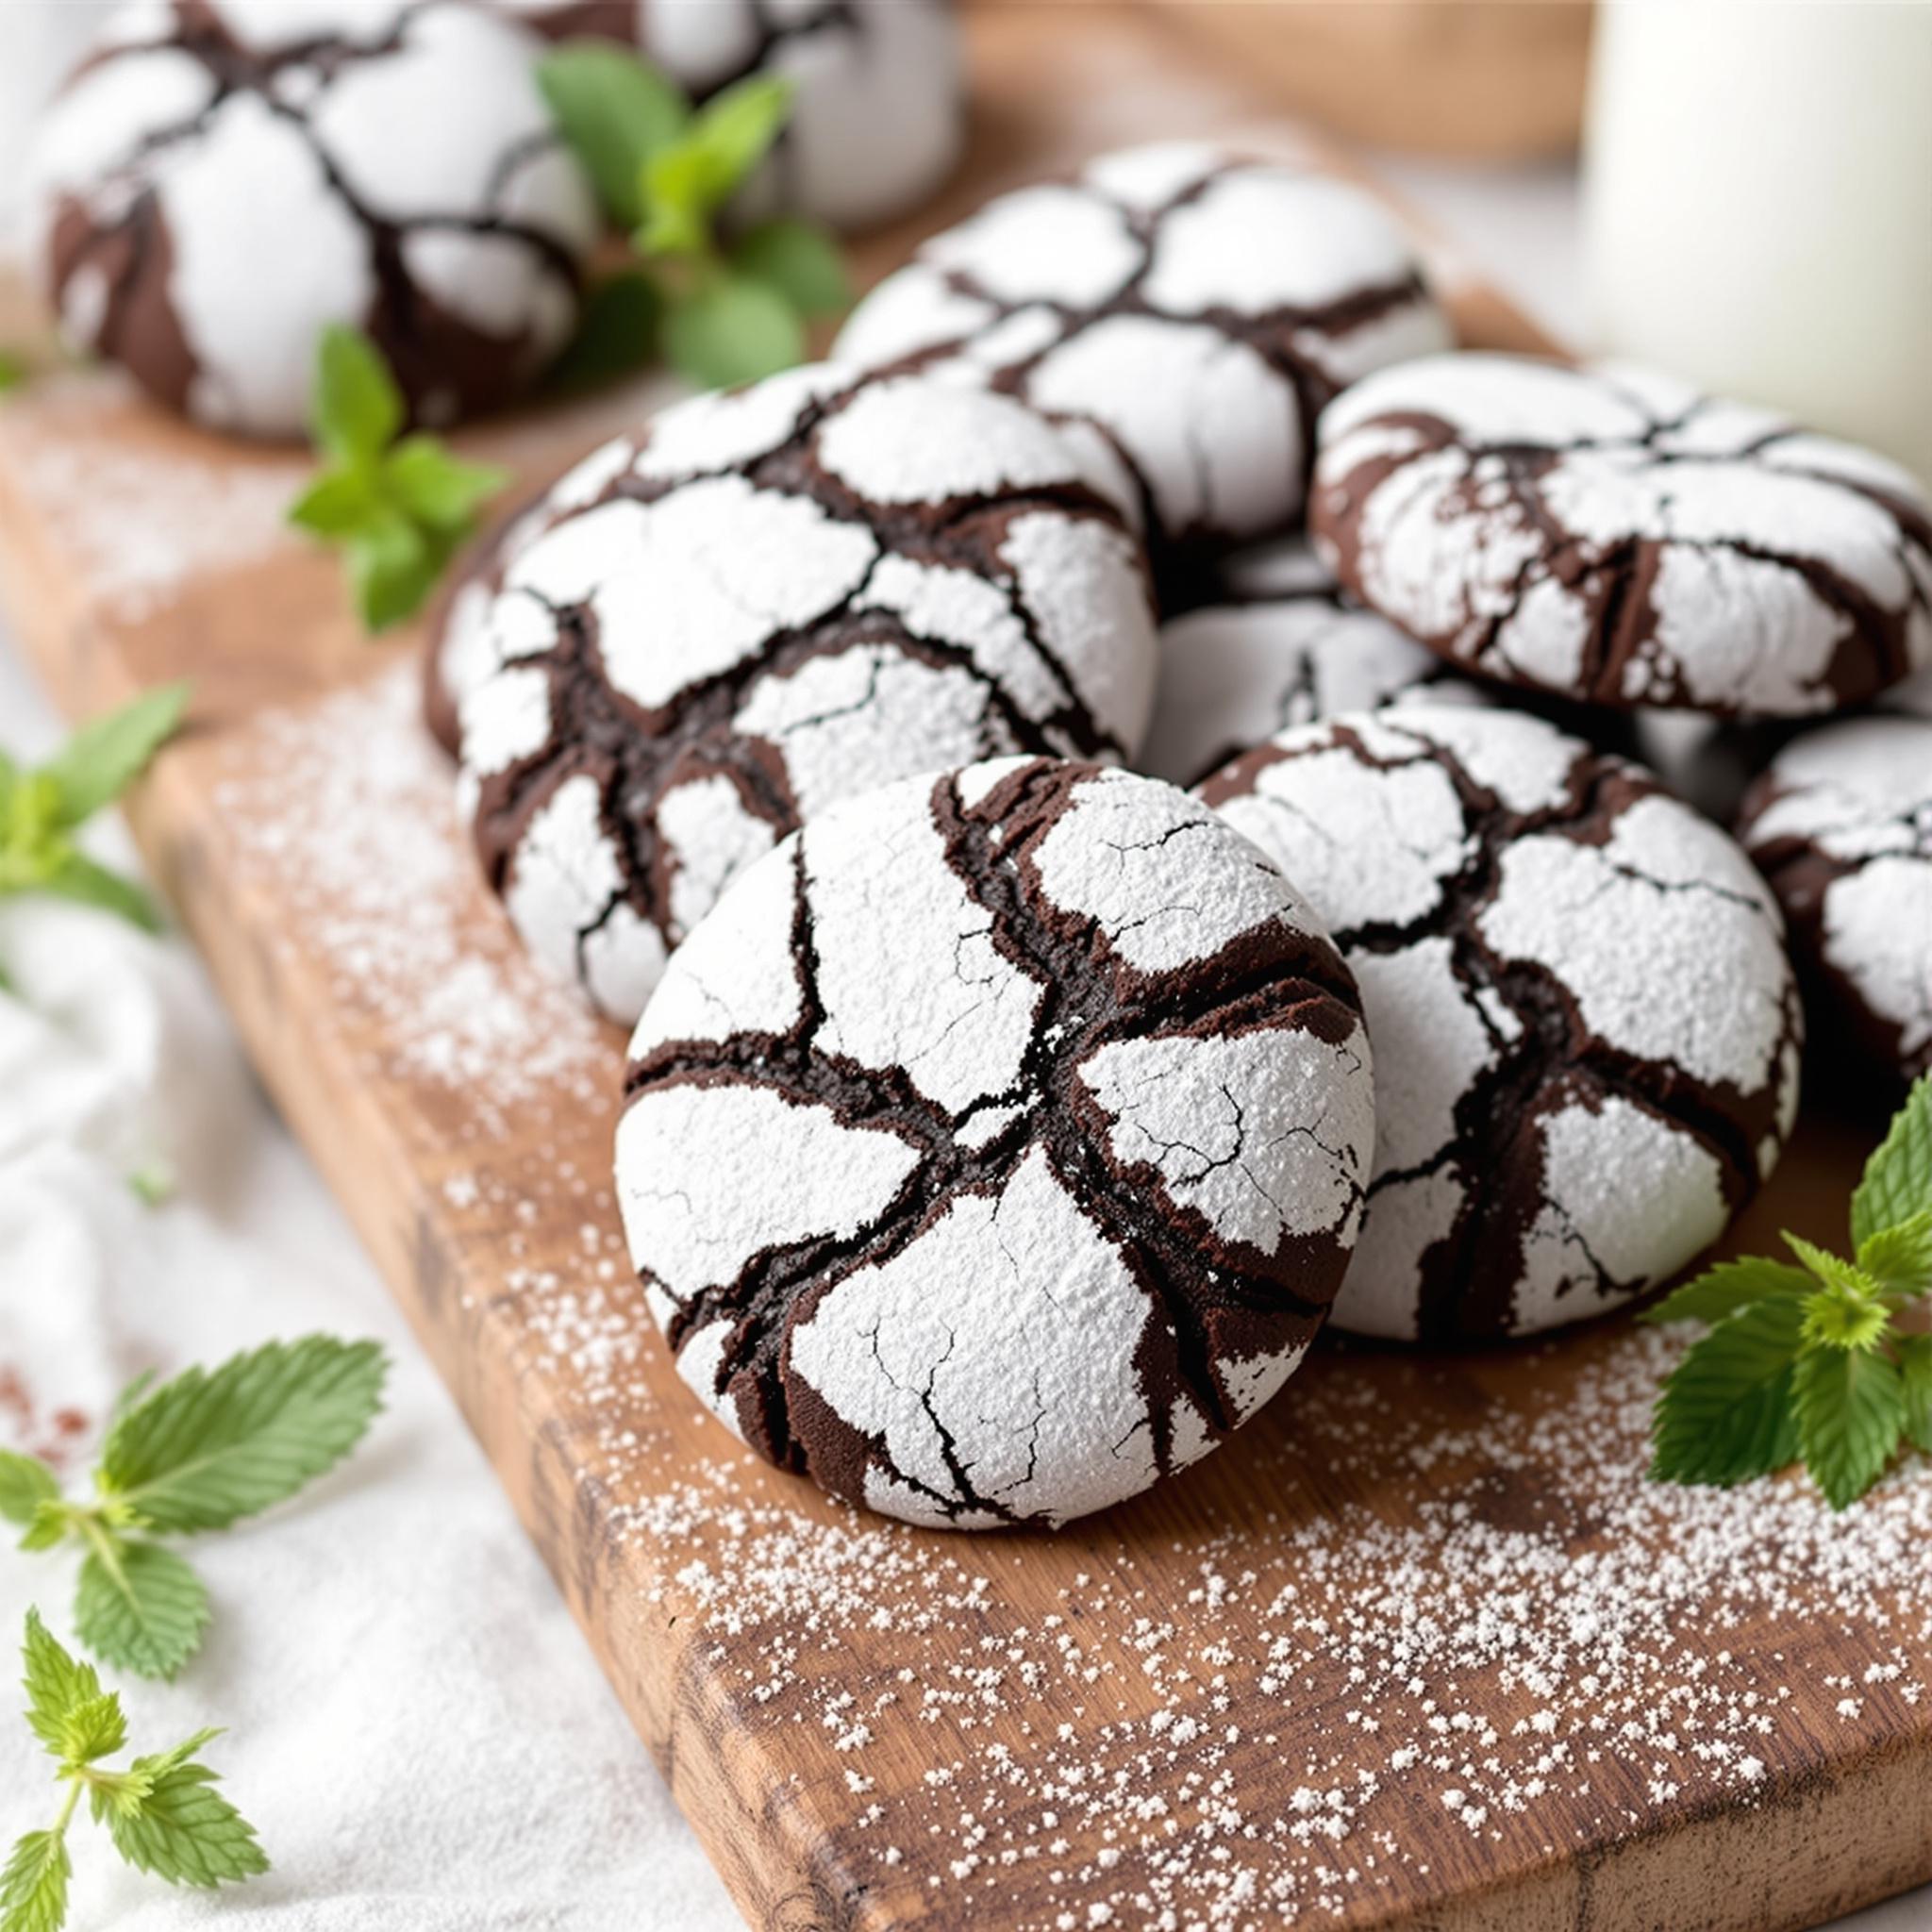
- Roll the dough balls generously in powdered sugar for dramatic contrast.
- Use a cookie scoop for uniform-sized cookies.

Serving Suggestions
Serve these cookies with a tall glass of cold milk or a hot cup of coffee for a comforting treat. For a fancy twist, sandwich two cookies together with a dollop of whipped cream or ice cream in the middle.
Healthier Alternatives for Chocolate Crinkle Cookies
Here are six ways to make this recipe healthier without sacrificing flavor:
- Gluten-Free Option: Substitute all-purpose flour with almond flour or oat flour.
- Low-Sugar Version: Use a sugar substitute like stevia or monk fruit sweetener.
- Vegan Variation: Replace the eggs with flax eggs and use plant-based butter.
- Protein-Packed: Add a scoop of protein powder to the dry ingredients.
- Less Fat: Swap half the butter with applesauce.
- Dark Chocolate Lover: Use dark cocoa powder for a richer, less sweet flavor.
Common Mistakes to Avoid
Mistake 1: Skipping the Chilling Step
One of the most common mistakes is skipping the chilling step. Without it, the cookies will spread too much in the oven, losing their iconic crinkled look. To avoid this, always chill the dough for at least 2 hours—or overnight for even better results.
Mistake 2: Overbaking
Overbaking can turn these soft, fudgy cookies into dry, cakey ones. Keep an eye on them while they bake and remove them from the oven when the edges are set but the centers are still slightly soft. They’ll continue to firm up as they cool.
Mistake 3: Not Coating Enough in Powdered Sugar
If you don’t coat the dough balls generously in powdered sugar, the crinkles won’t show up as dramatically. Make sure each ball is fully covered for that classic snowy appearance.
Frequently Asked Questions
Can I make the dough ahead of time?
Absolutely! You can prepare the dough up to 2 days in advance and store it in the refrigerator. Just let it sit at room temperature for 15-20 minutes before scooping and baking.
Can I freeze the dough?
Yes, you can freeze the dough in individual balls. Simply place them on a baking sheet, freeze until solid, then transfer to a freezer bag. When ready to bake, add a couple of extra minutes to the baking time.
Why didn’t my cookies crinkle?
This usually happens if the dough wasn’t chilled long enough or if the powdered sugar coating wasn’t thick enough. Ensure both steps are followed carefully for the best results.
Can I use Dutch-process cocoa?
Yes, Dutch-process cocoa works beautifully in this recipe and gives the cookies a deeper, more intense chocolate flavor.
How do I prevent the cookies from sticking?
Always line your baking sheets with parchment paper or a silicone baking mat to prevent sticking. This also makes cleanup a breeze!
Can I double the recipe?
Definitely! Just be sure to chill the dough in separate bowls to make it easier to handle.
What’s the best way to measure flour?
For accuracy, spoon the flour into your measuring cup and level it off with a knife. This prevents compacting, which can lead to dense cookies.
Can I use margarine instead of butter?
While margarine can work, butter provides a richer flavor and better texture. If you must substitute, opt for a high-quality margarine.
Why are my cookies flat?
Flat cookies often result from warm dough or improper measuring of ingredients. Chill the dough thoroughly and measure carefully to avoid this issue.
Can I add nuts?
Of course! Chopped walnuts or pecans add a delightful crunch to these soft cookies. Fold them in after mixing the dough.
Conclusion
Chocolate crinkle cookies are more than just a dessert—they’re a celebration of flavor, texture, and joy. Whether you’re baking them for a special occasion or just because, this recipe is sure to become a favorite. With their rich chocolatey goodness and festive appearance, they’re guaranteed to bring smiles to everyone who tries them. So grab your mixing bowl and get ready to create some edible magic!