Why I Can’t Stop Making BBQ Honey Chicken Drumsticks
Last summer, I found myself in a bit of a cooking rut. You know that feeling when you make the same three things over and over? My family had started giving me that look at dinner time. The one that says “chicken breast again?” without actually saying it out loud. I needed something different but still easy enough to make on a busy weeknight.
That’s when I stumbled upon BBQ honey chicken drumsticks at a friend’s backyard party. I took one bite and immediately asked for the recipe. The sweet glaze with that smoky BBQ flavor was exactly what my dinner routine needed. Since then, I’ve made this dish at least two dozen times, and it never gets old.
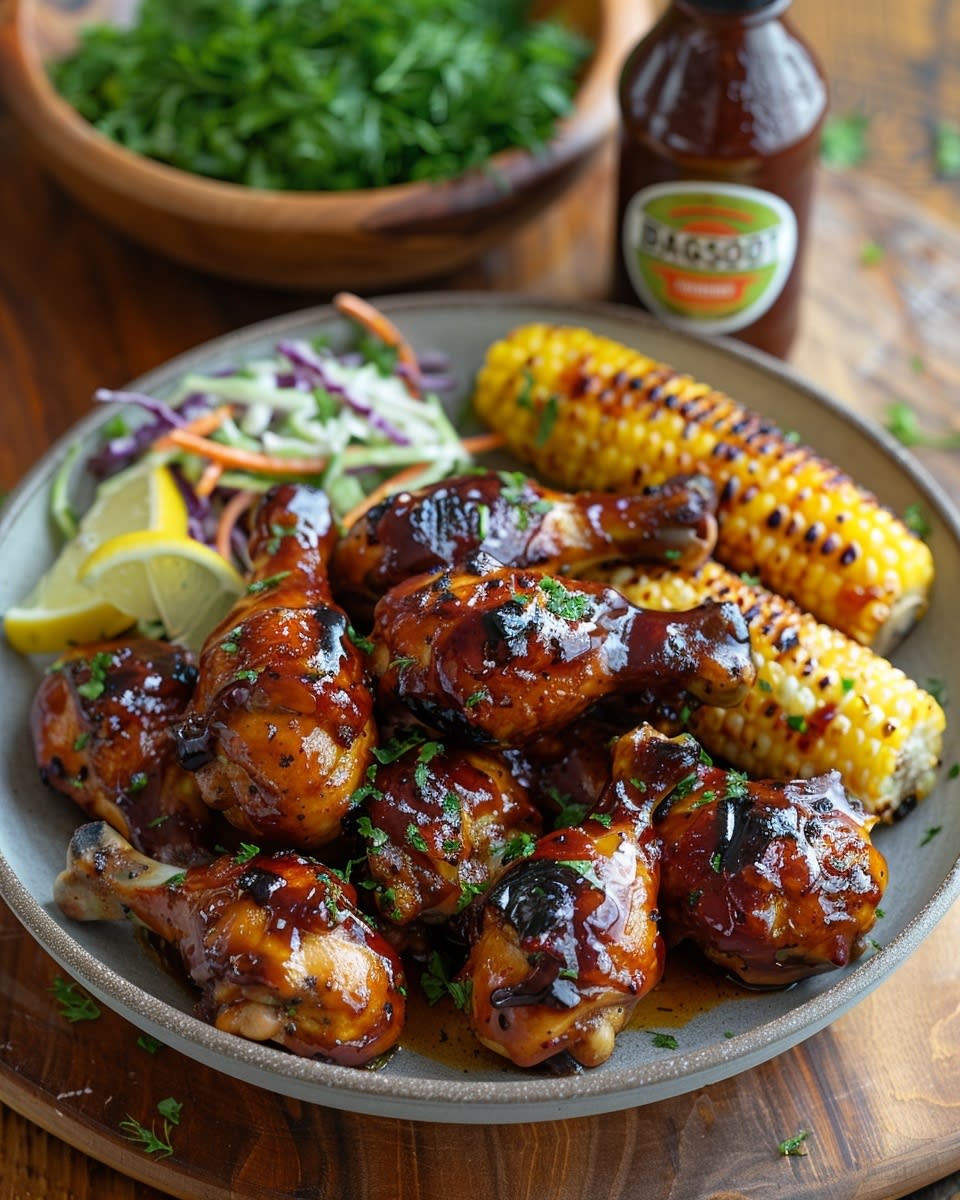
Welcome to my blog, where I share my love for easy and delicious recipes! Today, I’m excited to share with you a recipe that’s perfect for summer: BBQ Honey Chicken Drumsticks. This dish is not just tasty but also super easy to make, making it a hit at any backyard barbecue or family dinner.
The best part? You don’t need to be a grill master to pull this off. I’ve made these drumsticks countless times, and they turn out great every single time. Whether you’re cooking for picky kids or trying to impress your in-laws, this recipe has your back.
Let’s dive into how you can make these mouth-watering drumsticks and why they are a must-try for anyone who loves simple, flavor-packed meals.
Why BBQ Honey Chicken Drumsticks Are So Popular
There’s a reason this dish shows up at cookouts and potlucks everywhere. One of the reasons this dish is so popular is its perfect balance of sweet and savory flavors. You get the sticky sweetness from honey mixed with the tangy, smoky notes of BBQ sauce. It’s a combination that makes your taste buds happy.
The combination of honey and BBQ sauce creates a unique, irresistible taste that everyone loves. I’ve served these to friends who swear they don’t like chicken drumsticks, and they always come back for seconds. The glaze caramelizes beautifully when cooked, creating those crispy, slightly charred edges that make grilled chicken so good.
It’s also a versatile dish that can be enjoyed on its own or paired with your favorite sides. I usually serve mine with corn on the cob and coleslaw, but they work just as well with rice, potato salad, or a simple green salad. My kids love eating them straight off the bone, which makes cleanup easier too.
What Makes This Recipe Different
I’ve tried probably a dozen different honey chicken recipes over the years. Some were too sweet. Others had that artificial BBQ taste that comes from bottled sauce. This version strikes the perfect balance.
The secret is in the ratio of ingredients and the cooking method. You’re not just dumping sauce on chicken and hoping for the best. The honey helps the BBQ sauce stick to the meat while adding natural sweetness. As it cooks, everything thickens into a gorgeous glaze that coats each drumstick.
Another thing that sets this recipe apart is how forgiving it is. Forgot to marinate overnight? No problem. Only have a few minutes to prep? That works too. The cooking process is flexible enough to fit into your schedule, whether you’re grilling on a Saturday afternoon or baking them on a Tuesday night.
The Kid-Approved Factor
Let me tell you something about feeding kids. My seven-year-old son will pick apart a casserole looking for things he doesn’t like. But give him a BBQ honey chicken drumstick, and he’s quiet for at least ten minutes. That’s a parenting win in my book.
Drumsticks are naturally kid-friendly because they come with their own handle. No cutting required. The sweet honey flavor appeals to young palates without being too spicy or overwhelming. I’ve made these for birthday parties, and they disappear faster than the cake.
Even picky eaters seem to give these a chance. The glaze looks appealing, and the smell alone is enough to get kids interested. Plus, eating with your hands makes dinner feel more fun and less like a chore.
Perfect for Any Occasion
These drumsticks work for so many different occasions. I’ve made them for:
- Weekend BBQ parties with friends and neighbors
- Quick weeknight dinners when I’m short on time
- Picnics at the park (they’re good cold too)
- Game day snacks that are heartier than wings
- Potluck contributions that always get compliments
The recipe scales up easily if you’re feeding a crowd. I’ve made fifty drumsticks at once for a big family reunion, and the process wasn’t any harder than making a dozen. You just need more baking sheets or grill space.
They also reheat beautifully, which is rare for grilled chicken. I often make extra on purpose so we have leftovers for lunch the next day. Just pop them in the oven or air fryer for a few minutes, and they taste almost as good as fresh.
Budget-Friendly and Practical
Chicken drumsticks are one of the most affordable cuts of meat you can buy. I can usually find them on sale for less than two dollars per pound. That makes this recipe perfect for feeding a family without breaking the bank.
The other ingredients are basic pantry staples. Honey, BBQ sauce, and a few spices. You probably have most of what you need already sitting in your kitchen. No special trips to fancy grocery stores or hunting down exotic ingredients.
I appreciate recipes that don’t require me to buy twenty different things I’ll only use once. This one uses simple ingredients in a way that creates something special. It’s proof that you don’t need complicated recipes to make food that tastes amazing.
The Make-Ahead Advantage
One of my favorite things about this recipe is how well it works when you prep ahead. You can mix your glaze the night before and store it in the fridge. You can even coat the drumsticks in advance and let them marinate for a few hours or overnight.
This makes entertaining so much easier. When guests arrive, you’re not stuck in the kitchen scrambling. Just throw the drumsticks on the grill or in the oven, and you’re done. You get to actually enjoy the party instead of missing all the fun.
I’ve also frozen these after cooking them. They thaw well and make great emergency dinners when you forgot to plan ahead. Just having a batch in the freezer gives me peace of mind on those chaotic days.


Getting Your Ingredients Together for BBQ Honey Chicken Drumsticks
Now that you know why these drumsticks are worth making, let’s talk about what you actually need. I promise the ingredient list is so simple that you’ll wonder how something this easy can taste so good.
First up, you’ll need about 8 to 10 chicken drumsticks. I usually buy a family pack from the grocery store, which typically has around twelve pieces. That gives me a couple extra in case someone wants seconds. Or thirds. Which happens more often than I’d like to admit.
For the glaze, grab your favorite BBQ sauce. I’m not picky about brands here. Sometimes I use the sweet kind, other times I go for something with a bit of smoke. It really depends on what’s in my pantry. The beauty of this recipe is that it works with whatever you have on hand. The BBQ sauce you already love will work perfectly fine.
You’ll also need honey. I use about a third of a cup for ten drumsticks, but you can adjust based on how sweet you like things. The honey does more than add sweetness, though. It helps create that sticky, glossy coating that makes these drumsticks look like they came from a restaurant.
Olive oil is essential for keeping the chicken moist during cooking. I drizzle maybe two tablespoons over the drumsticks before they go in the oven. You could use vegetable oil or even melted butter if that’s what you have, but olive oil is my go-to.
Season everything with salt and pepper to taste. This seems obvious, but I’m telling you, don’t skip this step. The seasoning brings out all the other flavors and makes sure your chicken doesn’t taste bland under all that glaze.
Here’s where you can get creative. I almost always add garlic powder because, well, garlic makes everything better. Paprika gives a nice color and a subtle smoky flavor that plays well with the BBQ sauce. And if you like a little heat like I do, throw in some cayenne pepper. Just a pinch goes a long way. My husband can’t handle spicy food, so I usually keep it mild and let people add hot sauce at the table.
That’s literally it. Six main ingredients plus a few optional spices. No fancy equipment needed either. Just a baking sheet, a bowl, and a brush for the glaze. If you’re planning a full spread, these pair wonderfully with appetizers like mini chicken quesadilla bites or even spicy sriracha deviled eggs for a kick.
How to Make Perfect Honey BBQ Chicken Drumsticks
Alright, let’s get cooking. The first thing you want to do is preheat your oven to 400°F. I know it’s tempting to skip preheating, but trust me on this. Starting with a hot oven helps the chicken skin get crispy instead of rubbery.
While the oven heats up, grab a large bowl and toss in your chicken drumsticks. Drizzle them with that olive oil I mentioned earlier. Then comes the fun part where you get your hands a little messy. Sprinkle your salt, pepper, and any optional spices over the chicken.
Now just toss everything together until each drumstick is coated. I use my hands for this because it’s faster and more thorough than using tongs. Plus, you can feel if you’ve missed any spots. Just make sure to wash your hands really well afterward, obviously.
Line a baking sheet with parchment paper. This step is optional but makes cleanup so much easier. I learned this the hard way after scrubbing sticky glaze off a pan for twenty minutes. Never again. Arrange your drumsticks on the sheet with a bit of space between them. You want air to circulate around each piece so they cook evenly.
Pop them in the oven and set a timer for 30 to 35 minutes. The exact time depends on how big your drumsticks are. Smaller ones might be done in thirty minutes, while larger pieces need the full thirty-five. You’re looking for golden brown skin and juices that run clear when you poke the thickest part with a fork.
Funny enough, the first time I made these, I kept opening the oven door every five minutes to check on them. My mom saw me doing this and told me I was letting all the heat out. She was right. Now I just set the timer and walk away. The chicken will be fine without constant supervision.
While the drumsticks are doing their thing in the oven, you’ve got time to make your glaze. In a small bowl, mix together your BBQ sauce and honey. I usually do about half a cup of BBQ sauce with a third cup of honey, but you can adjust the ratio to your preference. Stir it until everything is combined and smooth.
This is also when I taste the glaze and decide if it needs anything. Sometimes I add a splash of apple cider vinegar for tang, or a little soy sauce for depth. But most of the time, the basic honey and BBQ combo is perfect as is.
When your timer goes off, carefully pull out the baking sheet. The chicken should look cooked through and smell incredible. Now comes the glazing step, which transforms good chicken into amazing chicken.
Use a basting brush to coat each drumstick generously with your honey BBQ mixture. Don’t be shy here. You want a thick layer of glaze covering every surface. I usually go back over each piece twice to make sure I’ve got good coverage.
Slide the pan back into the oven for another 5 to 10 minutes. This second baking time is where the magic happens. The glaze caramelizes and gets sticky and gorgeous. It forms this shiny coating that makes the drumsticks look professional.
Keep an eye on them during these final minutes. You want the glaze to bubble and thicken, but you don’t want it to burn. I’ve gotten distracted folding laundry before and came back to find my glaze a little too dark on the edges. Still tasted good, but it wasn’t as pretty.
By the way, if you’re making these for a party spread alongside dishes like loaded nachos with ground beef, you can keep them warm in a low oven until you’re ready to serve. They hold up really well.
The Grilling Option for BBQ Chicken Drumsticks
Here’s the thing about this recipe that I really love. You don’t have to use the oven if you don’t want to. During summer, I make these on the grill all the time because I don’t want to heat up my kitchen.
The process is almost identical. Season your drumsticks the same way, but instead of baking them, you’ll put them on a preheated grill over medium heat. Close the lid and let them cook for about 25 to 30 minutes, turning them every 7 to 10 minutes so they cook evenly on all sides.
Once they’re cooked through, brush on your honey BBQ glaze and leave them on the grill for another 5 minutes. The direct heat caramelizes the glaze even faster than the oven does, creating these beautiful char marks that everyone loves.
I actually prefer the grilled version when I’m having people over because it looks more impressive. There’s something about food coming off the grill that makes guests think you worked harder than you actually did. Plus, you get those smoky notes that complement the BBQ sauce perfectly.
The cleanup is easier too since you’re not dealing with a sticky baking sheet. Just brush down the grill grates while they’re still warm, and you’re done.
Common Mistakes to Avoid When Making Honey Glazed Chicken
I’ve made these drumsticks so many times that I’ve figured out what not to do. Let me save you some trouble.
First mistake: adding the glaze too early. I know it’s tempting to slather that honey BBQ mixture on from the start, but resist. The honey will burn if it’s in the oven for the full cooking time. That’s why we add it at the end. Those last few minutes are enough to caramelize everything without turning it black.
Second issue: overcrowding your pan. When drumsticks are too close together, they steam instead of roast. You end up with soggy skin instead of crispy, golden perfection. Give each piece some personal space. Use two baking sheets if you need to.
Another thing I learned the hard way is not checking if the chicken is actually done. Get yourself a meat thermometer. The internal temperature should hit 165°F at the thickest part of the drumstick. I thought I could just tell by looking at it, but I was wrong. A thermometer takes the guesswork out completely.
Also, don’t forget to let the drumsticks rest for a couple minutes after they come out of the oven. I used to serve them immediately and wondered why they were so dry. Resting lets the juices redistribute through the meat. Just five minutes makes a difference.
If you’re serving these as part of a bigger meal with options like crispy onion blossom bites, timing everything can be tricky. I usually make the drumsticks last since they’re best served warm and fresh from the oven.


Best Ways to Serve BBQ Honey Chicken Drumsticks
Here’s where you get to have some fun and make this meal your own. These BBQ honey chicken drumsticks are best served hot, straight from the oven or grill. The glaze is at its stickiest and most flavorful when everything is still warm. I usually transfer them to a big serving platter and just watch them disappear.
That said, one of the things I love about this dish is how flexible it is. Even if you’re serving them at room temperature for a picnic, they still taste great. I’ve packed these in a cooler for beach trips, and my family devours them cold. The honey glaze keeps everything moist, so you don’t get that dry, leftover chicken texture that nobody likes.
Now, let’s talk about what to serve alongside these drumsticks. Classic coleslaw is my number one choice. The creamy, tangy crunch balances out the sweet, sticky chicken perfectly. I make a simple vinegar-based slaw that takes maybe ten minutes to throw together. Just shredded cabbage, a splash of apple cider vinegar, a bit of sugar, and some salt. Done.
Baked beans are another go-to side. There’s something about beans and BBQ chicken that just works. I usually buy canned beans and doctor them up with some brown sugar, mustard, and bacon if I’m feeling fancy. Nobody needs to know they came from a can. Your secret is safe with me.
A fresh green salad is perfect if you want something lighter. Sometimes all that sticky sweetness needs a fresh counterpoint. I toss together whatever greens I have on hand with some cherry tomatoes, cucumber, and a light vinaigrette. It makes the meal feel more balanced without requiring much effort.
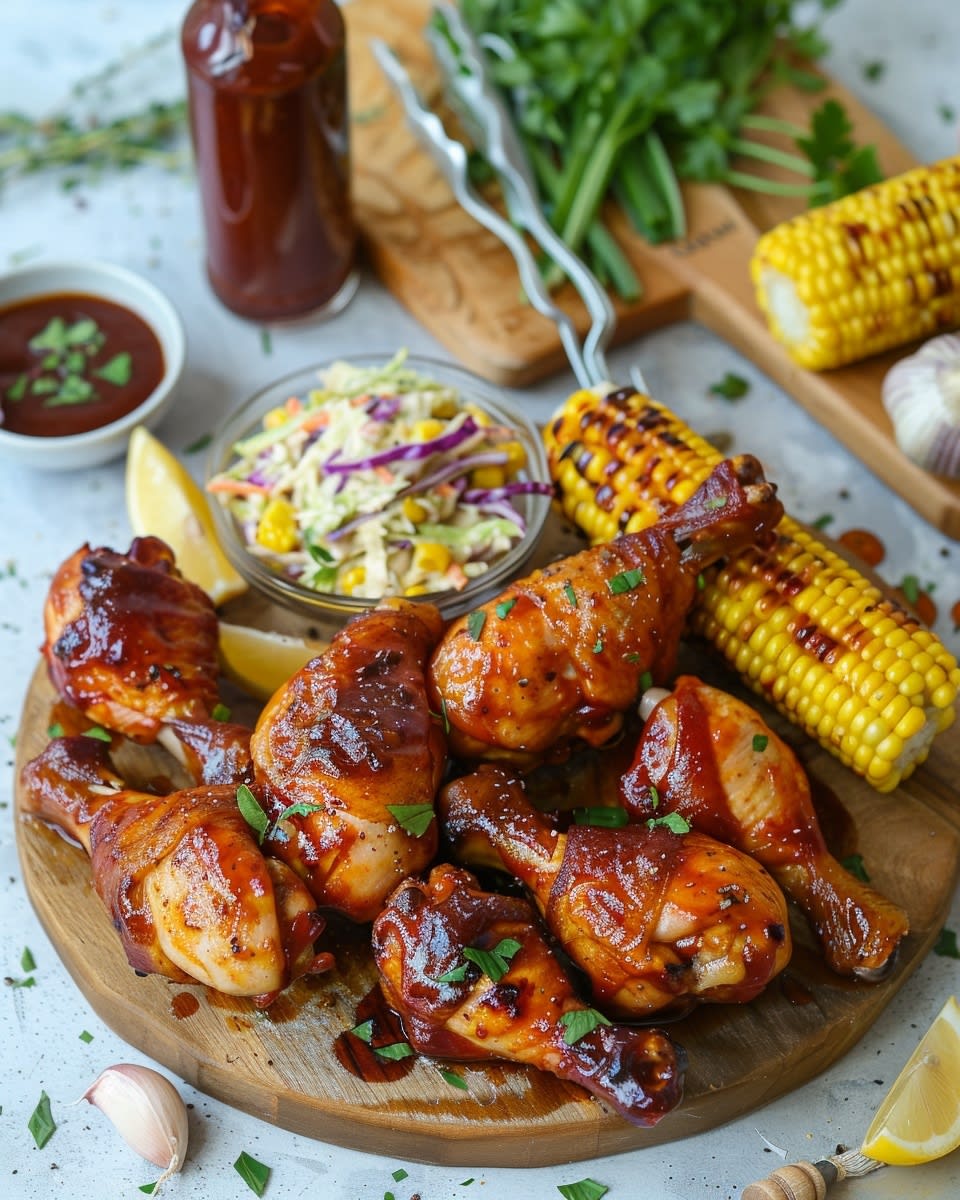
Corn on the cob is a summer favorite at my house. I grill it alongside the drumsticks if I’m already firing up the grill. Slather it with butter and a sprinkle of salt, and you’ve got a meal that feels like a real backyard cookout. My kids fight over who gets the first ear of corn, which is oddly one of my favorite parts of summer dinners.
Potato salad works beautifully too. The creaminess complements the BBQ flavors without competing with them. I have a family recipe that includes dill pickles and a touch of mustard that everyone always asks about. If you’re bringing these drumsticks to a potluck, chances are someone else will bring potato salad anyway, so it all works out.
For an extra touch that makes these look restaurant-quality, sprinkle some chopped fresh herbs on top right before serving. Parsley is classic and adds a pop of color. Cilantro gives it a slightly different vibe with more brightness. Even just a handful of chopped green onions works wonders. This tiny step makes people think you spent way more time on presentation than you actually did.
By the way, if you’re planning a picnic or potluck, these drumsticks can be made ahead and reheated. I mentioned this earlier, but it’s worth repeating because it’s such a game-changer for entertaining. Make them the night before, store them in the fridge in an airtight container, and reheat them in the oven at 350°F for about 10 minutes. They come out tasting almost identical to fresh.
I’ve also served these at room temperature straight from the container at outdoor events. Just wrap them in foil to keep them from drying out during transport. They’re surprisingly good even when they’re not piping hot. The glaze holds everything together, and the flavor actually intensifies a bit as it sits.
If you’re really trying to impress, serve them on a wooden board or a colorful platter with lemon wedges scattered around. A little squeeze of fresh lemon brightens everything up. I learned this trick from a friend who always makes her food look Instagram-worthy, and it genuinely does make a difference in how people perceive the meal.
Tips for Making Honey Chicken Drumsticks Even Better
After making these dozens of times, I’ve picked up a few tricks that take them from good to absolutely phenomenal. First, if you have the time, let the seasoned drumsticks sit in the fridge for an hour before cooking. This helps the spices really penetrate the meat. It’s not mandatory, but it does add an extra layer of flavor.
Another tip: double glaze them. After that first coating and bake, pull them out and add a second layer of the honey BBQ mixture before popping them back in. This creates an even thicker, more luxurious coating. It’s a bit extra, sure, but sometimes extra is exactly what you want.
If you’re concerned about food responsibility and ensuring your chicken is cooked safely, always check that internal temperature hits at least 165°F. The USDA has great guidelines on this. Better safe than sorry, especially when you’re cooking for others.
Want to add a smoky element without grilling? Try adding a teaspoon of liquid smoke to your glaze mixture. It sounds weird, but liquid smoke is basically concentrated smoke flavor, and it transforms the taste. You get that grilled flavor even when you’re using the oven. I discovered this during a rainy weekend when grilling wasn’t an option, and now I keep a bottle in my pantry.
Here’s something I learned from my neighbor who’s a fantastic cook: flip the drumsticks halfway through the initial baking time. This ensures even browning on all sides. I used to just leave them in one position, and sometimes the bottom would get a bit pale. Flipping takes two seconds and makes a noticeable difference.
If you’re watching your sugar intake, you can cut the honey in half and use a sugar-free BBQ sauce. I’ve done this for my diabetic uncle, and he couldn’t even tell the difference. The chicken still gets a nice glaze, just with less sweetness. It’s a small adjustment that makes the recipe more inclusive.
For those who love experimenting, try adding different spices to the glaze itself. I’ve mixed in ginger powder for an Asian-inspired version. I’ve added cumin for a southwestern twist. Once you nail the basic recipe, it becomes a template you can play with endlessly. That’s the beauty of simple recipes—they’re actually the most versatile.
Funny enough, I once accidentally used hot honey instead of regular honey, and it created this amazing sweet-heat combo. If you can find hot honey at your grocery store, I highly recommend trying it. It adds complexity without making the dish actually spicy. Just that warm tingle at the end.
If you’re making a big batch for a crowd, consider using two different BBQ sauces to create variety. Make half with a sweet sauce and half with a spicy or tangy one. People appreciate having options, and it’s minimal extra work. Label them if you’re serving buffet-style so people know which is which.
One more thing about presentation: serve them with wet wipes or napkins nearby. These drumsticks are deliciously messy, and nobody wants to be sitting there with sticky fingers and nowhere to clean them. I learned this at a party where I forgot napkins, and everyone was awkwardly wiping their hands on their jeans. Not my finest hosting moment.
If you’ve enjoyed making this recipe and want to explore more outdoor cooking ideas, definitely check out other BBQ and grilling recipes that work beautifully for warm-weather gatherings and family meals. There’s something special about cooking outdoors that makes ordinary food taste extraordinary.
Frequently Asked Questions About BBQ Honey Chicken Drumsticks
How long do I need to marinate the chicken drumsticks?
Technically, you don’t need to marinate them at all. The recipe works beautifully with just a quick seasoning right before cooking. That said, if you want deeper flavor, marinating for 2 to 4 hours in the fridge helps. I’ve even left them overnight when I’m really planning ahead. Just mix the olive oil, salt, pepper, and spices in a large bag with the drumsticks and refrigerate. The glaze still goes on at the end, so marinating is really just about letting the base seasonings penetrate the meat more thoroughly.
Can I use a different type of meat for this recipe?
Absolutely. This honey BBQ glaze works wonderfully on chicken thighs, wings, or even bone-in chicken breasts. I’ve made it with thighs when drumsticks weren’t on sale, and they turned out fantastic. You can also use this method with pork chops or ribs if you adjust the cooking time accordingly. Pork generally takes a bit longer, and you want the internal temperature to reach 145°F for safety. The glaze is versatile enough to complement different proteins, so don’t feel locked into drumsticks if you prefer something else.
What if I don’t have BBQ sauce? Can I substitute it with something else?
If you’re out of BBQ sauce, you can make a quick substitute with ketchup, a splash of Worcestershire sauce, a bit of brown sugar, and some vinegar. It won’t be exactly the same, but it’ll get you close enough in a pinch. I’ve also used teriyaki sauce mixed with honey for an Asian-inspired version that my family loved. Hoisin sauce works too if you have it. The key is finding something with a balance of sweet, tangy, and savory flavors that can stand up to the honey.
Is this recipe suitable for a gluten-free diet?
It can be, but you need to check your BBQ sauce label carefully. Many commercial BBQ sauces contain ingredients that may have gluten or are processed in facilities with gluten. Look for brands specifically labeled gluten-free. The rest of the recipe—chicken, honey, olive oil, and basic spices—is naturally gluten-free. I have a friend with celiac disease, and I always double-check my sauce before she comes over for dinner. Better safe than sorry, and there are plenty of good gluten-free BBQ sauce options available now.
How can I make the drumsticks spicier?
Adding cayenne pepper or red pepper flakes to your spice mix is the easiest way to bring heat. Start with a quarter teaspoon and work your way up based on your tolerance. You can also use a spicy BBQ sauce as your base or add hot sauce directly to the glaze mixture. I like mixing in sriracha sometimes for that vinegary heat. Another option is to sprinkle red pepper flakes on top right before serving, so people can control their own spice level. That way, you’re not making the whole batch too hot for those who prefer mild flavors.
Can I grill these drumsticks instead of baking them?
Yes, and I actually covered this in detail earlier in the article because grilling is my preferred method during summer. The process is nearly identical—season the drumsticks, grill them over medium heat for 25 to 30 minutes, turning every 7 to 10 minutes for even cooking. Once they’re done, brush on the honey BBQ glaze and leave them on the grill for another 5 minutes to caramelize. The grill adds a wonderful smoky flavor and those gorgeous char marks that everyone loves. Just keep an eye on them to prevent burning since grill temperatures can vary.
How do I store leftover drumsticks?
Let them cool to room temperature, then transfer them to an airtight container and refrigerate. They’ll keep for 3 to 4 days in the fridge. For reheating, I pop them in a 350°F oven for about 10 minutes until they’re warmed through. You can also use an air fryer, which actually makes the skin crispy again. Microwaving works in a pinch, but the skin gets a bit rubbery. If you want to freeze them, they’ll last up to 3 months. Just thaw them in the fridge overnight before reheating.
Are there any vegetarian alternatives to this recipe?
While chicken is obviously the star here, you could use the same honey BBQ glaze on cauliflower steaks or thick portobello mushroom caps for a vegetarian version. The cooking time would be shorter—maybe 20 to 25 minutes for cauliflower. I’ve made glazed cauliflower this way for a vegetarian friend, and she loved it. Tofu is another option if you press it well and cut it into thick slabs. The glaze is what makes this recipe special, so applying it to vegetables or plant-based proteins can give you a similar flavor experience, just with a different texture.
Can I make this recipe in an air fryer?
Definitely. Air fryers work great for these drumsticks and actually make the skin extra crispy. Preheat your air fryer to 400°F, arrange the seasoned drumsticks in a single layer, and cook for about 20 to 25 minutes, flipping them halfway through. Once they’re cooked through, brush on the honey BBQ glaze and air fry for another 3 to 5 minutes. The air circulation creates this amazing crispy exterior while keeping the inside juicy. Just make sure not to overcrowd the basket, or they won’t cook evenly. You might need to work in batches depending on your air fryer size.
What’s the best way to prevent the glaze from burning?
The key is adding the glaze near the end of cooking rather than at the beginning. Honey burns easily at high temperatures, so that initial 30 to 35 minutes of cooking should be done without any glaze. Only brush it on during the final 5 to 10 minutes. If you’re grilling, keep the drumsticks on medium heat rather than high, and move them to a cooler part of the grill if you notice the glaze starting to char too quickly. Watching them closely during that final glazing stage makes all the difference between beautiful caramelization and burnt sugar.
I hope this guide has given you everything you need to make these BBQ honey chicken drumsticks your own. The beauty of this recipe is in its simplicity and how easily you can adapt it to your family’s tastes. Whether you’re cooking for a Tuesday night dinner or a weekend gathering, these drumsticks deliver big flavor with minimal fuss. Give them a try, and don’t be surprised when they become one of your most-requested dishes.
Ingredients
Equipment
Method
- Préchauffez votre four à 400°F (200°C).
- Dans un grand bol, mélangez les pilons de poulet avec l'huile d'olive, le sel, le poivre et les épices optionnelles jusqu'à ce qu'ils soient enrobés.
- Tapissez une plaque de cuisson de papier sulfurisé et disposez les pilons en laissant de l'espace entre chacun.
- Enfournez les pilons pendant 30 à 35 minutes, jusqu'à ce qu'ils soient dorés et que les jus soient clairs.
- Pendant que les pilons cuisent, mélangez le miel et la sauce BBQ dans un petit bol.
- Une fois cuits, badigeonnez généreusement les pilons avec le mélange miel-sauce BBQ.
- Remettez-les au four pendant 5 à 10 minutes pour caraméliser le glaçage.
- Servez chaud et profitez-en !