Introduction: My Love Affair with Grilled Garlic Butter Lobster Tails
I’ll never forget the first time I grilled lobster tails in my backyard. The smell of garlic and butter mingling with that sweet lobster meat made my neighbors peek over the fence. That night changed everything I thought I knew about cooking seafood at home.
Hi, I’m a food enthusiast who spends way too much time experimenting in the kitchen. Over the years, I’ve learned that grilled garlic butter lobster tails aren’t just for fancy restaurants. You can make them at home, and they’ll taste even better than what you’d pay $40 for at a steakhouse.
The magic of grilled lobster tails comes from three things: quality seafood, proper technique, and that irresistible garlic butter. When you get these elements right, the meat turns out tender and juicy with a slightly smoky char. The garlic butter seeps into every bite, creating flavors that make people think you’re a professional chef.
Here’s the thing though. Many home cooks feel nervous about cooking lobster. They worry about overcooking it or wasting expensive seafood. I get it. Lobster tails aren’t cheap, and nobody wants to mess them up. That’s exactly why I’m sharing everything I’ve learned through years of trial and error.
In this guide, I’ll walk you through the entire process of making perfect grilled garlic butter lobster tails. We’ll start with selecting the best lobster tails at the market. Then I’ll show you how to prepare them, create an amazing garlic butter sauce, and grill them to perfection. You’ll also learn the right cooking times and temperatures that prevent rubbery, overcooked meat.
By the end, you’ll have the confidence to serve restaurant-quality lobster at your next backyard gathering. Your friends and family will be seriously impressed. Let’s get started with the foundation of any great lobster dish: choosing quality tails.
Selecting the Best Lobster Tails for Grilling
The difference between an okay lobster dinner and an amazing one starts at the store. I learned this lesson the hard way when I bought cheap frozen tails that tasted like rubber. Quality matters with seafood, especially when you’re spending good money on it.
Fresh versus frozen lobster tails is the first choice you’ll face. Here’s my honest take: frozen tails work great if they’re handled properly. Most lobster gets frozen shortly after harvesting anyway. The key is buying from a store with high turnover and proper storage.
I usually go with frozen Maine lobster tails or cold-water varieties. They have sweeter, more tender meat than warm-water tails. The price is higher, but the difference in taste is worth every penny. Warm-water tails work fine if you’re on a budget, but the meat tends to be tougher and less flavorful.
When shopping for lobster tails for grilling, look for tails that weigh between 5 and 8 ounces each. This size cooks evenly on the grill and gives you a nice portion. Smaller tails dry out too quickly, while larger ones take forever to cook through.
How to Check for Quality and Freshness
The shell color tells you a lot about the lobster. Look for bright, vibrant shells without dark spots or discoloration. Black spots often mean the meat is starting to break down. Nobody wants that.
If you’re buying fresh tails at the seafood counter, they should smell like clean ocean water. Any strong fishy or ammonia smell means the lobster is past its prime. Trust your nose on this one. It won’t lie to you.
Check the meat through the shell if possible. Fresh lobster meat looks translucent and slightly gray or white. It should never look dry, yellowed, or have ice crystals all over it. Heavy ice buildup suggests the tail has been frozen and thawed multiple times.
The texture matters too. Give the tail a gentle squeeze if you can. It should feel firm and spring back. Mushy or soft spots are red flags that the meat is breaking down.
Smart Shopping Tips at the Market
I always ask the person behind the seafood counter when they got their lobster shipment. Most stores receive seafood on specific days. Shopping right after a delivery gives you the freshest options.
Don’t be shy about asking questions. Find out where the lobster comes from and whether it’s been previously frozen. A good seafood counter employee will know these details and share them happily.
Here’s my checklist when buying lobster tails:
- Shell appears bright and clean without dark spots
- Meat looks firm and translucent
- No strong fishy odor
- Minimal ice crystals on frozen tails
- Tail feels heavy for its size
- Package is intact without tears or damage
Price can indicate quality, but not always. Sometimes you’re just paying for the brand name or fancy packaging. Compare prices between stores in your area. I’ve found great deals at Asian markets and wholesale clubs.
Related Question: How Do I Know If the Lobster Tail Is Fresh?
This question comes up constantly, and for good reason. Fresh lobster should have clear visual and smell indicators that tell you it’s good to cook.
The shell is your first clue. A fresh or properly frozen lobster tail has a hard, intact shell with good color. The meat underneath should be visible as a pale, slightly translucent color. If the meat looks opaque white or has a cottage cheese texture, it’s breaking down.
Smell is the ultimate test. Fresh lobster smells like the ocean, clean and slightly briny. Any sour, fishy, or chemical smell means the lobster is old. Some stores mask bad smells with heavy refrigeration, so always ask to smell before you buy.
The fan at the end of the tail provides another freshness indicator. It should be intact and spread open naturally. If it’s damaged or curled up tight, the lobster might have been mishandled.
For frozen tails, check the packaging date if available. Lobster maintains quality for about 6 to 9 months in the freezer. Anything older might still be safe but won’t taste as good.
Feel the weight too. A good lobster tail feels heavy because it’s full of meat. If it feels light or hollow, the meat might have dried out or there’s less meat than the shell suggests.
When thawing frozen tails at home, do it slowly in the refrigerator overnight. Never use hot water or the microwave. These methods cook the outer meat while the inside stays frozen, giving you uneven texture.
I keep a simple rule: if something seems off about the lobster, don’t buy it. Your instincts about food are usually right. There will always be another chance to buy better quality seafood. Saving a few dollars isn’t worth a disappointing meal or worse, getting sick.
Now that you know how to pick perfect lobster tails, you’re ready to move on to preparation. Getting this selection step right makes everything else easier. Quality ingredients need less work to taste amazing.


Preparing Your Lobster Tails for the Grill
With your perfect lobster tails in hand, it’s time to get them ready for their transformation. This prep work might seem intimidating at first, but I promise it’s simpler than you think.
The first step is thawing if you bought frozen tails. I pop mine in the fridge the night before I plan to grill. They need about 8 to 10 hours to thaw completely. Some people use cold water to speed things up, which works in a pinch. Just seal the tails in a plastic bag and submerge them in cold water for about 30 minutes, changing the water halfway through.
Once thawed, rinse the tails under cold water and pat them completely dry with paper towels. Water on the shell creates steam on the grill, and we want a nice sear instead. This is one of those little details that makes a huge difference in the final result.
How to Butterfly Lobster Tails Like a Pro
Butterflying sounds fancy, but it’s really just cutting the tail so the meat sits on top of the shell. This technique lets the garlic butter soak into the meat while giving you that impressive presentation.
Grab a sharp pair of kitchen shears. Regular scissors won’t cut it, literally. You need something strong enough to slice through that tough shell. I use the same shears I keep for breaking down chicken in other recipes.
Place the lobster tail on your cutting board with the rounded shell side facing up. Starting from the wide end where it was attached to the body, cut straight down the center of the shell. Stop when you reach the tail fan but don’t cut through it. The fan acts as a handle and keeps everything together.
Here’s where it gets interesting. Gently spread the shell apart with your fingers. You’ll see the meat inside still attached at the bottom. Carefully work your fingers underneath the meat to loosen it from the bottom shell. Don’t rip it out completely though. You want to lift it up and rest it on top of the split shell.
The meat should now be sitting pretty on top, still attached at the tail end. Press down gently on the shell halves to spread them wider. This creates that classic butterflied look you see in restaurants. The first time I did this, I felt like a surgeon. Now it takes me maybe 30 seconds per tail.
Some people crack the shell on the underside too, but I skip that step. It makes the tail harder to handle on the grill and doesn’t improve the cooking process.
Related Question: How Do I Butterfly a Lobster Tail?
Let me break this down even more since I get asked about it constantly. The butterflying technique separates amateur lobster cooking from the pros.
Position your lobster tail shell-side up on a stable cutting board. The curve should be facing you, with the wider end closer to your dominant hand. Using kitchen shears, insert the blade at the meaty end and cut through the center of the top shell lengthwise. Apply steady pressure rather than trying to cut quickly. The shell will crack and split as you go.
Keep your cut centered by following the natural line down the middle of the shell. This isn’t just about looks. A centered cut means the meat cooks evenly on both sides. When you reach the tail fan, stop cutting. That fan portion stays intact as your anchor point.
Now flip the tail over so the softer underside faces up. You’ll see the meat clearly through the thin membrane. Slide your thumbs between the meat and the shell, starting from the cut you just made. Gently wiggle your thumbs to separate the meat from the shell walls. Be patient here. Rushing causes the meat to tear.
Once loosened, lift the meat up through the opening you created. Rest it on top of the shell halves, keeping it attached at the tail end. The meat should sit elevated like it’s lying on a shell bed. Press the shell halves outward to flatten them slightly. This gives you a stable base for grilling.
If you notice the membrane still clinging to the meat, you can carefully peel it away. I usually leave it because it helps hold everything together during cooking. It becomes tender on the grill and nobody notices it in the final dish.
The butterflied tail should look like an open book with the meat as the pages. This presentation isn’t just pretty. It exposes maximum surface area for the garlic butter to penetrate and allows even heat distribution during grilling.
Creating an Incredible Garlic Butter
Now we’re getting to the good stuff. The garlic butter makes or breaks grilled lobster tails. I’ve tried dozens of variations, and this simple version beats all the complicated recipes I’ve tested.
Start with real butter, not margarine or any substitute. I use salted butter because it brings out the lobster’s natural sweetness. You’ll need about half a stick per two lobster tails. Melt it gently in a small saucepan over low heat. Don’t rush this by cranking up the temperature. Burnt butter tastes bitter and ruins the whole experience.
While the butter melts, mince three or four fresh garlic cloves. The pre-minced stuff in jars doesn’t have the same punch. Fresh garlic releases oils that create depth and complexity you can’t get from a jar. I learned this lesson while perfecting my teriyaki chicken marinade years ago.
Once your butter is completely melted, add the minced garlic. Let it cook in the butter for about two minutes, just until fragrant. You’re not trying to brown the garlic, just wake up its flavor. If it starts to brown, pull the pan off the heat immediately.
Here’s my secret ingredient that makes people ask for the recipe every single time: a squeeze of fresh lemon juice. Maybe a tablespoon or so. The acidity brightens everything and cuts through the richness of the butter. It makes the lobster taste even more lobster-y, if that makes sense.
I also add a pinch of smoked paprika for color and a subtle smoky note that complements the grilling. A tiny bit of cayenne pepper adds warmth without making things spicy. We’re talking like an eighth of a teaspoon here. You want a whisper of heat, not a shout.
Funny enough, I discovered this combination while experimenting with flavors for a pizza recipe and realized it would be perfect for seafood. Sometimes the best ideas come from unexpected places.
Mix everything together and keep it warm while you prep the grill. The butter should stay melted but not bubbling. I set the pan on the coolest part of my stove or even just next to the grill where it stays warm from ambient heat.
Mastering the Grill for Perfect Lobster Tails
Getting your grill setup right makes the difference between tender lobster and expensive rubber. I’ve made every mistake possible, so learn from my disasters.
You’ll need a few basic tools before starting. Long-handled tongs are essential for flipping without burning your hands. A basting brush for applying garlic butter, and a good instant-read thermometer for checking doneness. That thermometer changed my grilling game completely. No more guessing and hoping.
Whether you’re using gas or charcoal, the goal is the same: medium-high heat with both direct and indirect zones. For gas grills, I fire up all burners to preheat, then turn off one side before cooking. This gives you a hot zone for searing and a cooler zone for finishing if needed.
Charcoal grilling adds amazing flavor but requires more attention. Pile your coals on one side of the grill, leaving the other side empty. This two-zone setup gives you control. The hot side chars the meat while the cool side prevents burning. Pretty much the same principle I use when grilling a perfect brisket.
Clean your grill grates thoroughly before cooking. Old crud stuck to the grates will make the lobster stick and tear. I scrub mine with a wire brush while they’re heating up, then oil them lightly with a paper towel dipped in vegetable oil. Use tongs to hold the towel, not your fingers. Hot grates hurt.
Placing and Cooking Your Lobster Tails
Brush the lobster meat generously with your garlic butter before it hits the grill. Don’t be shy here. That butter is what makes everything magical. Save about half for basting while cooking and serving.
Place the tails flesh-side down directly over the heat. Yes, meat side down first. This sears the surface and creates those gorgeous grill marks everyone loves. The shell protects the meat from direct heat on the flip side, so starting flesh-down won’t overcook it.
Let them sear for about 5 minutes without moving them. I know the temptation to peek and fiddle, but resist it. Movement breaks the sear and makes the meat stick. Set a timer if you need to. I do this for everything I grill because I get distracted easily.
After five minutes, flip the tails so the shell side is down and the meat faces up. Brush more garlic butter over the meat immediately. The hot surface will sizzle and absorb all that flavor. This is the moment that makes your neighbors jealous.
Now it’s about watching for doneness rather than following exact time. Total cooking time depends on the size of your tails, but figure about 8 to 10 minutes for medium-sized ones. The meat turns from translucent to opaque white when it’s done. It should feel firm but still give slightly when you press it.
Here’s where that instant-read thermometer becomes your best friend. Insert it into the thickest part of the tail. You’re looking for an internal temperature of 135 to 140 degrees Fahrenheit. Pull the tails off at 135 if you’re serving immediately. They’ll coast up a few degrees while resting.
Related Question: What Is the Ideal Temperature for Grilling Lobster Tails?
Temperature control separates perfect lobster from the disappointing kind. We’re talking about two temperatures here: the grill temperature and the internal meat temperature.
Your grill should run between 400 and 450 degrees Fahrenheit for grilling lobster tails. This range gives you enough heat to char the meat and create flavor without incinerating it. Too hot, and the outside burns before the inside cooks through. Too cool, and you’re basically baking on the grill without any char or smoky flavor.
The internal temperature of the lobster meat matters even more. Pull your tails off the grill when they hit 135 to 140 degrees. At 135, the meat is tender and slightly translucent in the very center. By 140, it’s fully opaque and firm. I prefer 137 degrees personally. That sweet spot gives you tender meat that’s cooked through without being dry.
Anything over 145 degrees starts getting tough and rubbery. Lobster is unforgiving about overcooking. Unlike chicken or beef where you might have a wider margin, lobster goes from perfect to overdone in just a couple minutes.
Check the temperature in the thickest part of the tail, usually about two-thirds of the way from the fan end toward the body end. Insert your thermometer probe into the center of the meat, not touching the shell. The shell conducts heat differently and will give you a false reading.
For those without a thermometer, watch for visual and texture cues. The meat turns bright white and opaque when done. Raw lobster meat is slightly translucent and grayish. Cooked meat is bright white throughout. The texture should be firm but spring back when pressed lightly with your finger or tongs.
By the way, the grill temperature will fluctuate during cooking, especially with charcoal. Keep your grill lid closed as much as possible between bastings to maintain consistent heat. Every time you open the lid, you lose heat and add cooking time.
If your tails are cooking too fast on the outside but staying raw inside, move them to the indirect heat zone and close the lid. This finishes them gently without additional char. It’s a technique that saves dinner when things get too hot too quickly.
Remember that smaller tails cook faster than larger ones. A 4-ounce tail might be done in 7 minutes total, while an 8-ounce tail could take 12 minutes. Size matters more than exact timing, which is why temperature checking beats watching the clock.
One last tip about achieving that perfect char without overcooking: baste frequently with garlic butter but flip only once. Each flip loses heat and extends cooking time. One good sear on each side is plenty. Multiple flips might seem professional, but they actually work against you with delicate seafood like lobster.


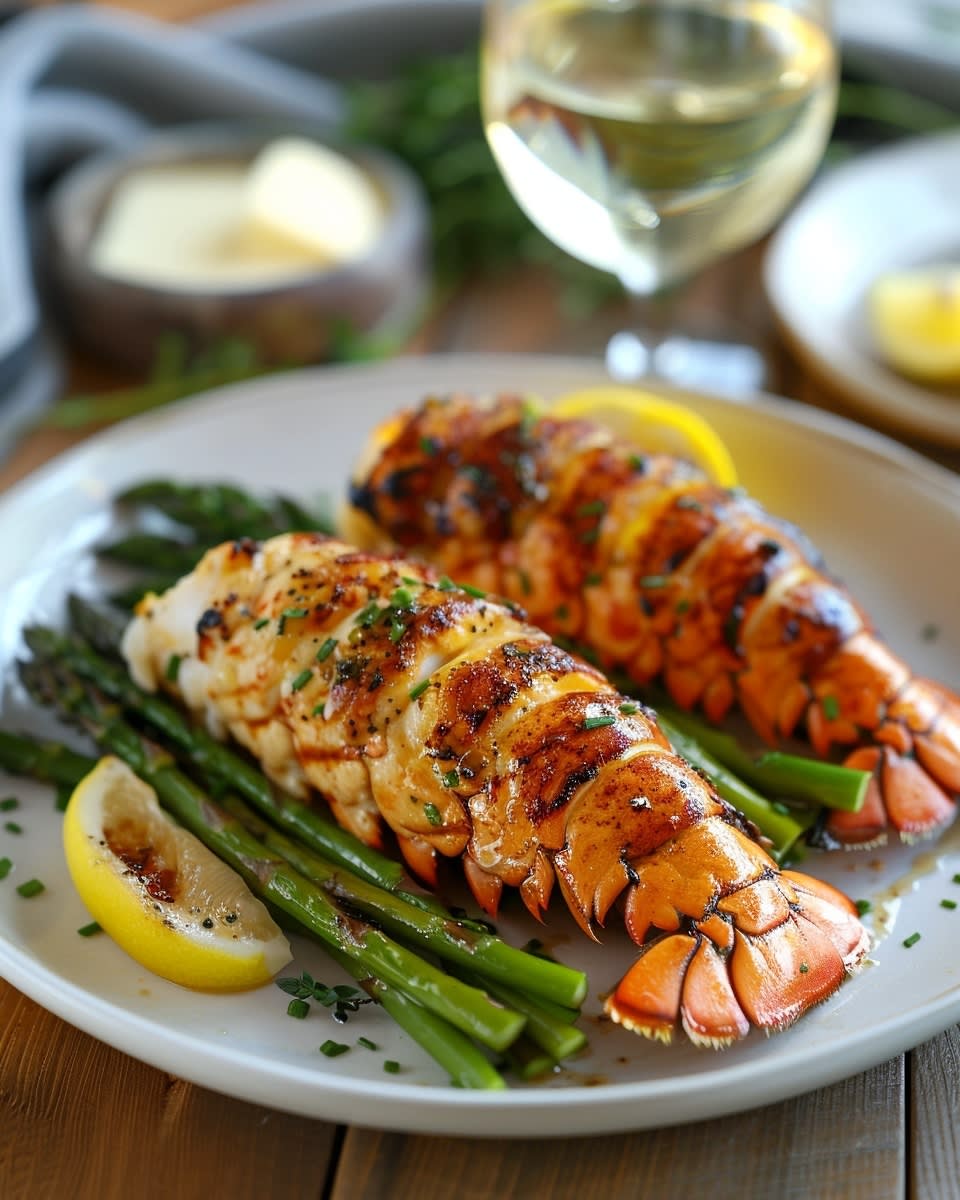
Serving and Enjoying Your Grilled Garlic Butter Lobster Tails
You’ve grilled perfect lobster tails, and now comes the fun part: serving them in a way that makes everyone at the table feel special. Presentation matters almost as much as flavor when you’re working with premium seafood.
I like to arrange the lobster tails on individual plates or a large serving platter while they’re still hot. The shells provide natural drama and color against white plates. Sometimes I nestle them on a bed of fresh herbs like parsley or dill. The green adds visual pop and a subtle aroma that enhances the experience.
Before serving, give each tail one final brush of warm garlic butter. This creates a glossy finish that catches the light beautifully. Don’t dump the remaining butter down the drain either. Pour it into small ramekins for dipping. Trust me, your guests will want extra butter for dunking every single bite.
A wedge of fresh lemon on each plate isn’t just decoration. Squeezing lemon over the lobster right before eating brightens the rich flavors. I cut my lemons into wedges rather than slices because wedges are easier to squeeze without seeds flying everywhere. Small detail, but it matters when you’re trying to look elegant.
Side Dishes That Complete the Meal
Lobster tails are rich and buttery, so I balance them with lighter sides that don’t compete for attention. The meal should feel cohesive rather than like five different recipes fighting on one plate.
Grilled vegetables work beautifully since you already have the grill fired up. Asparagus, zucchini, and bell peppers get a quick char while the lobster rests. I toss them with olive oil, salt, and pepper, then grill them over medium heat until they develop those gorgeous grill marks. The slight bitterness of charred vegetables contrasts perfectly with sweet lobster meat.
Here’s the thing about corn on the cob. It’s a classic pairing for a reason. I grill my corn in the husk after soaking it in water for 20 minutes. This steams the kernels inside while the outside chars slightly. Peel back the husk at serving time and slather it with more of that garlic butter. People go absolutely crazy for this.
A simple garden salad with vinaigrette provides freshness and acidity. I keep mine basic: mixed greens, cherry tomatoes, cucumber, and a light lemon vinaigrette. Nothing heavy or creamy that would weigh down the meal. The crisp vegetables cleanse your palate between bites of rich lobster.
Garlic bread might seem redundant since we’re already using garlic butter, but nobody has ever complained about it. I make mine on the grill too by brushing sliced baguette with olive oil and toasting it cut-side down. The smoky char adds another layer of flavor that plain oven-toasted bread can’t match.
Rice pilaf or wild rice blend works when you want something more substantial. The mild, nutty flavors support the lobster without overwhelming it. I cook mine with chicken broth instead of water for extra depth. A handful of toasted almonds or pine nuts adds texture and makes it feel more special.
By the way, roasted baby potatoes are another winner. I parboil them for about 8 minutes, then finish them on the grill with olive oil, rosemary, and sea salt. They develop crispy exteriors while staying creamy inside. The earthiness of potatoes grounds the meal and makes it more filling.
Related Question: What Are Some Good Side Dishes to Serve with Grilled Lobster Tails?
This question deserves its own section because side dish selection can make or break your lobster dinner. You want sides that complement rather than compete with the star of the show.
Start with grilled asparagus, which is probably my most-served side with lobster. The slight bitterness and crisp texture provide contrast to the sweet, tender meat. Asparagus also looks elegant on the plate, which matters when you’re serving something as special as lobster. Drizzle it with lemon juice and sprinkle flaky sea salt right before serving.
Coleslaw offers crunch and tang that cuts through the richness of garlic butter. I make a vinegar-based slaw rather than mayo-based because it feels lighter and more refreshing. Shredded cabbage, carrots, and a dressing of rice vinegar, a touch of sugar, and sesame oil creates an Asian-inspired version that’s become my go-to. The acidity literally cleanses your palate between bites.
Caesar salad pairs naturally with lobster if you want something more substantial than a simple garden salad. The creamy dressing and crunchy croutons add satisfying texture. Sometimes I even chop up leftover lobster meat and toss it into the Caesar for lunch the next day. It’s ridiculously good.
Grilled or roasted Brussels sprouts work surprisingly well, especially if you’re serving lobster in fall or winter. I halve them, toss with olive oil and balsamic vinegar, then roast at high heat until crispy. The caramelized edges add a sweet-savory element that complements the seafood. People who claim to hate Brussels sprouts always ask for seconds.
Pasta seems heavy at first thought, but a light version works. I make angel hair with olive oil, fresh garlic, red pepper flakes, and lots of fresh parsley. It’s basically garlic butter pasta that echoes the flavors on the lobster without being redundant. Keep portions small though. This is a supporting player, not the main event.
Steamed artichokes give you another excuse to serve melted butter for dipping. The ritual of pulling off artichoke leaves and scraping them through your teeth creates a fun, interactive element to the meal. Plus, artichokes and lobster share that subtle sweetness that makes them natural partners.
A fruit salad might sound weird, but hear me out. Watermelon, cantaloupe, and fresh mint with a squeeze of lime creates a palate cleanser that works between courses or alongside the main dish. The sweetness and juiciness refresh your mouth so each bite of lobster tastes as good as the first.
Tips for Maximum Flavor Enjoyment
The way you actually eat grilled lobster tails affects how much you enjoy them. I’ve developed a few habits over the years that maximize every bite.
Let the lobster rest for about two minutes after it comes off the grill. This isn’t as critical as resting a steak, but it allows the juices to redistribute and the temperature to even out. You won’t burn your mouth on the first bite either, which has definitely happened to me more than once.
Start eating from the fan end toward the body end. The meat gets thicker as you go, which means you finish with the best, meatiest bites. It’s like saving the best for last. Some people work the opposite direction, but I think my way builds anticipation throughout the meal.
Use a seafood fork if you have one, but a regular fork works fine too. Work the meat out of the shell in whole pieces rather than cutting it up first. This preserves the texture and keeps each bite juicy. Cutting everything up front lets the juices run out onto the plate.
Dip or drizzle, don’t drown. That garlic butter is intense, and you want to taste the sweet lobster meat, not just butter. I do a light dip on one edge of each bite. This gives you butter flavor without overwhelming the delicate seafood. You paid good money for that lobster. Taste it.
Funny enough, I learned about proper grilling techniques from my neighbor who competed in barbecue competitions. He taught me that respecting your ingredients means not covering them up with too much sauce or seasoning. That lesson applies perfectly to lobster.
Pair your meal with the right beverage. I’m not a wine expert, but I know that crisp white wines like Chardonnay or Sauvignon Blanc work beautifully with lobster. The acidity cuts through the butter while the wine’s body matches the richness of the meat. If wine isn’t your thing, sparkling water with lemon or a light beer works too.
Here’s something most people don’t think about: the temperature of your plates. Warm plates keep the lobster hot longer, which matters since lobster fat congeals quickly when it cools. I run my plates under hot water or warm them in a low oven for a few minutes before plating. This restaurant trick makes a noticeable difference at home.
Create a little ritual around the meal. Light candles, use cloth napkins, play some background music. Lobster dinners are special occasions even when you make them at home. The ambiance enhances the flavors psychologically. I know it sounds silly, but eating in a nice environment makes food taste better.
Don’t rush through dinner. Lobster is meant to be savored slowly. Put your fork down between bites. Talk to your dining companions. Enjoy the moment. We live in such a hurried world that slowing down for a special meal feels almost rebellious.
Save those shells after everyone finishes eating. Lobster shells make incredible stock for soups and sauces. I throw them in a pot with water, onion, celery, and herbs, then simmer for an hour. The resulting stock adds amazing depth to seafood chowders or risotto. Waste nothing when you’re working with premium ingredients.
Making the Experience Memorable
Beyond the food itself, grilled lobster tails create memories that stick with people. I remember specific lobster dinners from years ago because they marked special occasions or brought people together.
If you’re serving lobster for a celebration, consider making place cards or a simple menu card. It sounds fancy, but it takes five minutes and makes guests feel valued. Handwritten cards beat printed ones because they add a personal touch that shows you care.
Take photos before anyone starts eating. Food photography has become its own art form, and grilled lobster tails photograph beautifully. Natural light works best if you’re eating during daylight. The colors and textures really pop in good lighting. These photos become memories you’ll revisit later.
Get kids involved if you’re cooking for family. Let them brush the garlic butter on or arrange the lemon wedges on plates. They’ll remember helping make something special way more than just eating it. My nephew still talks about the time he helped me grill lobster for his birthday three years ago.
If you’ve been following along with other recipes and want more grilling inspiration, I’ve got plenty of ideas waiting in the grilling section that use similar techniques with different proteins and flavors.
Consider pairing the meal with stories or conversation starters about the best meals people have had or places they’ve traveled. Food connects us to memories and experiences. Lobster dinners naturally lend themselves to celebration and reflection. The meal becomes about more than just eating.
Storing and Using Leftovers
You probably won’t have leftovers because grilled lobster tails disappear fast. But if you do, store them properly to enjoy later. Remove the meat from the shells and place it in an airtight container in the fridge. It’ll keep for two days max.
Leftover lobster makes amazing lobster rolls. Mix the chopped meat with a little mayo, lemon juice, and diced celery. Serve it on toasted hot dog buns. This transforms your fancy dinner into an equally delicious casual lunch.
You can also add leftover lobster to pasta, omelets, or salads. The meat is already cooked and flavored, so it just needs gentle reheating or no heating at all. Cold lobster in a salad is actually fantastic on a hot summer day.
Never microwave leftover lobster if you can avoid it. The microwave makes it rubbery and unpleasant. If you must reheat it, do so gently in a pan with a little butter over low heat for just a minute or two. You’re warming it, not cooking it again.
The goal with leftovers is to use them quickly while they still taste fresh. Lobster loses its magic after a couple days in the fridge. It’s not like chicken or beef that holds up for nearly a week. Seafood demands respect and quick consumption.
Making grilled garlic butter lobster tails at home transforms you from a nervous cook into someone who can handle premium ingredients with confidence. Every time you do it, you’ll get faster and more comfortable with the process. The first time feels scary. The fifth time feels like second nature. Keep practicing, and soon you’ll be the person everyone asks to cook when lobster goes on sale. The combination of smoky char, tender meat, and that incredible garlic butter creates moments that people remember long after the meal ends.
Frequently Asked Questions About Grilled Garlic Butter Lobster Tails
Can I use frozen lobster tails for grilling?
Absolutely, frozen lobster tails work great for grilling as long as you thaw them properly. Most lobster is frozen shortly after harvest anyway, so frozen doesn’t mean lower quality. Thaw them overnight in the refrigerator for best results, or use the cold water method if you’re short on time. Just make sure they’re completely thawed before grilling, otherwise the inside stays cold while the outside overcooks.
How long should I grill lobster tails?
Plan for about 8 to 10 minutes total for medium-sized tails between 5 and 8 ounces. Grill them flesh-side down for about 5 minutes first, then flip and cook shell-side down for another 3 to 5 minutes. The exact time depends on tail size and your grill temperature. Always use an instant-read thermometer and pull them at 135 to 140 degrees internal temperature rather than relying solely on time.
Should I remove the vein from lobster tails?
The dark vein running through lobster tails is the digestive tract, and yes, you should remove it if it’s visible and looks full. It won’t hurt you, but it can have a gritty texture and slightly bitter taste. After butterflying the tail, you can easily pull it out with your fingers or rinse it away under cold water. Sometimes it’s not visible at all, especially in smaller tails, and that’s fine too.
Can I prepare the garlic butter ahead of time?
Yes, garlic butter keeps beautifully in the fridge for up to a week or in the freezer for months. Make a big batch and store it in an airtight container or roll it into a log using plastic wrap. When you’re ready to use it, just melt the amount you need. Having garlic butter on hand makes weeknight lobster dinners much easier since half your prep work is already done.
What if my lobster tails curl up while grilling?
Curling happens when the muscle contracts from heat, but you can prevent most of it by skewering the tail before grilling. Run a metal or wooden skewer lengthwise through the meat to keep it flat. Some curling is natural and doesn’t affect taste, but keeping tails flat helps them cook more evenly. Don’t stress too much about a little curl though, it still tastes amazing.
Do I need to clean lobster tails before cooking?
A quick rinse under cold water is all you need. Remove any visible shell fragments or debris, but there’s no extensive cleaning required. The meat comes pretty clean from the store. After rinsing, pat the tails completely dry with paper towels. Excess water on the shell creates steam on the grill instead of a nice sear, so getting them dry is important.
Can I grill lobster tails without butterflying them?
You can grill whole lobster tails without butterflying, but I don’t recommend it. Butterflying exposes the meat to heat and seasoning, which creates better flavor and more even cooking. Whole tails take longer to cook through and the meat doesn’t absorb the garlic butter as well. The butterflying technique takes maybe an extra minute per tail and makes a huge difference in the final result.
What’s the best way to tell if lobster is overcooked?
Overcooked lobster becomes tough, rubbery, and dry with a chalky texture. The meat pulls away from the shell and shrinks noticeably. If you cut into it and it’s tough to chew, you’ve gone too far. Prevention is easier than fixing it, so use a thermometer and pull the tails at 135 to 140 degrees. Once lobster is overcooked, there’s unfortunately no way to reverse it.
Can I use a gas grill instead of charcoal?
Gas grills work perfectly for lobster tails. They give you easier temperature control, which is actually an advantage with delicate seafood. You won’t get quite the same smoky flavor as charcoal, but the results are still excellent. Preheat your gas grill to medium-high, create a two-zone setup by turning off one burner, and follow the same cooking process. The convenience of gas makes weeknight lobster much more realistic.
How do I reheat leftover grilled lobster without drying it out?
The best method is gentle reheating in a covered pan with a little butter over low heat for just a minute or two. You’re warming it, not cooking it again. Alternatively, eat leftover lobster cold in salads or lobster rolls where reheating isn’t necessary. Never microwave it if you can avoid it, as microwaves turn lobster meat tough and rubbery. Leftovers are best used within two days while the meat still tastes fresh.
Ingredients
Equipment
Method
- Décongeler les queues de homard pendant la nuit au réfrigérateur ou utiliser la méthode de l'eau froide pendant 30 minutes.
- Rincer les queues sous l'eau froide et sécher complètement.
- À l'aide de ciseaux de cuisine, couper soigneusement le long de la coque, en s'arrêtant à l'éventail de la queue.
- Soulever délicatement la chair et la reposer sur le dessus de la coque.
- Faire fondre le beurre dans une petite casserole à feu doux.
- Ajouter l'ail haché au beurre fondu et cuire pendant environ 2 minutes jusqu'à ce qu'il soit parfumé.
- Incorporer le jus de citron, le paprika fumé et le poivre de Cayenne, puis garder au chaud.
- Préchauffer le gril à feu moyen-élevé, environ 400-450°F.
- Badigeonner généreusement la chair de homard avec le beurre à l'ail.
- Placer les queues de homard côté chair vers le bas directement sur la chaleur pendant environ 5 minutes.
- Retourner les queues et badigeonner à nouveau de beurre à l'ail sur le côté de la chair, cuire pendant encore 3-5 minutes.
- Vérifiez la température interne, en visant 135-140°F.
- Retirer du gril et laisser reposer pendant 2 minutes avant de servir.
- Servir avec du beurre à l'ail supplémentaire et des quartiers de citron.