Last summer, I found myself staring at a package of chicken breasts with zero motivation to cook. Then I remembered these skewers my neighbor brought to a cookout the year before. Everyone devoured them in minutes. I grabbed some honey, garlic, and wooden skewers from my pantry, and boom—dinner was sorted. My kids actually asked for seconds, which never happens on a Wednesday night.
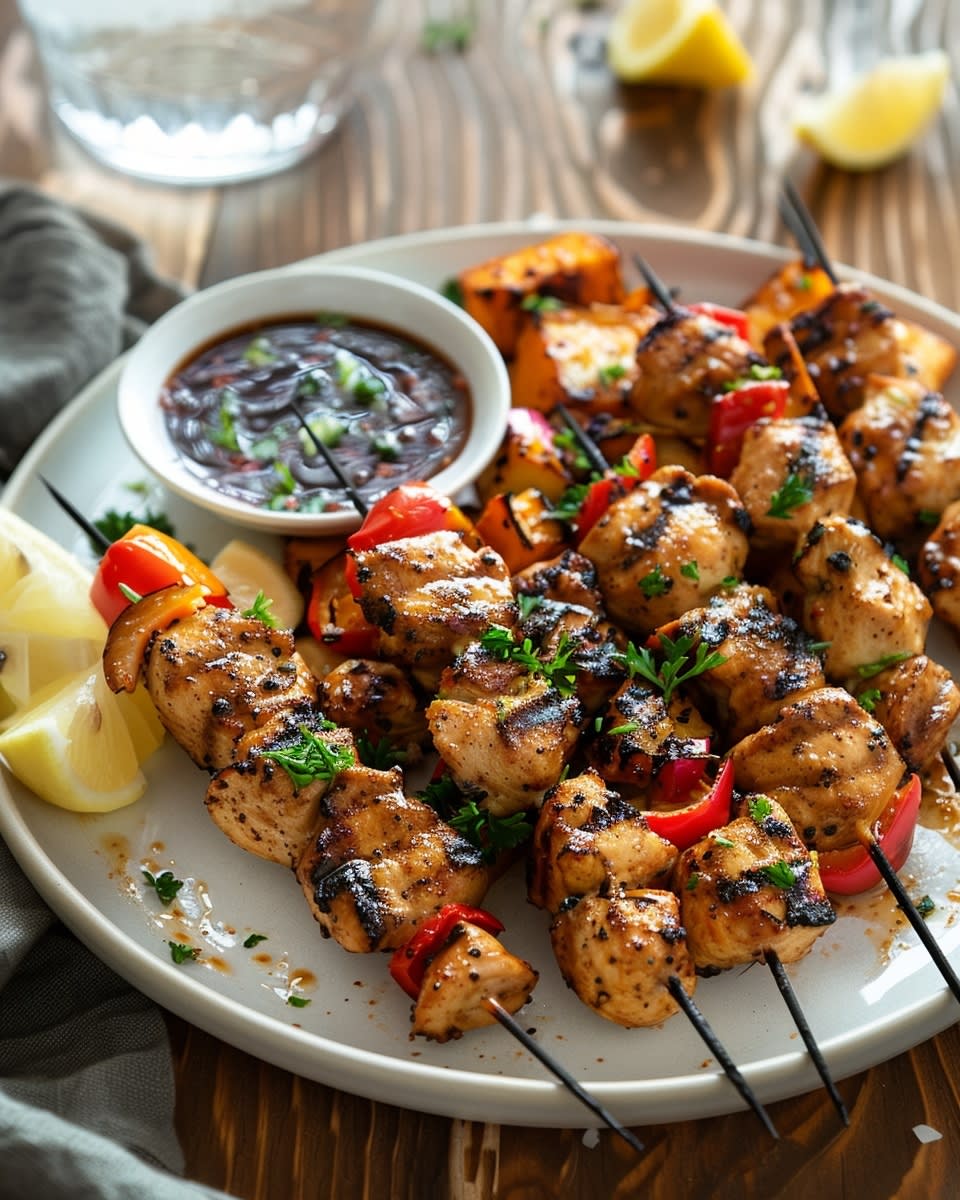
That’s the magic of Grilled Honey Garlic Chicken Skewers. They turn boring chicken into something people get excited about. The sweet honey mixes with savory garlic to create flavors that stick with you. Every bite delivers that perfect char from the grill along with tender, juicy meat.
These skewers work for basically any occasion. Planning a summer barbecue? Make a double batch. Need something fast for dinner after soccer practice? These cook in under 20 minutes. Hosting family for the weekend? They look impressive but require minimal effort. I’ve served them at birthday parties, neighborhood block parties, and random Tuesday nights when I just wanted something tasty.
The best part is how simple they are to put together. You don’t need fancy cooking skills or hard-to-find ingredients. Most of what you need is probably sitting in your kitchen right now. A basic marinade, some chicken, and a hot grill are all it takes. Even cooking beginners nail this recipe on their first try.
Why Grilled Honey Garlic Chicken Skewers Are So Popular
The flavor combination is the real star here. Honey garlic sauce hits different than other marinades. The sweetness from honey balances out the sharp, pungent kick of fresh garlic. Add a touch of soy sauce for depth, and you’ve got something that makes your taste buds happy. This sweet and savory mix is why people keep coming back for more.
I’ve noticed that picky eaters actually enjoy these skewers. My nephew refuses most foods, but he’ll eat three of these without complaint. Kids like the mild sweetness. Adults appreciate the garlic bite. It’s one of those rare dishes that pleases everyone at the table.
The sticky glaze that forms on the outside creates an amazing texture. As the grilled chicken cooks, the sugars in the honey caramelize. You get these beautiful char marks with a glossy coating. The outside has a slight crispness while the inside stays moist and tender. That contrast makes each bite interesting.
Chicken skewers are super versatile too. You can adjust the recipe based on what you have or what you need. Want more heat? Toss in some red pepper flakes or sriracha. Prefer a tangier flavor? Add extra lime juice or a splash of vinegar. Need to keep it low-carb? The marinade already works great for keto diets. Going gluten-free? Just swap regular soy sauce for tamari.
I’ve made these skewers with different cuts of chicken. Boneless thighs work beautifully because they stay juicy even if you overcook them slightly. Chicken breasts are leaner and cook faster. Both options taste great. You can even use the same marinade on chicken wings or drumsticks if you’re not in the mood for skewers.
The vegetables you add between the chicken pieces are totally up to you. I usually go with:
- Bell peppers (any color works)
- Red onion chunks
- Zucchini rounds
- Cherry tomatoes
- Pineapple pieces for extra sweetness
My friend swears by adding mushrooms. Her husband prefers keeping it meat-only. The recipe adapts to whatever sounds good to you. That flexibility is why these skewers show up at so many different types of meals.
Preparation takes maybe 15 minutes if you’re moving slowly. Cut the chicken into chunks. Mix your marinade. Thread everything onto skewers. Let it sit for 30 minutes or overnight. The longer marinating time gives you deeper flavor, but even a quick 30-minute soak works when you’re pressed for time.
I love that honey garlic chicken doesn’t create a huge mess. You need one bowl for marinating and your grill or grill pan for cooking. That’s it. No multiple pots and pans cluttering your stove. Cleanup takes less time than the actual cooking. On busy nights, that matters more than anything.
Grilling the skewers is straightforward. Heat your grill to medium-high. Oil the grates so nothing sticks. Place your skewers down and let them cook for about 5-6 minutes per side. You want nice color and an internal temperature of 165°F. Don’t overthink it. The marinade does most of the heavy lifting for flavor.
If you don’t have an outdoor grill, no problem. A grill pan on your stovetop works just fine. I’ve even baked these in the oven under the broiler when it’s raining. They still turn out delicious. The cooking method matters less than the marinade quality.
These skewers also reheat well, which is rare for chicken. I make extra and pack them for lunch the next day. A quick zap in the microwave and they’re good to go. The chicken doesn’t dry out like plain grilled chicken often does. That honey garlic sauce keeps everything moist.
People always ask for the recipe when I bring these to gatherings. It feels fancy enough for company but easy enough for regular rotation. That sweet spot is hard to find with recipes. Most dishes are either impressive and complicated or simple and boring. These skewers manage to be both impressive and simple at the same time.
The affordability factor helps too. Chicken costs less than beef or seafood. The marinade ingredients are pantry staples that don’t break the bank. You can feed a crowd without spending a fortune. I’ve made 40 skewers for a party and spent less than $25 on ingredients.
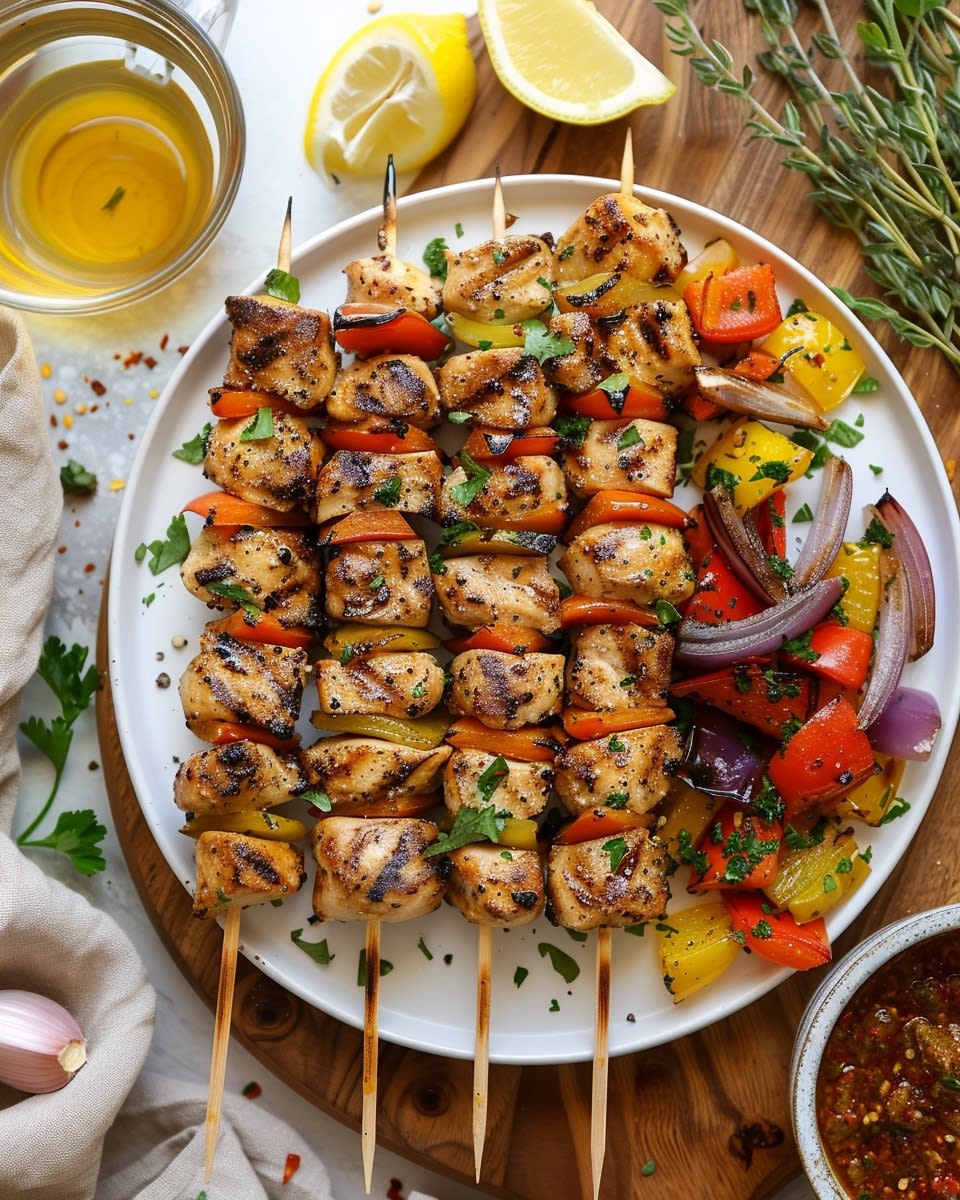
Social media loves these skewers. They photograph beautifully with those char marks and colorful vegetables. If you’re into sharing food pics, these deliver every time. The presentation looks professional even though the effort level is minimal.
Ingredients You’ll Need
Now that you know why these skewers are worth making, let’s talk about what actually goes into them. The ingredient list is refreshingly short, which is part of why I make these so often.
For the honey garlic sauce marinade, you’ll need:
1/3 cup of honey – This creates that signature sweetness and helps with caramelization. I prefer raw honey when I have it, but regular grocery store honey works perfectly fine. If you’re watching sugar intake, you could try using half the amount, though the glaze won’t be quite as sticky.
4-5 garlic cloves, minced – Fresh garlic makes a huge difference here. Those pre-minced jars from the store are convenient, but they lack that sharp, aromatic punch. I usually go heavy on the garlic because my family loves it. If you’re cooking for garlic-sensitive folks, start with 3 cloves and work your way up.
1/4 cup soy sauce – This brings in the savory depth and a bit of saltiness that balances the honey. I use low-sodium soy sauce so I can control the salt level myself. For gluten-free folks, tamari or coconut aminos work great as substitutes. My sister-in-law uses coconut aminos and honestly, I can barely tell the difference.
2 tablespoons olive oil – This helps everything coat the chicken evenly and prevents sticking on the grill. You could use avocado oil or vegetable oil instead. I once ran out of olive oil and used melted butter, which actually added a nice richness.
2 tablespoons lemon juice – Freshly squeezed is better, but bottled works in a pinch. The acid helps tenderize the marinated chicken and adds brightness to cut through the sweetness. Lime juice works as a substitute if that’s what you have on hand.
1/2 teaspoon black pepper – Freshly ground tastes better, but pre-ground is fine. This adds a subtle heat that doesn’t overpower the other flavors.
1/2 teaspoon salt – Remember that soy sauce already brings saltiness, so don’t go overboard here. I sometimes skip the salt entirely if I’m using regular soy sauce instead of low-sodium.
For the skewers themselves, you’ll need 2 pounds of boneless chicken, cut into 1-inch chunks. That’s usually about 4-5 breasts or 6-7 thighs. I mentioned earlier that both cuts work, but here’s the thing – thighs forgive timing mistakes better. Breasts are great if you prefer leaner meat, but watch them carefully so they don’t dry out.
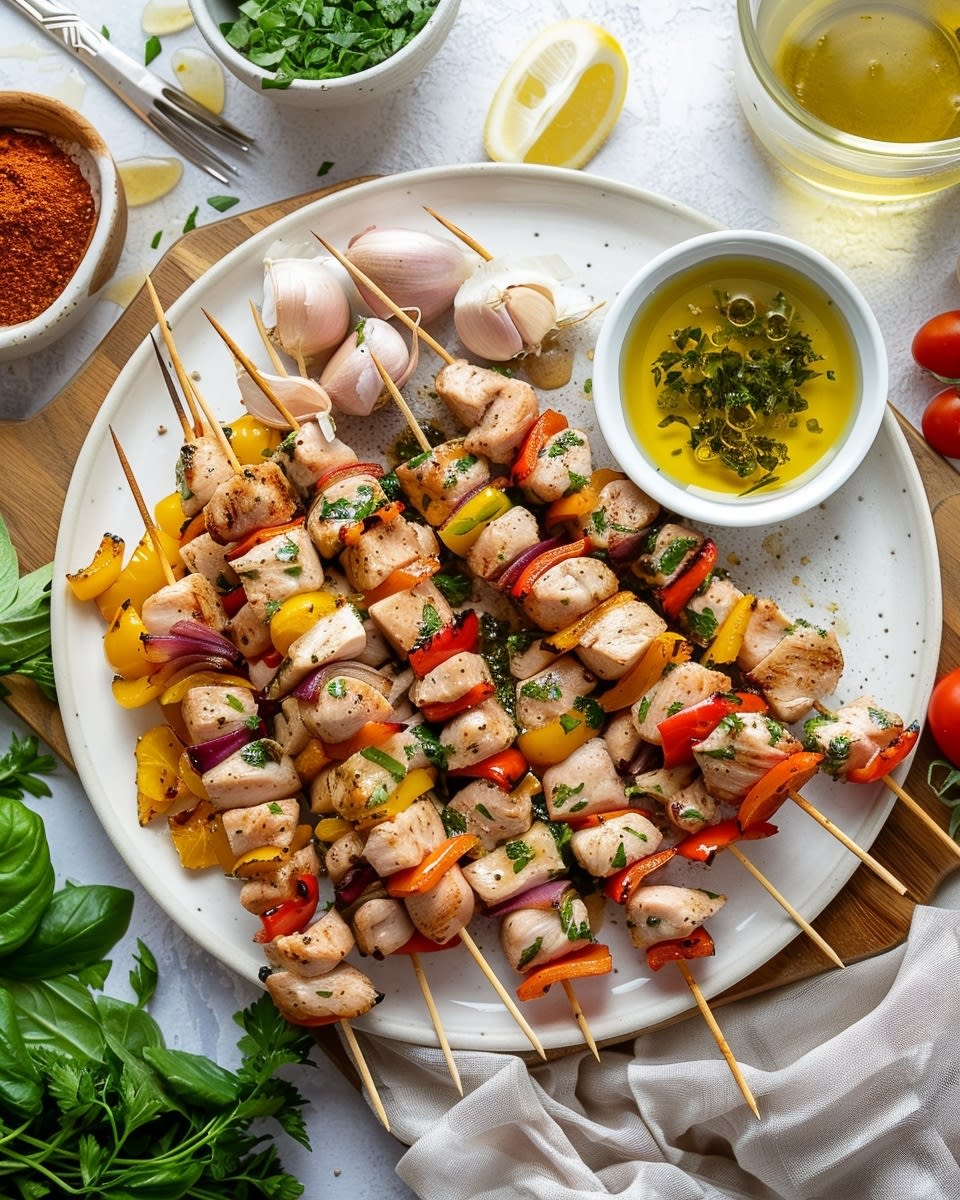
The vegetables are optional but highly recommended. I typically grab 2 bell peppers, 1 large red onion, and maybe a zucchini. Cut everything into similar-sized pieces so they cook evenly. My neighbor adds pineapple chunks, which honestly sounds weird but tastes incredible. The pineapple juice actually adds more of that sweet-savory thing going on.
You’ll also need wooden or metal skewers. Wooden ones need to soak in water for at least 30 minutes before grilling so they don’t catch fire. I learned that the hard way during my first attempt at making something similar to BBQ Honey Chicken Drumsticks on skewers. Metal skewers are reusable and don’t require soaking, but they get scorching hot on the grill, so be careful handling them.
Here’s something I wish someone had told me earlier – the quality of your honey glaze depends heavily on the honey itself. Darker honeys like buckwheat or wildflower create a more robust flavor. Lighter honeys like clover or acacia give you a milder sweetness. I keep both types in my pantry and choose based on who I’m cooking for.
The olive oil you use matters less than I thought it would. I’ve used fancy extra virgin stuff and cheap store brand, and both worked fine. Save your expensive olive oil for salads where you can actually taste the difference.
How to Prepare Your Grilled Honey Garlic Chicken Skewers
Preparation is where the magic happens, and honestly, it’s easier than assembling furniture from that Swedish store we all know.
Start by making your marinade. Grab a medium bowl and whisk together the honey, minced garlic cloves, soy sauce, olive oil, lemon juice, black pepper, and salt. Mix it until everything combines into a smooth sauce. It should smell amazing already. If it doesn’t, you probably forgot the garlic.
Cut your chicken into roughly equal chunks. I aim for about 1 to 1.5 inches. Too small and they dry out. Too big and the outside burns before the inside cooks through. This isn’t rocket science, but consistency helps everything cook at the same rate.
Toss the chicken pieces into a large zip-top bag or a bowl with a lid. Pour about three-quarters of your marinade over the chicken. Save that remaining quarter for basting later – trust me on this. Seal the bag and massage everything around so each piece gets coated. Stick it in the fridge.
Now comes the question everyone asks: how long to marinate chicken? The best way to marinate chicken for these skewers is anywhere from 30 minutes to 24 hours. I’ve done both extremes. Thirty minutes gives you good flavor. Four hours gives you great flavor. Overnight makes the chicken incredibly tender and deeply flavored. If you’re planning ahead, marinate it the night before. If you forgot about dinner until 6 PM, thirty minutes still works.
By the way, don’t marinate for more than 24 hours. The acid in the lemon juice starts breaking down the chicken texture too much, and you end up with mushy meat. I made that mistake once trying to meal prep for three days ahead.
While the chicken marinates, prep your vegetables. Cut your bell peppers and onions into similar-sized pieces as your chicken. If you’re using zucchini, cut it into thick rounds. Cherry tomatoes can go on whole. This is also when you’d want to soak your wooden skewers if you’re using them.
When you’re ready to cook, thread everything onto your skewers. I usually do chicken, pepper, onion, chicken, zucchini, chicken – you get the idea. Leave a tiny bit of space between pieces so heat can circulate. Don’t pack them too tightly or you’ll end up with steamed chicken instead of grilled. Also don’t leave too much space or everything slides around and falls off. There’s a sweet spot you’ll figure out after making these once or twice.
Here’s something that trips people up: how to prevent skewers from burning. If you’re using wooden skewers, that soaking step is crucial. But also, don’t let the exposed ends hang over direct flames. Position your skewers so the food covers most of the stick, or use aluminum foil to wrap any exposed ends. I’ve lost count of how many times I’ve had to explain why there’s charcoal dust on the chicken.
Now for the grill. The perfect grilling temperature for these skewers is medium-high, around 375-400°F. If your grill doesn’t have a thermometer, hold your hand about 6 inches above the grates. If you can keep it there for 3-4 seconds before it gets too hot, you’re in the right range.
Oil your grill grates before putting the skewers down. I use a paper towel dipped in oil, held with tongs. This prevents sticking better than any non-stick spray. It’s a trick I picked up from watching someone make Grilled Steak with Chimichurri Sauce at a cookout, and it works for everything.
Place your skewers on the grill. Don’t move them immediately. Let them sit for about 5-6 minutes to develop those gorgeous char marks. Then rotate them a quarter turn. After another 5-6 minutes, flip them completely. Brush on that reserved marinade during the last few minutes of cooking. The sugars in the honey will caramelize and create that glossy coating everyone loves.
Funny enough, the biggest mistake people make is constantly flipping and poking at the chicken. Leave it alone. Let it cook. Moving it constantly prevents proper browning and makes everything stick to the grates.
So how to check if chicken is cooked? The safest method is using an instant-read thermometer. Stick it into the thickest part of a chicken piece. You’re looking for 165°F. If you don’t have a thermometer, cut into the thickest piece. The juices should run clear, and the meat should be white throughout with no pink. The texture should be firm but not tough.
I’ve also learned that carryover cooking is real. The chicken keeps cooking for a minute or two after you take it off the grill. If you wait until it hits exactly 165°F on the grill, it might be a bit overdone by the time you eat it. I usually pull mine off at 160°F and let it rest.
Speaking of resting, let your skewers sit for about 3-5 minutes before serving. This lets the juices redistribute. It’s tempting to dive right in, especially when they smell that good, but that short wait makes them even juicier.
If you don’t have a grill, an oven broiler works surprisingly well. Set your oven rack about 6 inches from the heating element. Place the skewers on a foil-lined baking sheet. Broil for about 10-12 minutes, flipping once halfway through. Keep a close eye on them since broilers vary wildly in intensity. I’ve also made these in a grill pan when my outdoor grill was broken, and they turned out fantastic.
One more thing – if you’re making a ton of these for a party, you can partially cook them ahead of time. Grill them until they’re about 80% done, then finish them on the grill right before serving. This is similar to how restaurants handle volume. It’s also helpful if you’re juggling multiple dishes, like if you’re also making Crispy Onion Blossom Bites or something else that needs attention.
The whole cooking process from start to finish takes about 15-20 minutes once you’ve got your grill going. That’s faster than waiting for delivery and way more satisfying. Plus your whole backyard smells like a restaurant. My neighbors always seem to show up around dinner time when I’m making these. Coincidence? I think not.


Serving Suggestions and Side Dishes
Alright, so you’ve got these beautiful Grilled Honey Garlic Chicken Skewers fresh off the grill. Now what? The right side dishes can turn this from a good meal into something people remember weeks later.
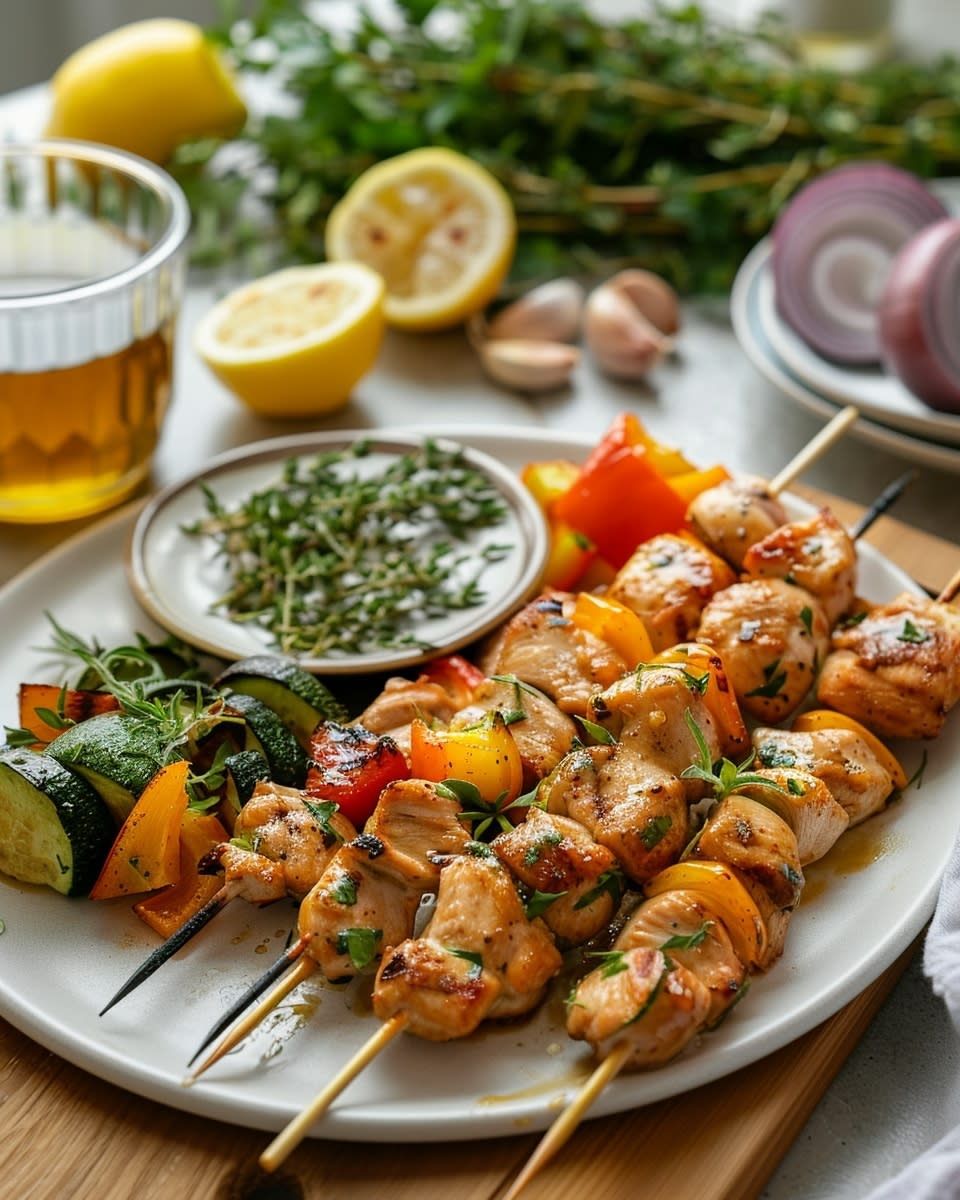
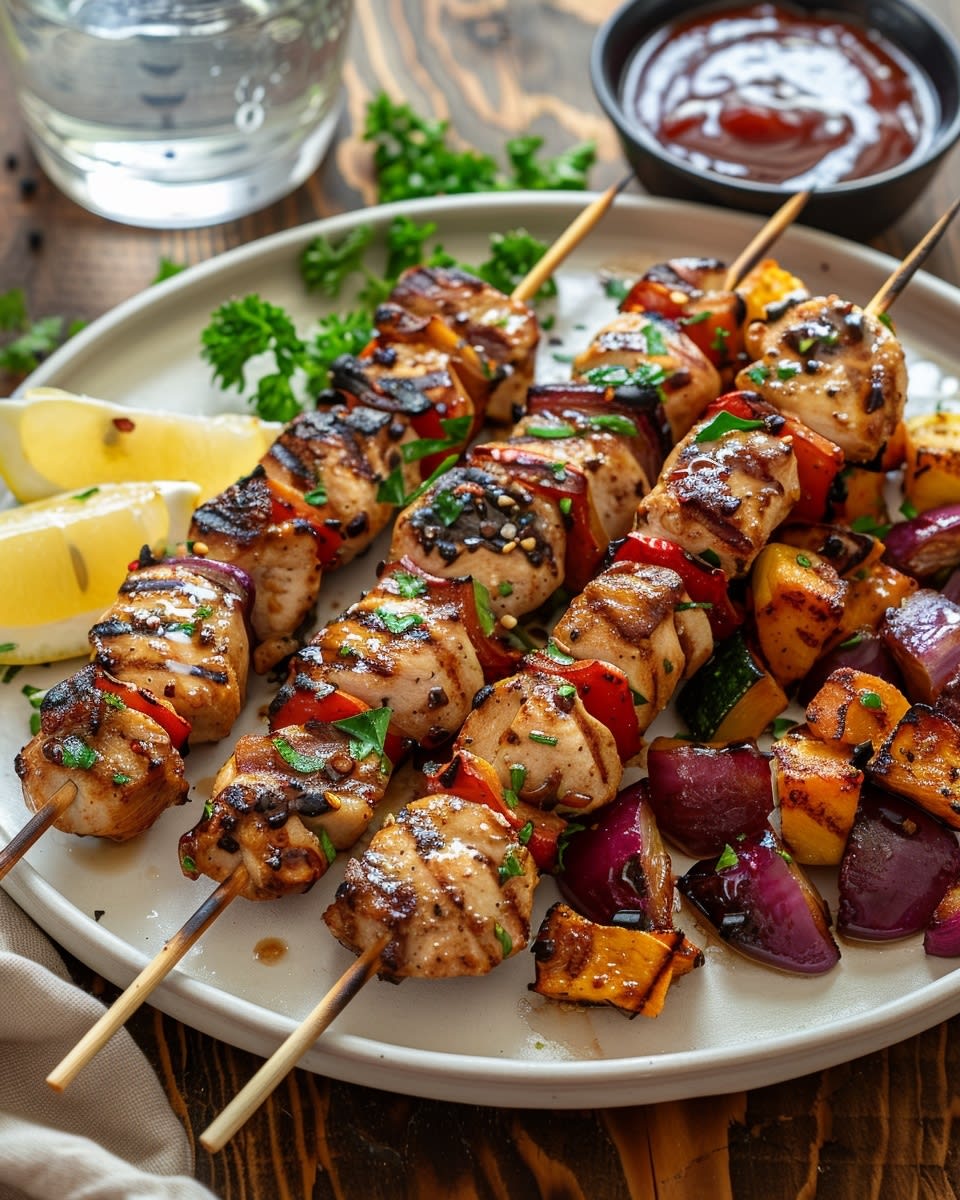
I always grab a serving platter that’s big enough to spread the skewers out without stacking them. Nobody wants their gorgeous char marks hidden. Arrange them in a single layer, maybe on a bed of fresh herbs like cilantro or parsley. It looks restaurant-quality with basically zero effort.
For side dishes, I’ve tried just about everything over the years. Rice works beautifully because it soaks up that honey garlic glaze that drips off the chicken. I usually make jasmine rice because it’s slightly fragrant and doesn’t compete with the main flavors. Brown rice gives you a nuttier taste and more fiber if that’s your thing. My mom always made coconut rice with these, which added this subtle sweetness that somehow made everything better.
Quinoa is another solid choice, especially if you’re feeding health-conscious guests. It brings protein to the table and has this interesting texture that contrasts nicely with the tender chicken. I cook mine in chicken broth instead of water for extra flavor. Sometimes I’ll toss in some diced cucumber and tomatoes after it cools down a bit, almost like a quinoa salad situation.
Here’s the thing about coleslaw – it’s basically the perfect partner for these skewers. The crispy, cool crunch cuts through the richness of the glaze. I make mine with a light vinegar-based dressing rather than heavy mayo. Shredded cabbage, carrots, maybe some thinly sliced red onion, and a simple dressing of rice vinegar, a touch of honey, and sesame oil. Takes five minutes to throw together. My brother-in-law brings store-bought coleslaw to our cookouts, and honestly, that works fine too when you’re short on time.
Grilled vegetables are an obvious pairing since you already have the grill going. I’ll throw on some corn on the cob, asparagus spears, or thick slices of eggplant. Brush them with olive oil, sprinkle some salt, and let them get those char marks alongside your skewers. Everything finishes around the same time, which makes timing super easy.
I’ve noticed that starchy sides really complement the sweet and savory profile. Roasted potatoes seasoned with garlic and herbs work great. So do sweet potato wedges if you want to double down on that sweetness factor. One time I served these skewers with garlic bread, and people acted like I’d discovered something revolutionary. Sometimes the simplest pairings are the best.
Fresh vegetables as a side salad bring balance to the meal. A simple garden salad with mixed greens, cherry tomatoes, cucumber, and a light vinaigrette keeps things fresh. I’m not fancy about it – bagged salad greens are fine. What matters is having something cool and crisp to offset the warm, sticky chicken. If you want to align with healthy eating guidelines, loading up your plate with colorful vegetables alongside the protein makes nutritional sense.
For garnishes, I keep it simple but intentional. Sesame seeds sprinkled on top add a nice visual element and a subtle nutty flavor. Chopped green onions or scallions bring freshness and a mild onion flavor that doesn’t overpower. Fresh cilantro works if your crowd isn’t part of the “cilantro tastes like soap” group. A few lime wedges on the side let people add extra brightness if they want it.
Here’s something I started doing that gets compliments every time: I reserve some of the marinade before it touches raw chicken, simmer it on the stove until it thickens slightly, and serve it as an extra dipping sauce. Use a clean basting brush to apply it after the chicken is cooked if you want that extra glossy finish. Never use the same brush or sauce that touched raw chicken without cooking it first – that’s just basic food safety.
Speaking of sauces, these skewers are delicious on their own, but having options never hurts. A spicy mayo made with sriracha mixed into regular mayo gives heat-lovers something to get excited about. Peanut sauce brings a Thai-inspired twist that surprisingly works with the honey garlic flavors. I’ve even seen people serve these with tzatziki, which sounds weird but the cool cucumber yogurt sauce actually pairs nicely.
If you’re going for a full barbecue spread, these skewers fit right in with other grilled favorites. I’ve served them alongside burgers, hot dogs, and ribs at summer parties. They’re a lighter option that balances out heavier items. People appreciate having choices that don’t sit like rocks in their stomachs.
Now let’s talk about leftovers, because these actually reheat better than most chicken dishes. Store them in an airtight container in the fridge for up to four days. I usually slide the chicken and vegetables off the skewers before storing because it saves space and makes reheating easier.
To reheat, the microwave works but isn’t ideal. If you go that route, cover the chicken with a damp paper towel to keep moisture in. Heat in 30-second intervals, checking after each one. Usually takes about a minute and a half total. The chicken won’t have that crispy exterior anymore, but it’ll still taste good.
The oven method is better if you have time. Preheat to 350°F, spread the chicken on a baking sheet, and warm for about 10 minutes. This keeps the texture closer to the original. You can even stick it under the broiler for the last minute to crisp up the edges again.
My favorite way to use leftovers is chopping them up for other dishes. Toss them into a salad for protein. Make a wrap with some lettuce, tomatoes, and maybe that spicy mayo I mentioned. Stir them into fried rice. Mix them with pasta and vegetables for a quick dinner remix. The flavors work in so many contexts that leftovers never feel boring.
You can also freeze these skewers, though I’ll be honest – I rarely have leftovers lasting long enough to freeze. But if you’re meal prepping or made way too much, they’ll keep in the freezer for up to three months. Let them cool completely, wrap individually in plastic wrap, then store in a freezer bag. Thaw in the fridge overnight before reheating.
One thing I learned from making these so often is that presentation really does matter, even for weeknight dinners. Taking an extra 30 seconds to arrange things nicely on a serving platter, add some garnishes, and put the sides in actual bowls instead of just their cooking pots makes the meal feel more special. My kids eat better when food looks appealing. Heck, I eat better when it looks appealing.
For parties, I set up a little skewer station with different dipping sauces in small bowls, lime wedges, and extra garnishes. People can customize their experience. It also takes pressure off me as the host because everyone just serves themselves. Win-win situation.
By the way, if you’re really getting into grilling and want to expand your repertoire beyond these skewers, there’s a whole world of possibilities. You can find tons of inspiration and recipes in the BBQ and grilling category that’ll keep your grill busy all summer long. I’ve probably tried half the recipes there, and they’ve all become regular rotation meals at my house.
The beauty of these skewers is their flexibility. Serve them with fancy sides for company or just some rice and bagged salad for Tuesday dinner. Either way, people are happy. That’s really all that matters when you’re feeding folks you care about.
Frequently Asked Questions
How do I know when the chicken is fully cooked?
The most reliable method is using an instant-read thermometer inserted into the thickest part of the chicken, which should read 165°F. Without a thermometer, cut into the thickest piece to check that the meat is white throughout with no pink, and the juices run clear. The texture should feel firm but still tender, not rubbery or tough. Remember that chicken continues cooking for a minute or two after removing it from heat. I usually pull mine at 160°F and let carryover cooking finish the job.
Can I use a different type of meat for this recipe?
Absolutely! This honey garlic marinade works wonderfully with pork, shrimp, or even firm fish like salmon. Pork tenderloin cut into chunks cooks similarly to chicken and stays really juicy. Shrimp only needs about 2-3 minutes per side since it cooks so quickly. I’ve also used this marinade on lamb chunks, which gave it this interesting sweet-savory Mediterranean vibe. Beef works too, though the sweetness might be a bit much for some people. Just adjust cooking times based on whatever protein you choose.
What can I substitute for honey in the marinade?
Maple syrup is probably the closest substitute and creates a similar glaze with slightly different flavor notes. Agave nectar works well and is actually a bit sweeter, so you might want to use slightly less. Brown sugar mixed with a little water creates that sticky coating too. For sugar-free versions, try monk fruit sweetener or sugar-free pancake syrup, though the caramelization won’t be quite as nice. I’ve even used apple juice concentrate in a pinch, which gave it this interesting fruity sweetness that wasn’t bad at all.
Is there a way to make this recipe without a grill?
Yes, definitely! Your oven broiler works great – just place skewers on a foil-lined baking sheet about 6 inches from the heating element and broil for 10-12 minutes, flipping halfway through. A grill pan on your stovetop gives you those nice char marks and takes about the same time as outdoor grilling. You can even bake them in a regular oven at 425°F for about 20-25 minutes, though you won’t get the same charred exterior. I’ve made these all three ways depending on weather and how lazy I’m feeling, and they always turn out tasty.
How long should I marinate the chicken for the best flavor?
The sweet spot is between 2-8 hours for maximum flavor without compromising texture. Minimum effective time is 30 minutes if you’re in a rush, which still gives decent flavor penetration. Overnight marination (up to 24 hours) creates the most flavorful and tender chicken. Don’t go beyond 24 hours though, because the acid starts breaking down the meat texture too much and you end up with mushy chicken. I usually start marinating in the morning if I’m cooking that evening, which gives about 8 hours and consistently great results.
Can I prepare the skewers ahead of time?
You can definitely thread the marinated chicken and vegetables onto skewers several hours ahead and keep them covered in the fridge until grilling time. I’ve done this the morning of a party and just pulled them out when guests arrived. You can even partially cook them ahead – grill until about 80% done, then finish them on the grill right before serving. The marinade can be made up to 3 days in advance and stored in the fridge. Just don’t put raw chicken in marinade more than 24 hours ahead for both texture and food safety reasons.
What are some good sides to serve with these skewers?
Light, refreshing sides work best to balance the sweet and sticky glaze. Jasmine or coconut rice, quinoa salad, coleslaw with vinegar dressing, and grilled vegetables are all winners. A simple green salad with citrus vinaigrette adds brightness and crunch. Roasted potatoes or sweet potato wedges give you that satisfying starchy component. Corn on the cob, cucumber salad, or even just some warm pita bread with hummus round out the meal nicely. The key is having something that provides textural contrast to the tender, glazed chicken.
How do I keep the skewers from sticking to the grill?
Clean, well-oiled grill grates are essential. I use tongs to rub a paper towel dipped in vegetable oil across the grates right before adding the skewers. Make sure your grill is properly preheated to medium-high heat before putting anything on it. Don’t move the skewers too soon – let them cook undisturbed for 5-6 minutes so a crust forms, which naturally releases from the grates. If you’re constantly flipping and moving them, they’ll stick more. Using a basting brush to apply a thin layer of oil to the chicken before grilling helps too.
Can these skewers be made spicy?
Definitely! Add red pepper flakes, sriracha, or your favorite hot sauce directly to the marinade. Gochujang (Korean chili paste) gives it a nice kick with umami depth. Fresh jalapeños or Thai chilies minced into the marinade work great for people who like real heat. I sometimes brush on a spicy glaze during the last few minutes of cooking using honey mixed with chili garlic sauce. Start conservative with heat additions and taste the marinade before adding chicken – you can always add more spice but can’t take it away once it’s in there.
How many skewers does this recipe make?
With 2 pounds of chicken, you’ll typically get 8-10 skewers depending on how generously you load them and whether you’re adding vegetables between the chicken pieces. I usually get about 6-7 pieces of chicken per skewer plus vegetables. That feeds about 4-6 people as a main dish, or 8-10 people as part of a larger spread. If you’re feeding teenage boys or really hungry adults, assume 2-3 skewers per person. For parties, I double or triple the recipe because these disappear fast and people always want seconds.
These Grilled Honey Garlic Chicken Skewers have become one of those recipes I don’t even think about anymore – my hands just know what to do. Give them a shot this week, play around with the sides and garnishes until you find your favorite combination, and I promise they’ll end up in your regular rotation too.
Ingredients
Equipment
Method
- Dans un bol moyen, fouettez ensemble le miel, l'ail haché, la sauce soja, l'huile d'olive, le jus de citron, le poivre noir et le sel pour créer la marinade.
- Coupez le poulet en morceaux de taille égale d'environ 1 pouce.
- Placez le poulet dans un grand sac zip ou un bol et versez environ trois-quarts de la marinade dessus. Gardez la marinade restante pour la glaçure plus tard.
- Fermez le sac ou couvrez le bol et réfrigérez pendant au moins 30 minutes ou jusqu'à 24 heures pour mariner.
- Préparez les légumes en les coupant en morceaux de taille similaire à celle du poulet.
- Enfilez le poulet mariné et les légumes sur des brochettes en bois ou en métal.
- Préchauffez le gril à feu moyen-vif (375-400°F) et huilez les grilles.
- Placez les brochettes sur le gril et faites cuire pendant 5-6 minutes de chaque côté jusqu'à ce qu'elles soient dorées et cuites (température interne de 165°F).
- Badigeonnez les brochettes avec la marinade réservée durant les dernières minutes de cuisson.
- Laissez reposer les brochettes pendant 3-5 minutes avant de servir.
Nutrition
Notes
Pour plus de saveur, vous pouvez faire mijoter la marinade réservée jusqu'à ce qu'elle épaississe pour l'utiliser comme sauce d'accompagnement. Assurez-vous toujours qu'elle est bien cuite avant de servir pour éviter toute contamination croisée.