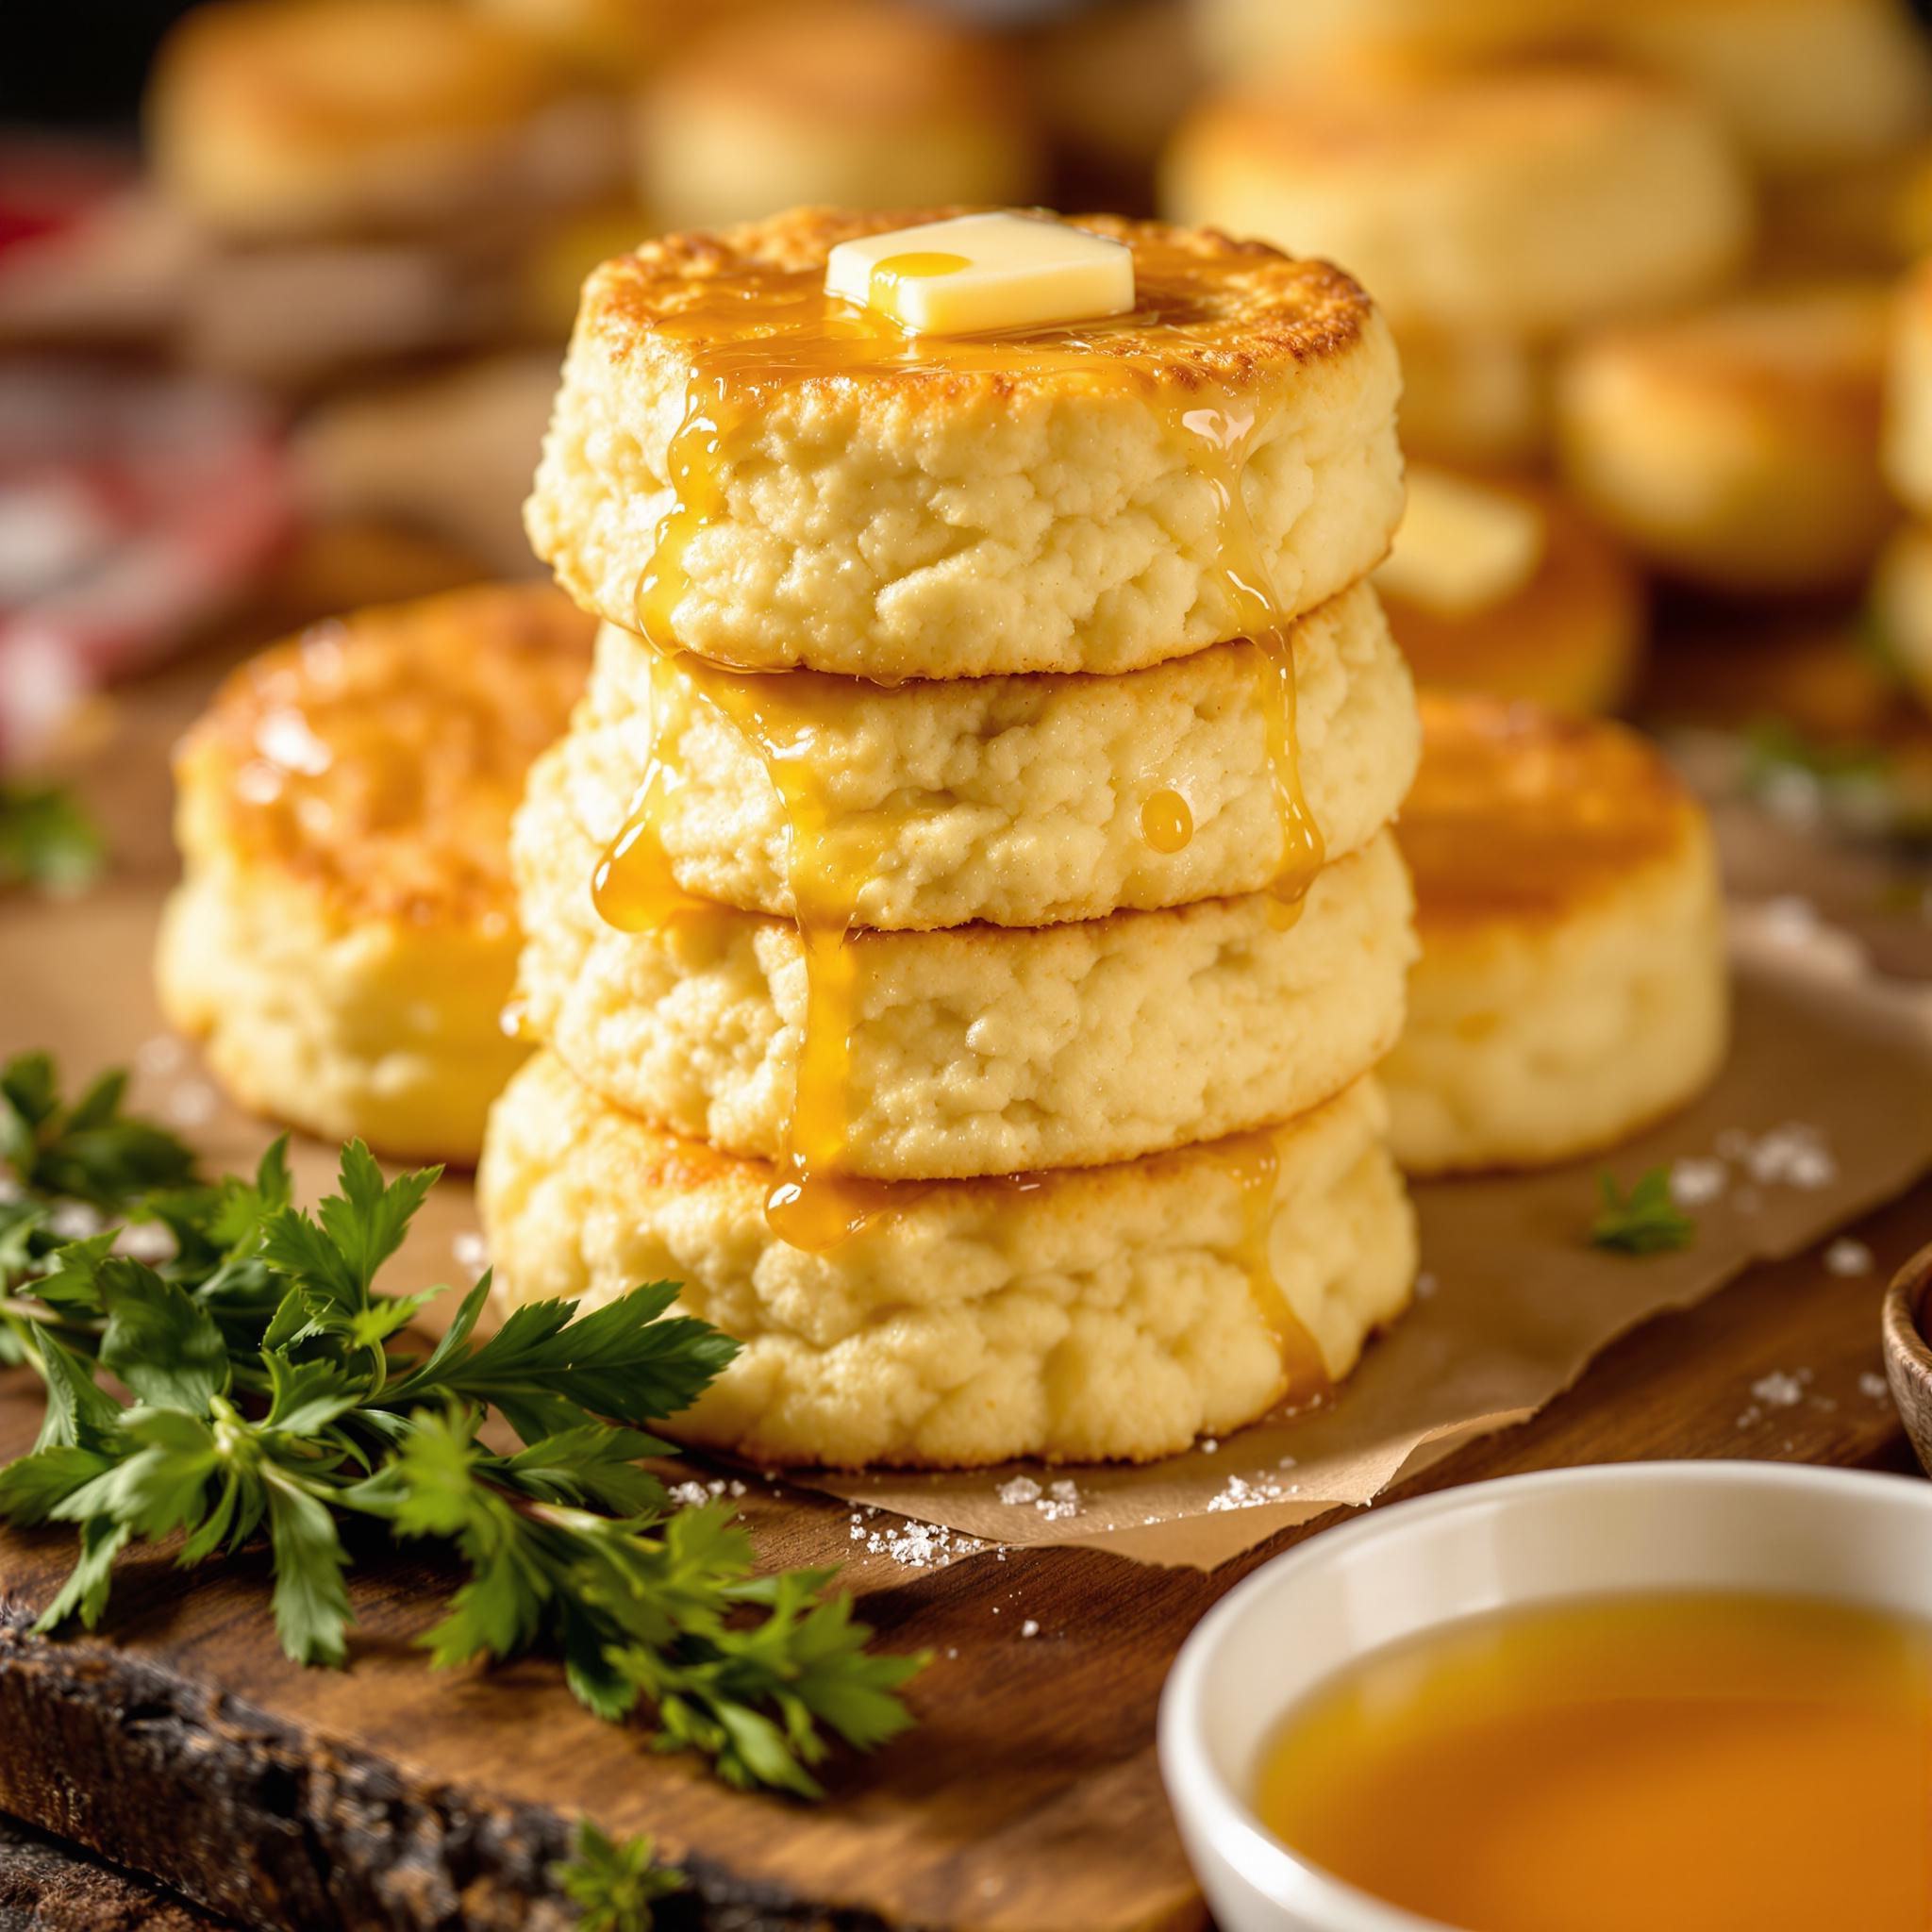
Introduction to J.P.’s Big Daddy Biscuits
There’s something magical about the aroma of freshly baked biscuits wafting through the kitchen, and J.P.’s Big Daddy Biscuits are no exception. These buttery, flaky delights have a way of bringing people together—whether it’s for a cozy breakfast or a comforting snack. I first stumbled upon this recipe during a family reunion, where my uncle proudly served these biscuits as the star of the brunch spread. They were so irresistible that I had to recreate them at home. Now, they’ve become a staple in my household, and I can’t wait to share the joy with you!
The Story Behind J.P.’s Big Daddy Biscuits
This recipe has roots in Southern baking traditions, where biscuits are more than just food—they’re a symbol of warmth and hospitality. The original version was passed down through generations in my uncle’s family, but over time, he added his own twist by incorporating a secret ingredient: a touch of honey for subtle sweetness. When I tried making them myself, I realized how versatile they could be. Whether you serve them plain, slathered with butter, or topped with jam, these biscuits are guaranteed to impress.
Why You’ll Love This Recipe
J.P.’s Big Daddy Biscuits are not only delicious but also surprisingly easy to make. With simple ingredients and straightforward steps, even beginner bakers can achieve bakery-worthy results. The combination of crisp edges and soft, fluffy interiors makes every bite utterly satisfying. Plus, there’s nothing quite like the pride of pulling a golden tray of homemade biscuits out of the oven!
Perfect Occasions to Prepare Them
These biscuits shine on lazy weekend mornings when you want to treat your loved ones to something special. They’re equally perfect for holiday gatherings, potlucks, or even as a quick side dish for dinner. Imagine serving warm biscuits alongside a steaming bowl of soup or chili—it’s comfort food at its finest!
Ingredients for J.P.’s Big Daddy Biscuits
- 2 cups all-purpose flour
- 1 tablespoon baking powder
- 1 teaspoon salt
- 6 tablespoons cold unsalted butter, cubed
- 3/4 cup whole milk
- 1 tablespoon honey (optional)
Substitution Options
If you’re looking to customize this recipe, here are some swaps you can try:
- Use buttermilk instead of whole milk for tangier biscuits.
- Swap honey for maple syrup if you prefer a different kind of sweetness.
- For a dairy-free option, substitute almond milk and coconut oil for the milk and butter.
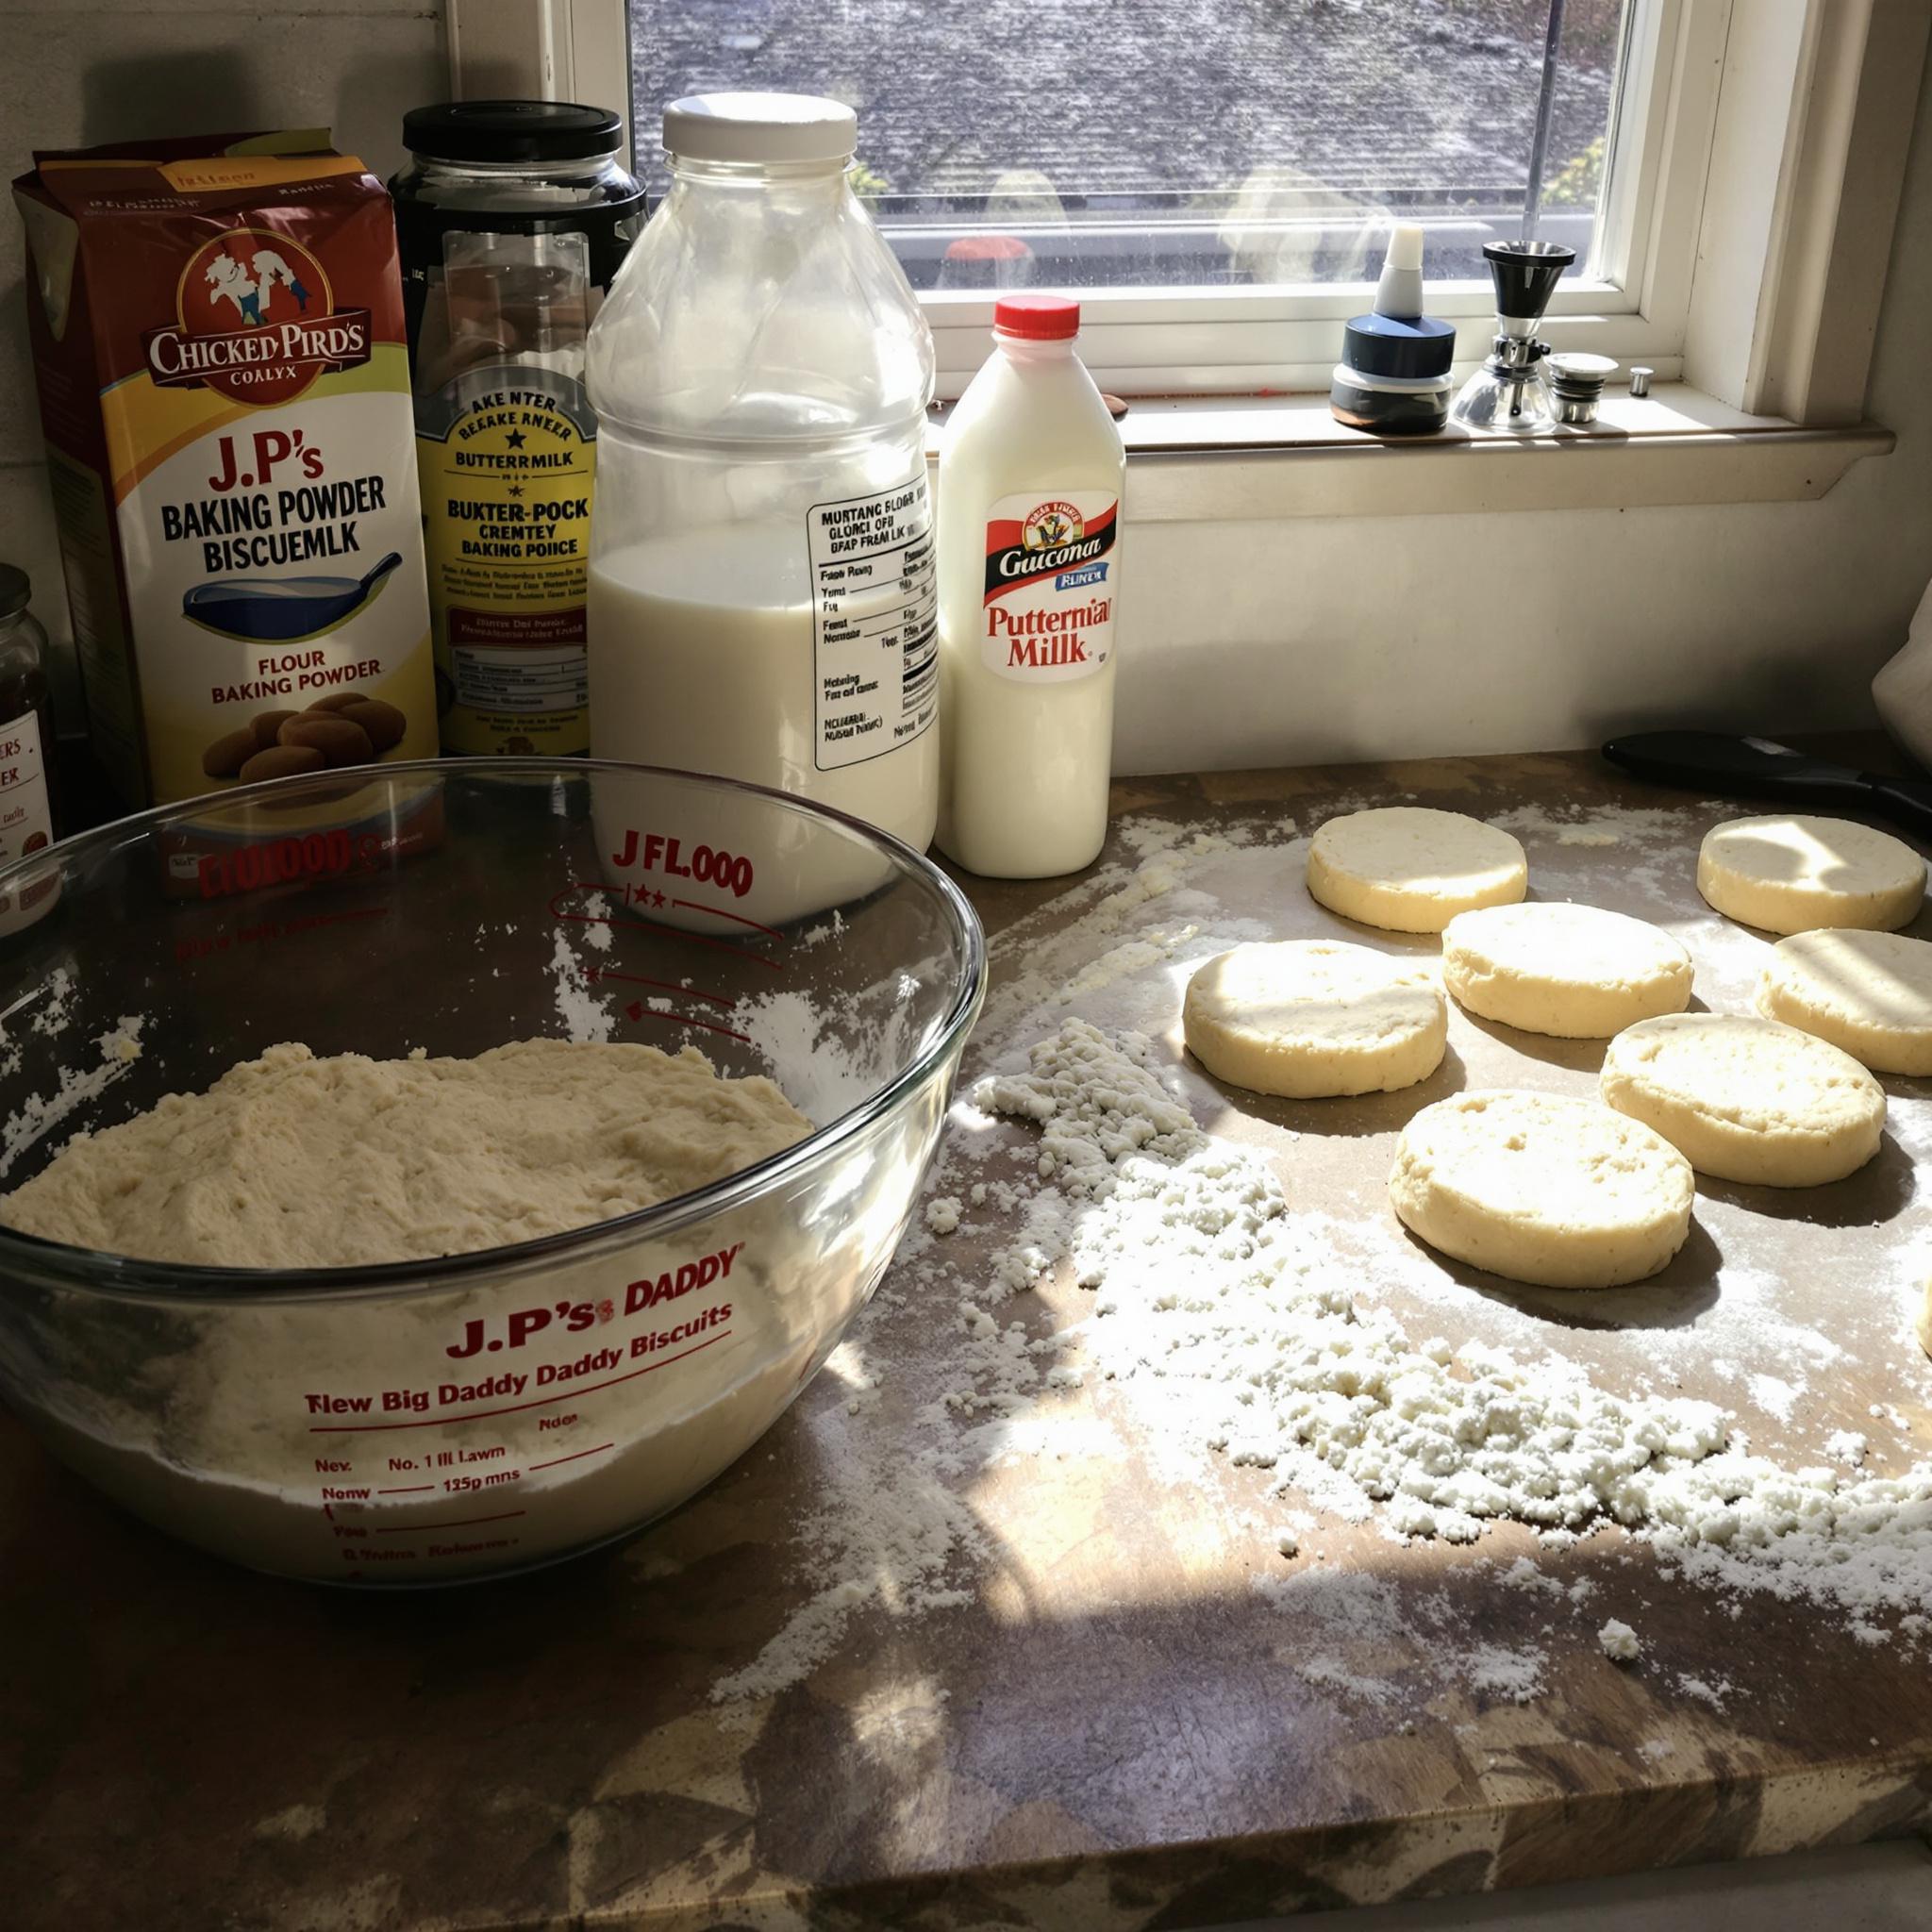
Preparation Steps
Step 1: Mixing the Dry Ingredients
Begin by whisking together the flour, baking powder, and salt in a large mixing bowl. This step ensures that the leavening agent is evenly distributed throughout the dough, which is key to achieving those light, airy layers. As you mix, notice how the powdery texture feels between your fingers—it’s the foundation of your biscuits! Pro tip: Sift the dry ingredients for an extra-smooth consistency.
Step 2: Cutting in the Butter
Next, add the cold, cubed butter to the dry mixture. Using a pastry cutter or your fingertips, work the butter into the flour until the mixture resembles coarse crumbs. It’s crucial to keep the butter cold; this helps create those coveted flaky layers once the biscuits bake. Picture tiny pockets of butter melting in the oven, creating steam that lifts the dough beautifully.
Step 3: Adding the Liquid
Pour in the milk (and honey, if using) and gently stir until the dough comes together. Be careful not to overmix—this is one of the secrets to tender biscuits. The dough should be slightly sticky but manageable. If needed, sprinkle in a bit more flour to prevent sticking. At this stage, the dough will look rustic and imperfect, but trust me, it’s exactly what you want!
Step 4: Shaping and Baking
Turn the dough onto a lightly floured surface and pat it into a rectangle about 1-inch thick. Use a round biscuit cutter to shape the dough, pressing straight down without twisting to ensure even rising. Place the biscuits close together on a baking sheet for soft sides or spaced apart for crispier edges. Bake in a preheated oven at 425°F for 12-15 minutes, or until golden brown. As they bake, your kitchen will fill with the irresistible scent of butter and honey—a true reward for your efforts!
Chef’s Tip
To take these biscuits to the next level, brush the tops with melted butter immediately after removing them from the oven. This adds a glossy finish and locks in moisture, ensuring each bite is rich and flavorful.
Time Required
- Prep Time: 15 minutes
- Cooking Time: 15 minutes
- Total Time: 30 minutes
Nutritional Information
Per serving (1 biscuit): Calories: 180 | Protein: 3g | Fat: 9g | Carbohydrates: 22g
Extra Information
Did you know that biscuits were originally considered a quick bread? Unlike yeast-based breads, which require hours of rising, biscuits rely on baking powder for their rise, making them a speedy yet satisfying option.
Necessary Tools
- Mixing bowls
- Pastry cutter or fork
- Baking sheet
- Round biscuit cutter
Storage Instructions
To store leftover biscuits, allow them to cool completely before transferring them to an airtight container. Keep them at room temperature for up to two days. For longer storage, freeze the biscuits in a single layer on a baking sheet before transferring them to a freezer-safe bag. To reheat, simply pop them in the oven at 350°F for 5-10 minutes. Frozen biscuits can last up to three months, though I doubt they’ll stick around that long!
When reheating, avoid microwaving, as this can make the biscuits soggy. Instead, opt for the oven method mentioned above to restore their original flakiness. And remember, while leftovers are great, these biscuits truly shine when enjoyed fresh out of the oven.
Tips and Tricks
Here are a few tricks to elevate your biscuit game:
- Chill the dough for 15 minutes before baking to enhance flakiness.
- Use a sharp knife to cut the dough if you don’t have a biscuit cutter.
- Experiment with adding herbs or cheese to the dough for savory variations.

Serving Suggestions
Pair these biscuits with scrambled eggs and bacon for a hearty breakfast, or serve them alongside a creamy chicken pot pie for dinner. For dessert, split them open and fill them with fresh berries and whipped cream—a delightful twist!
Healthier Alternatives
If you’re looking to lighten up this recipe, here are six variations to consider:
- Whole Wheat Flour: Replace half the all-purpose flour with whole wheat flour for added fiber.
- Reduced Sugar: Omit the honey entirely for a less sweet version.
- Low-Fat Milk: Use skim or low-fat milk instead of whole milk.
- Vegan Option: Substitute plant-based butter and almond milk for a vegan-friendly twist.
- Gluten-Free: Use a gluten-free flour blend designed for baking.
- Herb-Infused: Add chopped rosemary or thyme for a savory, lower-calorie option.
Common Mistakes to Avoid
Mistake 1: Overworking the Dough
One of the most common mistakes is overmixing the dough, which leads to tough biscuits. Remember, the goal is to handle the dough as little as possible to maintain its tenderness. Pro tip: Stop mixing as soon as the ingredients come together, even if the dough looks a bit shaggy.
Mistake 2: Skipping the Cold Butter
Using warm butter instead of cold butter can ruin the texture of your biscuits. Warm butter blends too easily into the flour, preventing those essential flaky layers. Always chill your butter beforehand and work quickly to keep it cold.
Mistake 3: Twisting the Cutter
Twisting the biscuit cutter while cutting the dough can seal the edges, hindering proper rising. Press straight down for clean cuts that allow the biscuits to expand beautifully in the oven.
Frequently Asked Questions
Can I make these biscuits ahead of time?
Absolutely! You can prepare the dough, shape the biscuits, and refrigerate them overnight. Just bake them fresh in the morning for warm, gooey goodness.
What’s the best way to reheat biscuits?
Reheat biscuits in the oven at 350°F for 5-10 minutes to retain their flakiness. Avoid microwaving, as it can make them soggy.
Can I freeze unbaked biscuits?
Yes! Freeze shaped biscuits on a baking sheet, then transfer them to a freezer bag. Bake directly from frozen, adding a few extra minutes to the cooking time.
Do I need a biscuit cutter?
Nope! A glass or sharp knife works just fine. Just aim for uniform shapes to ensure even baking.
How do I know when the biscuits are done?
Look for golden-brown tops and a hollow sound when tapped. Underbaked biscuits will feel doughy in the center.
Can I add mix-ins like cheese or herbs?
Definitely! Fold in shredded cheddar or chopped herbs before shaping for a flavorful twist.
Why didn’t my biscuits rise?
This could be due to expired baking powder or overmixing the dough. Double-check your ingredients and handle the dough gently.
Are these biscuits kid-friendly?
They sure are! Kids love helping shape the dough and enjoy the buttery flavor. Serve them with jam or honey for a fun treat.
Can I use self-rising flour?
Yes, but omit the baking powder and salt since self-rising flour already contains these ingredients.
What’s the ideal thickness for rolling out the dough?
Aim for about 1 inch thick. Thicker biscuits may not cook evenly, while thinner ones won’t rise properly.
Conclusion
J.P.’s Big Daddy Biscuits are a testament to the power of simple ingredients coming together to create something extraordinary. Whether you’re a seasoned baker or a newbie in the kitchen, this recipe promises delicious results every time. So grab your apron, gather your loved ones, and let the aroma of freshly baked biscuits fill your home with warmth and joy. Happy baking!