I’ll never forget the first time I made loaded nachos with ground beef for my friends on game night. The moment I pulled that bubbling tray from the oven, every conversation stopped. Everyone gathered around the kitchen counter like moths to a flame. We devoured the entire batch in minutes, and I knew I had discovered something special.
There’s something magical about a plate of loaded nachos with ground beef. The crunch of the chips. The gooey melted cheese. The savory, seasoned beef. All those colorful toppings creating layers of flavor in every bite. It’s comfort food that brings people together, whether you’re watching sports, hosting a party, or just craving something delicious on a Tuesday night.
I’ve spent years perfecting my nacho recipe, testing different ingredient combinations and cooking methods. I’ve made plenty of mistakes along the way (like the time I used soggy chips and ended up with a mushy mess). But those failures taught me what works and what doesn’t. Today, I’m excited to share everything I’ve learned with you.
This guide will walk you through making the best loaded nachos with ground beef right in your own kitchen. I’ll show you exactly which ingredients to buy, how to layer them properly, and the secrets to getting that perfect cheese melt. By the end, you’ll know how to create restaurant-quality nachos that will have everyone asking for seconds.
Ingredients You’ll Need for Loaded Nachos with Ground Beef
The difference between mediocre nachos and amazing ones comes down to your ingredients. I learned this the hard way after serving bland nachos to my family one night. My sister took one bite and asked if I forgot to add seasoning. That was my wake-up call to pay attention to quality.
Let me break down exactly what you need to make loaded nachos with ground beef that people will remember. I’ve organized these by category to make shopping easier.
The Foundation
- Tortilla chips – 12 to 16 ounces of thick, sturdy chips (restaurant-style works best)
- Ground beef – 1 pound of 80/20 ground beef (the fat content matters for flavor)
- Taco seasoning – 2 tablespoons (homemade or store-bought)
- Water – 1/4 cup for cooking the beef
Your chips are the base of everything, so don’t cheap out here. I always choose thick, restaurant-style tortilla chips because thin ones turn soggy fast. Trust me on this. I’ve ruined entire batches by using flimsy chips that couldn’t handle the toppings.
For the ground beef, I recommend 80/20 for the perfect balance of flavor and texture. Leaner beef dries out too much. Fattier beef makes your nachos greasy. The 80/20 ratio hits the sweet spot every time.
The Cheese (Most Important Part)
- Shredded cheddar cheese – 2 cups (sharp or medium, your choice)
- Shredded Monterey Jack cheese – 1 cup (adds creaminess)
Here’s my biggest tip about cheese: shred it yourself from a block. Pre-shredded cheese has anti-caking agents that prevent smooth melting. When I switched to shredding my own, the difference was night and day. The cheese melted into this gorgeous, gooey blanket instead of staying separated and grainy.
I use a mix of cheddar and Monterey Jack. The cheddar brings bold flavor while the Monterey Jack melts beautifully. Some people add pepper jack for heat, which I love when I want extra spice.
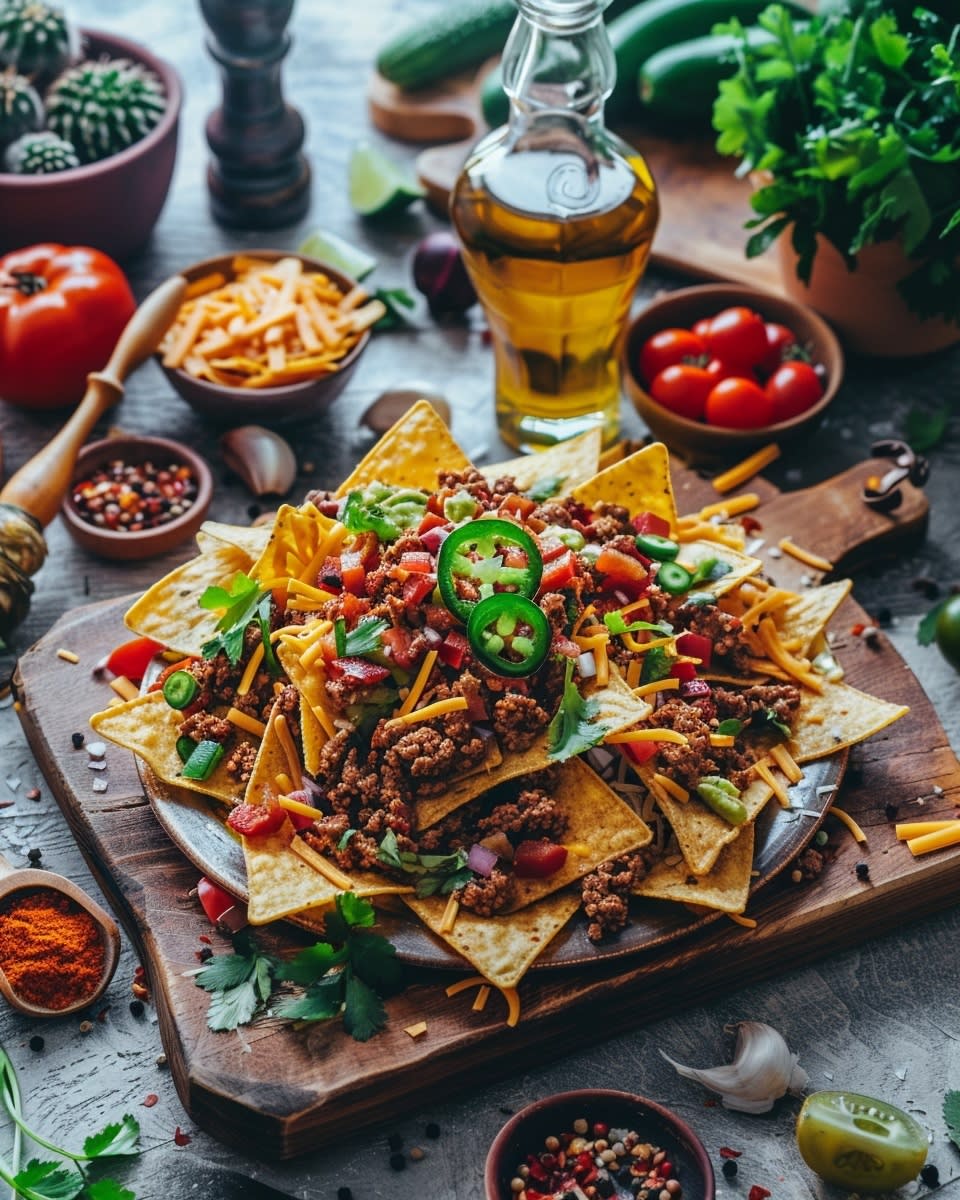
The Fresh Toppings
- Black beans – 1 can (15 ounces), drained and rinsed
- Roma tomatoes – 2 large, diced
- Red onion – 1/2 medium, finely diced
- Jalapeños – 2 to 3, sliced (fresh or pickled)
- Black olives – 1/2 cup, sliced (optional)
- Green onions – 3 to 4, sliced
- Fresh cilantro – 1/4 cup, chopped
These fresh ingredients add color, texture, and brightness to balance the rich beef and cheese. I prep all my vegetables before I start cooking. Having everything ready to go makes assembly so much easier.
The tomatoes should be diced small so they distribute evenly. I remove the seeds and pulp to avoid adding extra moisture. Watery tomatoes are one of the main culprits behind soggy nachos.
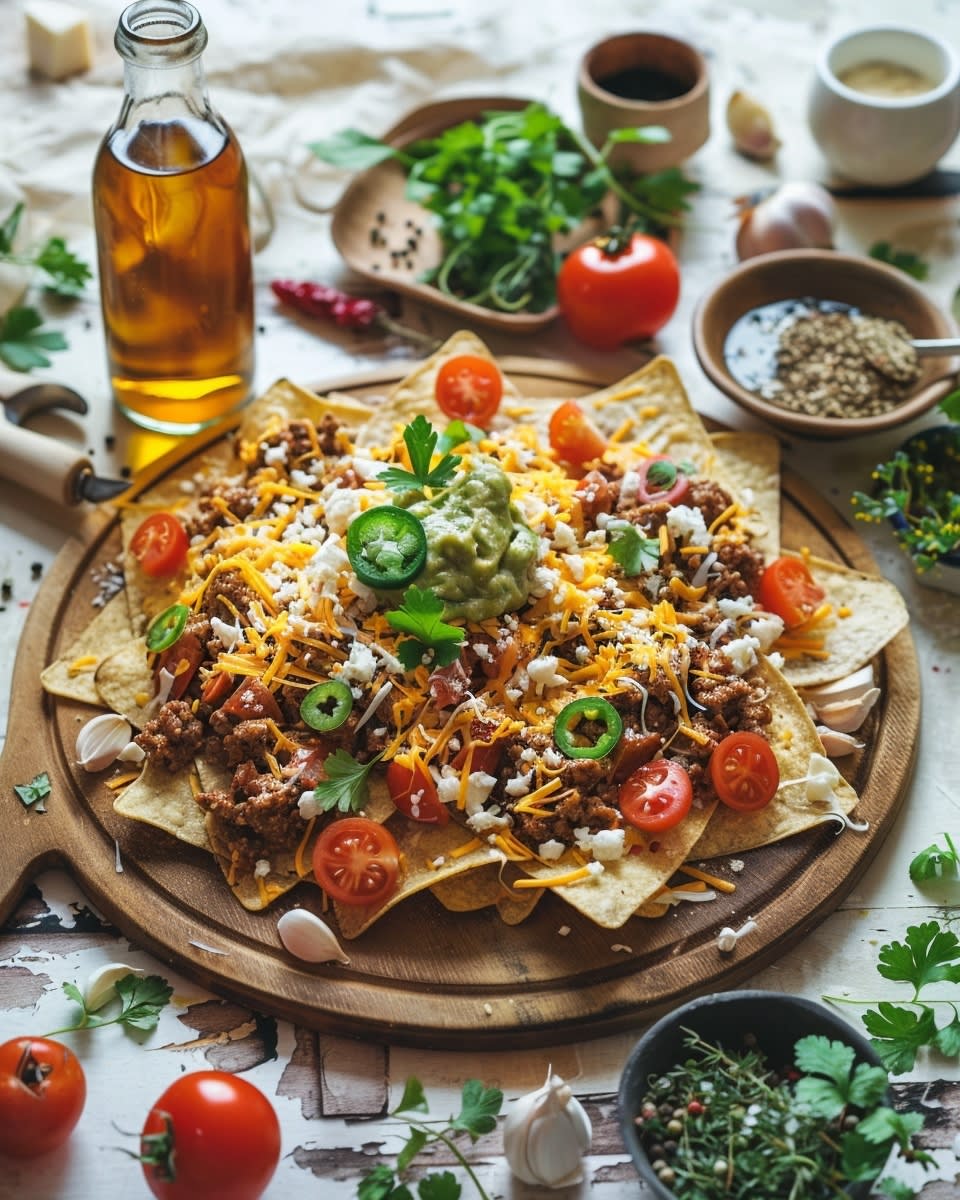
The Finishing Touches
- Sour cream – 1 cup
- Guacamole – 1 cup (homemade or store-bought)
- Salsa – 1 cup (your favorite variety)
- Lime – 1, cut into wedges
- Hot sauce – optional, for serving
These condiments go on after baking. They add cooling creaminess and tangy brightness that cut through the richness. My personal favorite is a dollop of cold sour cream on a hot, cheesy nacho. The temperature contrast is perfect.
Why Quality Matters
I used to think all ingredients were basically the same. Then I made two batches of nachos side by side. One had cheap processed cheese and basic chips. The other had quality cheese and thick tortilla chips. The difference shocked me.
The high-quality loaded nachos with ground beef had better texture, richer flavor, and stayed crispy longer. Everyone at the party gravitated toward that plate. The cheaper version sat half-eaten.
You don’t need to buy the most expensive options. But choosing fresh vegetables, real cheese, and sturdy chips makes a huge difference. These small upgrades turn good nachos into great ones.
Fresh ground beef also matters more than you’d think. I buy mine from the butcher counter instead of pre-packaged tubes. The texture is better and it browns more evenly. If you can only upgrade one ingredient, make it the beef. It’s the star of the show.
The beauty of loaded nachos with ground beef is their flexibility. You can adjust these ingredients based on what you have or what your crowd likes. Not a fan of black olives? Leave them off. Want extra cheese? Add another cup. This recipe works as a guideline, not a strict rulebook.
I keep most of these ingredients stocked in my kitchen because nacho cravings strike without warning. Having everything ready means I can throw together a batch in under 30 minutes. It’s become my go-to recipe for unexpected guests or lazy weekend dinners.
Preparing the Ground Beef for Your Loaded Nachos
Now that you’ve got all your ingredients ready, it’s time to talk about the real star of the show. The ground beef can make or break your nachos, and I’ve learned this through plenty of trial and error.
My first few attempts at making loaded nachos with ground beef resulted in bland, greasy meat that nobody wanted to eat. I just threw the beef in a pan and hoped for the best. Big mistake. Proper preparation takes a few extra minutes, but those minutes make all the difference between forgettable nachos and ones people rave about.
The Right Way to Brown Your Beef
Here’s what I do every single time now. First, I heat a large skillet over medium-high heat. Not medium. Not high. Medium-high is the sweet spot. Too low and your beef steams instead of browns. Too high and you’ll burn the outside while leaving the inside undercooked.
I add the pound of ground beef to the dry pan. No oil needed since the beef has its own fat. Then comes the part most people mess up. I resist the urge to touch it for about 3-4 minutes. Just let it sit there. You’ll hear it sizzle and see the edges starting to turn brown.
This waiting period allows the beef to develop a proper crust. That browning is where the flavor lives. When I used to constantly stir and poke at the meat, it never developed those delicious browned bits. It just turned gray and unappetizing.
After those first few minutes, I break up the beef with a wooden spoon or spatula. I work it into crumbles about the size of a dime. Not too small or it gets dry. Not too chunky or it doesn’t distribute well on the nachos. Medium-sized crumbles are perfect.
The beef takes about 8-10 minutes total to cook through. I know it’s done when I don’t see any pink remaining and the meat has nice brown color throughout. Then I drain off most of the excess fat, leaving just a tablespoon or so for flavor.
Seasoning Your Ground Beef Like a Pro
This is where the magic happens. Plain ground beef tastes like, well, plain ground beef. But properly seasoned beef transforms into something crave-worthy.
I return the drained beef to the pan over medium heat and add my taco seasoning. You can absolutely use a store-bought packet, and I won’t judge you one bit. But when I have time, I make my own blend. It takes two minutes and tastes so much better.
My homemade seasoning for ground beef includes chili powder, cumin, paprika, garlic powder, onion powder, a pinch of cayenne, salt, and black pepper. The exact ratios don’t have to be perfect. I usually eyeball it based on how spicy I want the final dish.
After sprinkling the seasoning over the beef, I add about 1/4 cup of water. This is crucial. The water helps the spices coat every piece of meat evenly and prevents the seasoning from burning. I stir everything together and let it simmer for 3-4 minutes until the liquid mostly evaporates.
The beef should look glossy and smell incredible. If you’re wondering how to season ground beef for nachos, this method works every time. The key is adding enough seasoning that you can actually taste it. Don’t be shy with your spices.
One time I was making nachos for my nephew’s birthday party, and I under-seasoned the beef thinking some kids might not like spicy food. The nachos were so bland that even the adults were drowning them in hot sauce. Now I season generously and just keep the spicy toppings separate for people to add themselves.
By the way, if you’re looking for other crowd-pleasing appetizers, my mini chicken quesadilla bites use similar seasoning techniques and always disappear fast at parties.
Layering Your Nachos for Maximum Deliciousness
Alright, here’s where most people completely mess up their nachos. They pile everything on top and wonder why the bottom chips are naked and stale while the top is overloaded and soggy. Proper layering isn’t complicated, but it requires a strategy.
I’ll be honest with you. It took me probably twenty batches of nachos before I figured out the layering situation. My friends were too polite to complain, but I could see them digging through trying to find chips that actually had toppings on them.
The Foundation Layer Technique
I use a large rimmed baking sheet lined with parchment paper or foil for easy cleanup. Then I spread out about half of my tortilla chips in a single layer, covering the entire pan. These need to be shoulder to shoulder, like they’re at a crowded concert.
Then comes the first layer of seasoned ground beef. I distribute it evenly across all the chips, not just dumping it in the middle. Every chip deserves some beef. I use my spoon to scatter small portions everywhere.
Next, I sprinkle about a third of my black beans over the beef. Then comes the first cheese layer, using roughly half my total cheese. This is critical. The cheese acts as glue, holding everything together and creating that signature nacho pull when someone grabs a chip.
Some people ask me about the best way for layering nachos, and my answer is always the same: think in thirds. You want three distinct layers with proper distribution at each level.
Building the Second and Third Layers
After the first layer is set, I add another layer of chips on top. Not as many as the base layer, maybe about a third of what’s left. I nestle them into the gaps and spaces in the first layer.
Then I repeat the process. More beef. More beans. More cheese. Each ingredient should touch as many chips as possible. This isn’t the time to be lazy and just pile things in the center.
For the final top layer, I use the remaining chips and create little peaks and valleys. This isn’t just for looks. Those varied heights help the cheese melt into different levels, creating interesting texture throughout the dish.
I finish with the last of the beef, beans, and cheese, making sure to leave some chips visible so they can get crispy in the oven. Completely burying everything under cheese might sound good in theory, but you end up with steamed chips instead of crunchy ones.
Here’s the thing about nacho construction that nobody tells you: how you layer nachos affects the eating experience more than almost anything else. Well-layered nachos mean every single bite has multiple flavors and textures. Poorly layered nachos are frustrating and disappointing.
Creative Variations on the Classic
Once you master the basic layering technique, you can get creative with your toppings. I sometimes add corn kernels between layers for sweetness and texture. Other times I’ll scatter pickled jalapeños throughout instead of just on top.
For a Mexican street corn vibe, I mix some cotija cheese in with my cheddar and Monterey Jack. The salty, crumbly texture adds another dimension. You could also try adding avocado salsa between the layers for extra richness, though I usually save that for topping.
My brother-in-law likes to add refried beans instead of black beans, spreading them thin between layers. It creates a creamier nacho that holds together better for dipping. His version is different from mine, but I have to admit it’s pretty delicious.
If you’re feeling adventurous, you could even incorporate some baked zucchini chips into your nacho layers for a healthier twist. I tried this once for health-conscious friends and was surprised by how well it worked.
The beauty of making loaded nachos with ground beef is that the layering principle stays the same no matter what ingredients you choose. Chips, then toppings, then cheese. Repeat. That’s your formula for success.
One last tip about layering: don’t make your nacho mountain too tall. I see people on social media building these ridiculous towers that look impressive but are impossible to eat. Keep your layers reasonable. Two to three layers is perfect for home cooking. Any more than that and the bottom stays cold while the top burns.
Funny enough, my most successful nacho nights have been when I stopped trying to impress people with height and focused on even distribution. Simple beats fancy every time when it comes to nachos. Kind of like how simple deviled eggs with good seasoning beat overly complicated versions.
Trust me on this layering approach. Your nachos will go from amateur hour to professional quality just by taking a few extra minutes to distribute everything properly. It’s not rocket science, but it does require intention and care.


Baking Your Loaded Nachos to Perfection
Alright, your nachos are assembled and looking beautiful. Now comes the moment of truth. The oven can either transform your carefully layered creation into crispy, melty perfection, or turn it into a disappointing mess. I’ve done both more times than I care to admit.
The first time I tried baking nachos, I cranked the oven to 450 degrees thinking hotter meant faster and better. Wrong. The cheese burned on top while the bottom layer stayed cold. My roommate took one look and ordered pizza instead. That stung, but it taught me an important lesson about patience and proper temperature.
The Perfect Oven Temperature
I always preheat my oven to 375 degrees Fahrenheit. This is the Goldilocks zone for nachos. Not so hot that the cheese browns before everything heats through. Not so cool that the chips get soggy waiting for the cheese to melt. Just right.
While the oven preheats, I leave my assembled nachos on the counter. Room temperature ingredients melt more evenly than cold ones. If I’ve stored my cheese in the fridge, those extra five minutes of sitting out make a noticeable difference in how smoothly everything melts together.
Here’s something I learned from a chef friend: oven position matters more than people think. I place my baking sheet on the middle rack, never the bottom. The bottom rack gets too much direct heat and burns the chips before the cheese melts. The middle rack provides even heat distribution from all sides.
How Long to Bake and What to Watch For
So how long should you bake loaded nachos? My standard answer is 12-15 minutes, but that’s not the whole story. Every oven runs a little different. My current oven runs hot, so I usually pull my nachos at 11 minutes. My mom’s oven is slower, and hers need the full 15.
Instead of relying solely on time, I watch for visual cues. The cheese should be completely melted and starting to bubble. You’ll see little golden spots forming on the cheese, especially around the edges. That’s where the magic happens. Those browned cheese bits have incredible flavor.
The chips around the perimeter should look slightly toasted but not burned. If you smell burning at any point, get those nachos out immediately. The line between perfectly crispy and overdone is thin, maybe 60 seconds thin.
I also pay attention to the sound coming from my oven. Yeah, I know that sounds weird, but you can actually hear when nachos are ready. The bubbling cheese makes this gentle sizzling noise that changes pitch when it’s done. After making nachos every couple weeks for years, I’ve developed this weird sixth sense about it.
One trick I picked up from watching too many cooking shows: if your cheese isn’t browning enough but everything else is done, switch your oven to broil for the last 60-90 seconds. Watch it like a hawk though. Broilers are aggressive and will burn your nachos in literally seconds if you get distracted.
The Five-Minute Rest Period Nobody Talks About
This might be the most important tip in this entire guide. When your nachos come out of the oven, do not serve them immediately. I know the bubbling cheese is calling to you. I know everyone’s gathered around ready to dive in. Make them wait.
Let the nachos rest for 4-5 minutes on the counter. During this time, the cheese sets slightly, going from lava-hot and liquidy to that perfect gooey consistency. The chips firm back up a bit too, regaining some of the crispness they lost from the heat and steam.
I learned this lesson the hard way during a Super Bowl party. I pulled the nachos and immediately set them out. Within minutes, I had friends burning their mouths and the whole pan turned into a cheese puddle because people were diving in before it set. Now I announce a mandatory five-minute waiting period, and the results are always better.
While the nachos rest, I prepare my cold toppings. This is when I dice any last-minute fresh ingredients and get my sour cream, guacamole, and salsa ready in serving bowls. The timing works out perfectly.
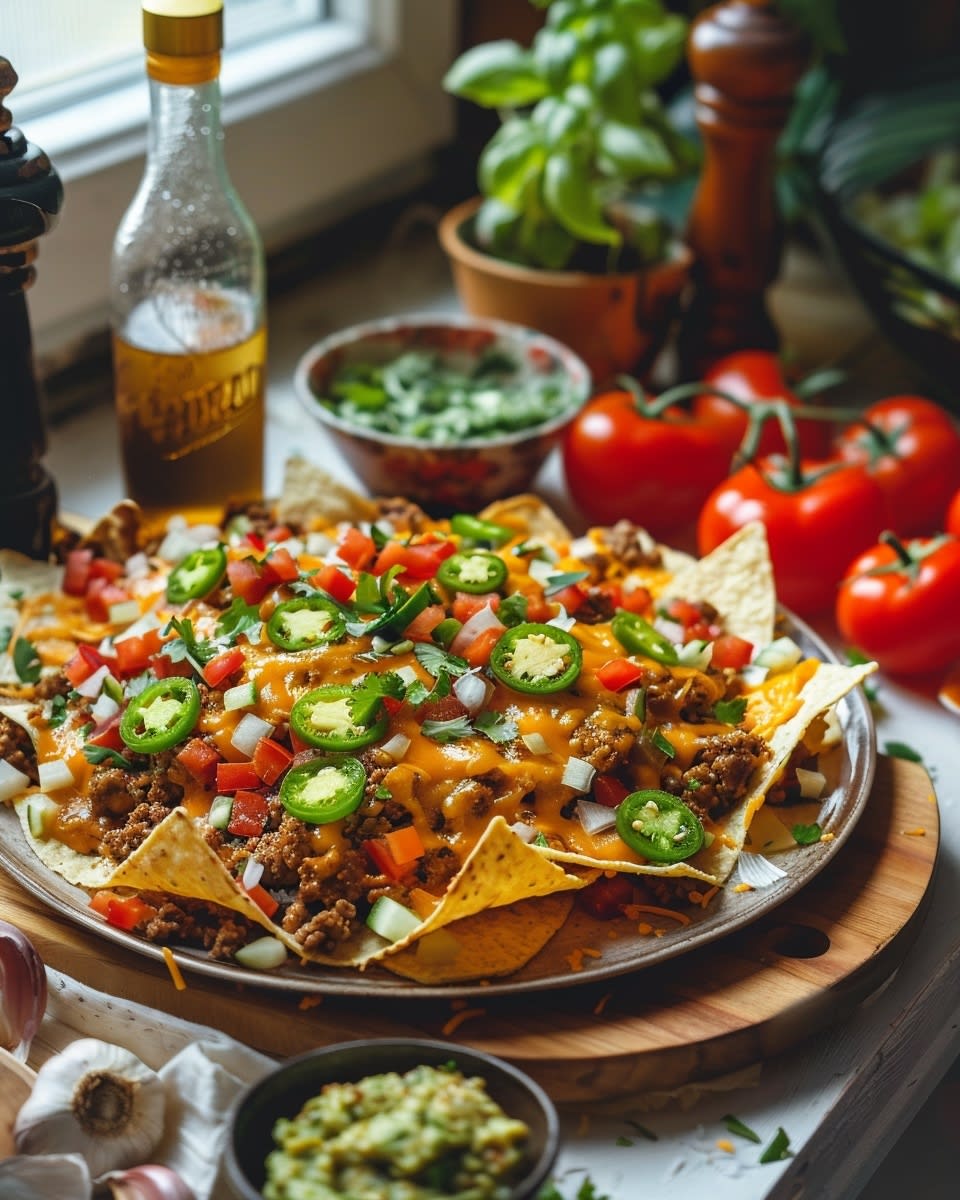
Achieving That Perfect Crispy-Melty Balance
The holy grail of nachos is getting chips that stay crispy while the cheese gets properly melty. These two goals seem to contradict each other, but they’re totally achievable with the right approach.
First, don’t overload your nachos with wet ingredients before baking. I add tomatoes, salsa, sour cream, and guacamole only after baking. These ingredients release moisture that turns chips soggy. Keep them separate until serving time.
Second, use enough cheese to bind everything but not so much that you’re creating a cheese soup. The right amount of cheese melts into the layers while still letting some chips peek through to get crispy. When every chip is completely buried, they steam instead of crisp.
Third, work quickly when assembling. The longer your nachos sit before going in the oven, the more time moisture has to seep into the chips. I prep all my ingredients first, then assemble and bake immediately.
Some people wonder if techniques like grilling work for nachos, and honestly, I’ve tried it on my outdoor grill a few times during summer. It can work if you’re careful with heat management, but the oven gives more consistent results for this particular dish.
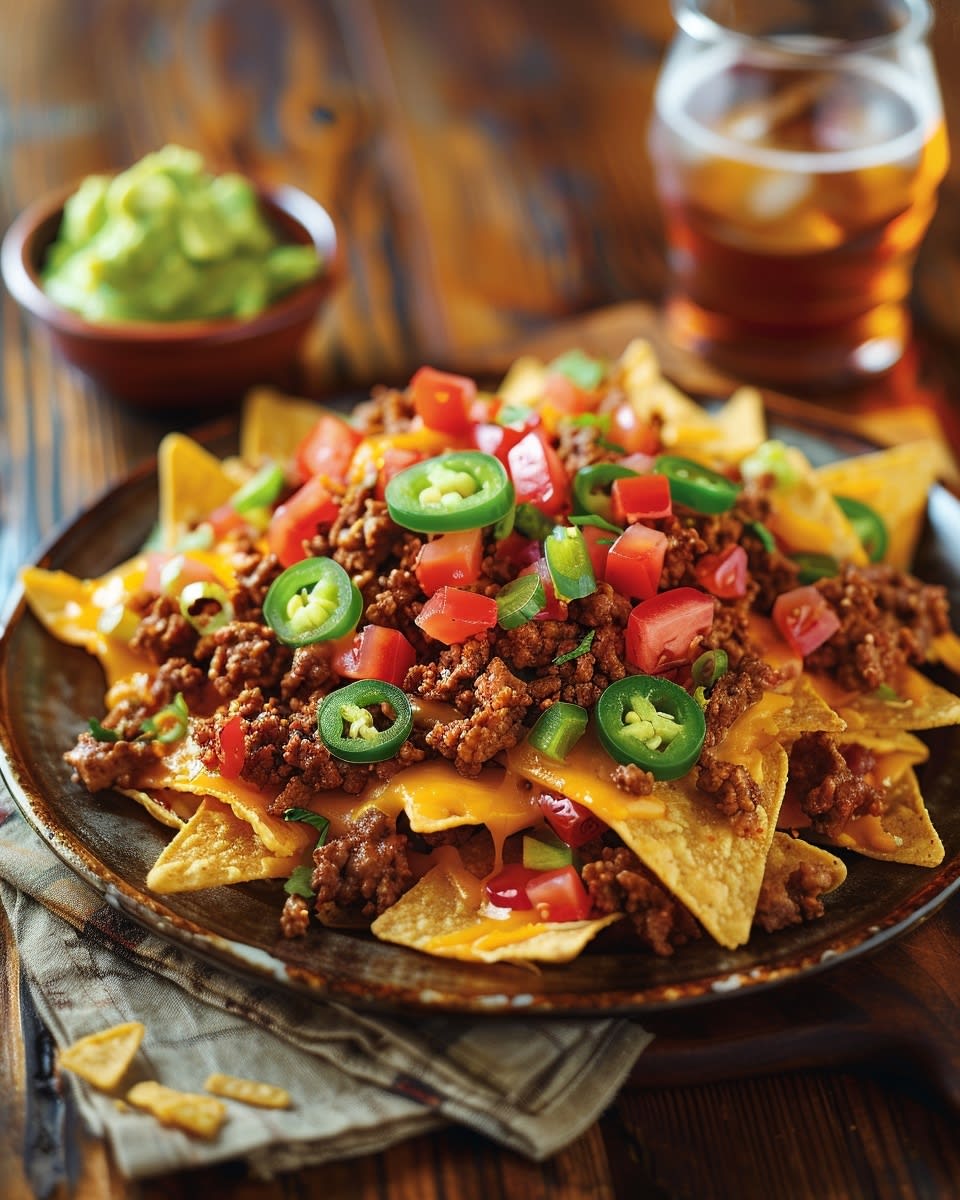
Serving and Presentation Tips That Impress
Presentation might seem like a small thing, but it affects how people experience your nachos. I learned this from my sister, who has an eye for making food look Instagram-worthy without being fussy about it.
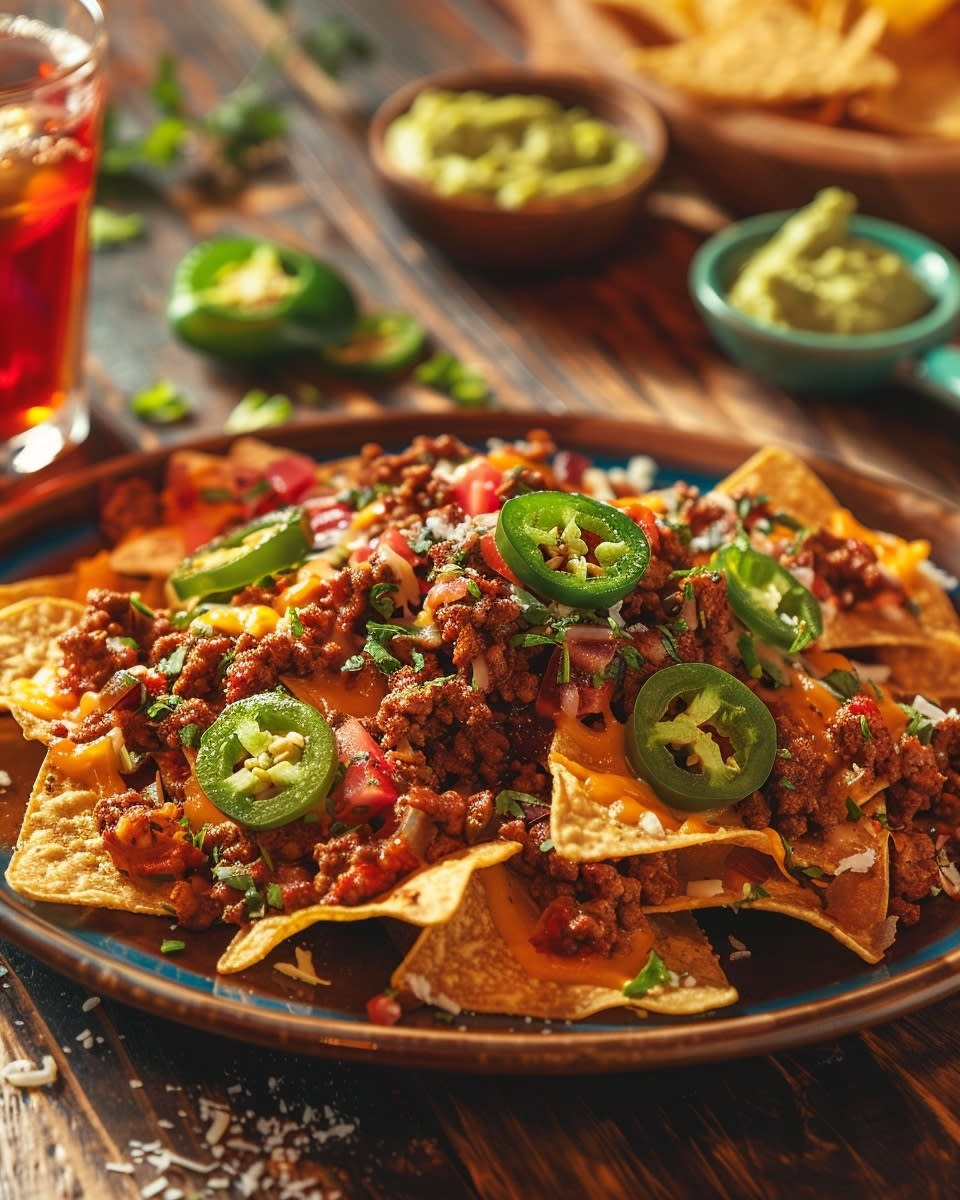
After the rest period, I add my fresh toppings strategically. Small dollops of sour cream scattered across the top, not one giant blob in the middle. Guacamole in several spots so everyone can reach it easily. Salsa drizzled lightly over everything or served on the side for people to add themselves.
Then comes the garnish situation. Fresh cilantro scattered on top adds color and brightness. Thinly sliced green onions create beautiful contrast. A few lime wedges placed around the edges let people customize their flavor. Sliced jalapeños for people who want extra heat.
I serve my loaded nachos with ground beef right on the baking sheet. Why dirty another dish? The casual, family-style presentation actually makes people more comfortable diving in. Plus, the baking sheet retains heat, keeping everything warm while people eat.
If I’m hosting something fancier, I’ll transfer the nachos to a large serving platter. Sometimes I use a pizza pan, which works great for nachos. The round shape looks nice on a table, and the raised edge prevents toppings from sliding off.
Here’s a serving tip that changed everything for me: I always make sure serving utensils are nearby. Tongs or a large spatula make it easy for people to grab portions without destroying the whole pan. Without utensils, people use their hands and things get messy fast.
For game day or parties, I set up a nacho station with extra toppings on the side. Small bowls of jalapeños, extra cheese, hot sauce, additional sour cream, and salsa let everyone customize their plate. This also prevents the original pan from getting picked over unevenly.
Timing Your Nachos for Gatherings
When I’m making nachos for a group, timing is everything. Nobody wants to sit around hungry while the host is still assembling food. But serving nachos too early means they get cold and sad before people finish them.
My strategy is to do all the prep work before guests arrive. The beef is cooked and seasoned. Vegetables are chopped. Cheese is shredded. Everything sits ready in containers. Then, about 20 minutes before I want to serve, I assemble and bake.
This timing means nachos come out right when people are settling in and getting hungry. The smell of melting cheese and seasoned beef fills the house, which honestly does half the work of making people excited to eat.
If you’re serving nachos as an appetizer before a meal, keep the portions reasonable. I use a smaller baking sheet and fewer chips. Nothing kills dinner appetite like a pound of cheese and beef beforehand. Save the giant mega-nacho platter for when nachos are the main event.
By the way, if you’re looking for more crowd-pleasing options, I’ve found that having a variety of appetizers and snacks keeps everyone happy since not everyone has the same taste preferences or dietary needs.
What to Do With Leftovers
Funny enough, I rarely have leftover nachos because people demolish them. But on the rare occasion there’s some left, I have a system. Nachos don’t reheat well in the traditional sense. The chips get even soggier, and the cheese turns weird and separated.
Instead, I repurpose leftover nacho toppings. I’ll scrape the beef, cheese, and beans into a container and use them for tacos or burrito bowls the next day. The chips themselves are usually too far gone to save, so those get tossed.
If you absolutely must reheat nachos, your best bet is the oven at 350 degrees for about 5 minutes. Not perfect, but better than the microwave, which turns them into a soggy disaster. Air fryers can also work for reheating small portions if you have one.
Making nachos is one of those skills that seems simple but has layers of technique underneath. The difference between okay nachos and phenomenal ones comes down to these details: proper baking temperature, knowing when they’re done, letting them rest, and thoughtful presentation. Master these elements and you’ll be the nacho person in your friend group forever.
I hope these techniques help you create the kind of nachos that stop conversations and bring people together around the table. There’s something special about sharing food that’s been made with care and attention. Whether it’s game night, a casual weeknight dinner, or a big celebration, loaded nachos with ground beef never disappoint when you know what you’re doing. Give these methods a try, and I think you’ll be amazed at how much better your nachos turn out.
Frequently Asked Questions
What are the essential ingredients for loaded nachos with ground beef?
The must-have ingredients include thick tortilla chips, ground beef (preferably 80/20), taco seasoning, and plenty of cheese (I recommend a mix of cheddar and Monterey Jack). Beyond that, you’ll want black beans, fresh vegetables like tomatoes and onions, and toppings such as sour cream, guacamole, and salsa. The beauty of nachos is their flexibility, so you can adjust based on preferences. Just don’t skip the cheese or quality chips, as those are the foundation of great nachos.
How do you season ground beef for nachos?
After browning and draining your ground beef, return it to medium heat and add taco seasoning (about 2 tablespoons for a pound of beef). Then add 1/4 cup of water to help distribute the spices evenly and prevent burning. Let it simmer for 3-4 minutes until the liquid mostly evaporates and the beef looks glossy. You can use store-bought taco seasoning or make your own with chili powder, cumin, paprika, garlic powder, onion powder, salt, and pepper. Don’t be shy with seasoning; you want to actually taste it.
How do you layer nachos for the best texture?
Layer in thirds for even distribution. Start with half your chips spread evenly on a baking sheet, then add portions of beef, beans, and cheese. Add another layer of chips nestled into the first layer, then repeat with more toppings. Finish with a final layer of chips and remaining ingredients. The key is distributing everything across all the chips, not just piling it in the center. This ensures every chip gets toppings and prevents some from being soggy while others are bare.
How long should you bake loaded nachos?
Bake at 375 degrees Fahrenheit for 12-15 minutes on the middle oven rack. Watch for the cheese to become completely melted and bubbly with some golden spots forming around the edges. Every oven is different, so use visual cues rather than just time. If your cheese isn’t browning enough, you can switch to broil for the last 60-90 seconds, but watch closely. After removing from the oven, let the nachos rest for 4-5 minutes before serving.
Can I use other types of meat instead of ground beef?
Absolutely! Ground turkey or chicken work great and are leaner options. Shredded chicken, carnitas, or even seasoned ground pork make excellent alternatives. I’ve also made vegetarian versions using seasoned black beans or crumbled tofu. Whatever protein you choose, make sure it’s well-seasoned and not too wet, as excess moisture makes chips soggy. The cooking method stays essentially the same regardless of protein choice.
What are some good toppings for loaded nachos?
Beyond the basics, try corn kernels, pickled jalapeños, different types of cheese like pepper jack or cotija, fresh cilantro, green onions, and diced avocado. Black olives add a nice briny element. Some people love adding refried beans for creaminess. For post-baking toppings, sour cream, guacamole, salsa, pico de gallo, and hot sauce are classics. Fresh lime wedges are essential for squeezing over everything. Don’t add wet ingredients like salsa or sour cream before baking or you’ll end up with soggy chips.
How can I make my nachos spicier?
There are several approaches to heat. Add diced jalapeños or serrano peppers between the layers before baking. Use pepper jack cheese instead of or in addition to cheddar. Mix cayenne pepper or hot sauce into your ground beef while seasoning it. Top with pickled jalapeños, fresh habaneros, or your favorite hot sauce after baking. I like to provide hot sauce on the side so everyone can control their own heat level. Adding a spicy salsa or making a chipotle crema for drizzling also works wonderfully.
Can I prepare the ground beef ahead of time?
Yes, this is actually a great time-saver. Cook and season your ground beef up to two days ahead, then store it in an airtight container in the refrigerator. When you’re ready to make nachos, either reheat the beef before layering or use it cold and let the oven heat it through (though preheating works better). You can also freeze cooked seasoned beef for up to three months. Just thaw it in the fridge overnight before using. This makes throwing together nachos even faster.
Why do my nachos always turn out soggy?
Soggy nachos usually result from using thin chips, adding wet ingredients before baking, or over-layering. Use thick restaurant-style chips that can handle the weight. Only add dry ingredients like cheese, beans, and cooked meat before baking. Save tomatoes, salsa, sour cream, and guacamole for after baking. Also, make sure you’re not using too much cheese, as excess melted cheese can steam the chips. Proper layering with some chips exposed to direct heat helps maintain crispness.
Can I make nachos in advance for a party?
Nachos are really best made fresh, but you can do all the prep work ahead. Cook your beef, chop vegetables, shred cheese, and prep toppings hours or even a day before. Store everything separately in the fridge. Then assemble and bake right before serving. If you try to make fully assembled nachos ahead, the chips will get soggy from sitting with the toppings. The actual assembly and baking only takes about 20 minutes, so timing it fresh isn’t too difficult even when hosting.
Ingredients
Equipment
Method
- Préchauffez votre four à 375 degrés Fahrenheit.
- Cuisez le bœuf haché dans une poêle à feu moyen-vif jusqu'à ce qu'il soit doré, environ 8-10 minutes.
- Égouttez l'excès de graisse du bœuf, en laissant une cuillère à soupe pour la saveur.
- Remettez le bœuf dans la poêle et ajoutez l'assaisonnement pour tacos et l'eau; laissez mijoter pendant 3-4 minutes.
- Disposez la moitié des chips de tortilla sur une plaque de cuisson.
- Répartissez uniformément le bœuf cuit sur les chips.
- Parsemez un tiers des haricots noirs sur le bœuf.
- Ajoutez la moitié du fromage râpé sur les haricots.
- Ajoutez une deuxième couche de chips de tortilla.
- Répétez les couches avec le reste du bœuf, des haricots et du fromage.
- Ajoutez une couche finale de chips de tortilla et garnissez avec le reste du bœuf et du fromage.
- Faites cuire pendant 12-15 minutes jusqu'à ce que le fromage soit bouillonnant et légèrement doré.
- Laissez les nachos reposer pendant 4-5 minutes avant de servir.
- Servez avec des garnitures fraîches comme la crème aigre, le guacamole, la salsa, la coriandre, les oignons verts, et des quartiers de lime.