Introduction to Homemade Mozzarella Cheese Sticks
Last Friday night, my kids came home from school begging for mozzarella sticks. Instead of ordering takeout, I decided to make them myself. The result? They devoured every single stick and asked for more. That’s when I knew I had perfected my recipe.
Welcome to my kitchen! Today, I’m excited to share with you my favorite way to make mozzarella cheese sticks. Whether you’re a fan of baked mozzarella sticks or prefer the classic fried version, this guide will help you create delicious, cheesy goodness right in your own home. Trust me, once you try making these yourself, you’ll never want to buy frozen ones again.
Making cheese sticks at home is easier than you think. You don’t need fancy equipment or complicated techniques. Just a few simple ingredients and about 30 minutes of your time. The best part? You control what goes into them, which means no mystery ingredients or preservatives.
What Are Mozzarella Cheese Sticks?
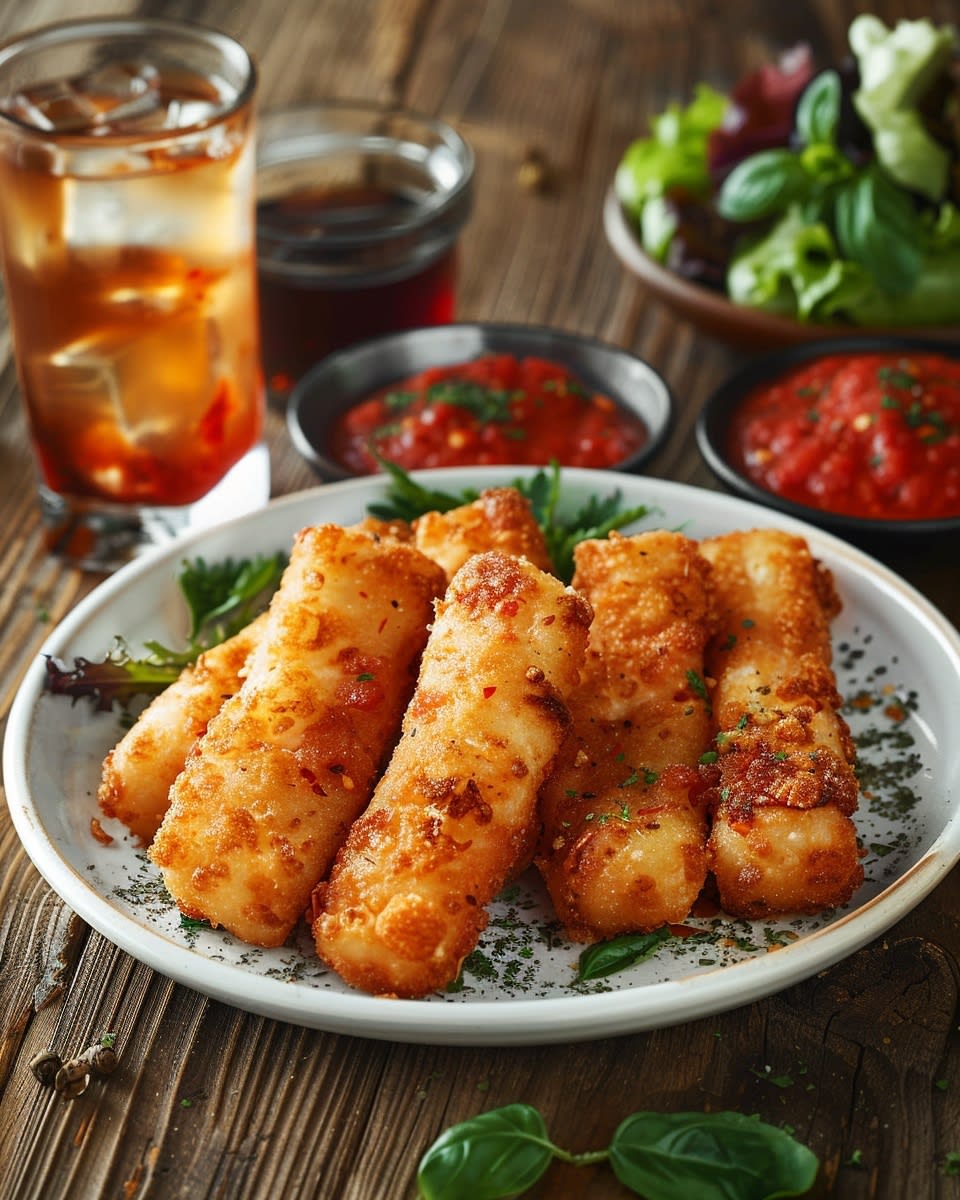
Let’s start by understanding what mozzarella cheese sticks are. These snacks are made from whole milk mozzarella cheese, cut into strips, and coated in a crispy outer layer. They’re perfect for snacking, parties, or as a fun appetizer that everyone loves.
The magic happens when the cheese gets hot. The inside becomes gooey and stretchy while the outside stays golden and crunchy. That contrast between textures is what makes them so addictive. You bite through the crispy coating and get that warm, melted cheese pull that makes everything worth it.
These treats have been around since the 1970s and quickly became a favorite at restaurants and bars. Now they’re a staple at parties, game nights, and family dinners. Kids love them because they’re fun to eat. Adults love them because they taste amazing and bring back memories.
Many people wonder about the difference between string cheese sticks and regular mozzarella sticks. String cheese is typically smaller and designed to peel apart. You can use string cheese to make mozzarella sticks, which actually makes the prep work even easier. Regular mozzarella cheese blocks give you more control over the size and shape though.
Why Make Your Own Mozzarella Cheese Sticks?
I used to buy frozen mozzarella sticks from the store. They were convenient but never quite hit the spot. The cheese was often rubbery, and the coating tasted stale. Making them from scratch changed everything for me.
When you make them yourself, the cheese tastes fresher and melts better. The coating stays crispier. Plus, you can customize the seasonings to match your taste. Want more garlic? Add it. Love spicy food? Throw in some cayenne pepper.
Another big reason to make your own is cost. A package of frozen mozzarella sticks costs about the same as a block of good cheese. But that cheese block makes way more sticks. You get better quality for less money.
If you’re wondering can you freeze mozzarella cheese sticks, the answer is yes! In fact, freezing them before cooking actually helps them hold their shape better. I always make a double batch and freeze half for busy weeknights. They go straight from freezer to oven with no thawing needed.
Key Ingredients You’ll Need for Perfect Mozzarella Cheese Sticks
To make these yummy treats, you’ll need a few key ingredients. Don’t worry—you probably have most of these in your kitchen already. Let me walk you through what works best.
The Cheese
Whole milk mozzarella cheese works best for this recipe. Low-moisture mozzarella holds its shape better when heated, so look for that on the package. Fresh mozzarella is too wet and will leak out during cooking.
You can buy a block and cut it into sticks yourself. I like cutting them about half an inch thick and three inches long. This size cooks evenly and gives you the perfect cheese-to-coating ratio.
Some people ask me how to make mozzarella sticks with shredded cheese. While it’s trickier, you can do it. You’ll need to form the shredded cheese into logs and freeze them solid before coating. It takes more time, but it works in a pinch. I prefer using block cheese because it’s simpler and gives better results.
Want to try something different? Cheddar cheese sticks are another option. They don’t melt quite as nicely as mozzarella, but they taste great. You can even mix cheddar and mozzarella together for a unique flavor.
The Coating
Bread crumbs create that classic crispy coating we all love. I use plain or Italian-style bread crumbs depending on my mood. Panko bread crumbs work great too—they’re extra crunchy.
Some people need to avoid bread for health reasons. If you’re wondering how to make mozzarella sticks without bread crumbs, crushed cornflakes or crackers work perfectly. Almond flour mixed with parmesan cheese is another good option. The texture is slightly different, but still delicious.
I always add seasonings to my bread crumbs. Garlic powder, Italian seasoning, salt, and pepper are my go-to choices. Sometimes I throw in dried basil or oregano. Get creative with your spice cabinet.
The Binding Ingredients
You’ll need eggs and flour to help the coating stick to the cheese. The flour creates a dry base layer. The egg acts like glue. Then the bread crumbs stick to the egg. This three-step process keeps everything in place during cooking.
Some recipes call for milk mixed with the eggs. This makes the coating slightly thinner and more even. I’ve tried it both ways and both work fine. Use what you have on hand.
Optional Add-Ins
Here’s where you can get creative. Add grated parmesan cheese to your bread crumbs for extra flavor. Mix in red pepper flakes if you like heat. Dried parsley adds color and a fresh taste.
I sometimes add a tiny bit of paprika to the flour. It doesn’t change the taste much, but it makes the sticks look more golden and appetizing. Little touches like this make homemade versions look restaurant-quality.
Choosing Between Baked and Fried Mozzarella Sticks
One of the first decisions you’ll make is whether to bake or fry your cheese sticks. Both methods work well, but they give slightly different results.
Fried mozzarella sticks are the traditional version. They get incredibly crispy and golden. The hot oil seals the coating quickly, which helps prevent cheese leaks. They’re ready in just a few minutes. The downside? They use more oil and require careful attention to avoid burns.
Baked mozzarella sticks are my weeknight choice. They’re healthier with way less oil. You can make a big batch at once without standing over a hot stove. They take longer to cook—about 10 to 12 minutes—but the hands-off time is nice. The coating isn’t quite as crispy as fried, but it’s still really good.
If you’re wondering how to make mozzarella sticks without frying, baking is your answer. The key is freezing them solid before baking and using a hot oven. I set mine to 425 degrees Fahrenheit. Some people use an air fryer, which splits the difference between baking and frying. It uses very little oil but gets them super crispy.
The Perfect Mozzarella Sticks Sauce
You can’t talk about mozzarella sticks without mentioning the sauce. Mozzarella sticks sauce takes these snacks from good to amazing.
Marinara sauce is the classic choice. The tangy tomato flavor balances the rich, cheesy taste perfectly. I keep a jar in my pantry just for this purpose. Sometimes I warm it up with extra garlic and Italian seasoning.
Ranch dressing is another popular option. It’s creamy and cooling, especially if you’ve added spices to your coating. My kids actually prefer ranch to marinara.
Want to try something different? Honey mustard, buffalo sauce, or even pesto work great. I’ve served them with spicy sriracha mayo for adult parties. Everyone raved about it.
Making your own marinara sauce is easy if you have time. Canned tomatoes, garlic, olive oil, and basil simmered for 20 minutes. It tastes so much fresher than store-bought versions.


How to Make Mozzarella Cheese Sticks at Home
Now that you’ve got your sauce ready and your ingredients lined up, it’s time to get our hands dirty with the actual cooking process. I’m going to walk you through this step by step, and honestly, it’s simpler than you might think.
The key to perfect cheese sticks is all about timing and temperature. I learned this the hard way after my first batch exploded in the pan, sending melted cheese everywhere. Not my finest kitchen moment, but it taught me exactly what NOT to do.
First things first—let’s talk about prep. Take your whole milk mozzarella cheese block and cut it into sticks about three inches long and half an inch thick. Some people cut them thicker, but I find this size cooks evenly without the cheese getting too melty before the coating crisps up. If you’re using string cheese sticks, you can skip the cutting completely, which saves about five minutes of prep time.
Here’s the thing about coating—you need three separate shallow bowls or plates. In the first one, put about half a cup of all-purpose flour with a pinch of salt and pepper. The second bowl gets two beaten eggs (add a splash of milk if you want). The third bowl holds your seasoned bread crumbs. I usually mix in a teaspoon of garlic powder, a teaspoon of Italian seasoning, and half a teaspoon each of salt and pepper into about a cup of bread crumbs.
Now comes the fun part. Take each cheese stick and roll it in flour until it’s completely covered. Shake off the excess—you don’t want clumps. Then dip it in the egg mixture, letting any extra drip off. Finally, roll it in the bread crumbs, pressing gently so they stick. I actually do this twice for each stick. Double coating makes all the difference. It creates a thicker barrier that keeps the cheese from leaking out.
Once all your sticks are coated, place them on a baking sheet lined with parchment paper. This is crucial—freeze them for at least two hours, or overnight if you have time. I can’t stress this enough. Frozen cheese sticks hold their shape way better during cooking. The coating has time to set, and the cheese stays put inside instead of oozing out everywhere.
For frying, heat about two inches of vegetable oil in a deep pan to 350 degrees Fahrenheit. Use a thermometer if you have one. Too hot and the coating burns before the cheese melts. Too cool and they get greasy and soggy. Drop a small piece of bread in the oil—if it sizzles immediately, you’re ready. Fry the frozen sticks for about two to three minutes, turning once, until they’re golden brown all over. Work in batches so you don’t crowd the pan. Drain them on paper towels and serve immediately while they’re hot.
By the way, these make a perfect addition to any appetizer spread. I usually serve them alongside Buffalo Chicken Dip with Cream Cheese when I’m hosting game day parties. The combination of spicy dip and cheesy sticks always disappears first.
How to Make Baked Mozzarella Sticks
Okay, let’s talk about the baked version because this is how I make them ninety percent of the time now. Less mess, less oil, and honestly, my family can barely tell the difference.
Baked mozzarella sticks follow the same coating process I just described. The difference is all in the cooking method. After your coated sticks have frozen solid, preheat your oven to 425 degrees Fahrenheit. Some recipes say 400, but I’ve found that higher temperature creates a crispier coating that better mimics the fried version.
Line a baking sheet with parchment paper or a silicone mat. Don’t skip this step—trust me, cleanup will be much easier. Arrange your frozen cheese sticks on the sheet with about an inch of space between each one. They need room for air to circulate.
Here’s my secret weapon for extra crispiness: spray them lightly with cooking spray before baking. This adds just enough fat to help them brown beautifully. Some people brush them with melted butter or olive oil, which works too. I’ve tried both and the spray is easier and more even.
Bake for about ten to twelve minutes. Keep a close eye on them around the eight-minute mark. You want them golden brown and slightly puffed. If you see cheese starting to leak out, they’re done—pull them out immediately. I set a timer for nine minutes and check them then. Every oven is different, so yours might take a minute more or less.
Funny enough, the first time I made baked mozzarella sticks, I forgot to freeze them first. They melted into flat cheese puddles on my baking sheet. My husband still teases me about serving “mozzarella pancakes” for dinner that night. Lesson learned—always freeze them solid before baking.
One trick I discovered by accident: if you flip them halfway through baking, they brown more evenly on all sides. Use tongs to turn each stick carefully after about six minutes. This extra step takes thirty seconds and makes them look professionally made.
If you’re putting together a party menu, these pair wonderfully with other finger foods. I often make them alongside Spinach Artichoke Dip Bites because they offer different flavors but similar hand-held convenience.
Making Mozzarella Sticks Without Bread Crumbs
So what happens if you can’t eat bread crumbs? Maybe you’re watching your carbs, or someone in your family has gluten issues. Don’t worry—you’ve got options, and some of them are actually tastier than the traditional version.
The first alternative I ever tried was crushed pork rinds. I know it sounds weird, but hear me out. They’re naturally crunchy, zero carb, and they get incredibly crispy when cooked. Just crush a bag of plain pork rinds in a food processor until they look like bread crumbs. Season them the same way you would regular bread crumbs. The coating comes out extra crunchy with a slightly savory flavor that’s honestly addictive.
Almond flour mixed with parmesan cheese is another fantastic option for anyone wondering how to make mozzarella sticks without bread crumbs. Use about three-quarters cup almond flour mixed with a quarter cup of finely grated parmesan. Add your usual seasonings—garlic powder, Italian herbs, whatever you like. The parmesan adds saltiness and helps the coating stick together. This version has a slightly nuttier taste that I actually prefer sometimes.
Crushed cornflakes work great if you’re avoiding wheat but can have corn. They create a coating that’s even crunchier than bread crumbs. I use the plain variety and season them heavily since cornflakes are kind of bland on their own. My kids love this version—they say it reminds them of chicken tenders.
Here’s something interesting I tried last month: coconut flour mixed with shredded coconut. Sounds crazy, right? But it creates this sweet-savory combo that works surprisingly well. The coating gets super crispy and has a subtle tropical flavor. It’s definitely different, but my friends who tried them at a cookout couldn’t stop talking about them.
Rice cereal crushed up fine is another gluten-free option. It doesn’t add much flavor, so you’ll want to season it well. I add extra parmesan cheese to rice cereal coatings to give them more taste.
For any of these alternatives, the process stays exactly the same. Flour, egg, coating mixture, freeze, then cook. The baking temperature and time don’t change either. Whether you’re making Loaded Nacho Cheese Fries or experimenting with different coatings on cheese sticks, the key is getting creative with what you have.
One thing to watch out for with alternative coatings—some brown faster than bread crumbs. Pork rinds especially can get dark quickly, so keep an eye on them. You might need to reduce the oven temperature by about 25 degrees or check them a minute or two earlier than usual.
I’ve also seen people use ground-up crackers, crushed pretzels, and even finely chopped nuts. The possibilities are pretty much endless once you understand the basic technique. The coating needs to be small and uniform, stick to the egg wash, and crisp up when heated. Anything that meets those criteria will work.
If you’re serving a variety of appetizers, consider making a batch of traditional cheese sticks and a batch with an alternative coating. It’s fun to compare them, and you’ll have options for guests with different dietary needs. Last time I hosted friends, I served regular ones alongside Deviled Eggs with Candied Bacon, and the variety made everyone happy.


Serving and Enjoying Your Mozzarella Cheese Sticks
The moment has arrived—your mozzarella cheese sticks are golden, crispy, and ready to eat. But wait, don’t just throw them on a plate and call it done. How you serve them makes a huge difference in the whole experience.
First off, timing matters more than you might think. These things are best eaten within five minutes of coming out of the oven or fryer. That’s when the cheese is at peak gooeyness and the coating is at its crispiest. I usually call everyone to the table before I even start cooking so nobody misses that perfect window.
Presentation doesn’t have to be fancy, but a little effort goes a long way. I arrange them on a serving platter lined with a paper towel to catch any excess oil. Then I remove that towel and transfer them to a clean plate. Stack them log-cabin style or fan them out in a circle—whatever looks good to you. Sprinkle a little fresh parsley or grated parmesan on top for that restaurant touch.
Speaking of restaurants, I learned a trick from my favorite Italian place downtown. They serve their cheese sticks on a wooden board with small bowls of different sauces arranged around it. It looks impressive but takes literally thirty seconds to set up. Your guests can pick their favorite sauce and it becomes this interactive eating experience.
Now let’s talk temperature. I know I mentioned serving them hot, but there’s hot and then there’s volcano-lava hot. My youngest burned the roof of his mouth once because he was too excited to wait. Now I tell everyone to wait about two minutes after they come out. The cheese needs just a moment to go from molten to perfectly melty. You’ll still get that amazing cheese pull, but without the third-degree burns.
Here’s something I discovered by accident—these actually taste amazing with unconventional pairings. One night I had leftover honey drizzle from making dessert, and I tried dipping a cheese stick in it. Sweet and salty together? Mind-blowing. Now I sometimes serve a small dish of hot honey alongside the traditional marinara. My friends thought I was crazy until they tried it.
Balsamic glaze is another unexpected winner. The tangy sweetness cuts through the richness of the cheese. You can buy it pre-made or reduce balsamic vinegar on the stove for about ten minutes until it gets syrupy. Drizzle it over the sticks right before serving or use it as a dipping sauce.
If you’re serving these at a party, consider making a dipping sauce bar. Set out four or five different options and let people experiment. I usually include marinara, ranch, honey mustard, garlic aioli, and something spicy like sriracha mayo. People love having choices, and it becomes a conversation starter.
One thing nobody tells you—these make surprisingly good leftovers if you reheat them properly. Never use a microwave though. That turns the coating soggy and the cheese rubbery. Pop them in a 375-degree oven for about five minutes, or use an air fryer for three minutes. They won’t be quite as good as fresh, but they’re still pretty darn tasty.
Side dish ideas? I keep it simple. A fresh green salad balances out the richness of fried cheese. Sometimes I serve them alongside pasta with marinara so people can use the same sauce for both. They also make a great appetizer before serving something lighter like grilled chicken or fish.
When you’re planning a full spread of snacks, variety is your friend. I love browsing through different appetizers and snacks to find combinations that work well together. Different textures and flavors keep things interesting for your guests.
Storing and Freezing Mozzarella Cheese Sticks
Let’s get real for a second—you’re probably not going to eat all these in one sitting. Well, maybe you will, but you probably shouldn’t. Good news is that mozzarella cheese sticks store beautifully both before and after cooking.
If you’re wondering can you freeze mozzarella cheese sticks, the answer is absolutely yes. In fact, freezing them before cooking is actually part of my recipe. But you can also freeze uncooked extras for later. After coating them completely, arrange them on a baking sheet so they’re not touching. Freeze them solid—this usually takes about two hours. Once they’re frozen hard, transfer them to a freezer bag or airtight container.
Here’s the thing about freezer storage—they’ll keep for up to three months. I write the date on the bag with a permanent marker so I don’t forget when I made them. There’s nothing worse than finding mystery food in your freezer six months later with no idea what it is or when it got there.
When you’re ready to cook frozen cheese sticks, don’t thaw them first. Seriously, just don’t. Thawed cheese sticks turn into a melty mess. Take them straight from freezer to fryer or oven. You might need to add an extra minute or two to the cooking time, but that’s it. Last Thursday I cooked some I’d frozen two weeks earlier and they turned out just as good as fresh.
Already cooked cheese sticks can be refrigerated for up to three days. Let them cool completely, then store them in an airtight container with paper towels between the layers to absorb moisture. This keeps them from getting too soggy. When you reheat them, that oven or air fryer method I mentioned earlier works perfectly.
You can technically freeze cooked cheese sticks too, but I’ll be honest—they’re never quite as good after freezing and reheating. The coating can get a bit tough and the cheese texture changes slightly. If you’re going to freeze them, do it before cooking. That’s my strong recommendation based on probably too many experiments in my own kitchen.
Something worth mentioning if you’re paying attention to what you eat—checking nutrient labeling on your cheese and other ingredients can help you make informed choices about portion sizes and nutritional content. I started doing this after my doctor suggested keeping an eye on my sodium intake. Turns out cheese sticks are delicious but not exactly a health food. Who knew, right?
For making big batches ahead, I’ve developed a system that works great. I spend an hour on Sunday afternoon making a triple batch. I freeze two-thirds of them uncooked and cook the remaining third for that week’s snacks. It’s like having my own freezer section full of homemade goodness ready whenever we need a quick appetizer or after-school snack.
Pro tip for freezer organization—use a muffin tin. Place one uncoated cheese stick in each cup, freeze solid, then coat them. This keeps them perfectly separated and uniform in size. I learned this trick from my sister who’s way more organized than I am.
FAQ
How do I make mozzarella sticks with shredded cheese?
You’ll need to form the shredded cheese into stick shapes first, which is honestly a bit tricky. Mix the shredded mozzarella with a tablespoon of flour to help it bind together, then press it firmly into silicone ice cube molds or shape it by hand into logs about three inches long. Freeze them overnight until they’re rock solid—this is crucial because shredded cheese has more surface area and melts faster. Then follow the regular coating process with flour, egg, and bread crumbs. I’ll be honest, it’s more work than using block cheese, but it definitely works if that’s what you have available.
Can you freeze mozzarella cheese sticks before or after cooking?
You can freeze them at either stage, but freezing them before cooking gives you better results. Uncooked frozen cheese sticks maintain their texture and crispiness better when you finally cook them. They’ll keep in the freezer for up to three months if stored in an airtight container or freezer bag. If you freeze already-cooked ones, they tend to get a slightly tougher coating and the cheese texture changes a bit when reheated. My personal preference is always to freeze them before cooking so you get that fresh-made quality every time you cook a batch.
How do I make mozzarella sticks without bread crumbs?
There are tons of alternatives that work great. Crushed pork rinds create an incredibly crunchy, low-carb coating. Almond flour mixed with parmesan cheese gives you a gluten-free option with a slightly nutty flavor. Crushed cornflakes work if you need to avoid wheat but can have corn. Even finely crushed crackers or pretzels make excellent substitutes. The key is making sure whatever you use is ground fine enough to stick to the egg wash and create an even coating. Season your alternative coating the same way you would regular bread crumbs—garlic powder, Italian seasoning, salt, and pepper all work beautifully.
What’s the best way to make mozzarella sticks without frying?
Baked mozzarella sticks are your answer here, and they turn out surprisingly close to the fried version. The secret is freezing them completely solid before baking and using a high oven temperature—I use 425 degrees Fahrenheit. Spray them lightly with cooking spray before baking to help them brown and crisp up. An air fryer is another fantastic option that uses minimal oil but gets them extra crispy. Air fry at 400 degrees for about eight minutes, flipping halfway through. Both methods are healthier than deep frying and way less messy to clean up afterward.
What is the best mozzarella sticks sauce?
Marinara sauce is the classic choice that never disappoints—the tangy tomato flavor perfectly balances the rich cheese. Ranch dressing is my kids’ favorite because it’s creamy and cooling. I personally love making a garlic aioli by mixing mayo, minced garlic, lemon juice, and a pinch of salt. Spicy options like buffalo sauce or sriracha mayo work great if you like heat. Honestly, the best sauce is whatever you enjoy most. I usually set out three different options when serving them to guests so everyone can find their favorite.
How would you describe mozzarella cheese sticks?
They’re sticks of whole milk mozzarella cheese coated in a seasoned, crispy breading and cooked until golden brown on the outside and gooey on the inside. The magic is that texture contrast—you bite through a crunchy exterior and hit warm, stretchy melted cheese that pulls away in long strings. They’re savory, satisfying, and kind of addictive. The coating is usually flavored with Italian herbs, garlic, and sometimes parmesan cheese. Think of them as the ultimate comfort food snack that’s fun to eat and perfect for sharing, though you might not want to.
Are cheddar cheese sticks similar to mozzarella cheese sticks?
They’re made the same way but taste quite different. Cheddar has a sharper, more intense flavor compared to mild mozzarella. The texture is also different—cheddar doesn’t get quite as stretchy and gooey when melted. It tends to be a bit grainier. That said, cheddar cheese sticks are delicious in their own right, especially if you like bold cheese flavor. You can even mix cheddar and mozzarella together for the best of both worlds—sharp flavor with good melt and stretch. The coating and cooking process stays exactly the same regardless of which cheese you use.
How long should I freeze mozzarella sticks before cooking them?
At least two hours, but overnight is even better. The cheese needs to be completely solid all the way through so it doesn’t leak out during cooking. I’ve gotten impatient and tried cooking them after just an hour of freezing, and I ended up with half-empty breaded shells and cheese puddles everywhere. Trust me, waiting is worth it. If you’re in a huge rush, you can freeze them for two hours and they’ll probably work, but four hours or overnight gives you the best insurance against cheese explosions. Once frozen solid, they’ll stay good in the freezer for months.
Why did my cheese leak out when I cooked my mozzarella sticks?
This usually happens for one of three reasons. First, they might not have been frozen long enough before cooking—the cheese needs to be rock solid. Second, your oil or oven might have been too hot, cooking the coating too fast before the inside heated through. Third, you might have had gaps in your coating where cheese could escape. Making sure you double-coat them and freeze them thoroughly solves most leaking problems. Also, don’t overcook them—pull them out as soon as they’re golden brown. Even an extra minute can cause leaks.
Can I use string cheese to make mozzarella sticks?
Absolutely, and it actually makes prep work easier. String cheese sticks are already the perfect size and shape, so you skip all the cutting. They’re made from low-moisture mozzarella, which is exactly what you want for this recipe. Just unwrap them, coat them following the flour-egg-breadcrumbs process, freeze them solid, and cook as usual. My kids love helping make these because there’s no knife work involved. The only downside is you can’t control the size, but honestly, the convenience more than makes up for it. I keep a bag of string cheese in my fridge specifically for making quick batches of cheese sticks.
I hope these tips help you become a mozzarella stick master in your own kitchen. There’s something really satisfying about pulling a batch of perfectly golden cheese sticks out of the oven and watching your family’s faces light up. Play around with different coatings, try new dipping sauces, and don’t be afraid to make them your own. Happy cooking!
Ingredients
Equipment
Method
- Coupez le fromage mozzarella en bâtonnets d'environ 8 cm de long et 1,5 cm d'épaisseur.
- Préparez trois bols peu profonds : un avec de la farine, un avec des œufs battus et un avec de la chapelure assaisonnée.
- Roulez chaque bâtonnet de fromage dans la farine, en secouant l'excès.
- Immergez le bâtonnet fariné dans le mélange d'œufs, en laissant le surplus s'égoutter.
- Roulez le bâtonnet dans la chapelure, en pressant doucement pour adhérer. (Optionnellement, couvrez-le deux fois pour une couche plus épaisse.)
- Placez les bâtonnets enrobés sur une plaque de cuisson recouverte de papier sulfurisé.
- Congelez les bâtonnets de fromage pendant au moins 2 heures ou toute la nuit jusqu'à ce qu'ils soient solides.
- Pour frémir : chauffez l'huile dans une poêle profonde à 180 °C et faites frémir les bâtonnets congelés pendant 2 à 3 minutes jusqu'à ce qu'ils soient dorés.
- Pour la cuisson : préchauffez le four à 220 °C, vaporisez légèrement les bâtonnets avec un spray de cuisson et faites cuire pendant 10 à 12 minutes jusqu'à ce qu'ils soient dorés et croustillants.