My Quest for the Ultimate Gourmet Strawberry Tart
Is there anything better than the first sweet, juicy strawberry of the season? I don’t think so. Every year, I wait (not so patiently) for those perfect, red berries to hit the market. And every year, I make this Gourmet Strawberry Tart. It’s become a joyful tradition. My family starts asking for it the moment they see the first berry crate at the store. It’s not just a dessert; it’s a celebration of sunshine and sweetness. Let me show you how to make this stunning, show-stopping tart that looks like it came from a fancy bakery.
A Slice of French Sunshine: The Story of the Tart
While you’ll find tarte aux fraises all over France, its beauty is in its simplicity and reverence for the fruit. In fancy patisseries, you might see a perfect, glazed arrangement. In a grandmother’s kitchen in Provence, it might be a rustic, free-form galette. My version is what I like to call “Gourmand“—meaning indulgent and luxurious. I add a layer of almond cream (frangipane) under the strawberries. It creates this amazing textural dance party: crisp crust, creamy nuttiness, and fresh berry pop. It bridges the elegance of tradition with my own love for a rich, satisfying bite.
Why This Gourmet Tart Will Steal Your Heart
You’ll adore this recipe for three big reasons. First, it totally wows your guests. It’s visually stunning but secretly simple. Second, the flavors are pure magic. The buttery crust, the toasty almond cream, and the bright strawberries sing together. Third, it’s surprisingly forgiving. Even if your crust tears a little, you can patch it up. Even if your berries aren’t all the same size, it will still taste incredible. It’s the kind of recipe that makes you feel like a master chef without the stress.
When to Whip Up This Beautiful Strawberry Tart
This tart is your new best friend for making memories. Bring it to a spring picnic and watch it disappear. Serve it as the grand finale for a Mother’s Day brunch or a dinner party. It’s perfect for a bridal or baby shower because it feels so special. Honestly, any Tuesday that needs a little sparkle is also a perfect occasion. I’ve even been known to bake one just for me and my husband to share on a quiet Friday night. Good food doesn’t need a fancy excuse.
What You’ll Need: Gourmet Strawberry Tart Ingredients
Gathering simple, quality ingredients is the first secret. Here’s your shopping list:
- 250 g (about 2 cups) of all-purpose flour – The base of our crisp shell.
- 125 g (1/2 cup) of cold, unsalted butter – Cold is key for a flaky crust!
- 100 g (1/2 cup) of granulated sugar – For sweetness in the crust.
- 1 large egg – This binds our dough together beautifully.
- 500 g (about 1 lb) of fresh strawberries – The brighter and redder, the better.
- 200 ml (about 3/4 cup + 2 tbsp) of heavy cream or crème fraîche – For the lush almond layer.
- 50 g (1/2 cup) of almond flour – This gives the cream its wonderful nutty flavor.
- 1 packet of vanilla sugar or 1 tsp vanilla extract – A warm, aromatic touch.
- 1 pinch of salt – This balances and enhances all the flavors.
No Problem! Handy Ingredient Swaps
Don’t run to the store if you’re missing something. Try these easy swaps:
- Crème Fraîche: Full-fat sour cream or plain Greek yogurt works in a pinch.
- Almond Flour: Finely ground hazelnuts or even graham cracker crumbs add a different but delicious crunch.
- Fresh Strawberries: In a non-berry season, use well-drained, thawed frozen strawberries. A mix of raspberries and blueberries is also gorgeous.
- Vanilla Sugar: Regular sugar plus a teaspoon of pure vanilla extract is perfect.
- Gluten-Free: Use a 1-to-1 gluten-free flour blend for the crust.
Let’s Bake! Your Step-by-Step Guide to Tart Perfection
Put on some fun music, and let’s get our hands dirty. This process is as enjoyable as eating the tart itself.
Step 1: Building the Sandy Base
Grab a large mixing bowl. In it, combine your flour, sugar, and that important pinch of salt. Whisk it all together so everything is evenly distributed. Now, take your cold butter and cut it into small cubes. Drop them into the flour mixture. Here’s the fun part: use your fingertips to rub the butter into the flour. Do this until the mixture looks like coarse, damp sand with some bigger pebbles of butter. This texture is what gives you a tender, flaky crust. Pro tip: Work quickly so the butter stays cold and doesn’t melt from your hands.
Step 2: Bringing the Dough to Life
Make a well in the center of your sandy mix. Crack your egg right into it. Using a fork, start to scramble the egg lightly in the center, then gradually draw in the flour mixture from the sides. Once it starts to come together, use your hands to gently knead it into a smooth, cohesive ball of dough. It should be soft but not sticky. Flatten it into a disc, wrap it tightly in plastic wrap, and let it rest in the fridge for 30 minutes. This chilling time relaxes the gluten and firms the butter back up, making the dough much easier to roll out later.
Step 3: Prepping the Star of the Show
While the dough chills, give your strawberries some love. Rinse them gently under cool water and pat them completely dry with a clean kitchen towel. Hull them (remove the green leafy tops). You can slice them in half, into quarters, or even keep some small ones whole. I love a mix of slices and halves for visual texture. Set them aside on a paper towel to soak up any extra moisture. Dry berries mean a less soggy crust!
Step 4: Rolling and Forming Your Tart Shell
Preheat your oven to 350°F (180°C). Lightly flour your clean countertop. Take your chilled dough disc and roll it out into a circle about 12 inches wide. Be patient and use even pressure. Carefully drape the rolled dough over your rolling pin to lift it and transfer it into a 9-inch tart pan with a removable bottom. Gently press the dough into the corners and up the sides. Roll your pin over the top to trim off the excess. Take a fork and prick the bottom of the crust all over. This “docking” prevents it from puffing up like a pillow in the oven.
Step 5: Creating the Creamy Almond Blanket
In a medium bowl, mix the heavy cream, almond flour, and vanilla sugar (or extract). Whisk it until it’s smooth and beautifully combined. You’ll see the vanilla specks dancing in the cream. Pour this mixture into your prepared tart shell. Use a spoon or offset spatula to spread it into a smooth, even layer across the bottom. This creamy layer will bake into a rich, custardy bed that soaks up the strawberry juices.
Step 6: The Artful Arrangement
Now for the masterpiece. Arrange your prepared strawberries on top of the almond cream. You can do concentric circles starting from the outside, or just scatter them artfully. Press them lightly into the cream so they nestle in. There’s no wrong way here—just make it look abundant and joyful! Chef’s tip: For a pro look, place the cut side of halved berries facing down. It creates a stunning, polished red surface.
Step 7: Baking to Golden Perfection
Slide your beautiful tart into the preheated oven. Bake for 30-35 minutes. You’re looking for the edges of the crust to be a deep golden brown and the almond cream to be set and slightly puffed. The strawberries will soften and their juices will bubble a little. Your kitchen will smell like a French bakery. Once done, remove the tart and let it cool completely in the pan on a wire rack. This cooling time lets everything set, so you get nice clean slices.
Your Tart Timeline: From Fridge to Table
Good baking is about timing. Here’s how it breaks down:
- Prep Time: 30 minutes (hands-on mixing and slicing)
- Chill Time: 30 minutes (crucial for the dough)
- Cook Time: 30 minutes
- Cool Time: 1 hour (be patient, it’s worth it!)
- Total Time: About 2 hours 30 minutes
A Little Chef’s Secret for You
My secret weapon? A tiny pinch of ground cardamom mixed into the almond cream. Just an eighth of a teaspoon. It adds a mysterious, warm, slightly citrusy note that makes people go, “What is that amazing flavor?” It complements the strawberries and almonds perfectly without being obvious. It’s my signature touch.
A Berry Fun Fact
Did you know strawberries aren’t actually berries? Botanically, they’re “aggregate accessory fruits.” The tiny yellow seeds on the outside are the true fruits! Each one is called an achene. The sweet, red part we love is actually the swollen stem end. Isn’t that wild? So when you’re eating this tart, you’re enjoying a delicious piece of horticultural magic.
Gathering Your Tools
You don’t need anything fancy. Here’s your toolkit:
- 1 large mixing bowl
- A 9-inch tart pan with a removable bottom (this is the key for easy serving!)
- Rolling pin
- Fork and whisk
- Measuring cups and spoons or a kitchen scale
- Wire cooling rack
Keeping Your Tart Fresh and Tasty
This tart is best enjoyed the day it’s made, but you can store it well.
Short-Term: Once completely cool, you can cover it loosely with foil or a cake dome and keep it at room temperature for up to 8 hours. If your kitchen is very warm, it’s better to store it in the fridge.
In the Fridge: For longer storage, keep it in the refrigerator for up to 2 days. The crust will soften a bit from the moisture of the filling, but it will still taste wonderful. Let it sit out for 15 minutes before serving to take the chill off.
Freezing is Tricky: I don’t recommend freezing the assembled tart, as the strawberries become mushy. However, you can freeze the unbaked tart shell (after fitting it in the pan) for up to a month. Just bake it from frozen, adding a few extra minutes to the baking time.
My Top Tips for Tart Success
- Cold Butter, Flaky Crust: This cannot be overstated. Use butter straight from the fridge.
- Don’t Overwork the Dough: Mix just until it comes together. Overworking makes it tough.
- Blind Bake for Extra Crispness: If you’re worried about a soggy bottom, bake the empty, pricked shell for 15 minutes before adding the fillings. Let it cool slightly first.
- Go Egg Wash: For a super shiny, golden crust, brush the edges with a beaten egg mixed with a splash of water before baking.
Make It a Showstopper: Presentation Ideas
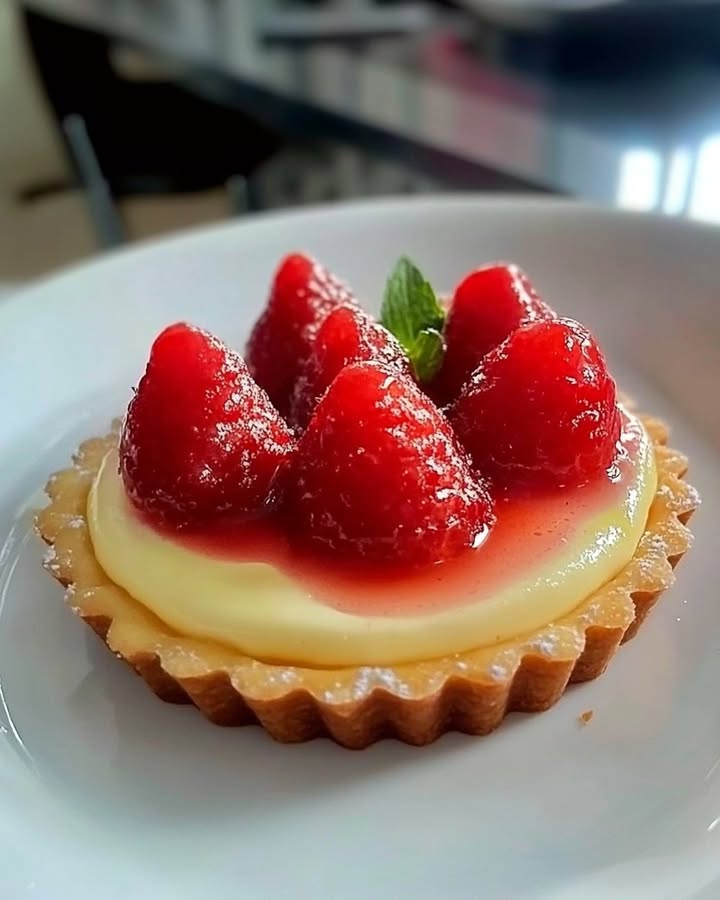
- Dust a light snowfall of powdered sugar over the top just before serving.
- Add fresh mint leaves for a pop of green color.
- Serve with a dollop of lightly sweetened whipped cream or a scoop of vanilla bean ice cream.
- Drizzle individual slices with a balsamic glaze reduction for a gourmet touch.
- Place the tart on a beautiful cake stand for your centerpiece.
Playing with Flavors: 6 Delicious Variations
Once you master the classic, try these fun twists!
- Lemon Zest Delight: Add the zest of one lemon to the dough and the almond cream. It brightens everything up.
- Chocolate-Hazelnut Dream: Swap almond flour for ground hazelnuts and sprinkle mini chocolate chips over the cream before adding berries.
- Summer Berry Medley: Use a mix of raspberries, blueberries, and blackberries alongside the strawberries.
- Dairy-Free Version: Use vegan butter in the crust and coconut cream instead of heavy cream.
- Individual Mini Tarts: Use a muffin tin with removable bottoms to make personal-sized tarts. Reduce baking time to 20-25 minutes.
- Ricotta Herb Savory Twist: Skip the sugar and vanilla. Fill with lemon-ricotta cheese, top with sliced strawberries, and finish with fresh cracked black pepper and basil.
Common Mistakes to Avoid for a Perfect Tart
Mistake 1: Using Warm Butter or Overhandling the Dough
This is the biggest culprit for a tough, hard crust. When the butter gets too warm, it blends completely into the flour. You lose those little butter pockets that steam and create flaky layers during baking. Always start with cold, cubed butter. Work it in with your fingertips quickly. Stop mixing the moment the dough forms a ball. Pat it together, don’t knead it like bread. Your future self will thank you for the tender, melt-in-your-mouth result.
Mistake 2: Skipping the Dough Chill Time
It’s tempting to roll the dough right away. Resist! Chilling lets the gluten relax and re-solidifies the butter. If you roll out warm dough, it will shrink dramatically in the oven and tear easily. Wrap that dough disc and give it a full 30 minutes in the fridge. Use this time to prep your strawberries and clean up. This simple wait makes the rolling process so much smoother and guarantees a better shape.
Mistake 3: Forgetting to Dock the Crust
You pressed the dough perfectly into the pan. It looks great. You put it in the oven. Then it comes out with a big, puffy bubble in the middle. This happens because air gets trapped under the crust as it bakes. The simple fix is “docking.” Use a fork to prick the bottom of the dough all over before adding the filling. These little holes let the steam escape, keeping your crust flat and even, ready to hold all that delicious filling.
Mistake 4: Not Drying the Strawberries Properly
Wet strawberries are the enemy of a crisp crust. They release juice as they bake, which can seep down and make the bottom layer soggy. After washing your berries, take the extra minute to pat them thoroughly dry with paper towels. Let them air dry on a towel while you roll out the dough. This small step protects the wonderful texture of your tart shell.
Mistake 5: Cutting the Tart While It’s Hot
I know, the smell is incredible, and you want to dive right in. But patience is a virtue here. The almond cream filling needs time to set as it cools. If you cut into a hot tart, the filling will ooze out, and the slices will be messy and fall apart. Let the tart cool completely in its pan on a wire rack. This allows everything to firm up, giving you those beautiful, clean, picture-perfect slices.
Your Gourmet Strawberry Tart Questions, Answered
Can I use frozen strawberries for this tart?
You can, but with a very important step. Frozen strawberries must be completely thawed and then very thoroughly drained. I even pat them dry with paper towels to remove as much excess liquid as possible. Using them straight from frozen will add too much water and make your tart filling runny and the crust soggy. For the best texture and flavor, fresh strawberries are always the first choice, but well-drained frozen ones work in a pinch.
My tart crust shrank a lot in the pan. What did I do wrong?
Shrinkage usually happens for two reasons. First, the dough wasn’t chilled long enough. The gluten was too tight and pulled back when heated. Second, you might have stretched the dough while fitting it into the pan. When you roll the dough, it should be slightly larger than your pan. Gently lift and lower it in, letting the edges fall into the corners. Press it in gently without pulling or stretching. Always give it that full 30-minute chill to relax the gluten.
Can I make the dough ahead of time?
Absolutely! This is a great time-saver. You can make the dough disc, wrap it tightly, and keep it in the refrigerator for up to 2 days. You can also freeze it for up to a month. If using frozen dough, let it thaw overnight in the fridge before rolling. You can even roll it out, fit it into the tart pan, and freeze the whole unbaked shell. Just add a few extra minutes when baking from frozen.
What’s the difference between this and a strawberry pie?
Great question! A classic American strawberry pie often has a pre-baked pastry or graham cracker crust filled with a glossy, jelled fresh strawberry topping. This French-inspired gourmet tart is different. The crust is a buttery, sweet shortcrust pastry (pâte sucrée). The filling bakes with the crust, creating a rich almond cream layer that the strawberries nestle into. It’s more of a unified, baked dessert versus a fresh fruit filling in a pre-made shell.
How do I prevent the almond cream from turning greasy?
If your almond cream looks oily or separated after baking, the oven temperature might have been too high, causing the fat to split. Make sure your oven is properly preheated to 350°F (180°C), not hotter. Also, ensure you’re using fresh almond flour and full-fat heavy cream or crème fraîche, which are more stable. Mixing the cream, almond flour, and sugar until just smoothly combined (not over-whipped) also helps.
Can I use a different nut flour instead of almond?
You sure can! Hazelnut flour is a fantastic substitute and pairs beautifully with strawberries. Pecan or walnut flour would also work, giving a deeper, toastier flavor. Just keep the measurement the same (50g). Be aware that different nut flours have different oil contents, so the texture of the cream layer might vary slightly, but it will still be delicious.
Do I need a special tart pan?
For the classic look and easiest serving, a tart pan with a removable bottom is ideal. The fluted sides are pretty, and the loose bottom lets you push the finished tart up and out for a clean transfer to a plate. In a pinch, you can use a regular pie dish. The presentation will be more rustic, and you’ll serve it directly from the dish, but the taste will be just as wonderful.
Why did my crust get soggy on the bottom?
Sogginess is often caused by moisture from the filling. To fight this: 1) Make sure your strawberries are very dry. 2) The almond cream layer acts as a barrier between the juicy fruit and the crust. 3) For extra insurance, you can “blind bake” the crust. Simply bake the empty, pricked shell for 15 minutes at 350°F before adding the fillings. Let it cool for 10 minutes, then proceed with the recipe.
Is there a way to make this recipe less sweet?
Yes, you can adjust the sweetness to your taste. You can reduce the sugar in the crust by about a quarter (from 100g to 75g). In the almond cream, the sugar is mostly for flavor and browning, but you can reduce the vanilla sugar by half if you like. Remember, the tartness of the strawberries balances the sweetness. Taste your berries first—if they are very sweet, you might want less sugar.
Can I add a glaze on top of the strawberries?
You can, but I often find it’s not necessary with this tart. The berries bake into the cream and look gorgeous naturally. If you want a glossy finish, you can warm a tablespoon of apricot jam with a teaspoon of water. Brush this lightly over the strawberries after the tart has cooled. It adds shine and a tiny bit of extra sweetness.
And there you have it! My all-time favorite recipe for a Gourmet Strawberry Tart. It’s more than just following steps; it’s about creating a little moment of joy. It’s about the smell of buttery crust filling your home, the vibrant red of the berries against the golden cream, and the happy silence that falls over the table with that first bite. I hope this recipe becomes a part of your family’s traditions, just like it has for mine. Don’t be afraid to make it your own. Now, go grab those strawberries and get baking. I can’t wait for you to taste it. Happy baking, and bon appétit!
Delightful Puff Horns
Ingredients
Equipment
Method
- Combine flour, sugar, and a pinch of salt in a bowl, whisk together.
- Cut cold butter into small cubes and add to the flour mixture.
- Use your fingertips to rub the butter into the flour until the mixture resembles coarse sand.
- Make a well in the center of the mixture and crack an egg into it; scramble the egg gently and mix in the flour.
- Knead gently into a ball, flatten into a disc, and wrap in plastic wrap to chill for 30 minutes.
- Rinse the strawberries, pat them dry, hull, and slice them as desired; set aside.
- Preheat oven to 350°F (180°C) and lightly flour your countertop.
- Roll out the chilled dough to about 12 inches wide and fit it into a 9-inch tart pan.
- Prick the bottom of the crust with a fork and chill for a few minutes.
- In a bowl, whisk the heavy cream, almond flour, and vanilla sugar until smooth.
- Pour the almond mixture into the tart shell, spreading evenly.
- Arrange the strawberries on top of the almond cream, pressing them lightly.
- Bake for 30-35 minutes until the crust is golden and the cream is set.
- Cool completely in the pan on a wire rack before serving.