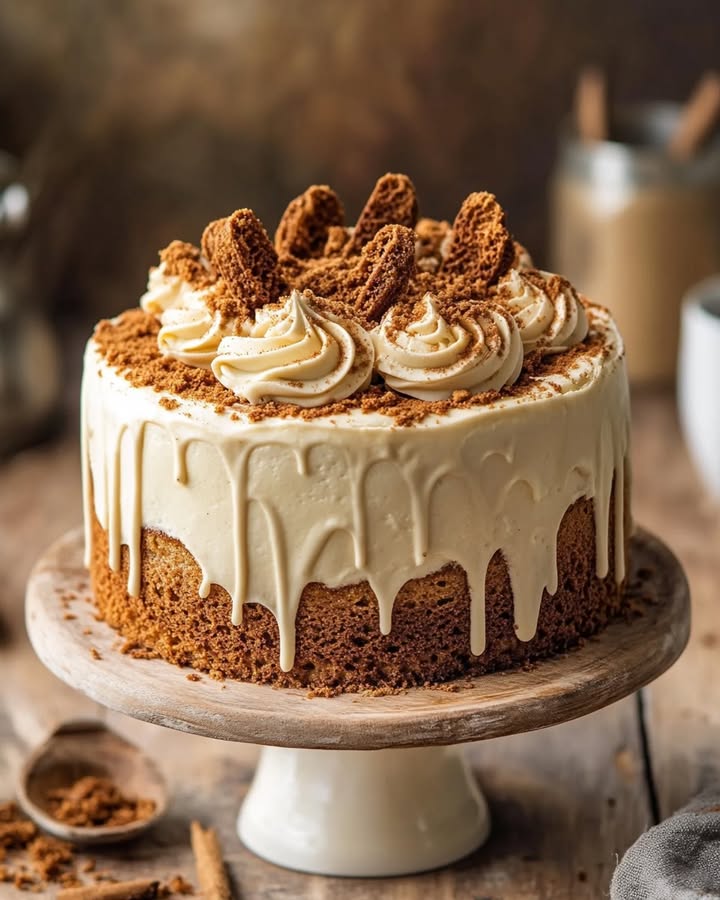
Dreamy Cookie Butter Cake Delight: Your New Favorite Obsession
You know that feeling when you taste something so good, you just have to close your eyes for a second? That’s this cake. My family practically starts hovering in the kitchen the moment I pull out the jar of cookie butter. This Dreamy Cookie Butter Cake Delight is the result of many (very delicious) experiments. I wanted a cake that was moist, flavorful, and packed with that cozy speculoos spice in every single bite. Let me tell you, this one is a total showstopper that’s easier to make than it looks.
From European Cookie to American Cake Sensation
Cookie butter, that magical spread, has its roots in Belgium and the Netherlands. It started as “speculoos,” the spiced cookies often given on St. Nicholas’ Day. The genius idea to grind them into a creamy, spreadable treat took the world by storm. This cake is a love letter to that innovation. It takes the classic American layer cake and gives it a wonderfully European twist. The traditional version uses just the spread, but my modern take uses it twice. We blend it right into the fluffy cake batter and again into the silky frosting. It’s a double dose of dreamy flavor that connects cookie traditions across the ocean.
Why You Will Absolutely Adore This Cookie Butter Dream
First, the flavor is unreal. It’s like autumn spices and caramelized sugar decided to have a party. Second, the texture is pure magic. The cake layers are incredibly tender, and the frosting is so light it’s like eating a cloud. Finally, it’s a baker’s dream because it’s forgiving. Room temperature ingredients do most of the work for you, ensuring a smooth, perfect bake every single time. It’s the kind of dessert that makes people ask for the recipe before they’ve even finished their slice.
When to Serve This Showstopper Cake
This cake turns any event into a celebration. It’s perfect for birthday parties where you want to surprise someone with a unique flavor. Bring it to a potluck and watch it become the star of the dessert table. It’s also my secret weapon for cozy holiday gatherings. A slice with a hot cup of coffee turns a simple Wednesday into a special treat. Honestly, any day that ends with “y” is a good day for this Dreamy Cookie Butter Cake Delight.
Gathering Your Ingredients for Success
Having everything ready makes the baking process a joy, not a chore. Here’s what you’ll need for this delightful layered cake.
For the Cake:
- 2 cups all-purpose flour
- 2 tsp baking powder
- 1/2 tsp salt
- 1 1/2 cups unsalted butter, room temperature
- 2 cups brown sugar
- 4 large eggs, room temperature
- 3/4 cup cookie butter
- 1 cup buttermilk, room temperature
- 2 tsp vanilla extract
For the Frosting:
- 1 1/2 cups unsalted butter, room temperature
- 1 cup cookie butter
- 5 cups powdered sugar
- 1/4 cup heavy cream
- 1 tsp vanilla extract
- Pinch of salt
For Decoration:
- Crushed speculoos cookies
- Drizzle of melted cookie butter
Handy Swaps for Your Pantry
No buttermilk? No problem! Make your own by adding 1 tablespoon of lemon juice or white vinegar to a measuring cup. Then fill it with regular milk until it reaches the 1-cup line. Let it sit for 5 minutes until it curdles slightly. For the cookie butter, any brand of speculoos or biscoff spread will work beautifully. If you’re out of brown sugar, you can use white sugar mixed with 2 tablespoons of molasses for a similar rich flavor.
Creating Your Dreamy Cookie Butter Cake Delight
Let’s get baking! Follow these steps for a flawless, stunning cake.
Step 1: Preheat and Prepare
Start by heating your oven to 350°F (175°C). This gives it time to reach the perfect temperature. While it heats, prepare your three 8-inch cake pans. Grease the sides and bottom with a little butter or baking spray. Then, line the bottoms with a circle of parchment paper. This little trick is a lifesaver. It guarantees your beautiful cake layers will release cleanly without any sticking. Pro tip: Trace the bottom of a pan on parchment paper and cut out three circles for a perfect fit.
Step 2: Whisk Dry Ingredients
In a medium bowl, grab your whisk. Combine the fluffy all-purpose flour, baking powder, and salt. Whisking them together does two important things. It evenly distributes the baking powder so your cake rises uniformly. It also breaks up any little lumps in the flour. You’ll see the mixture become one uniform, pale color. Set this bowl aside for now. We’ll come back to it when we’re ready to bring the batter together.
Step 3: Cream Butter and Sugar
Now for the fun part! In your mixing bowl, place the room-temperature butter and the brown sugar. Beat them together on high speed for a good 3 to 4 minutes. Don’t rush this. You want the mixture to become very pale in color. It should be light, fluffy, and almost look like a smooth frosting. This step incorporates air into the batter. That air is what gives our Dreamy Cookie Butter Cake Delight its wonderful, tender crumb.
Step 4: Add Eggs and Cookie Butter
With the mixer on medium speed, add your eggs one at a time. Let each egg fully blend into the butter mixture before adding the next. This patience ensures a smooth, emulsified batter. After the eggs are in, scrape down the bowl. Then, add that gorgeous, spiced cookie butter and the vanilla extract. Mix until the batter is a beautiful caramel color and perfectly smooth. Your kitchen will already start to smell incredible.
Step 5: Combine Wet and Dry
This is the key to a tender cake. Reduce your mixer speed to low. Add about one-third of your flour mixture and mix until just combined. Follow that with half of the buttermilk. Repeat, ending with the final third of the flour. The batter will be thick, creamy, and speckled with spices. Stop mixing the moment the last flour disappears. Overmixing at this stage can lead to a tough cake, and we want pure delight, not toughness!
Step 6: Bake to Perfection
Divide the lovely, fragrant batter evenly between your three prepared pans. Use a spatula to smooth the tops. Place them in the center of your preheated oven. Bake for 25 to 28 minutes. The cakes are done when they spring back lightly to the touch. A toothpick inserted into the center should come out with a few moist crumbs, not wet batter. The edges will just be pulling away from the sides of the pan.
Step 7: Cool Completely
Let the cakes cool in their pans for exactly 10 minutes on a wire rack. This allows them to firm up just enough. Then, run a knife around the edges. Invert each pan onto the rack and gently lift it away. Peel off the parchment paper circles. Let the layers cool completely before you even think about frosting. Frosting a warm cake is a recipe for a melted, sliding mess. Patience is a virtue here!
Step 8: Make the Fluffy Frosting
While the cakes cool, make the dreamy frosting. In a clean bowl, beat the room-temperature butter and cookie butter together until creamy and smooth. This might take 2-3 minutes. Scrape down the bowl. With the mixer on low, slowly add the powdered sugar, one cup at a time. This prevents a huge sugary cloud from exploding in your kitchen. Once it’s all in, add the heavy cream, vanilla, and a pinch of salt.
Step 9: Whip It Good
Now, turn your mixer up to medium-high speed. Let it whip for a full 3 to 4 minutes. Watch the magic happen. The frosting will become significantly lighter in color. It will grow in volume and become wonderfully fluffy and spreadable. This whipping incorporates air, making the frosting smooth as silk and not too sweet. Give it a taste – it’s heavenly.
Step 10: Assemble the Layers
Place your first cake layer on a serving plate or cake stand. Use about a cup of frosting and spread it evenly over the top with an offset spatula. Add the second layer and repeat. Top with the third layer. Now, apply a thin coat of frosting all over the entire cake – top and sides. This is called a “crumb coat.” It traps any loose crumbs. Chill the cake for 15 minutes to set this layer.
Step 11: Frost and Decorate
After the crumb coat is set, use the remaining frosting to create your final, beautiful coat. Smooth it over the sides and swirl it on top. Don’t worry about it being perfectly smooth. The homemade, “rustic” look is charming! Now, gently press crushed speculoos cookies onto the sides or just around the bottom border. Finally, warm a spoonful of cookie butter and drizzle it artfully over the top. It adds shine and an extra punch of flavor.
Step 12: Set and Serve
For the best slicing experience, pop the finished cake into the refrigerator for about 30 minutes. This lets the frosting firm up just enough. Then, use a sharp knife, warmed under hot water and wiped dry, to cut clean, beautiful slices. Serve each piece with a big smile. Get ready for the compliments to roll in. Chef’s tip: For super clean slices, clean your knife between each cut.
Your Baking Timeline
Planning makes baking easy. Here’s a quick breakdown of the time you’ll need for your Dreamy Cookie Butter Cake Delight.
- Prep Time: 25 minutes (plus ingredient warming time)
- Cook Time: 25-28 minutes
- Cooling Time: 1 hour 30 minutes (crucial!)
- Assembly & Decoration: 20 minutes
- Chilling Time: 30 minutes
- Total Time: About 3 hours (mostly hands-off cooling)
- Servings: 10-12 happy people
A Secret for the Ultimate Flavor
My biggest secret is in the brown sugar. Don’t just scoop it from the bag. Press it firmly into your measuring cup until it’s packed tight. This ensures you get the right amount of moisture and that deep, molasses-like flavor. That rich flavor is the perfect partner for the spiced cookie butter. It creates a depth that makes this cake truly unforgettable.
A Little Cookie Butter Fact
Did you know the famous brand “Biscoff” got its name from a mix of two words? It comes from “Biscuit” and “coffee.” Those spiced cookies were originally served with coffee on Belgian airplanes. So, serving this cake with a cup of coffee is truly keeping with tradition. It’s a match made in heaven.
Tools You’ll Need in Your Kitchen
You don’t need fancy gear. Here’s the simple list:
- Three 8-inch round cake pans
- Parchment paper
- Mixing bowls (medium and large)
- Electric hand mixer or stand mixer
- Whisk and rubber spatula
- Wire cooling rack
- Offset spatula for frosting (a butter knife works in a pinch!)
- Measuring cups and spoons
Keeping Your Cake Delicious Later
This Dreamy Cookie Butter Cake Delight stores beautifully. If your house is cool, you can cover it with a cake dome and leave it on the counter for up to two days. The frosting acts as a seal. For longer storage, the refrigerator is your friend. Cover the cake well with plastic wrap or place it in an airtight container. It will stay fresh and moist for up to 5 days.
Let refrigerated cake slices sit at room temperature for about 20 minutes before serving. This lets the frosting soften and the flavors bloom again. The texture will be just like it was fresh from the assembly.
You can also freeze this cake! Wrap individual slices tightly in plastic wrap, then place them in a freezer bag. Freeze for up to 2 months. Thaw overnight in the refrigerator or for a few hours on the counter. It’s a wonderful treat to have ready for unexpected guests or a sudden craving.
My Best Tips for a Perfect Cake
- Room temperature is key! Cold ingredients don’t blend well. They can cause a curdled batter and a dense cake. Plan ahead.
- Use a kitchen scale if you have one. Measuring flour by weight (280g) is more accurate than by cups.
- Don’t open the oven door during the first 20 minutes of baking. The rush of cold air can make cakes fall.
- Level your cake layers if they dome. Use a serrated knife to slice off the very top for a flat, stable stack.
Making It Look as Good as It Tastes
- Use the back of a spoon to create big, swoopy swirls in the frosting on top.
- Place whole speculoos cookies on top instead of just crumbs for a bold look.
- Serve on a beautiful cake stand with a dusting of powdered sugar.
- Drizzle both cookie butter and melted chocolate for a two-toned effect.
Try These Tasty Variations
Love the base recipe? Try mixing it up with one of these fun twists.
- Chocolate Chip Cookie Butter Cake: Fold 1 cup of mini chocolate chips into the cake batter before baking.
- Cookie Butter Cheesecake Fusion: Swap the frosting for a cookie butter cheesecake layer. Mix cookie butter into a no-bake cheesecake filling and spread it between the layers.
- Single-Layer Snack Cake: Bake the batter in a 9×13 inch pan. Simply frost the top and cut into squares for an easier, casual treat.
- Cookie Butter Cupcakes: Divide the batter into lined muffin tins. Bake for 18-20 minutes and frost each one for perfect individual portions.
- Nutty Delight: Add 3/4 cup of finely chopped toasted hazelnuts or pecans to the cake batter for a wonderful crunch.
- Spiced Apple Cookie Butter Cake: Add 1 tsp of cinnamon and 1/2 cup of finely chopped dried apples to the batter for a fall-inspired flavor.
Common Mistakes to Avoid
Avoid these simple pitfalls for a perfect cake every time.
Mistake 1: Using Cold Ingredients
This is the number one reason cakes turn out dense or curdled. Cold butter and eggs don’t emulsify properly with the sugar. Your batter will look weird and separate. This leads to a heavy, greasy cake texture. Always set your butter, eggs, and buttermilk out at least an hour before you start baking. Your ingredients should feel cool to the touch, not cold.
Mistake 2: Overmixing the Batter
Once you add the flour, you must mix with a gentle hand. Overmixing develops the gluten in the flour. Too much gluten makes your cake tough and chewy, like bread. We want tender crumbs, not a workout for your jaw! Mix only until the last streak of flour disappears into the batter. A few small lumps are perfectly fine.
Mistake 3: Frosting a Warm Cake
I know you’re excited. But frosting a cake that is even slightly warm is a disaster waiting to happen. The heat will melt the butter in your frosting. Your beautiful layers will start to slide apart. Crumbs will get everywhere in your frosting coat. Be patient. Let the layers cool completely on a wire rack. This can take over an hour. Use this time to make your frosting!
Mistake 4: Not Measuring Flour Correctly
Scooping flour directly from the bag with your measuring cup packs it down. You end up with way more flour than the recipe needs. This makes your cake dry and dense. The right way is to “fluff” the flour in its container first. Then, spoon it lightly into your measuring cup. Finally, level it off with the flat edge of a knife. For true accuracy, a kitchen scale is your best baking friend.
Your Cookie Butter Cake Questions, Answered
What is cookie butter, and where can I find it?
Cookie butter is a smooth, spreadable paste made from crushed speculoos cookies. These are spiced, caramelized biscuits from Belgium. It tastes like gingerbread mixed with caramel. You can find it in most major grocery stores now. Look near the peanut butter or in the international foods aisle. Popular brands are Lotus Biscoff and Trader Joe’s Speculoos Cookie Butter.
Can I make this cake ahead of time?
Absolutely! You have a few great options. You can bake the cake layers up to two days in advance. Let them cool completely, then wrap each layer tightly in plastic wrap. Store them at room temperature. You can also make the frosting ahead. Keep it in an airtight container in the fridge for up to 3 days. Let it come to room temperature and re-whip it before using. You can even assemble the whole cake a day ahead. Just store it covered in the fridge.
My frosting is too runny. How can I fix it?
A runny frosting usually means your butter was too soft or the kitchen was very warm. Don’t panic! First, try chilling the whole bowl of frosting in the refrigerator for 20-30 minutes. Then, whip it again with your mixer. If it’s still too soft, you can add a little more powdered sugar, 1/4 cup at a time, until it thickens up. Just be careful not to make it too sweet.
Can I use a different size pan?
Yes, but your baking time will change. For two 9-inch pans, bake for 30-35 minutes. For a 9×13 inch sheet cake, bake for 35-40 minutes. For cupcakes, fill liners 2/3 full and bake for 18-22 minutes. Always use the toothpick test to check for doneness, no matter the pan size.
Why did my cake layers sink in the middle?
A sunken cake usually points to leavening issues. Your baking powder might be old and lost its power. Always check the expiration date. Another common cause is opening the oven door too early. The sudden temperature drop shocks the delicate cake structure. Wait until at least the minimum bake time is up before you peek. Underbaking can also cause sinking, so make sure that toothpick comes out clean.
Can I freeze this cake?
You sure can! Freeze the unfrosted cake layers individually. Wrap them tightly in plastic wrap, then in foil. They’ll keep for up to 2 months. Thaw overnight in the refrigerator. You can also freeze the frosted whole cake. Freeze it uncovered on a tray until the frosting is solid. Then wrap the whole thing tightly in plastic wrap. Thaw in the refrigerator overnight before serving.
What can I use instead of buttermilk?
If you don’t have buttermilk, make a quick buttermilk substitute. Add 1 tablespoon of white vinegar or lemon juice to a liquid measuring cup. Fill the cup with regular milk until it reaches the 1-cup line. Stir and let it sit for 5-10 minutes. It will curdle and thicken slightly, mimicking the acidity and texture of real buttermilk.
Is there a way to make this cake nut-free?
Most standard cookie butter is nut-free. It is made from cookies (wheat flour, spices, sugar, oil). However, always check the label on your specific jar to be safe. Some brands may be processed in facilities with nuts, or have specialty versions with nuts added. If you need it to be nut-free, confirm with the manufacturer.
The brown sugar is hard as a rock. What do I do?
Hard brown sugar happens to everyone. To soften it quickly, place it in a microwave-safe bowl with a damp paper towel draped over the top. Microwave in 20-second bursts, breaking it up with a fork in between. You can also place a slice of bread or a couple of apple wedges in the bag of sugar overnight. The sugar will absorb the moisture from the bread or apple and soften up.
How do I get those super clean cake slices?
The secret is a hot, clean knife. Fill a tall glass with very hot water. Before your first cut, dip your sharp slicing knife into the water. Wipe it completely dry with a clean towel. Make your slice in one smooth, gentle motion. Clean the knife in the hot water and dry it again before every single cut. This gives you stunning, professional-looking slices every time.
This Dreamy Cookie Butter Cake Delight is more than just a dessert. It’s a conversation starter, a comfort food, and a guaranteed smile-maker. It might look fancy, but the steps are simple and straightforward. The most important ingredient is the love you put into making it. So preheat that oven, soften your butter, and get ready to create something truly special. Your friends and family are going to be so impressed. Happy baking!
Deep Dish Delight
Ingredients
Equipment
Method
- Preheat the oven to 350°F (175°C) and prepare three 8-inch cake pans.
- Whisk together flour, baking powder, and salt in a medium bowl.
- Cream the butter and brown sugar in a mixing bowl until light and fluffy.
- Add eggs one at a time, mixing well after each addition, then add the cookie butter and vanilla extract.
- Gradually mix in the dry ingredients and buttermilk, alternating until just combined.
- Divide the batter among the prepared pans and smooth the tops.
- Bake for 25 to 28 minutes or until a toothpick comes out with a few moist crumbs.
- Cool the cakes in the pans for 10 minutes, then invert onto a wire rack to cool completely.
- Beat the butter and cookie butter for the frosting until smooth, then gradually add powdered sugar, heavy cream, vanilla, and salt.
- Whip the frosting until light and fluffy.
- Assemble the cake by layering it with frosting between each layer and applying a crumb coat.
- Frost the outside of the cake, decorate with crushed speculoos cookies and drizzle melted cookie butter on top.
- Chill the cake for 30 minutes before slicing and serving.