Cococus Cold Cake: Your New Favorite Tropical Escape
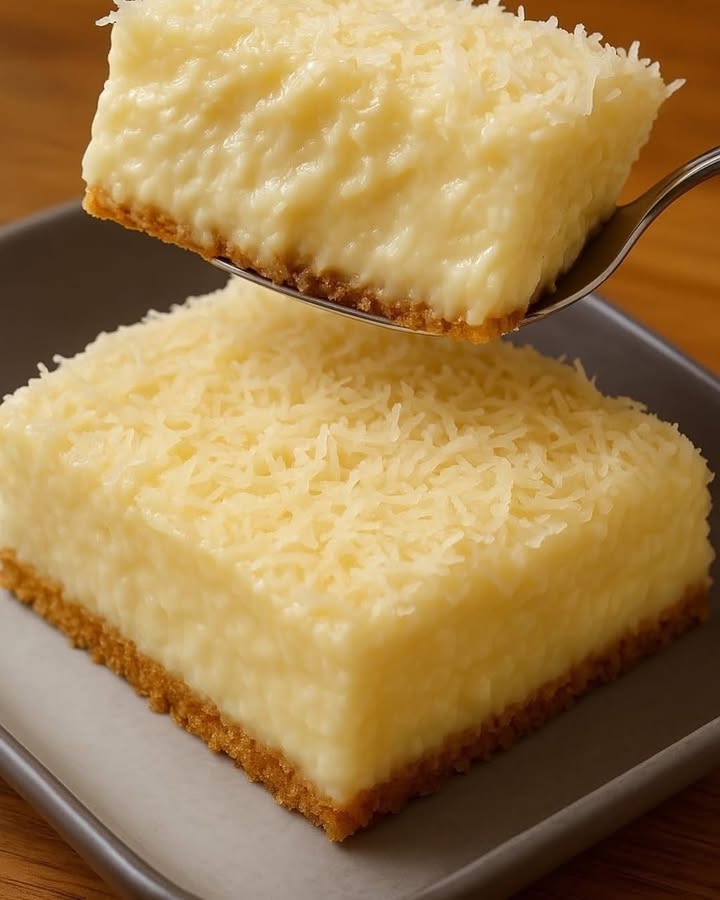
You know that feeling when it’s so hot outside that even thinking about turning on the oven makes you sigh? I was there last summer, desperate for a dessert that felt like a cool breeze. That’s when I first tried the Cococus Cold Cake. The moment that impossibly creamy, coconutty bite hit my tongue, I was teleported to a beach. This isn’t just a cake; it’s a textural wonder—wet, lush, and so refreshing it feels like a secret. I knew I had to perfect the recipe, and now, it’s the dessert my family begs for. It’s the most creamy and refreshing dessert you will try today, and I promise, it’s love at first bite.
A Slice of Tropical Tradition
This delightful cake, known as *Bolo de Coco Gelado* in Brazil, is a staple in many Latin American homes. It’s a beautiful blend of simple baking and brilliant technique. The magic really happens after the cake comes out of the oven. Soaking a warm, humble sponge with sweetened coconut milk is a tradition born from a love of moist, flavorful desserts that can stand up to hot climates. My version is inspired by a dear friend’s grandmother, who would make it for every celebration, claiming it “fed the soul and cooled the spirit.” It’s a modern take on a classic, where the convenience of canned coconut milk meets the timeless joy of a homemade, syrup-soaked treat.
Why You’ll Adore This Coconut Cold Cake
Let me count the ways! First, the texture is pure magic—somehow both wonderfully wet and perfectly sliceable. The flavor is pure, unadulterated coconut, from the cake to the syrup to the fluffy topping. It’s also shockingly easy. You basically mix, bake, soak, and chill. No fancy frosting skills required. But the best part? It must be made ahead. This is your secret weapon for stress-free entertaining. While other desserts demand last-minute fuss, this one just gets better and better as it rests in the fridge, leaving you free to enjoy your own party.
When to Serve Your Tropical Masterpiece
This cake is a star at any gathering. It’s a guaranteed hit at summer barbecues and pool parties. I love bringing it to potlucks because it travels beautifully right in its dish. It’s elegant enough for a birthday or Mother’s Day brunch, yet simple enough for a weeknight treat when you need a sweet escape. Honestly, any day that ends with “y” is a good day for Cococus cake.
Gathering Your Ingredients
Let’s gather our tropical treasure! You’ll need two sets of ingredients: one for the cake and one for the dreamy soak.
For the Cake:
- 4 large eggs
- 1 cup of whole milk
- 1 bottle (200 ml) of coconut milk
- 1 cup of granulated sugar
- 2 sticks (1 cup) of melted butter, slightly cooled
- 2 cups of all-purpose wheat flour
- 1 tablespoon of baking powder
- 100g (about 1 cup) of grated coconut
For the Soaking Syrup (Calda):
- 1 can (14 oz) of sweetened condensed milk
- 200 ml of coconut milk
- 1/2 cup of whole milk
Handy Substitutions for Your Pantry
No stress if you’re missing something! Here are my tried-and-true swaps:
- Coconut Milk: Use full-fat for the creamiest result. “Lite” coconut milk will work but will be less rich.
- Grated Coconut: Sweetened or unsweetened both work. I prefer unsweetened to control the sugar level.
- Dairy Milk: Any fat percentage is fine. For a dairy-free version, use almond or oat milk throughout.
- Butter: A neutral oil like vegetable or coconut oil can be used in a pinch.
Creating Your Coconut Dream Cake, Step-by-Step
Step 1: Blend the Wet Goodness
Grab your blender! Crack in the 4 eggs. Pour in the regular milk and that lovely bottle of coconut milk. Add the sugar and the melted butter. Now, let it rip! Blend on high for a good minute or two until the mixture is completely smooth, frothy, and homogenous. You should see a pale, creamy liquid. This is the base of our incredibly moist cake. Pro tip: Let the melted butter cool just a bit so it doesn’t start cooking the eggs when you blend them.
Step 2: Bring in the Dry Team
In a separate bowl, whisk together your flour and baking powder. This aerates them and prevents lumps. Now, with the blender on a low setting, gradually add the flour mixture through the opening in the lid. Stop as soon as the last bit of flour is incorporated. You want to avoid overmixing. Finally, stir in the grated coconut by hand with a spatula. The batter will be thin, but that’s perfect! It bakes up light and ready to absorb all that syrup.
Step 3: Bake to Golden Perfection
Preheat your oven to 350°F (180°C). Pour the batter into a well-greased 9×13 inch baking dish. Slide it into the oven. The smell after 20 minutes is divine. Bake for 35-40 minutes. You’ll know it’s done when the top is a beautiful golden brown and a toothpick inserted in the center comes out clean.
Step 4: Whisk the Liquid Gold (The Syrup)
While the cake bakes, make the syrup. It’s so easy! Simply whisk together the entire can of condensed milk, the coconut milk, and the regular milk in a saucepan or a bowl. You can do this by hand—no cooking needed. You’re creating a sweet, coconuty elixir that will transform the cake.
Step 5: The Soaking Ritual
Here comes the fun part! As soon as the cake comes out of the oven, use a skewer or the tines of a fork to poke holes all over the hot surface. Go crazy—this is how the syrup gets down deep. Now, slowly and evenly, pour the syrup all over the hot cake. Listen to that satisfying sizzle as it gets sucked right in. Watch the cake eagerly drink up every last drop.
Step 6: The Final Flourish and Chill
Immediately after pouring the syrup, sprinkle the top evenly with the remaining 100g of grated coconut. This creates that iconic fluffy, textured topping. Now, the most important step: walk away. Let the cake cool completely on the counter, then cover it and refrigerate for at least 2 hours, but overnight is truly best. This chilling time allows the cake to set and the flavors to marry into that famous wet, creamy texture.
Your Cake Timeline
Let’s plan your success!
- Prep Time: 15 minutes
- Bake Time: 40 minutes
- Soaking & Cooling Time: 30 minutes
- Chill Time (Essential!): 2 hours minimum (overnight ideal)
- Total Time: About 3 hours 25 minutes (plus chilling)
- Yield: 12 generous portions
- Calories: Approximately 320 kcal per serving
Chef’s Secret for Ultimate Creaminess
My secret? Use full-fat coconut milk for both the cake and the syrup, and don’t shake the can before opening for the syrup. Scoop out some of the thicker, creamy part that rises to the top to mix with the condensed milk. This adds an extra layer of luxurious, creamy fat that makes the texture absolutely unforgettable.
A Sweet Bit of Coconut Trivia
Did you know the coconut isn’t actually a nut? It’s a drupe, a fruit with a hard stone inside—like a peach or a plum! The word “coconut” itself comes from the 16th-century Portuguese and Spanish word “coco,” meaning “grinning face,” because the three indentations on the shell look like a smiling head. So really, you’re baking a happy, tropical fruit into your dessert!
Essential Kitchen Tools
You likely have everything you need:
- Blender or electric mixer
- 9×13 inch baking pan
- Mixing bowls and whisk
- Measuring cups and spoons
- Spatula
- Toothpick or skewer for testing
Storing Your Perfect Cococus Cake
This cake is a dream to store. Simply keep it covered with plastic wrap or in an airtight container in the refrigerator. The cold environment is key to maintaining its signature wet-yet-firm texture.
It will stay perfectly delicious for up to 4-5 days. In fact, many people think it tastes even better on the second or third day as the flavors continue to meld.
I do not recommend freezing this cake. The freezing process can disrupt the delicate, creamy emulsion of the syrup and cake, leading to a grainy or separated texture when thawed. It’s best enjoyed fresh from the fridge.
Tips & Tricks for Coconut Success
- Poke Liberally: Don’t be shy with the holes! More holes mean more even syrup distribution for every bite.
- Patience is a Virtue: That chill time is non-negotiable. It allows the cake to fully absorb the syrup and become sliceable.
- Serve it Cold: Use a sharp knife dipped in hot water for clean slices. Serve directly from the fridge.
- Toast for Twist: For a nutty flavor, toast the grated coconut for the topping in a dry pan before sprinkling.
How to Present Your Masterpiece
- Serve each square with a thin slice of fresh pineapple or a few mango chunks on the side.
- A dollop of freshly whipped cream or a scoop of vanilla ice cream takes it over the top.
- Garnish with a mint leaf or edible flower for a pop of color.
- For a party, cut into small, bite-sized cubes and serve with toothpicks as a finger-food dessert.
6 Delicious Variations to Try
Once you master the basic Cococus, the world is your oyster (or coconut!).
- Tropical Fruit Cococus: Add 1/2 cup of crushed pineapple (well-drained) to the cake batter.
- Chocolate-Coconut Swirl: Swirl 1/2 cup of chocolate sauce into the batter before baking for a marbled effect.
- Piña Colada Style: Substitute 1/2 cup of the milk in the syrup with pineapple juice.
- Vegan Delight: Use flax eggs (1 tbsp ground flax + 3 tbsp water per egg), vegan butter, and a vegan condensed milk alternative.
- Lime Zest Zing: Add the zest of two limes to the cake batter for a bright, citrusy note.
- Nutty Crunch: Sprinkle a layer of chopped macadamia nuts or pecans along with the coconut on top.
Common Mistakes to Avoid
Mistake 1: Skipping the Holes or Not Making Enough
This is the biggest mistake! If you don’t poke enough holes, the syrup will just sit on top. The cake underneath will be dry. You need to create channels for that liquid gold to seep down into every crumb. Use a skewer or fork and poke all the way down to the bottom of the pan, about every half-inch. It should look like a happy little polka-dot pattern when you’re done.
Mistake 2: Pouring the Syrup on a Cold Cake
The cake must be hot when you pour the syrup. A hot cake is more porous and absorbent. The heat helps pull the syrup deep into its structure. If you let the cake cool first, it won’t drink up the syrup properly. You’ll end up with a soggy top layer and a dry base. Always have your syrup ready to go the moment the cake comes out of the oven.
Mistake 3: Not Chilling Long Enough
Impatience is the enemy of texture here. This cake needs time in the fridge to set. The cold temperature firms up the soaked cake, making it sliceable and giving it that perfect “wet” but not messy consistency. Cutting into it after only an hour will be a sloppy disaster. Plan ahead—make it the day before you need it. Trust me, the wait is worth it.
Mistake 4: Overmixing the Batter
Once you add the flour, you need a gentle hand. Overmixing develops the gluten in the flour. This can make your cake tough and chewy instead of soft and tender. Mix just until you see no more dry flour streaks. A few small lumps are totally fine. They will bake out.
Your Cococus Cold Cake Questions Answered
Can I use coconut cream instead of coconut milk?
I wouldn’t recommend it for this specific recipe. Coconut cream is much thicker and richer, which could throw off the liquid balance in both the cake and the syrup. Using it in the cake could make it too dense, and in the syrup, it might not pour or absorb properly. Stick with coconut milk for the right consistency and classic result.
Why is my cake soggy on the bottom?
A soggy bottom usually means one of two things. First, you might have underbaked the cake. Make sure a toothpick comes out clean from the center. Second, you may have poured on too much syrup. While it’s tempting to use it all, if your cake didn’t bake up high enough, it can’t absorb the full amount. Next time, pour slowly and stop if you see a pool of syrup that isn’t soaking in after a minute or two.
Can I make this cake gluten-free?
Absolutely! I’ve had great success using a 1-to-1 gluten-free all-purpose flour blend. Make sure the blend contains xanthan gum, which helps with structure. The process is exactly the same. The texture might be slightly more delicate, but it will be just as delicious and soak up the syrup wonderfully.
How do I know when the cake is perfectly baked?
Look for three signs: First, the top should be a uniform golden brown. Second, the edges will start to pull slightly away from the sides of the pan. Third, and most importantly, insert a toothpick into the center of the cake. It should come out with just a few moist crumbs attached, or completely clean. If it has wet batter, it needs more time.
My syrup seems too thick. Is that okay?
It should be pourable but creamy. If it’s too thick to pour easily (this can happen if your condensed milk was very cold), just gently warm the mixture in a saucepan over low heat, stirring constantly, until it loosens up. Let it cool for a minute before pouring it over the hot cake. Don’t make it hot, just fluid.
Can I add rum or another liquor to the recipe?
For an adult version, a splash of rum, coconut rum, or even malibu in the soaking syrup is fantastic! Add about 2-3 tablespoons to the syrup mixture. The alcohol will mostly bake/cook off, leaving just a wonderful flavor behind. It’s a perfect touch for a dinner party dessert.
What’s the best way to cut clean slices?
Use a sharp, thin-bladed knife. Run it under very hot water, wipe it dry, and then make your cut. The heat helps the knife glide through the sticky coconut topping and the creamy cake without dragging. Wipe and reheat the knife between each cut for the cleanest, most beautiful slices.
How long does it really need to chill?
The absolute minimum is 2 hours, but for the ideal texture where every bite is cool, set, and perfectly blended, I strongly recommend chilling it overnight. This isn’t just a suggestion—it truly transforms the cake and makes serving a breeze. Think of the chill time as part of the cooking process.
Can I double the recipe?
You sure can, for a crowd! Simply double all ingredients. You’ll need to bake it in two separate 9×13 pans, or in a very large sheet pan. Keep an eye on the baking time; it may need a few extra minutes if the batter is deeper in a larger pan. Always use the toothpick test to be sure.
Is it supposed to be this wet?
Yes! This is a “wet” cake by design, similar to a tres leches cake. It should be incredibly moist and creamy, not dry and fluffy like a traditional birthday cake. When you press a spoon into it, it should give easily and feel lush. If it’s swimming in liquid on the plate, it might be under-chilled. If it’s dry, it may not have absorbed all the syrup properly.
Ready for Your Taste of the Tropics?
There you have it! The secret to the most creamy, refreshing, and downright addictive dessert in your repertoire. This Cococus Cold Cake is more than just a recipe; it’s a experience. It’s the joy of simple baking, the magic of a good soak, and the bliss of a cold, tropical treat on a hot day. I can’t wait for you to try it and see your family’s faces light up. So go on, gather your ingredients, and get ready for the compliments to roll in. Don’t forget to make it a day ahead—your future self will thank you! Now, who’s ready for a slice?
Strawberry Shortcake Delight
Ingredients
Equipment
Method
- Blend the eggs, whole milk, coconut milk, sugar, and melted butter until smooth.
- Whisk together flour and baking powder in a separate bowl.
- Gradually add the flour mixture to the blender on low speed and mix until just combined, then fold in grated coconut.
- Preheat the oven to 350°F (180°C) and pour the batter into a greased 9x13 inch baking dish.
- Bake for 35-40 minutes until golden brown and a toothpick comes out clean.
- While the cake bakes, whisk together condensed milk, coconut milk, and whole milk for the syrup.
- Poke holes all over the hot cake, then pour the syrup evenly over it while it's still warm.
- Sprinkle the top with grated coconut and let it cool completely, then refrigerate for at least 2 hours (overnight is ideal).