The Ultimate Fudgy Brownies: Your Search for Crackly-Top Perfection Ends Here!
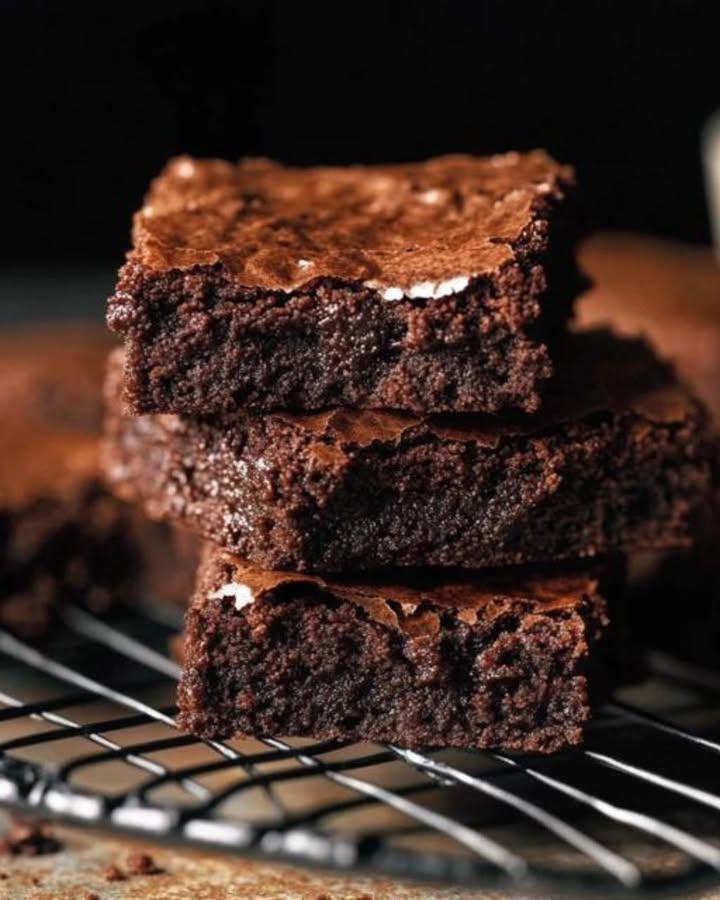
You know that feeling when you bite into a brownie and it’s just… perfect? Deeply chocolaty, impossibly fudgy, with that irresistible shiny, crackly top that promises pure joy. That’s the feeling we’re chasing today. Forget the boxed mix! My quest for the perfect homemade brownie ended right here, in my own kitchen, with this simple, glorious recipe. They’re the ones I make for my book club, for bake sales, and honestly, just for me on a Wednesday. Let’s bake some happiness.
A Brief, Delicious History of the Brownie
The story of the brownie is wonderfully American. Legend says it was born from a happy accident in a Chicago kitchen around 1893. A chef, baking for a ladies’ luncheon, supposedly forgot to add baking powder to her chocolate cake. The result? A dense, fudgy bar that was an instant hit. Whether that tale is true or not, the brownie quickly became a staple. From that first dense square to the modern debate of “cakey vs. fudgy,” it’s a treat that’s all about comfort. This recipe proudly lands on the ultra-fudgy side of history.
Why You’ll Fall in Love With This Brownie Recipe
This recipe is a winner for so many reasons. First, it comes together in one bowl with simple ingredients you likely have right now. The method—melting the butter and sugar together—is the magic secret to that iconic crackly crust. They bake up rich but not overly sweet, with an intense chocolate flavor. Best of all, they are incredibly forgiving. Even on a hectic day, these brownies bring a sense of calm, delicious accomplishment.
When to Whip Up a Batch of Fudgy Brownies
Honestly, any time is a good time for brownies! But they truly shine at certain moments. Pack them in a lunchbox for a sweet surprise. Bring a plate to a potluck—they always disappear first. They’re the perfect, comforting dessert for a family movie night. I also love gifting them in a cute box tied with a ribbon. A homemade brownie is more than a treat; it’s a little edible hug.
Gathering Your Ingredients for Fudgy Brownies
Let’s gather our tools for chocolatey success. Here’s what you need:
- 1 stick (115g) unsalted butter
- 100g dark brown sugar, packed
- 100g granulated sugar
- 2 large eggs
- 1 teaspoon pure vanilla extract
- 60g all-purpose flour
- 40g unsweetened cocoa powder (I use Dutch-processed for extra richness)
- ½ teaspoon salt
- ¼ teaspoon baking soda
- 4 oz (about ⅔ cup) semisweet chocolate chips (optional, but highly recommended!)
Easy Ingredient Swaps & Substitutions
Out of something? No worries. Here are some swaps that work beautifully:
- Butter: You can use salted butter. Just omit the extra ½ teaspoon of salt in the recipe.
- Sugars: You can use all granulated sugar if you don’t have brown sugar. The brown sugar just adds a lovely, subtle molasses note.
- Flour: For a gluten-free version, use a 1:1 gluten-free all-purpose flour blend.
- Chocolate Chips: Feel free to use chopped dark chocolate bars, milk chocolate chips, or even white chocolate chips. Walnuts or pecans are also a classic add-in.
How to Make Perfect Fudgy Brownies: Step-by-Step
Ready to create some magic? Follow these simple steps for the best homemade brownies.
Step 1: Prep Your Pan and Oven
Start by preheating your oven to 350°F (175°C). This gives it time to reach the perfect, steady temperature for even baking. Next, line an 8×8 inch baking pan with parchment paper. Let the paper hang over two opposite sides. This creates “handles” that make it super easy to lift the whole brownie slab out later. No more wrestling with a stuck pan! A little spritz of cooking spray on the pan under the paper helps it stay put.
Step 2: Melt and Mix the Butter and Sugars
In a medium saucepan, melt the butter over low heat. Once it’s fully melted and just starting to bubble a little, take it off the heat. Now, immediately whisk in the dark brown and granulated sugars. You’ll whisk for a good minute or two. The goal is to dissolve the sugars into the warm butter. The mixture will look thick, glossy, and caramel-like. This step is the secret to that shiny, crackly top we all adore!
Step 3: Incorporate the Eggs and Vanilla
Let the butter-sugar mixture cool for a minute so you don’t scramble the eggs. Then, crack in both eggs and add the vanilla extract. Whisk vigorously! You want to mix until the batter is smooth, glossy, and well-blended. You should see it pull together beautifully. This also helps add air, contributing to that perfect texture. Pro tip: Using room-temperature eggs helps them incorporate more smoothly.
Step 4: Gently Fold in the Dry Ingredients
Now, place a sieve over your bowl. Add the flour, cocoa powder, salt, and baking soda into the sieve. Sift them directly into the wet ingredients. This prevents lumps and ensures everything is evenly combined. Put the whisk away and grab a spatula. Gently fold the dry ingredients into the wet. Stop as soon as you no longer see streaks of flour. A few tiny lumps are okay! Overmixing is the enemy of fudgy brownies.
Step 5: The Final Flourish – Chocolate Chips!
This is the fun part. If you’re using chocolate chips (and you really should), pour them into the batter. Give it just a few gentle folds to distribute them evenly. The batter will be thick, dark, and incredibly tempting. Try to resist eating it raw! Those pockets of melted chocolate in the baked brownie make every bite a delightful surprise.
Step 6: Bake to Fudgy Perfection
Scrape every last bit of that glorious batter into your prepared pan. Use your spatula to spread it into an even layer, getting it into all the corners. Slide the pan into your preheated oven. Bake for 25-30 minutes. Start checking at 25 minutes. The brownies are done when the top is shiny and crackly, and a toothpick inserted into the center comes out with a few moist crumbs attached—not wet batter. Remember, they will continue to cook as they cool!
Step 7: The Crucial Cooling Step
This is the hardest part: patience! Let the brownies cool in the pan on a wire rack for at least 10-15 minutes. Then, use the parchment paper handles to lift the entire block out. Let it cool completely on the rack before you even think about slicing. Cutting into warm brownies is a messy, crumbly affair. Waiting ensures you get those clean, sharp squares. I promise, it’s worth the wait.
Fudgy Brownie Recipe Timings
Here’s a quick breakdown of your time investment for these incredible homemade brownies:
- Prep Time: A swift 10 minutes
- Cook Time: 25-30 minutes
- Cooling Time: Approximately 1 hour (for clean slicing)
- Total Time: About 1 hour 40 minutes (mostly hands-off cooling)
My Chef’s Secret for the Best Brownies
After testing dozens of recipes, here’s my non-negotiable secret: sift your cocoa powder. Cocoa is notoriously clumpy. Sifting it with the flour ensures it blends seamlessly into the batter without any dry, bitter pockets. It creates that smooth, intense chocolate flavor in every single bite. It’s a tiny extra step that makes a huge difference.
A Fun Fact About Your Ingredients
That dark brown sugar you’re using does more than just sweeten! The molasses in it is slightly acidic. When combined with the baking soda in the recipe, it creates a tiny bit of lift and a wonderful, chewy texture. It’s also responsible for that beautiful, deep golden color and a hint of rich, toffee-like flavor in the background. Science is delicious!
Equipment You’ll Need
You don’t need any fancy gadgets for this recipe. Here’s the short list:
- 8×8 inch square baking pan
- Parchment paper
- Medium saucepan
- Whisk and silicone spatula
- Wire cooling rack
- Measuring cups and spoons or a kitchen scale (a scale is great for accuracy!)
How to Store Your Homemade Brownies
Once completely cool, store your brownies in an airtight container at room temperature. Layer them between sheets of parchment paper if you’re stacking them. They will stay deliciously fresh and fudgy for up to 5 days this way.
If you want to keep them longer, brownies freeze beautifully. Wrap the whole slab or individual squares tightly in plastic wrap, then place them in a freezer bag or airtight container. They can be frozen for up to 3 months.
To enjoy frozen brownies, simply let them thaw at room temperature for an hour or two. For a warm, gooey treat, pop a frozen square in the microwave for 15-20 seconds. It’s like having fresh-baked brownies anytime!
Tips and Advice for Brownie Success
- Do not overbake! Better to err on the side of slightly underdone. They firm up as they cool.
- For super clean slices, use a plastic knife. It sounds odd, but it cuts through the sticky fudginess without tearing.
- Let all your ingredients, especially the eggs, come to room temperature before you start. This helps everything emulsify and blend smoothly.
Pretty Presentation Ideas
Make your brownies look as good as they taste! Dust them with a light shower of powdered sugar or cocoa powder. Serve them warm with a scoop of vanilla ice cream and a drizzle of hot fudge sauce. For a fancy touch, add a few fresh raspberries and a sprig of mint on the plate.
Delicious Brownie Variations to Try
Once you master this base, the fun begins! Here are six tasty twists:
- Salted Caramel Brownies: Swirl ½ cup of thick salted caramel sauce into the batter before baking.
- Peanut Butter Swirl Brownies: Drop spoonfuls of ½ cup peanut butter onto the batter and swirl with a knife.
- Mint Chocolate Brownies: Add 1 teaspoon of peppermint extract with the vanilla, and use Andes mint pieces instead of chocolate chips.
- Orange Zest Brownies: Add the zest of one orange to the butter-sugar mixture for a bright, citrusy note.
- Espresso Brownies: Dissolve 1 tablespoon of instant espresso powder into the melted butter for a deep, mocha flavor.
- Rocky Road Brownies: After baking, top warm brownies with mini marshmallows, chopped nuts, and extra chocolate chips. Broil for 1-2 minutes until golden.
Common Mistakes to Avoid When Making Brownies
Mistake 1: Overmixing the Batter After Adding Flour
This is the #1 way to end up with tough, cakey brownies. Once you add the flour, gluten development begins with every stir. Too much mixing makes the gluten strong, leading to a chewy, bread-like texture. To avoid this, sift your dry ingredients into the wet. Then, use a folding motion with a spatula. Mix just until the last streaks of flour disappear. A few small lumps are perfectly fine and promise a more tender bite.
Mistake 2: Overbaking and Relying Only on the Toothpick Test
We want fudgy, not dry! If you bake your brownies until a toothpick comes out completely clean, they are already overdone. They will continue to cook from residual heat as they cool. The perfect sign is a shiny, crackly top and a toothpick that shows a few moist, fudgy crumbs clinging to it. Start checking at the 25-minute mark. It’s better to pull them out a minute early than a minute late.
Mistake 3: Cutting Into Warm Brownies
I know the temptation is real. The smell is intoxicating. But if you cut into your brownie slab while it’s still warm, you’ll get a gooey, crumbly mess. The structure hasn’t had time to set. Let the brownies cool in the pan, then lift them out to cool completely on a rack. This patience rewards you with neat, clean squares that hold their shape. For the absolute cleanest cuts, chill the whole slab in the fridge for an hour first.
Mistake 4: Using Cold Eggs Straight From the Fridge
Cold eggs don’t blend as easily into your warm butter-sugar mixture. This can cause the batter to look slightly curdled or separate. It can also make it harder to get that smooth, emulsified texture needed for a crackly top. A simple fix: take your eggs out about 30 minutes before you start baking. If you forget, place them in a bowl of warm water for 5-10 minutes. Room-temperature eggs incorporate beautifully for a silky batter.
Your Fudgy Brownie Questions Answered
Can I double this brownie recipe?
Absolutely! Doubling the recipe works great. Simply use a 9×13 inch baking pan instead of the 8×8 inch. Keep a close eye on the baking time, as it may need a few extra minutes. Start checking around the 30-minute mark. All the other instructions and ingredient ratios stay exactly the same. This is my go-to for when I need a bigger batch for a party or gathering.
Why didn’t my brownies get a shiny, crackly top?
The shiny top comes from properly dissolving the sugar into the hot, melted butter. Make sure you whisk the sugars into the butter vigorously and for a full minute while the butter is still quite warm. This step creates a smooth, glossy mixture that sets up into that beautiful crust as it bakes. Also, ensure your baking soda is fresh, as it helps with the chemical reaction needed for the top to form.
What’s the difference between Dutch-process and natural cocoa powder?
This is a great baking question! Natural cocoa powder is acidic and tangy. Dutch-process cocoa is treated to neutralize the acids, making it milder and richer in color. This recipe works well with either, but they behave differently. Dutch-process will give you a deeper chocolate flavor and darker color. If you use natural cocoa, its acidity reacts with the baking soda for a bit more lift. Both make delicious brownies.
How can I make my brownies even more fudgy?
For the ultimate fudgy texture, you can try two tweaks. First, replace one of the eggs with just an extra egg yolk. The extra fat from the yolk increases richness. Second, you can slightly reduce the flour by a tablespoon. This creates a higher ratio of fat to flour, which is the key to fudginess. Be careful not to reduce it too much, or the structure can become too gooey to slice neatly.
Can I make these brownies without an electric mixer?
Yes, and I often do! This is a fantastic one-bowl, hand-whisked recipe. A sturdy whisk and a little elbow grease are all you need. In fact, mixing by hand helps prevent overmixing once the flour is added. Just make sure you whisk the butter and sugars, then the eggs, really well to get that smooth, emulsified base. The final folding is easiest done with a spatula.
My brownies are too cakey. What went wrong?
A cakey texture usually points to two issues: overmixing or overbaking. As mentioned, overmixing develops gluten. Also, check your leavening. While this recipe uses a small amount of baking soda, using baking powder by mistake (which has double the lifting power) can make them too puffy and light. Finally, ensure you’re measuring your flour correctly. Spoon it into the measuring cup and level it off; scooping packs in too much flour.
Are these brownies suitable for freezing?
They freeze wonderfully! Let the baked brownies cool completely. You can freeze the whole slab wrapped tightly in plastic wrap and foil, or cut them into squares and freeze them in a single layer on a tray before transferring to a bag. This prevents them from sticking together. Thaw at room temperature or gently warm in the microwave. The texture remains perfectly fudgy.
What can I use instead of parchment paper?
If you don’t have parchment paper, you can generously grease your pan with butter or non-stick spray. For extra insurance, grease the pan and then dust it with a light coating of cocoa powder instead of flour. This prevents white streaks on your brownies. However, parchment paper is the best method because it guarantees easy removal and perfectly intact edges.
How do I know exactly when my brownies are done baking?
Look for visual and physical cues. The edges will start to pull away from the sides of the pan slightly, and the top will be set with a beautiful network of cracks. The center should still look moist but not raw. Perform the toothpick test right in the center. If it comes out with a few sticky crumbs or a bit of fudgy batter, they’re done. If it’s wet with runny batter, they need more time.
Can I add nuts or other mix-ins to this recipe?
Please do! This batter is a great base for creativity. Up to 1 cup of your favorite add-ins works well. Chopped walnuts, pecans, or almonds add a wonderful crunch. Try different chips like white chocolate, butterscotch, or peanut butter. You could even fold in crushed pretzels or Oreo pieces for a fun twist. Just stir them in at the very end, right before pouring the batter into the pan.
The Final Slice
There you have it! Everything you need to make legendary, fudgy brownies right in your own kitchen. This recipe is my tried-and-true favorite, the one I come back to time and again because it never fails to bring smiles. It proves that the most indulgent treats don’t have to be complicated. So preheat that oven, melt that butter, and get ready for the best, crackly-topped, deeply chocolatey homemade brownies of your life. Happy baking!
Carrot Zucchini Muffins
Ingredients
Equipment
Method
- Preheat your oven to 350°F (175°C) and line an 8x8 inch baking pan with parchment paper.
- Melt the butter in a medium saucepan over low heat, then whisk in the dark brown and granulated sugars until thick and glossy.
- Let the mixture cool, then add eggs and vanilla extract, whisking until smooth and well blended.
- Sift the flour, cocoa powder, salt, and baking soda into the wet ingredients and gently fold them in until just combined.
- Fold in the chocolate chips.
- Spread the batter evenly in the prepared pan and bake for 25-30 minutes, checking at 25 minutes.
- Let the brownies cool in the pan on a wire rack for 10-15 minutes, then lift out using the parchment paper and cool completely before slicing.