
Introduction to Simple Scones
There’s something magical about the aroma of freshly baked scones wafting through the kitchen. These Simple Scones are my go-to recipe when I want to impress family and friends without spending hours in the kitchen. They’re buttery, flaky, and utterly delightful—perfect for tea time or brunch. What makes this recipe special is its versatility; you can enjoy them plain, with a dollop of jam, or even add your favorite mix-ins like chocolate chips or dried fruits. I first tried making these scones on a rainy afternoon, and they’ve been a staple in my home ever since.
The Origin of Scones: A Bite of History
Scones have their roots in Scotland, where they were traditionally made with oats and cooked on a griddle. Over time, they evolved into the tender, crumbly treats we know today. The British perfected the art of scone-making, serving them as part of their iconic afternoon tea tradition. My version of Simple Scones pays homage to this classic while keeping things modern and approachable. Whether you’re craving traditional plain scones or looking to experiment with flavors, this recipe has got you covered.
Why You’ll Love This Recipe
What sets these Simple Scones apart is their balance of flavor and texture. They’re not overly sweet, which makes them versatile for both sweet and savory pairings. Plus, they come together in under an hour, making them ideal for busy mornings or last-minute gatherings. The dough is easy to work with, and the results are consistently delicious. Whether you’re a seasoned baker or a beginner, this recipe will make you feel like a pro.
Perfect Occasions to Prepare Simple Scones
These Simple Scones are perfect for any occasion! Serve them at a cozy Sunday brunch, pack them for a picnic, or enjoy them with a hot cup of tea during a quiet afternoon. They’re also a hit at holiday gatherings or baby showers. Their versatility ensures they’ll always be a crowd-pleaser, no matter the setting.
Ingredients for Simple Scones
- 2 cups all-purpose flour
- 1/4 cup granulated sugar
- 1 tablespoon baking powder
- 1/2 teaspoon salt
- 1/2 cup unsalted butter, cold and cubed
- 3/4 cup heavy cream, plus extra for brushing
- 1 teaspoon vanilla extract
- Optional: 1/2 cup dried fruit, chocolate chips, or nuts
Substitution Options
If you’re looking to customize your Simple Scones, here are some substitution ideas:
- Swap all-purpose flour with whole wheat flour for a nuttier flavor.
- Use coconut milk instead of heavy cream for a dairy-free option.
- Replace granulated sugar with honey or maple syrup for natural sweetness.
- Add lemon zest or almond extract for a unique twist.
Preparation
Step 1: Mixing the Dry Ingredients
Start by whisking together the flour, sugar, baking powder, and salt in a large mixing bowl. This step ensures that all the dry ingredients are evenly distributed, which is key to achieving consistent results. Imagine the soft, powdery texture of the flour blending seamlessly with the tiny granules of sugar—it’s almost meditative! Pro tip: Use a fine-mesh sieve to sift the flour for an extra-light scone.
Step 2: Cutting in the Butter
Next, cut the cold butter into small cubes and add them to the dry mixture. Use a pastry cutter or your fingertips to blend the butter until the mixture resembles coarse crumbs. The butter should still be visible in pea-sized pieces, as this creates those irresistible flaky layers. As you work, notice how the butter starts to soften slightly, releasing its rich aroma. Pro tip: Keep the butter cold to ensure the scones bake up light and airy.
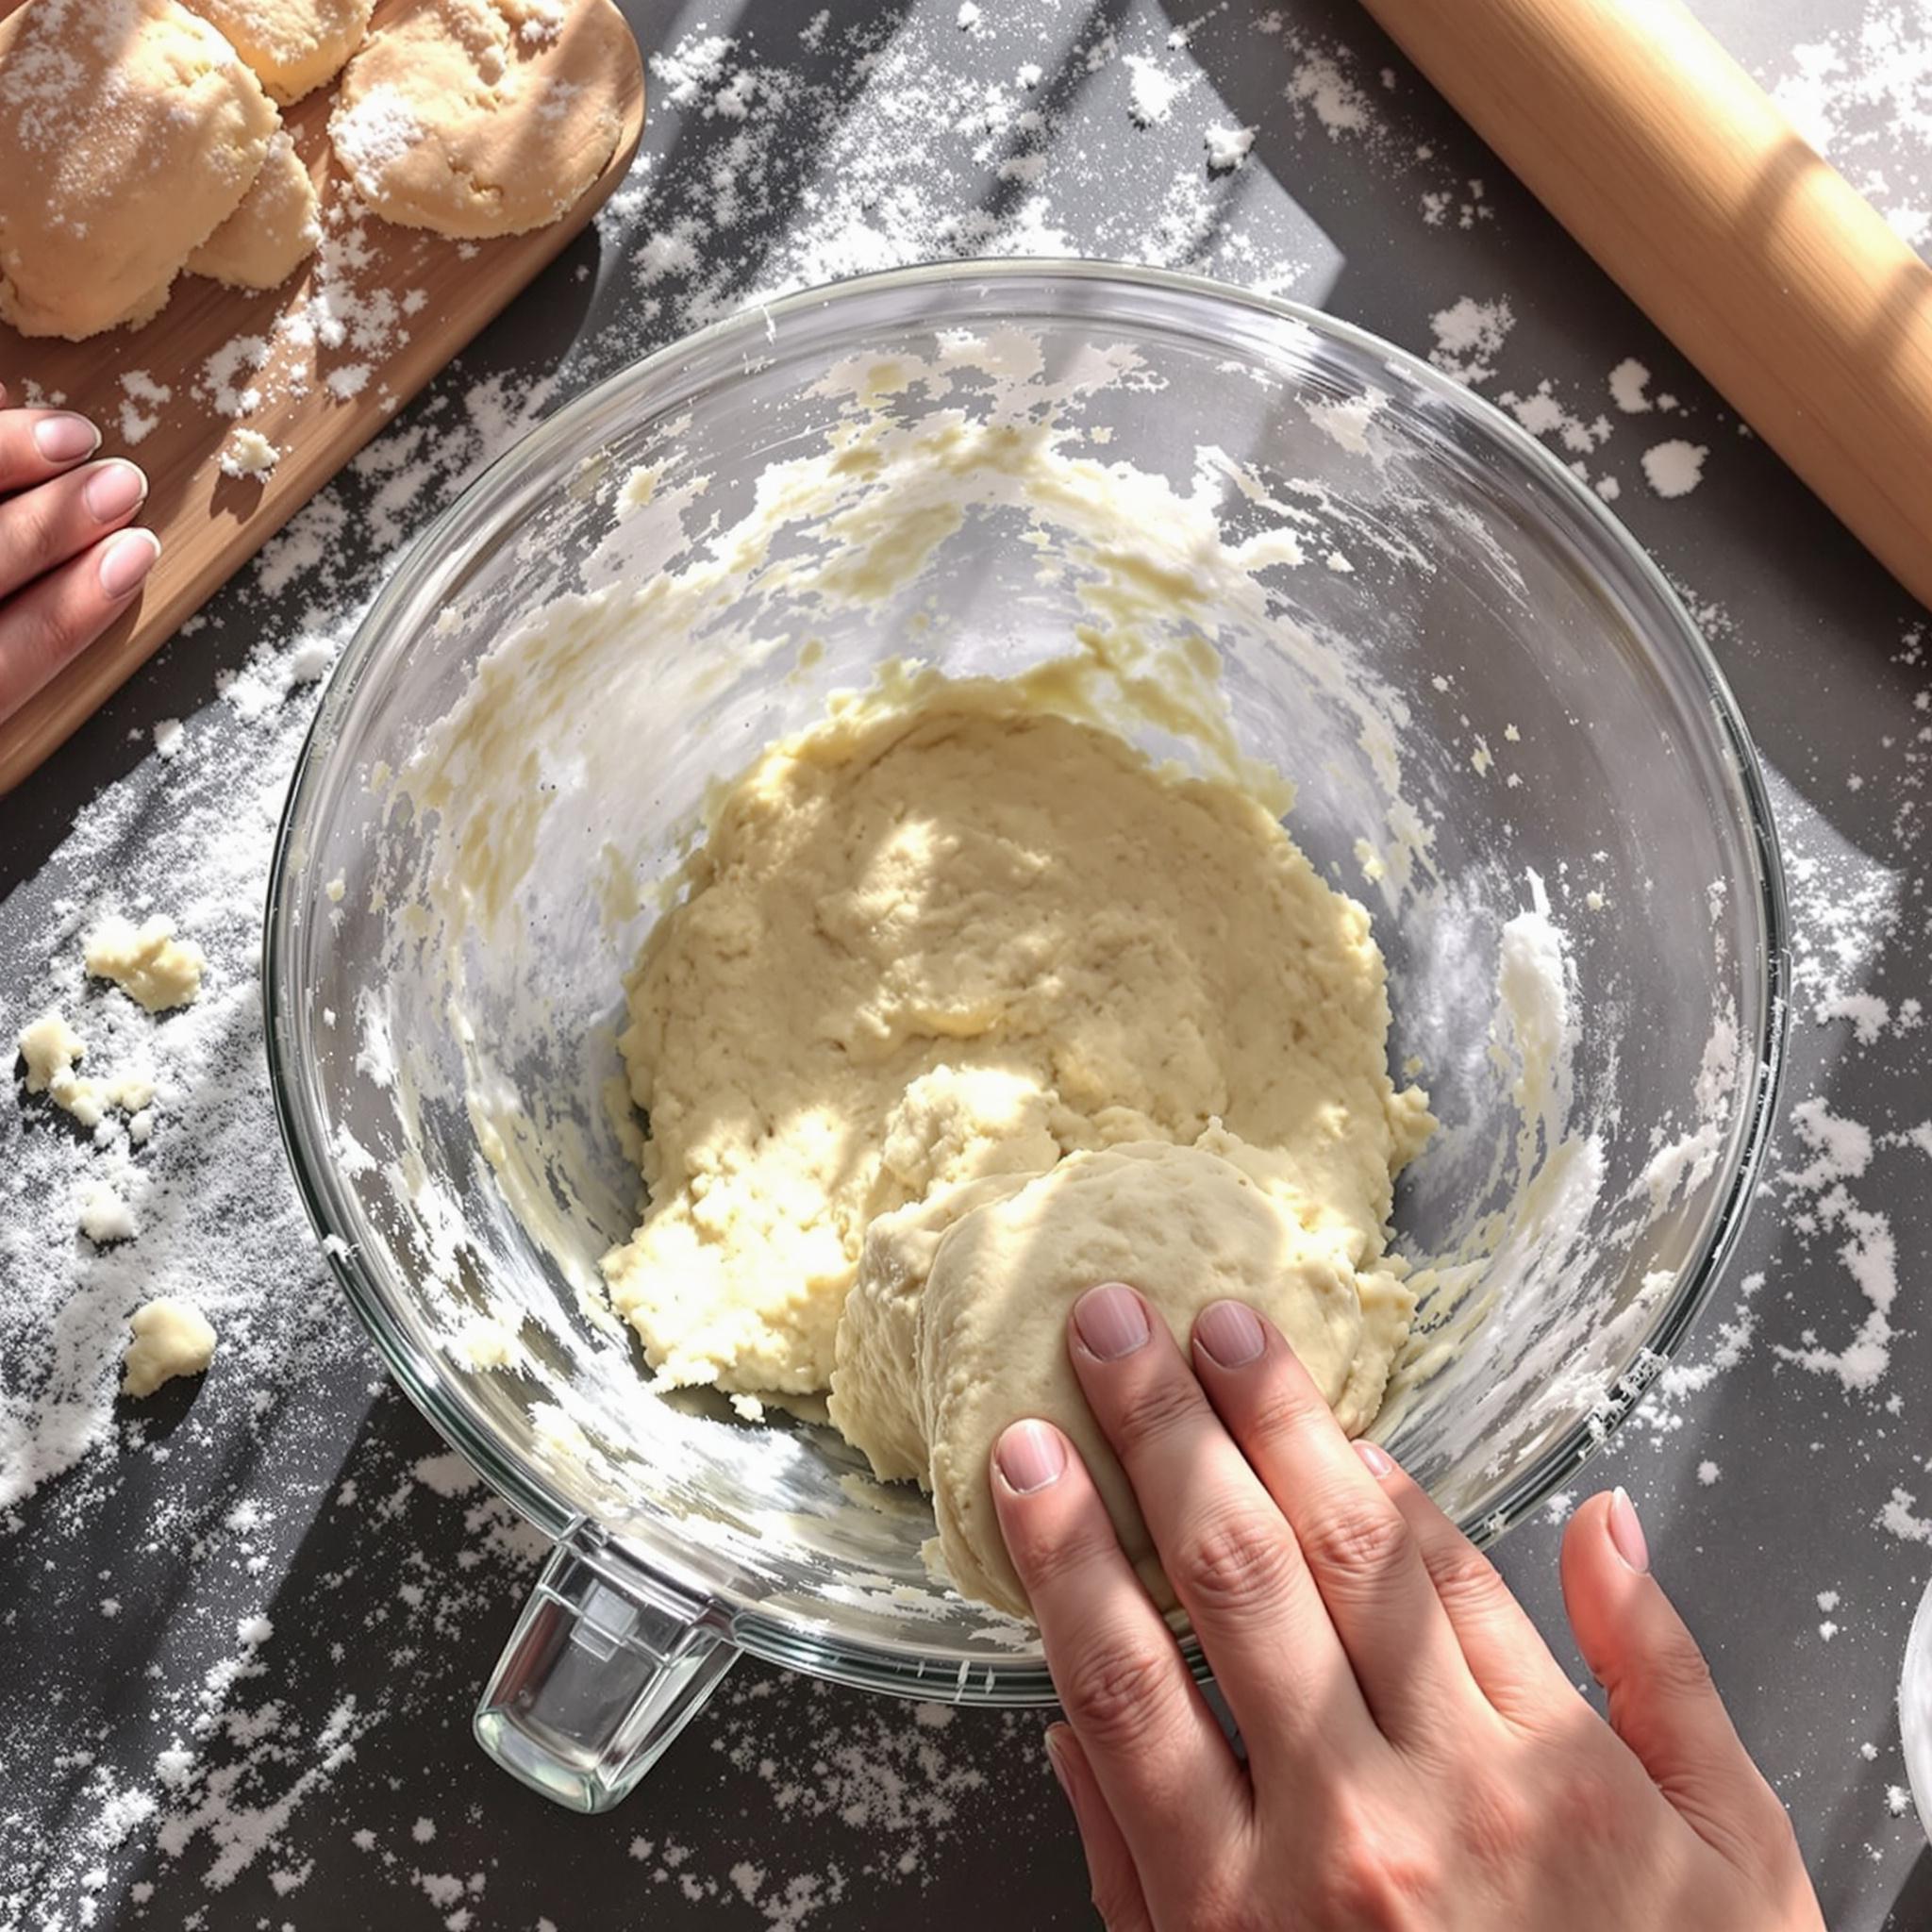
Step 3: Adding the Wet Ingredients
In a separate bowl, combine the heavy cream and vanilla extract. Gradually pour this mixture into the dry ingredients, stirring gently until the dough comes together. Be careful not to overmix, as this can make the scones tough. The dough should be slightly sticky but manageable. If you’re adding mix-ins like chocolate chips or dried fruit, fold them in gently at this stage.
Step 4: Shaping and Baking
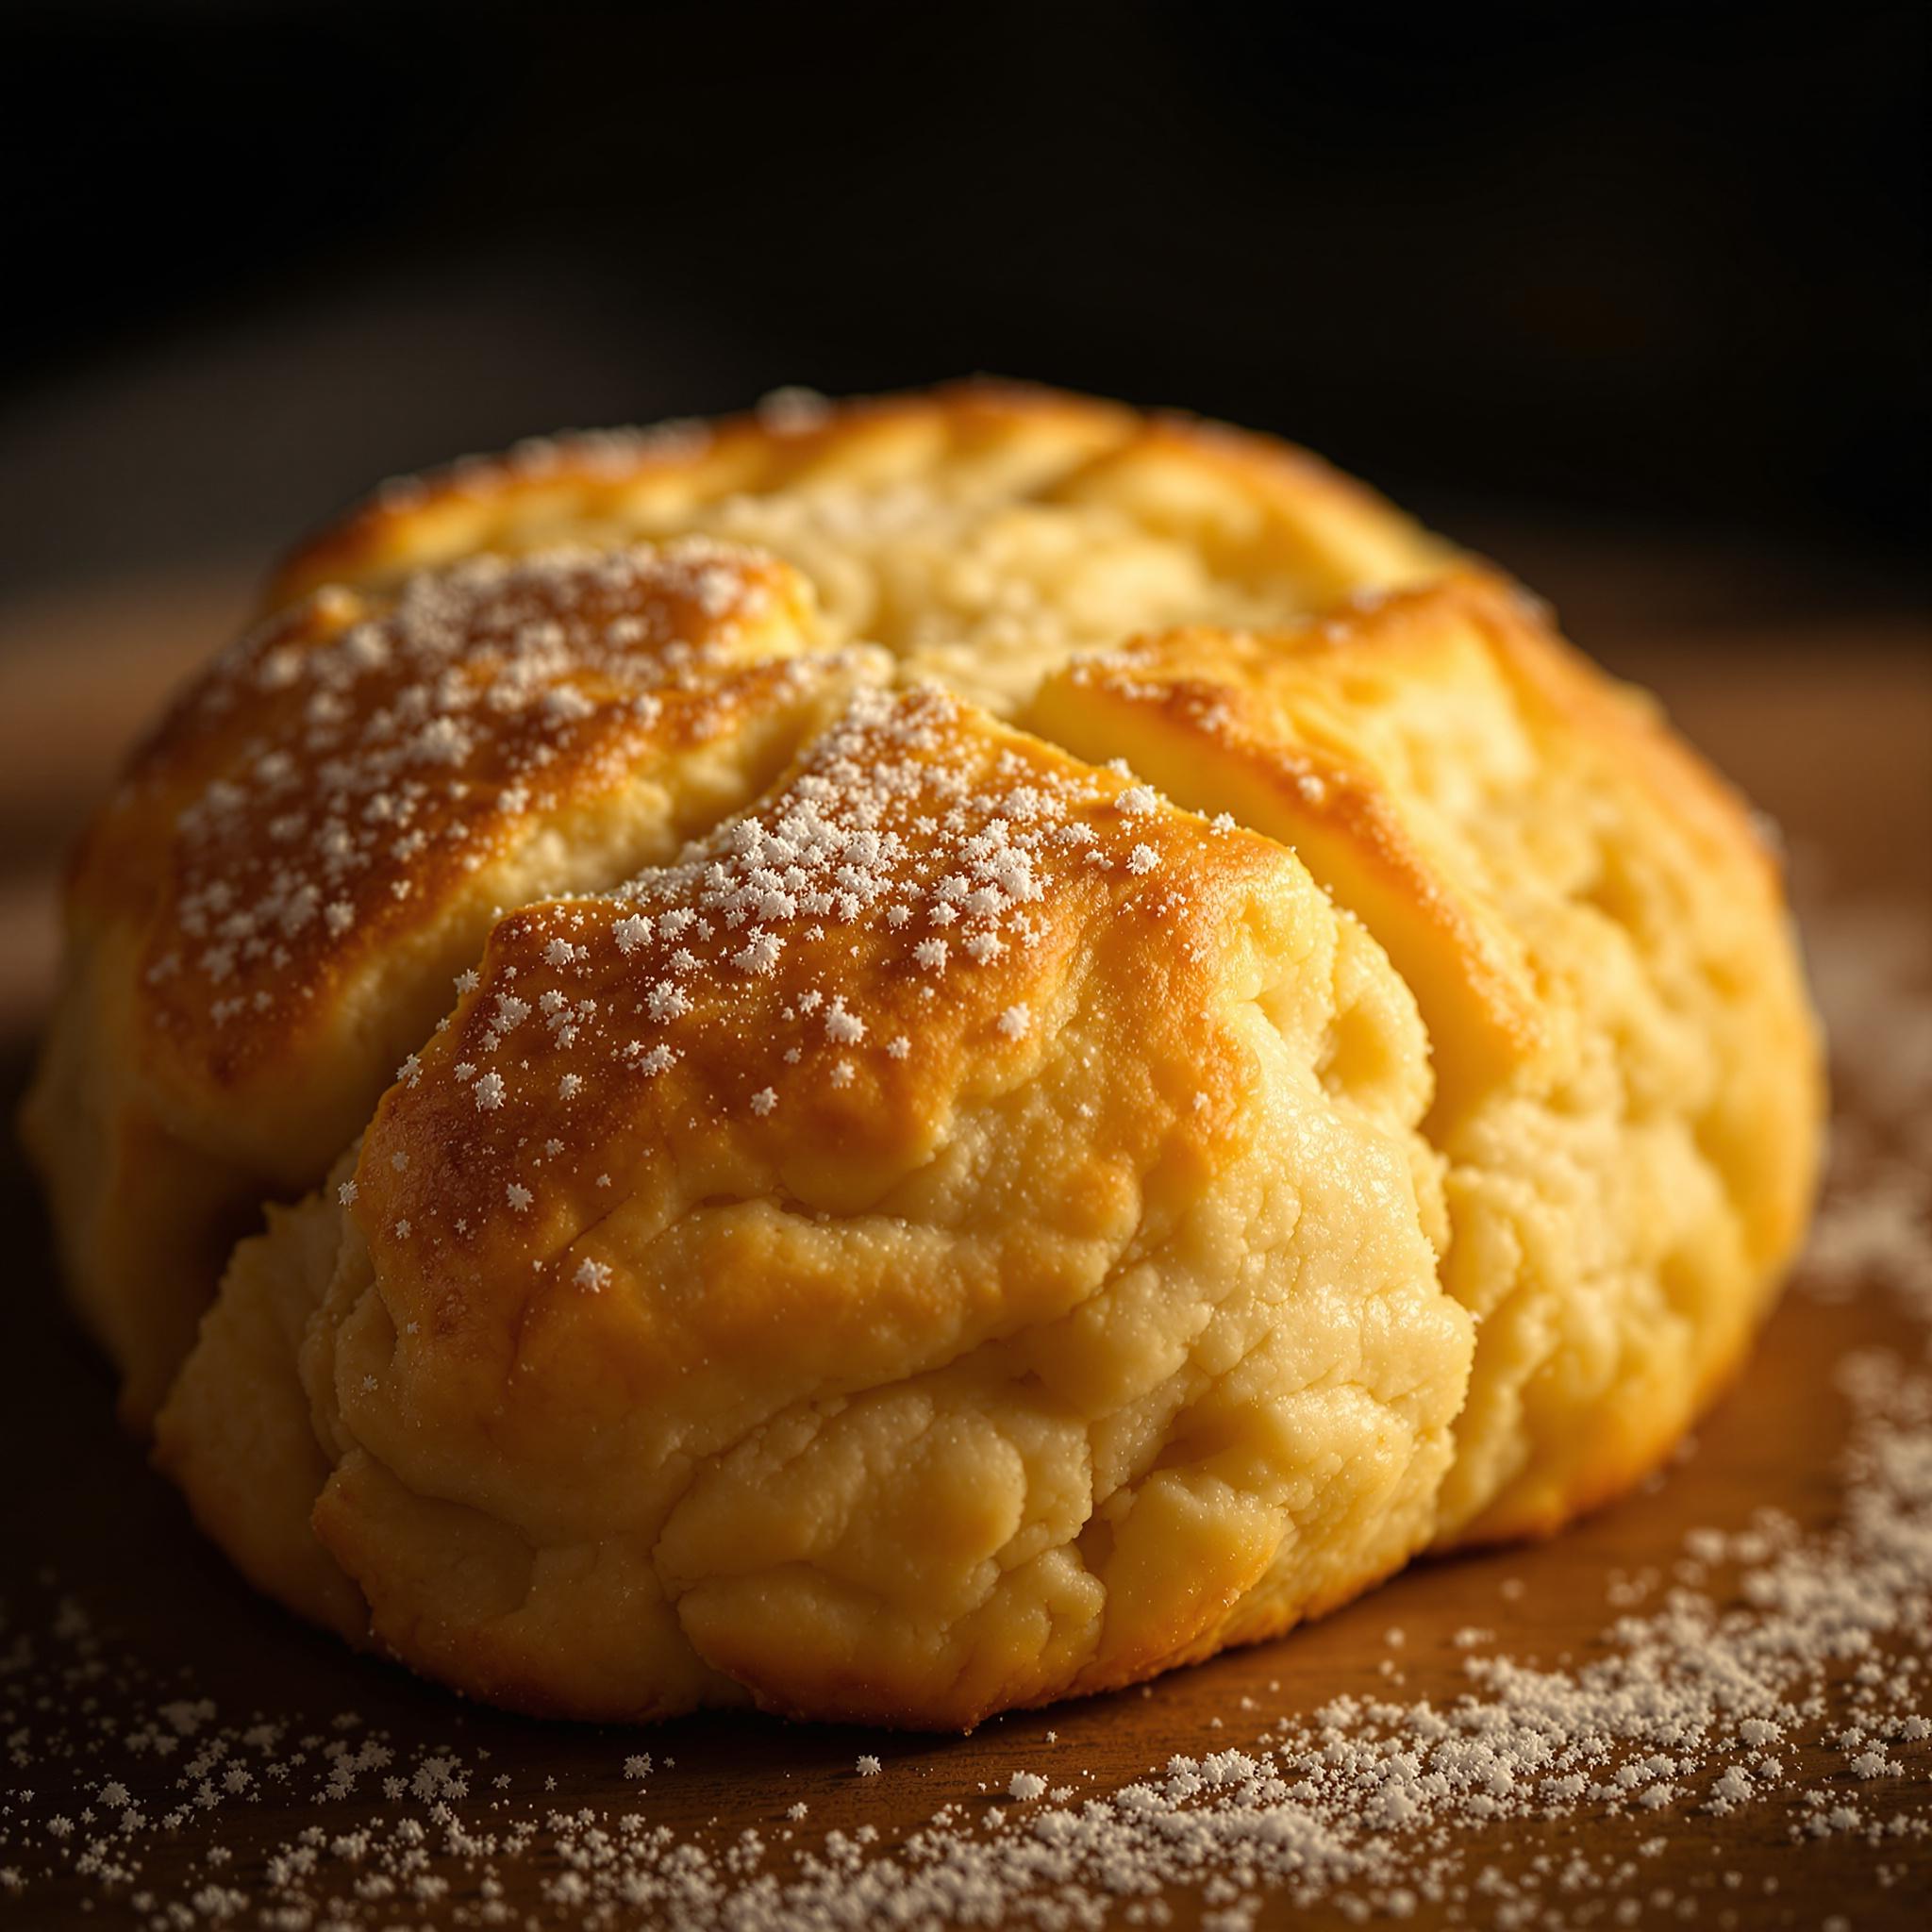
Turn the dough onto a lightly floured surface and shape it into a circle about 1-inch thick. Cut the circle into wedges and transfer them to a baking sheet lined with parchment paper. Brush the tops with a little heavy cream for a golden finish. Bake in a preheated oven at 400°F (200°C) for 15-20 minutes, or until the scones are golden brown. As they bake, your kitchen will fill with the warm, inviting scent of butter and sugar.
Chef’s Tip
To elevate your Simple Scones, try freezing the shaped dough for 15 minutes before baking. This helps the butter firm up again, resulting in taller, flakier scones. It’s a game-changer!
Time Breakdown
- Prep Time: 20 minutes
- Cooking Time: 15-20 minutes
- Total Time: 35-40 minutes
Nutritional Information
Each scone contains approximately:
- Calories: 250
- Protein: 4g
- Fat: 12g
- Carbohydrates: 30g
- Sugar: 8g
Extra Information
Did you know that scones are traditionally served with clotted cream and jam in England? While clotted cream might be hard to find, whipped cream or mascarpone makes a great substitute.
Necessary Tools
- Mixing bowls
- Pastry cutter or fork
- Baking sheet
- Parchment paper
- Oven
Storage Instructions
Once cooled, store your Simple Scones in an airtight container at room temperature for up to two days. For longer storage, freeze them in a zip-top bag for up to one month. To reheat, simply pop them in the oven at 350°F (175°C) for 5-10 minutes. Frozen scones can go straight from the freezer to the oven for a fresh-baked taste. If you’re planning to serve them later, consider wrapping each scone individually in plastic wrap to preserve their freshness.
Tips and Tricks
Here are a few tips to take your Simple Scones to the next level:
- Chill the dough before baking to prevent spreading.
- Use a sharp knife to cut the dough cleanly for even baking.
- Experiment with different glazes, such as honey or powdered sugar icing.
Serving Suggestions
Pair your Simple Scones with a dollop of whipped cream and fresh berries for a refreshing treat. Alternatively, serve them alongside a savory spread like herbed butter for a unique twist.
Healthier Alternatives
Looking to make your scones healthier? Here are six variations to try:
- Whole Grain Scones: Replace half the all-purpose flour with whole wheat flour for added fiber.
- Low-Sugar Scones: Reduce the sugar by half and add mashed bananas for natural sweetness.
- Vegan Scones: Use plant-based butter and almond milk instead of dairy products.
- Gluten-Free Scones: Swap regular flour with a gluten-free blend.
- Protein-Packed Scones: Add a scoop of protein powder to the dry ingredients.
- Fruit-Infused Scones: Incorporate grated apple or pear for moisture and flavor.
Common Mistakes to Avoid
Mistake 1: Overmixing the Dough
Overmixing is one of the most common mistakes when making scones. It activates the gluten in the flour, leading to dense, tough scones. To avoid this, mix the dough just until it comes together. Remember, a few lumps are perfectly fine!
Mistake 2: Using Warm Butter
Cold butter is essential for creating those flaky layers. If the butter melts too early, the scones won’t rise properly. Always keep your butter chilled and handle it as little as possible.
Mistake 3: Skipping the Resting Step
Resting the dough allows the gluten to relax, resulting in lighter scones. Don’t skip this step—even 10 minutes can make a difference.
Frequently Asked Questions
Can I make scones ahead of time?
Absolutely! You can prepare the dough, shape it into scones, and freeze them before baking. Simply bake them directly from frozen, adding a few extra minutes to the cooking time.
What’s the best way to reheat scones?
For best results, reheat scones in the oven at 350°F (175°C) for 5-10 minutes. This restores their crisp exterior and soft interior.
Can I use self-rising flour?
Yes, you can substitute self-rising flour for all-purpose flour and omit the baking powder. Just adjust the salt accordingly.
How do I know when the scones are done?
Your scones are ready when they’re golden brown on top and sound hollow when tapped on the bottom. A toothpick inserted into the center should come out clean.
What’s the best type of cream to use?
Heavy cream works best because of its high fat content, which contributes to the scones’ rich flavor and tender texture.
Can I add fruit to the scones?
Definitely! Fold in dried fruits, fresh berries, or even citrus zest for added flavor and color.
Why are my scones flat?
Flat scones often result from overmixing or using warm butter. Make sure to handle the dough gently and keep your ingredients cold.
Do I need a special tool to cut the dough?
No, a sharp knife or pizza cutter works just fine. However, a round biscuit cutter can give you uniformly shaped scones.
Can I make savory scones?
Of course! Skip the sugar and add herbs, cheese, or bacon bits for a savory twist.
How long do scones stay fresh?
Scones are best enjoyed within two days. Store them in an airtight container to maintain freshness.
Conclusion
These Simple Scones are a testament to the joy of baking—quick, easy, and endlessly customizable. Whether you stick to the classic recipe or experiment with new flavors, they’re sure to become a favorite in your household. So grab your apron, gather your ingredients, and let’s bake up some happiness!