Introduction
I still remember the first time I baked banana bread. The smell of warm bananas, cinnamon, and butter filled my kitchen. It felt like magic. Since then, baking has become my happy place. And when it comes to banana bread, nothing beats the better homes and gardens banana bread recipe. This recipe is a go-to for home bakers everywhere. Why? Because it works every time.
In this article, you’ll learn tips to make your bread moist and flavorful. I’ll also share fun variations to try and answer common questions about this classic banana bread recipe. Whether you’re new to baking or just looking for a fresh twist, this guide has something for everyone.
Why Choose the Better Homes and Gardens Banana Bread Recipe?
This recipe stands out because it’s simple and reliable. You don’t need fancy tools or hard-to-find ingredients. Just basic pantry staples and overripe bananas. For me, that’s what makes it so special. It’s a classic banana bread recipe that delivers great taste without stress.
Better Homes and Gardens is a trusted name in home cooking. Their recipes are tested and perfected. That’s why so many people turn to them for inspiration. When you follow their banana bread recipe, you know it’s going to turn out well. No guesswork needed.
Another reason I love this recipe is its versatility. You can keep it plain or add chocolate chips, nuts, or even swirls of caramel. The options are endless. But no matter what, the base recipe always shines through.
Gathering Your Ingredients
Before you start baking, let’s talk about what you’ll need. Here’s a quick list of the key ingredients for the better homes and gardens banana bread recipe:
- All-purpose flour
- Baking soda
- Salt
- Unsalted butter
- Granulated sugar
- Eggs
- Ripe bananas
- Vanilla extract
One of the secrets to making moist banana bread is using the right bananas. Look for bananas with brown spots on the peel. These are sweeter and softer, which adds more flavor to your bread. If your bananas aren’t ripe yet, don’t worry. Place them in a paper bag for a day or two to speed up the process.
Here’s a personal tip: freeze overripe bananas if you aren’t ready to bake. Peel them, pop them in a freezer bag, and thaw when you’re ready. They’ll be perfect for your next loaf of easy banana bread recipe.
A lot of people ask if they can swap ingredients. Yes, you can! For example, use melted coconut oil instead of butter for a dairy-free version. Or try half whole wheat flour for a healthier twist. Just keep in mind that small changes can affect the texture and taste. Stick to the basics if you’re new to baking.
Now that you have your ingredients ready, let’s talk about how to mix everything together. The order matters, especially with baking. Start by creaming the butter and sugar until light and fluffy. Then add the eggs one at a time. Mash your bananas separately before mixing them in. This step ensures an even distribution of banana goodness throughout your bread.
If you want to take your bread to the next level, consider adding mix-ins. Some of my favorites include:
- Chopped walnuts for crunch
- Dark chocolate chips for indulgence
- Dried cranberries for a tart twist
These extras make your bread feel extra special. Plus, they’re a fun way to experiment with flavors.
Finally, don’t forget to grease your loaf pan well. Even the best recipes can stick if the pan isn’t prepared. Use nonstick spray, butter, or line the pan with parchment paper for easy removal.
Step-by-Step Instructions for Perfect Banana Bread
Alright, let’s get into the nitty-gritty of making banana bread using the better homes and gardens banana bread recipe. If you’ve ever wondered how to make banana bread from Better Homes and Gardens, you’re in luck. I’ll break it down step by step, sprinkling in some tweaks I’ve picked up along the way.
First things first: preheat your oven to 350°F (175°C). Funny enough, this is one of those recipes where precision matters—baking at the right temperature makes all the difference. While the oven heats up, grab your ingredients. Remember, we covered those earlier, so you should be all set.
Start by creaming the butter and sugar together until they’re light and fluffy. This usually takes about 2-3 minutes with a hand mixer. Pro tip: if you don’t have a mixer, a good old-fashioned wooden spoon works too—just be ready for an arm workout! Once that’s done, crack in your eggs one at a time, mixing well after each addition. Here’s the thing: adding eggs one by one helps them incorporate better into the batter, giving your bread a smoother texture.
Now for the bananas. Mash them up in a separate bowl until they’re mostly smooth but still have a few lumps. Don’t overthink it—banana bread is supposed to feel a little rustic. Fold the mashed bananas into the wet mixture, then add a splash of vanilla extract. The vanilla might seem like a small detail, but trust me, it adds a layer of warmth that ties everything together.
On the dry side, whisk together your flour, baking soda, and salt. A quick sift can help avoid clumps, but honestly, I rarely bother unless I’m feeling fancy. Gradually add the dry ingredients to the wet ones, stirring just until combined. Overmixing is the enemy here—it can make your bread dense instead of soft and tender. By the way, if you’re craving something similar but with a nutty twist, check out this sweet alabama pecan bread recipe. It’s another favorite of mine!
Pour the batter into your prepared loaf pan, smoothing the top with a spatula. Pop it into the oven and bake for about 60-70 minutes. To test for doneness, stick a toothpick into the center. If it comes out clean or with just a few crumbs clinging to it, you’re golden. Let the bread cool in the pan for about 10 minutes before transferring it to a wire rack. Cooling is crucial—it lets the flavors settle and prevents the bottom from getting soggy.
Tips for Baking Success
Baking banana bread isn’t rocket science, but there are a few pitfalls to watch out for. For starters, resist the urge to open the oven door every five minutes. I know it’s tempting—you want to peek at your masterpiece—but doing so can cause the bread to sink. Patience is key here.
Another common mistake? Overmixing the batter. I mentioned this earlier, but it bears repeating. When you mix too much, the gluten in the flour starts to develop, which can lead to a tough loaf. Instead, aim for a gentle hand. Think of it as coaxing the ingredients together rather than forcing them.
Tools matter too. A sturdy loaf pan is essential—I prefer nonstick pans because they save so much hassle. If you’re serious about baking, investing in a good stand mixer can also make life easier. But don’t worry if you don’t have one; a handheld mixer works just fine. Oh, and speaking of tools, if you’re a fan of dipping bread in savory sauces, you’ve got to try this carrabba’s bread dip recipe. It’s perfect for pairing with freshly baked loaves.
One question I hear often is, “What temperature should banana bread be baked at?” As I mentioned earlier, 350°F (175°C) is ideal. This moderate heat ensures even cooking without burning the edges. Keep an eye on your bread during the last 10 minutes of baking, especially if your oven runs hot.
Customizing Your Banana Bread
Here’s where the fun begins. The better homes and gardens banana bread recipe is fantastic on its own, but why not jazz it up? Customizations are my jam—they let you put your personal stamp on a classic dish. For example, tossing in a handful of chocolate chips turns this humble bread into a decadent treat. Dark chocolate pairs beautifully with the sweetness of bananas, creating a flavor combo that’s hard to resist.
If you’re more of a nut person, chopped walnuts or pecans add a delightful crunch. Funny story: I once made a batch with both chocolate chips and nuts, and my friends practically begged me for the recipe. They had no idea how simple it was! Want to explore another nutty option? Give this bob evans banana bread recipe a whirl—it’s packed with flavor.
Cinnamon swirls are another crowd-pleaser. Simply sprinkle a mix of cinnamon and sugar over the batter before baking, then use a knife to gently swirl it in. It’s a trick I learned from experimenting with other recipes, and it never fails to impress. Speaking of impressive, if you’re looking for a completely different kind of bread, this jimmy johns bread recipe is worth a shot. It’s a whole new world of carb-y goodness.
For a healthier twist, consider swapping half the all-purpose flour with whole wheat flour. It adds a nutty flavor and boosts the fiber content. Just be warned: whole wheat flour absorbs more moisture, so you might need to adjust the liquid slightly. Another option is to stir in shredded coconut or dried fruit like cranberries or raisins. These additions bring bursts of sweetness and texture that complement the bananas perfectly.
My absolute favorite variation, though, involves a secret ingredient: a dollop of caramel sauce swirled into the batter. It creates pockets of gooey goodness that take this bread to the next level. Seriously, it’s like dessert disguised as breakfast. If you haven’t tried it yet, you’re missing out!
Finally, don’t forget about presentation. A dusting of powdered sugar or a drizzle of glaze can elevate your banana bread from homemade to bakery-worthy. And hey, who doesn’t love a little extra flair?
In conclusion, the beauty of the better homes and gardens banana bread recipe lies in its simplicity and adaptability. Whether you stick to the original or go wild with variations, the result is always comforting and delicious. So grab your apron, fire up the oven, and let’s bake something amazing!
Storing and Serving Suggestions for Your Better Homes and Gardens Banana Bread
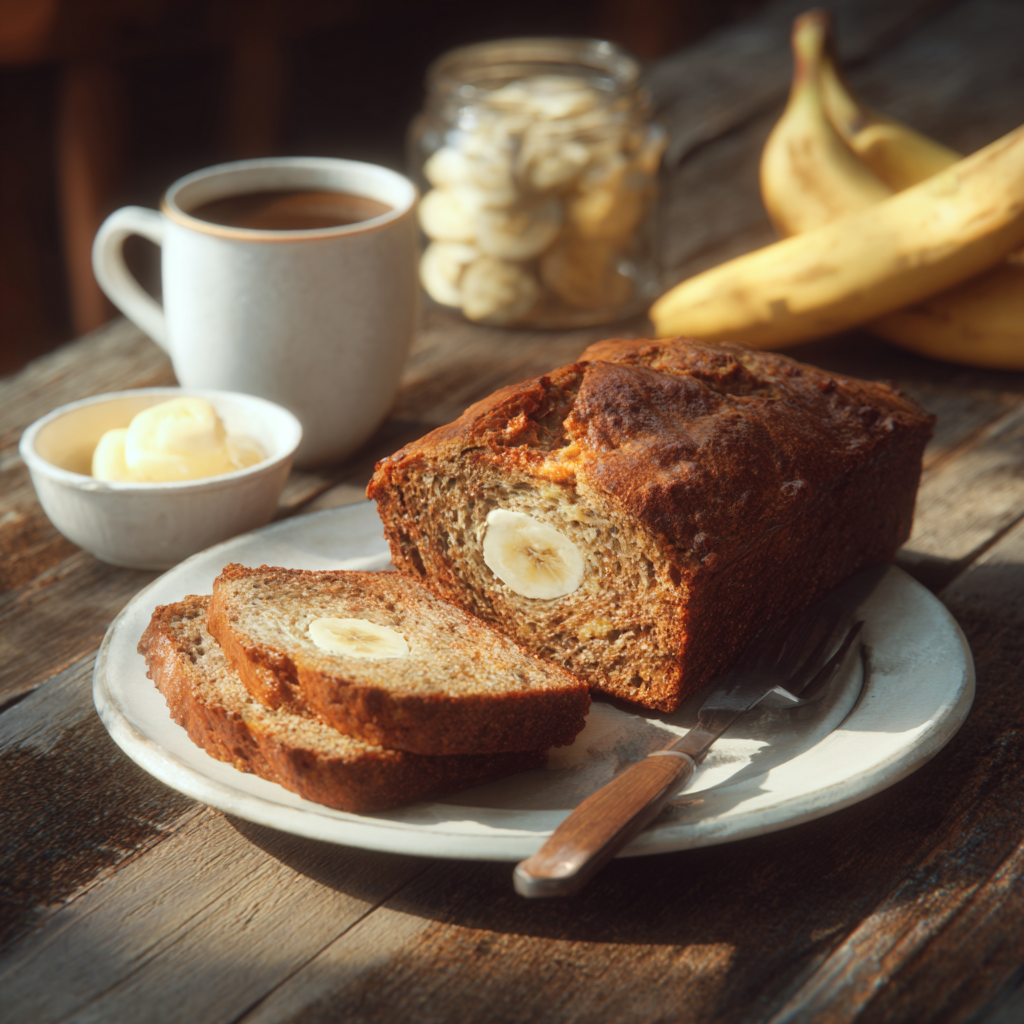
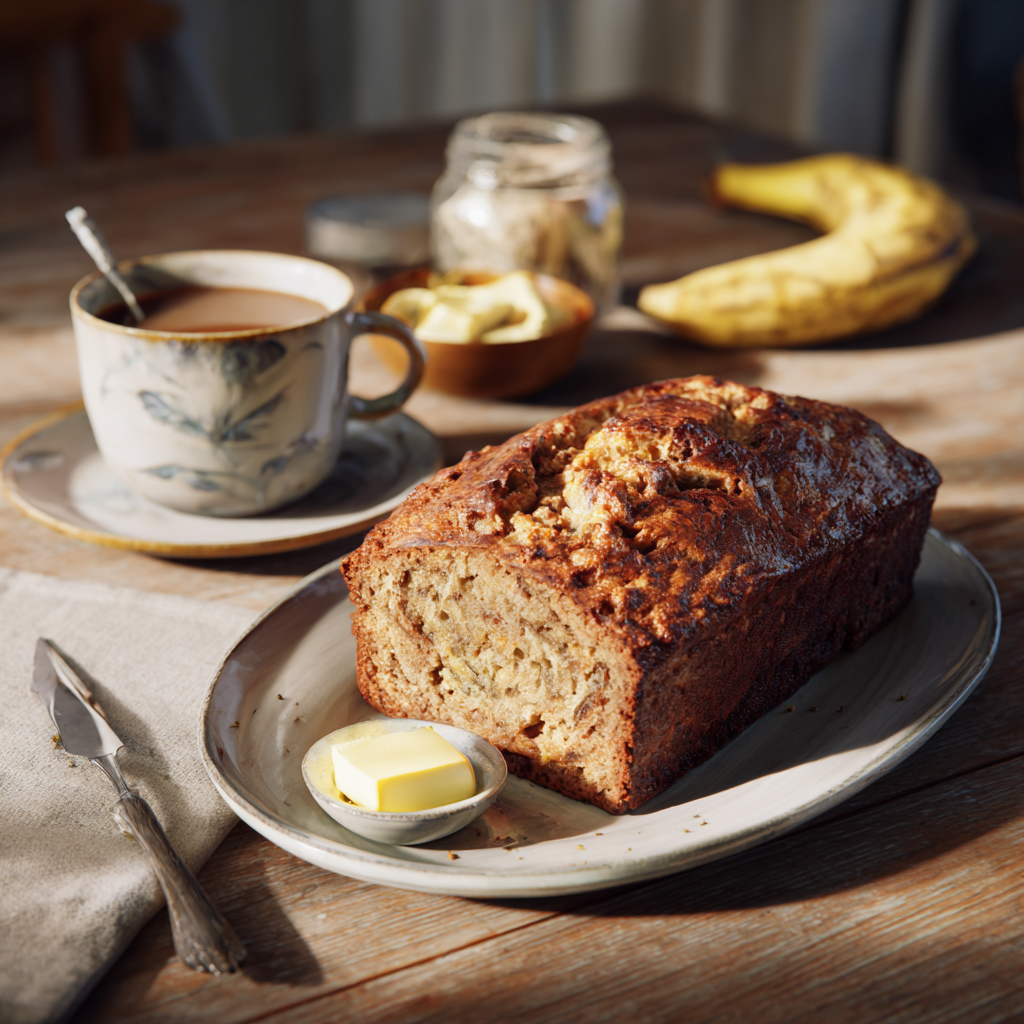
Let’s talk about what happens after you pull that golden loaf of better homes and gardens banana bread recipe out of the oven. You’ve baked it to perfection, but now comes the fun part—how to store it, serve it, and enjoy every last crumb. Trust me, I’ve learned a thing or two about keeping banana bread fresh (and sneaky ways to make it disappear faster).
First up, storing your bread. Here’s the deal: banana bread is pretty forgiving, but it does have its limits. If you plan to eat it within a couple of days, wrap it tightly in plastic wrap or aluminum foil. This keeps it from drying out. Funny enough, I once left a slice uncovered overnight, and it turned into a mini brick by morning. Lesson learned.
If you’re not going to finish the loaf within a few days, pop it into the fridge. The cooler temperature helps extend its life, though I recommend warming slices slightly before serving. Cold banana bread just doesn’t hit the same spot. By the way, how long does banana bread last? On the counter, it’s good for about 3-4 days. In the fridge, you can stretch it to a week. But honestly, mine rarely lasts that long.
Now, let’s chat serving ideas because, wow, there are so many ways to enjoy this classic treat. My go-to method? A thick slice slathered with butter while it’s still warm. It’s pure comfort food magic. Another favorite? Drizzle some honey over the top for an extra touch of sweetness. Or, if you’re feeling fancy, pair it with a dollop of whipped cream or a scoop of vanilla ice cream. Dessert vibes, anyone?
Here’s a pro tip: turn your banana bread into French toast. Slice it thick, dip it in an egg-and-milk mixture, and cook it on a skillet until golden brown. Top it with maple syrup and berries, and suddenly breakfast feels like a special occasion. Honestly, this hack has saved many a lazy Sunday morning at my house.
Oh, and don’t sleep on pairing it with coffee or tea. There’s something about the combination of warm banana bread and a steaming mug of caffeine that feels downright luxurious. If you’re looking for more bread inspiration, head over to the bread recipes category. You’ll find plenty of ideas to keep your baking game strong.
Frequently Asked Questions About Banana Bread
I get asked a lot of questions about banana bread, especially when it comes to tweaking recipes or troubleshooting mishaps. Let’s tackle some common ones so you can bake with confidence.
- Can I freeze banana bread?
Absolutely! Freezing is a great way to preserve your better homes and gardens banana bread recipe. Wrap it tightly in plastic wrap, then place it in a freezer-safe bag. It’ll stay good for up to three months. Just thaw it at room temperature when you’re ready to enjoy it again. Pro tip: slice it before freezing so you can grab individual pieces as needed. - Should I use oil or butter in banana bread?
Both work, but they give slightly different results. Butter adds richness and flavor, while oil makes the bread extra moist. Personally, I lean toward butter because it complements the bananas beautifully. However, if you’re aiming for a dairy-free version, coconut oil is a fantastic substitute. - Why is my banana bread dense?
Dense banana bread usually happens when the batter is overmixed. Remember, gluten develops the more you stir, which can lead to a tougher texture. Mix gently, just until everything comes together. Also, check your measurements—too much flour can weigh it down too. - Is it okay to reduce sugar in the recipe?
Yes, but proceed with caution. Sugar not only sweetens the bread but also helps with moisture and browning. If you cut back too much, your loaf might turn out dry or pale. Try reducing it by a quarter first and see how it goes. And hey, ripe bananas are naturally sweet, so you might not even miss the extra sugar. - Can I make banana bread gluten-free?
You bet! Swap the all-purpose flour for a gluten-free blend, ideally one with xanthan gum. I’ve done this plenty of times, and the results are surprisingly similar. Just be mindful of the liquid ratio since gluten-free flours absorb moisture differently. - What’s the best way to mash bananas?
Use a fork or potato masher for that rustic texture we all love. No need to get fancy—a few lumps are perfectly fine. If you want super smooth bananas, blend them in a food processor. Either way works! - Can I add fruit or veggies to banana bread?
Totally! Shredded zucchini or grated apple pairs wonderfully with bananas. They add moisture and a subtle flavor boost. I’ve even thrown in blueberries for a fruity twist. Experimentation is half the fun of baking! - How do I know when banana bread is done?
The toothpick test is your best friend. Insert it into the center—if it comes out clean or with a few crumbs clinging to it, you’re good to go. Avoid gooey batter sticking to the tester. Overbaking is less of a concern than underbaking here. - Why did my banana bread sink in the middle?
A sunken loaf often means the batter wasn’t fully cooked or the oven door was opened too early. Opening the oven lets heat escape, which can cause the bread to collapse. Patience is key—wait until the timer goes off before peeking. - Can I make banana bread in a bundt pan?
Sure thing! Just adjust the baking time accordingly. Bundt pans are deeper, so it’ll take longer—about 75-90 minutes. Keep an eye on it and test for doneness as usual. Bonus points if you glaze it afterward for a show-stopping dessert.
Final Thoughts on the Better Homes and Gardens Banana Bread Recipe
Banana bread isn’t just a recipe—it’s a vibe. Whether you’re whipping up the better homes and gardens banana bread recipe for the first time or putting your own spin on it, there’s something deeply satisfying about creating something delicious from simple ingredients. It’s cozy, comforting, and always welcome at the table.
So here’s my challenge to you: give this recipe a try. Play around with mix-ins, toppings, or even turning it into French toast. Baking is all about making it yours, and I guarantee you’ll discover new ways to love this classic treat. And hey, if you come up with a killer variation, drop me a line—I’d love to hear about it!
Better Homes and Gardens Banana Bread Recipe
Ingredients
Equipment
Method
- Preheat your oven to 350°F (175°C).
- Cream the butter and sugar together until light and fluffy.
- Add the eggs one at a time, mixing well after each addition.
- Mash the bananas in a separate bowl until mostly smooth.
- Fold the mashed bananas into the wet mixture.
- Add the vanilla extract and mix well.
- In another bowl, whisk together the flour, baking soda, and salt.
- Gradually add the dry ingredients to the wet ingredients, stirring just until combined.
- Pour the batter into a prepared loaf pan, smoothing the top.
- Bake for 60-70 minutes or until a toothpick inserted in the center comes out clean.
- Let the bread cool in the pan for 10 minutes before transferring it to a wire rack.