
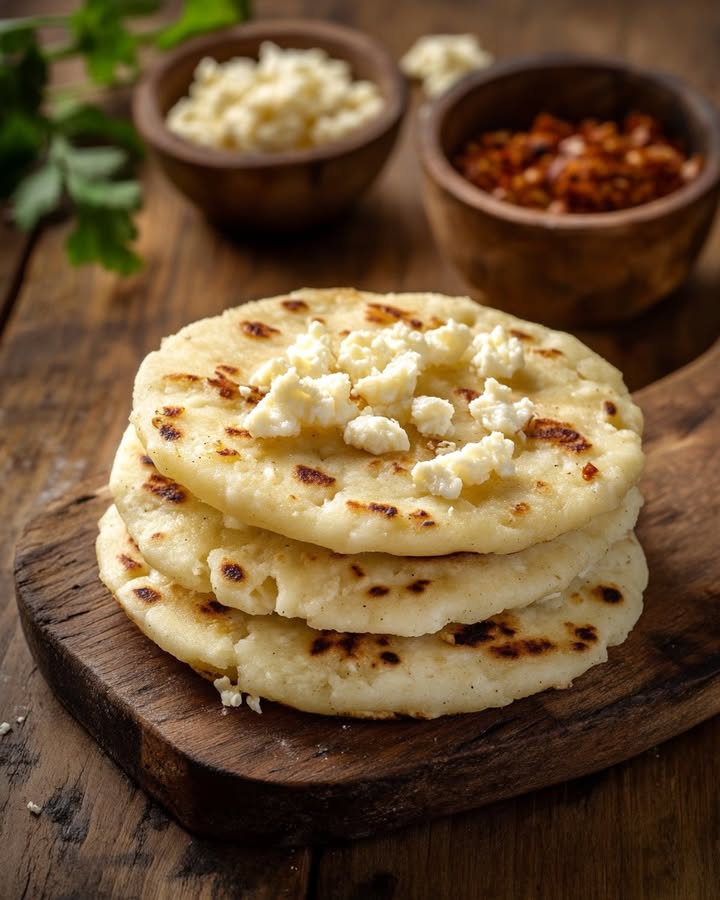
Discover the Magic of Cheesy Colombian Arepas
Imagine a warm, crispy corn cake filled with gooey, melted cheese. That’s the magic of Cheesy Colombian Arepas. These little pockets of joy are a staple in Colombian cuisine, and once you try them, you’ll understand why. They’re not just a snack; they’re a slice of comfort and a taste of tradition.
Arepas: A Colombian Tradition with a Twist
Growing up, my grandmother used to tell me stories about how arepas were a daily part of her childhood in Colombia. She would wake up to the sound of the arepa-making process, and it was always a communal activity. Traditionally, arepas were plain, but over time, creative minds added cheese, creating a delightful twist that we now know as Cheesy Colombian Arepas. Today, they are enjoyed across the world, blending old traditions with new flavors.
Why You’ll Fall in Love with This Recipe
These Cheesy Colombian Arepas are not just any ordinary corn cakes. They are a perfect blend of crispy exterior and soft, cheesy interior. The simplicity of the ingredients and the ease of preparation make them a go-to for quick snacks or a satisfying side dish. Plus, the versatility means you can serve them at any time of the day, from breakfast to dinner.
Ideal Occasions to Prepare This Delight
Whether it’s a casual family gathering, a cozy night in, or a lively party, Cheesy Colombian Arepas are always a hit. They are perfect as a handheld snack, an appetizer, or even a light meal. Serve them with a side of salsa, guacamole, or a fresh salad for a complete and satisfying experience.
Ingredients
- 2 cups hot water
- 2 tablespoons softened butter
- 1 teaspoon kosher salt
- 1 cup masarepa (PAN brand recommended)
- 1 cup shredded mozzarella
- 1/4 cup oil, for frying
Substitution Options
- Butter: You can use margarine or olive oil if you prefer.
- Mozzarella: Try using queso blanco or feta for a different flavor profile.
- Masarepa: If PAN is not available, you can use other pre-cooked cornmeal brands.
Preparation Section
Step 1: Mixing the Ingredients
In a large mixing bowl, combine the hot water, softened butter, and kosher salt. Stir until the butter is mostly melted. Gradually add the masarepa, about 1/2 cup at a time, stirring until well combined. The mixture should be smooth and not too sticky. Let the dough rest for 2-5 minutes to achieve the right consistency.
Step 2: Shaping the Arepas
Divide the dough into 10 equal balls. Make an indentation in each ball and fill it with shredded mozzarella. Carefully seal the dough around the cheese, smoothing it into a ball. Gently flatten each ball into a 3-inch wide, 1/2-inch thick cake. This step is where the magic happens, as you create those perfect little cheese-filled pockets.
Step 3: Frying the Arepas
Heat the oil in a skillet over medium heat. Once the oil is hot, carefully place the arepas in the skillet. Cook for 5-7 minutes on each side, or until golden brown and the cheese starts to bubble. Pro tip: Keep an eye on the heat to prevent burning. Drain the arepas on paper towels and sprinkle with flaky salt if desired.
Chef’s Tip: Perfecting the Dough
To get the perfect cooking consistency, it’s essential to adjust the water or masarepa as needed. The dough should be soft and not sticky. This balance ensures that your arepas are both crispy and tender. For more tips on achieving the right consistency, check out this guide on cooking consistency.
Timing
Preparation Time: 15 minutes
Cooking Time: 12 minutes
Resting Time: 2-5 minutes
Total Time: 30-35 minutes
Chef’s Secret: Using the Right Masarepa
Using PAN masarepa is key to achieving the best results. It’s pre-cooked and finely ground, making it ideal for arepas. If you can’t find PAN, look for other pre-cooked cornmeal brands, but be sure to adjust the water content accordingly.
Extra Info
The origins of arepas can be traced back to the indigenous people of Colombia and Venezuela. Over time, these simple corn cakes have evolved into a beloved dish with numerous variations, including the irresistible Cheesy Colombian Arepas.
Necessary Equipment
- Large mixing bowl
- Measuring cups and spoons
- Spatula
- Skillet
- Paper towels
Storage
Store the arepas in an airtight container in the refrigerator for up to 3 days. Reheat them in a skillet or oven to restore their crispiness. For longer storage, you can freeze the arepas. Place them in a freezer-safe bag and store for up to 2 months. Thaw and reheat before serving. Proper storage ensures that your arepas stay fresh and delicious, ready to be enjoyed whenever you crave them.
Tips and Advice
For the best results, use room temperature ingredients. This helps the dough come together more smoothly. Also, make sure the oil is hot enough before adding the arepas to the skillet. This prevents the arepas from absorbing too much oil and ensures they cook evenly.
Presentation Tips
Arrange the arepas on a platter and garnish with fresh herbs or a sprinkle of chopped scallions. Serve them with a side of your favorite dipping sauce, like a spicy salsa or a creamy avocado dip. You can also cut them in half and stuff them with additional fillings, such as grilled chicken, pulled pork, or a mix of vegetables.
Healthier Alternative Recipes
Looking for ways to make your Cheesy Colombian Arepas a bit healthier? Here are six delicious variations:
- Whole Wheat Arepas: Replace half of the masarepa with whole wheat flour for a fiber-rich version.
- Vegan Arepas: Use vegan butter and a dairy-free cheese alternative to keep it plant-based.
- Baked Arepas: Instead of frying, bake the arepas in the oven for a lower-calorie option.
- Stuffed Vegetable Arepas: Add a variety of sautéed vegetables like zucchini, bell peppers, and onions to the filling for a nutritious boost.
- Protein-Packed Arepas: Mix in some cooked black beans or lentils for added protein and texture.
- Low-Fat Arepas: Use a low-fat cheese alternative and reduce the amount of butter for a lighter version.
If you’re in the mood for more Central American delights, check out our Cheese Bean Pupusas recipe, or if you’re feeling adventurous, try our Spicy Octopus Stir-fry. For a hearty main course, our Spicy Beef Rendang is a must-try. And if you’re looking to explore more global cuisines, don’t miss our Moroccan Kefta Tagine.
Common Mistakes to Avoid
Mistake 1: Too Much Water
Adding too much water can make the dough too sticky and difficult to handle. Start with the recommended amount and gradually add more if needed. The dough should be soft but not sticky. Practical tip: Use a fork to mix the dough to help distribute the water evenly.
Mistake 2: Not Sealing the Cheese Properly
If the cheese isn’t sealed well, it can leak out during cooking, resulting in a mess and less flavorful arepas. Make sure to pinch the dough firmly around the cheese and smooth it out. This will ensure that the cheese stays inside and melts perfectly.
Mistake 3: Overcooking the Arepas
Overcooking can result in a hard, dry arepa. Keep an eye on the cooking time and flip the arepas when they start to turn golden brown. The cheese should be just starting to melt, and the outside should be crispy but not burnt. Practical tip: Use a timer to help you keep track of the cooking time.
Mistake 4: Using Cold Ingredients
Using cold ingredients can affect the texture of the dough. Make sure all your ingredients are at room temperature before starting. This will help the dough come together more smoothly and ensure a better final product.
Mistake 5: Not Letting the Dough Rest
Skipping the resting time can result in a tough, unworkable dough. Let the dough rest for 2-5 minutes to allow the masarepa to absorb the water fully. This step is crucial for achieving the right consistency and making the perfect arepas.
For more amazing recipes and culinary adventures, be sure to explore our World Cuisine section. Happy cooking!
FAQ
What is the origin of arepas?
Arepas have a rich history dating back to the indigenous peoples of Colombia and Venezuela. These simple corn cakes were originally made from ground corn and have evolved into a beloved dish with many variations, including the popular Cheesy Colombian Arepas.
Can I use regular cornmeal instead of masarepa?
While you can use regular cornmeal, it may not yield the same results. Masarepa is pre-cooked and finely ground, making it ideal for arepas. Regular cornmeal will produce a different texture and may require more water to form a workable dough.
What type of cheese works best for arepas?
Traditionally, mozzarella is used for its melting properties, but you can also try queso blanco, feta, or a combination of cheeses. The key is to use a cheese that melts well and has a good flavor.
How do I store leftover arepas?
Store leftover arepas in an airtight container in the refrigerator for up to 3 days. You can also freeze them for up to 2 months. To reheat, place them in a skillet or oven to restore their crispiness.
Can I make arepas without frying?
Yes, you can bake arepas instead of frying. Preheat your oven to 375°F (190°C) and place the arepas on a baking sheet. Bake for about 20-25 minutes, or until they are golden brown and the cheese is melted.
Is there a vegan version of this recipe?
Absolutely! To make vegan arepas, use vegan butter and a dairy-free cheese alternative. The rest of the recipe remains the same, and you’ll still get a delicious, cheesy treat.
How can I make the arepas healthier?
To make healthier arepas, you can use whole wheat flour, a low-fat cheese alternative, or bake them instead of frying. You can also add vegetables or legumes to the filling for extra nutrition.
What are some dipping sauces for arepas?
Popular dipping sauces for arepas include salsa, guacamole, aji, and a creamy avocado dip. You can also try a yogurt-based sauce or a spicy garlic aioli.
Can I make arepas ahead of time?
Yes, you can prepare the arepas ahead of time and store them in the refrigerator or freezer. Simply reheat them in a skillet or oven before serving to restore their crispiness.
What other fillings can I use for arepas?
In addition to cheese, you can fill arepas with a variety of ingredients such as grilled chicken, pulled pork, sautéed vegetables, black beans, and even eggs. The possibilities are endless, and you can customize them to your taste.
Wrapping Up
There you have it, a delightful journey through the world of Cheesy Colombian Arepas. Whether you’re preparing them for a family gathering or a cozy night in, these arepas are sure to be a crowd-pleaser. With a few simple steps and a bit of love, you can create a perfect little pocket of comfort and joy. Happy cooking, and enjoy every bite!
Cheesy Colombian Arepas
Ingredients
Equipment
Method
- In a large mixing bowl, combine hot water, softened butter, and kosher salt. Stir until the butter is mostly melted.
- Gradually add the masarepa, about 1/2 cup at a time, stirring until well combined. Let the dough rest for 2-5 minutes.
- Divide the dough into 10 equal balls, making an indentation in each ball, and fill with shredded mozzarella.
- Seal the dough around the cheese, flatten each ball into a 3-inch wide, 1/2-inch thick cake.
- Heat oil in a skillet over medium heat and place arepas in the skillet once hot.
- Cook for 5-7 minutes on each side until golden brown and the cheese starts to bubble. Drain on paper towels and sprinkle with flaky salt if desired.