I still remember the first time I tried to impress my friends with a homemade dessert. I spent hours in the kitchen making an elaborate cake that required precise timing and multiple steps. It flopped. The layers slid off each other and the frosting melted everywhere. That’s when I discovered the magic of no-bake desserts, and these chocolate peanut butter no-bake bars became my secret weapon.
These bars saved me countless times when I needed a quick dessert for potlucks, family gatherings, or just a late-night craving. The best part? You don’t need to be a baking expert or spend all day in the kitchen. No oven means no stress and no chance of burning anything. Just mix, press, chill, and you’re done.
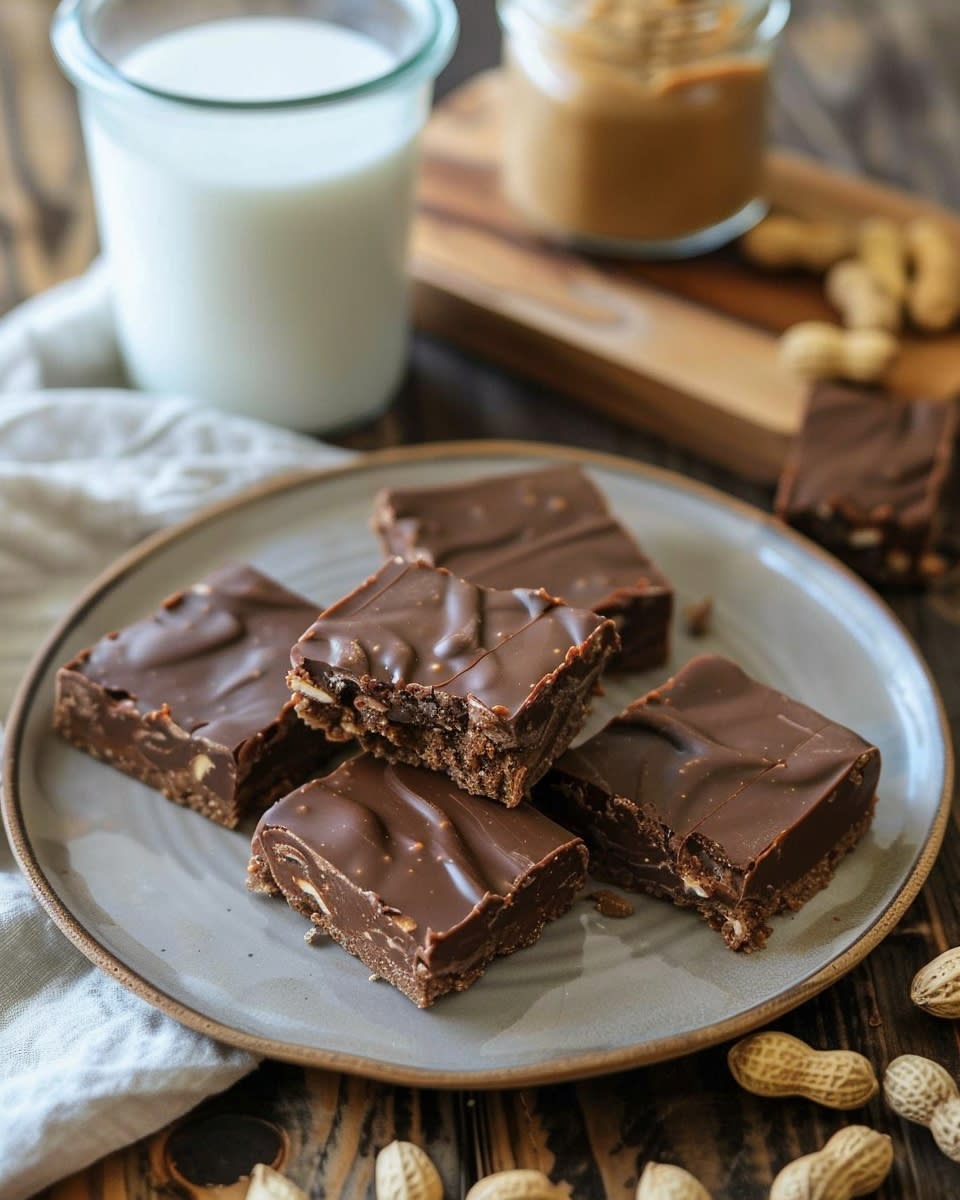
What makes these no-bake chocolate peanut butter bars so special is how they bring together two flavors that were basically made for each other. The creamy, salty richness of peanut butter pairs perfectly with smooth, sweet chocolate. Each bite gives you that satisfying combo of textures too. You get a slightly firm base with a silky chocolate topping that melts in your mouth.
The magic happens with just a handful of simple ingredients you probably already have in your pantry. Graham crackers form the base, giving these bars structure and a subtle sweetness. Peanut butter acts as the star ingredient and also works as a binder to hold everything together. Butter adds richness and helps create that perfect texture. Powdered sugar sweetens the peanut butter layer without making it grainy. And of course, chocolate chips melt into a glossy top layer that makes these bars look as good as they taste.
I love making these bars on Sunday afternoons and keeping them in my fridge all week. They’re perfect for packing in lunch boxes, serving at birthday parties, or bringing to office meetings. Kids go crazy for them, but adults love them just as much. I’ve seen people who claim they don’t like peanut butter change their minds after trying these bars.
The real beauty of this recipe is its flexibility. You can dress it up for special occasions by adding toppings or decorations. Or keep it simple for a quick weeknight treat. Either way, you’ll end up with something that tastes like it came from a fancy bakery.
Ingredients You’ll Need for Perfect Chocolate Peanut Butter Bars
Let me walk you through everything you need to make these amazing bars. I’ve made this recipe at least fifty times, so I know exactly what works best.
For the Peanut Butter Base:
- 2 cups graham cracker crumbs – You can buy pre-made crumbs or crush whole crackers yourself. I actually prefer crushing my own because the texture comes out better. Just put the crackers in a zip-top bag and roll over them with a rolling pin.
- 2 cups powdered sugar – Also called confectioners’ sugar. Don’t try to substitute regular granulated sugar here. The powdered version dissolves better and creates the right consistency.
- 1 cup creamy peanut butter – This is where quality matters. I always use a well-known brand of regular peanut butter, not the natural kind. Natural peanut butter has too much oil separation and won’t set up properly.
- 3/4 cup melted butter – Use real butter, not margarine. The flavor difference is huge. I melt mine in the microwave for about 45 seconds.
For the Chocolate Topping:
- 1 1/2 cups chocolate chips – Semi-sweet chocolate chips work great, but you can use milk chocolate if you prefer things sweeter. Dark chocolate works too if you want a more grown-up taste.
- 1/4 cup peanut butter – Adding peanut butter to the chocolate layer helps the flavors blend together and keeps the chocolate from getting too hard in the fridge.
Tips for Choosing the Best Ingredients:
Not all ingredients are created equal. Here’s what I’ve learned from making these bars over and over:
Peanut Butter: Stick with traditional creamy peanut butter like Jif or Skippy. These brands have the right amount of oil and sugar already mixed in. Natural peanut butter sounds healthier, but it will make your bars crumbly and oily. If someone in your family has a peanut allergy, you can substitute with almond butter or sunflower seed butter. I’ve tried both and they work great.
Chocolate Chips: Quality matters here. Store-brand chips often contain less cocoa and more fillers. They don’t melt as smoothly. I buy Ghirardelli or Nessy’s when they’re on sale. You can also chop up a chocolate bar instead of using chips. This actually gives you an even smoother topping.
Graham Crackers: Any brand works fine for this. Some people like to use chocolate graham crackers for an extra chocolate kick. Vanilla wafers also work if you can’t find graham crackers. I’ve even used crushed Oreos with the cream scraped off when I wanted to get fancy.
Butter: Always use unsalted butter so you can control the salt level. If you only have salted butter, reduce any additional salt in the recipe. For a dairy-free version, coconut oil works as a substitute. It changes the flavor slightly but still tastes delicious.
Possible Substitutions and Variations:
One reason I love this recipe is how easy it is to customize. Here are some swaps I’ve tried successfully:
For Gluten-Free Bars: Replace graham crackers with gluten-free graham crackers or crushed gluten-free cookies. Several brands make great options that taste just like regular ones.
For Reduced Sugar: You can cut the powdered sugar down to 1 1/2 cups if you prefer less sweetness. The bars will still hold together fine. Use sugar-free chocolate chips on top to reduce sugar even more.
For Extra Protein: Add 1/4 cup of protein powder to the peanut butter layer. Vanilla or chocolate protein powder both work. This turns these bars into a decent post-workout snack.
For Crunch: Mix in 1/2 cup of Rice Krispies cereal or crushed pretzels to the base. This adds a nice texture contrast.
For Flavor Twists: Add a teaspoon of vanilla extract to the peanut butter layer. Or sprinkle sea salt on top of the chocolate before it sets. Some people like adding mini marshmallows or chopped nuts too.
The ingredient list might look basic, but don’t let that fool you. Sometimes the simplest recipes create the most amazing results. I’ve brought fancy layered cakes to parties that got polite compliments. But these simple peanut butter chocolate bars always disappear first.


Step-by-Step Instructions for Making Chocolate Peanut Butter No-Bake Bars
Now that you’ve got all your ingredients ready, let’s actually make these bars. Trust me, this is easier than making a sandwich.
First things first, grab a 9×13 inch baking pan. I learned the hard way that size matters here. My first attempt used a smaller pan and the bars came out way too thick and took forever to set. Line your pan with parchment paper, leaving some overhang on the sides. This little trick makes getting the bars out so much easier later. You’ll just lift the whole thing out by the paper edges instead of trying to cut and pry bars from the pan like I used to do.
Get yourself a large mixing bowl. And I mean large. Don’t try to be a hero with a medium bowl unless you want peanut butter mixture all over your counter. Pour in those graham cracker crumbs, the powdered sugar, one cup of peanut butter, and your melted butter. Here’s where things get real. You need to mix this until everything comes together completely. I usually start with a wooden spoon but honestly end up using my hands because it’s faster and more thorough.
The mixture should look crumbly at first but then start clumping together as you mix. It should feel like wet sand at the beach. If it seems too dry and won’t stick together, add a tablespoon more of melted butter. Too wet and sticky? Throw in a few more graham cracker crumbs. I’ve made this recipe in different climates and humidity levels definitely affect how the mixture behaves.
Press this mixture firmly into your prepared pan. And when I say firmly, I mean really press down hard. Use the back of a measuring cup or your hands to pack it tight. My mom always uses a small rolling pin for this step. If you don’t press hard enough, your bars will fall apart when you try to cut them later. Been there, done that, swept up the crumbs.
The base should be completely even across the whole pan. Take an extra minute to smooth out any bumps or thin spots. This matters because those thin spots will crack when you cut the bars. Once you’ve got it perfect, stick the pan in the refrigerator while you make the topping. This helps it firm up a bit.
Now for the chocolate layer. Grab a microwave-safe bowl and dump in your chocolate chips and that quarter cup of peanut butter. Microwave this for 30 seconds, then stir. Then another 30 seconds, then stir again. Keep doing this in 30-second bursts until everything melts together smoothly. Don’t try to microwave it all at once for two minutes. I did that exactly one time and ended up with seized, grainy chocolate that I had to throw out.
Some people melt their chocolate in a double boiler on the stove, which works great if you’re fancy like that. I’m usually too impatient and the microwave method works perfectly fine. Just watch it carefully and stir between each heating. The mixture should be completely smooth and glossy when done.
Pour this chocolate mixture over your chilled peanut butter base. Use a spatula to spread it evenly across the entire surface. I like to pour it in the center and then gently push it toward the edges. Work quickly because the cold base will start making the chocolate set up faster than normal. Don’t stress if it’s not absolutely perfect though. These are homemade bars, not a magazine photoshoot.
Here’s where patience becomes important. Pop that pan back in the refrigerator for at least two hours. I know, I know. The wait is brutal. Sometimes I make these right after dinner so they’re ready for a late-night snack. Or I’ll make them in the morning and have them ready for after lunch. If you try to cut them too early, the chocolate will smear everywhere and the base might still be soft. Trust the process.
After they’ve chilled completely, lift the whole thing out using that parchment paper overhang. Place it on a cutting board. Use a sharp knife to cut the bars into squares. I usually cut mine into 24 pieces, but you can make them bigger or smaller depending on what you need. For parties, smaller squares work better because they’re rich. For personal snacking, go bigger.
Here’s a pro tip nobody tells you: wipe your knife clean between cuts. This keeps the edges sharp and clean instead of getting all messy and dragged through. I keep a damp paper towel right next to my cutting board for this. Makes such a difference in how pretty the final bars look.
How to Store These Bars Properly
Storage is actually super important with these no-bake peanut butter bars. They need to stay cold or they’ll get too soft and messy. I keep mine in an airtight container in the refrigerator. They’ll last about two weeks this way, though they’ve never survived that long in my house. Usually they’re gone within three or four days max.
Layer them with parchment paper between each level if you’re stacking them in your container. This prevents them from sticking together. I learned this after pulling apart a container full of bars that had fused into one giant chocolate peanut butter blob. Still tasted good, just didn’t look great.
You can also freeze these bars for up to three months. Wrap them individually in plastic wrap first, then put them all in a freezer bag. Pull one out whenever you need a quick dessert. They thaw in about 15 minutes at room temperature. Sometimes I eat them straight from the freezer though. They get this awesome fudgy texture when frozen that reminds me of ice cream bars.
If you’re bringing these to a party or gathering, keep them in a cooler with ice packs during transport. I once brought them to a summer barbecue without thinking about the heat. By the time I got there, I basically had chocolate soup. Now I always plan ahead for temperature.
Why These No-Bake Bars Are So Special
Okay, so what makes these particular bars stand out from every other dessert recipe out there? I’ve thought about this a lot because I genuinely make these more than any other sweet treat.
The texture combination is absolutely perfect. You bite through that smooth chocolate top layer and it gives way to the dense, slightly crumbly peanut butter base. It’s not too soft and not too hard. The graham crackers add little bits of texture throughout the base that keep things interesting. Every bite feels satisfying in your mouth. Similar to what I love about mini lemon cheesecake bites, there’s something about that contrast of layers that just works.
The flavor balance is spot-on too. Sweet but not cavity-inducing sweet. Rich but not so heavy you can only eat a tiny piece. The salt from the peanut butter cuts through all that chocolate and sugar. It’s that magical combination that keeps you reaching for just one more piece. Then another. Then maybe just one more after that.
Funny enough, these bars remind me of those expensive peanut butter cups you buy at fancy candy stores, except way better because they’re homemade. And honestly cheaper. A batch of these costs maybe five or six dollars to make and gives you two dozen bars. Try buying that many peanut butter cups at a candy shop and you’ll spend triple that.
I’ve brought these bars to so many different events over the years. Baby showers, graduation parties, church potlucks, office birthday celebrations. They work for literally everything. Unlike something like strawberry shortcake dessert cups that feel more summery and specific, these bars fit any season and any occasion.
Last Christmas, I made five batches of these as gifts. Put them in cute tins with ribbons and gave them to neighbors and coworkers. People were so excited. One of my coworkers said it was better than any store-bought gift she received. Another neighbor asked if I’d make them for her daughter’s wedding shower. That’s the kind of reaction these bars get.
Kids absolutely lose their minds over these. My nephew calls them “the best thing ever invented” which is high praise from an eight-year-old. But here’s what surprised me: adults are just as obsessed. I’ve seen very sophisticated people at fancy dinner parties sneak extra bars into napkins to take home. No judgment. I’d do the same thing.
They’re also fantastic for those times when you need something chocolatey but don’t want to commit to a whole cake or batch of cookies. If you’re craving something similar but want to turn on the oven, soft baked oatmeal chocolate chip cookies hit that same comfort food spot. But when it’s hot outside or you just can’t deal with baking, these no-bake bars save the day.
The fact that they’re no-bake means you can make them with kids too. My friend’s daughter made a batch by herself at age ten. No hot oven to worry about, no complicated steps where things can go wrong. Just measuring, mixing, and pressing. It’s a great recipe for teaching kids basic cooking skills without the stress.
I also love that these bars satisfy both chocolate lovers and peanut butter fans equally. My husband is all about chocolate while I lean toward peanut butter. These bars make us both happy. No compromising or making two separate desserts. For something even more intensely chocolate-forward, I sometimes make peanut butter chocolate lava cake, but these bars are definitely easier and less messy.
Another special thing about these chocolate peanut butter dessert bars? They taste even better the next day. Something about that extra time in the refrigerator lets all the flavors blend together perfectly. The chocolate firms up just right and the base gets that ideal density. I almost always make them the day before I need them now.


Tips and Tricks for Perfect Chocolate Peanut Butter Bars Every Time
After making these bars more times than I can count, I’ve picked up some tricks that really make a difference. Let me share the stuff that took me years to figure out.
Getting the Perfect Base Texture
The base is where most people mess up without even realizing it. If your graham cracker crumbs are too coarse, you’ll get a base that crumbles apart. Too fine and it becomes almost paste-like. I aim for somewhere in the middle. When I’m crushing my own crackers, I shake the bag after crushing to see how it settles. You want it to look like coarse sand, not flour.
Here’s something nobody ever told me: let your melted butter cool for about two minutes before mixing it with the other base ingredients. If it’s too hot, it can make the peanut butter too loose and then your base won’t set up right. I learned this after wondering why some batches came out perfect and others seemed weird and soft.
Want to add some crunch? Mix in half a cup of crispy rice cereal to your base mixture. It adds this amazing texture that people always ask about. I started doing this after accidentally knocking a bowl of cereal into my mixture once. Best mistake ever. The cereal stays slightly crunchy even after everything sets up.
You can also try adding a tablespoon of honey to the peanut butter layer if you want a different kind of sweetness. Honey gives it this subtle floral note that works really well with the chocolate. Just reduce the powdered sugar by about two tablespoons if you do this, otherwise it gets too sweet.
Chocolate Layer Secrets
The chocolate topping seems simple but there are definitely ways to make it even better. First off, don’t skip adding that peanut butter to the melted chocolate. I know it seems weird to add peanut butter to both layers, but it really does make the chocolate easier to cut through and keeps it from getting rock-hard in the fridge.
If you want an extra glossy finish on your chocolate, add a teaspoon of coconut oil when you’re melting the chocolate chips. This gives you that professional-looking shine you see on fancy desserts. Makes people think you spent way more effort than you actually did.
For holidays or special occasions, sprinkle decorations on the chocolate layer right after you spread it and before it sets. Mini chocolate chips, crushed candy canes at Christmas, or colored sprinkles for birthdays all work great. My daughter loves when I add those tiny heart sprinkles for Valentine’s Day. Press them down gently so they stick.
One trick I discovered by accident: if you slightly swirl the chocolate layer with a knife right after pouring it, you create this cool marbled effect. Just drag a butter knife through in random directions. Doesn’t change the taste at all but looks really impressive.
Common Mistakes and How to Fix Them
Let’s talk about what goes wrong and how to avoid it. I’ve made every mistake possible with these bars so you don’t have to.
Problem: Base is too crumbly and falls apart. This usually means you didn’t press it hard enough or you didn’t use enough butter. Fix it by adding another tablespoon or two of melted butter and really pack it down tight. I mean use some muscle. My arms get tired from pressing sometimes.
Problem: Chocolate layer cracks when you cut it. This happens when the bars are too cold. Let them sit at room temperature for about five minutes before cutting. Also make sure you’re using a sharp knife and wiping it clean between cuts. A dull knife drags through instead of slicing cleanly.
Problem: Everything is too soft and won’t hold shape. You probably didn’t chill them long enough. I know waiting is hard but these really do need at least two hours in the fridge. If you’re in a super hurry, the freezer for 45 minutes works but the texture is slightly different.
Problem: The layers separate when you bite into them. This means the peanut butter base wasn’t chilled before adding the chocolate, or the chocolate was too hot when poured. That quick chill in the fridge between layers really helps them bond together properly.
Problem: Peanut butter layer is oily. You used natural peanut butter, didn’t you? I told you not to do that! Just kidding, but seriously, natural peanut butter separates too much. Stick with regular processed peanut butter for this recipe. Save the natural stuff for sandwiches.
Creative Ways to Customize Your Bars
Once you’ve mastered the basic recipe, you can get creative. I treat this recipe like a canvas now.
Try making a triple layer version by adding a middle layer of melted butterscotch chips mixed with peanut butter. Pour it over the base, chill, then add your chocolate layer on top. It’s extra rich but absolutely incredible.
For a cookies and cream variation, crush up about ten Oreo cookies (cream and all) and mix them into your base instead of using all graham crackers. Use half graham crackers and half crushed Oreos. The cookies add little chocolate specks throughout that look cool and taste even better.
Make peanut butter pretzel bars by mixing crushed pretzels into the base along with the graham crackers. The salty pretzel pieces throughout create this sweet and salty thing that’s addictive. Use about one cup of pretzels and one cup of graham crackers instead of two cups of just graham crackers.
During fall, I like making a pumpkin spice version by adding a teaspoon of pumpkin pie spice to the peanut butter layer. Sounds weird but it works. The warm spices play nicely with both the peanut butter and chocolate. Sometimes I’ll top these with white chocolate instead of regular chocolate for variety.
For a healthier version, replace half the graham crackers with crushed unsweetened whole grain cereal or oats. Cut the sugar to one and a half cups. Use dark chocolate chips with at least 70% cacao. They won’t be quite as sweet but they’re still really good and you can feel slightly less guilty eating three of them.
My friend who loves coffee makes a mocha version by adding a tablespoon of instant espresso powder to the melted chocolate. The coffee flavor enhances the chocolate without being too strong. Perfect for grown-up gatherings when you want something a bit more sophisticated.
Serving Suggestions for Different Occasions
How you cut and serve these bars can really make a difference depending on the event.
For kids’ parties, cut them into small bite-sized squares and put them in colorful paper cupcake liners. Kids can grab them easily and the liners contain any mess. Plus they look adorable arranged on a platter.
At fancy dinner parties, cut them into thin rectangular bars and arrange them standing up on a white serving plate. Dust them lightly with cocoa powder right before serving. Suddenly your no-bake dessert looks like something from a restaurant. I’ve served these at pretty formal events and nobody ever guesses how easy they were to make.
For potlucks or large gatherings, keep them in the pan and cut them into standard squares. Arrange them on a nice platter with some doilies underneath if you want to get fancy. They’ll disappear quickly no matter how you present them.
When I’m packing these for lunch boxes or snacks, I wrap individual bars in parchment paper and twist the ends like candy wrappers. Makes them easy to grab and go. My kids love having them in their lunches. Their friends always want to trade for them.
One really fun way to serve these is to make a dessert board with the bars as the centerpiece. Add some fresh strawberries, a small bowl of whipped cream, extra chocolate chips scattered around, and maybe some cookies. People can customize their plate. It’s a whole experience instead of just handing someone a bar.
Temperature and Timing Tips
Timing really matters with these bars even though they seem super flexible.
If you’re making them in summer when your kitchen is hot, everything will be softer and might take longer to set. I sometimes stick my mixing bowl in the fridge for ten minutes before pressing the base just to firm things up a bit. The chocolate layer will also melt faster when you pour it, so work quickly.
In winter, the opposite happens. Everything firms up super fast which can actually make spreading the chocolate harder. If your chocolate starts setting before you get it spread evenly, just pop it in the microwave for ten seconds to loosen it back up.
The best time to cut these bars is actually in the morning after they’ve been in the fridge overnight. Something about that long, slow chill makes them slice perfectly. If you’re making them for an evening event, make them the night before rather than the morning of.
Food Safety and Quality
Since these bars contain dairy butter and stay at room temperature for serving, you want to be mindful of how long they sit out. Generally, they’re fine for about two hours at room temperature. After that, I put them back in the fridge. Following proper food quality standards helps ensure your desserts stay safe and delicious for everyone.
Always use ingredients before their expiration dates. Old peanut butter can taste stale and ruin the whole batch. Check your chocolate chips too. They can get that white bloom on them if they’ve been sitting around too long. It’s still safe to eat but doesn’t look as nice.
By the way, if you’re looking for more inspiration, browsing through different desserts recipes can spark ideas for variations on these bars or help you find your next favorite treat.
These little tips have honestly transformed my bar-making game. What started as a simple recipe has become something I can adjust and customize for any situation. That’s the real magic here – once you understand the basics, you can make these bars your own.
Frequently Asked Questions About No-Bake Chocolate Peanut Butter Bars
Can I use natural peanut butter instead of regular peanut butter?
I really don’t recommend using natural peanut butter for this recipe. Natural peanut butter has too much oil separation and lacks the stabilizers that help these bars hold together properly. The oil will make your base greasy and it won’t set up with the right texture. You’ll end up with bars that fall apart or feel too oily. Stick with regular processed peanut butter like Jif, Skippy, or Peter Pan. If you only have natural peanut butter, you’d need to significantly adjust the recipe by adding more graham crackers and less butter, but honestly it’s not worth the hassle.
How do I make these bars vegan?
Making a vegan version is totally possible with a few simple swaps. Replace the regular butter with vegan butter or coconut oil in the same amount. Make sure your peanut butter doesn’t contain honey, as some brands add it. Use dairy-free chocolate chips for the topping – brands like Enjoy Life or Hu Kitchen make great ones. Check your graham crackers too since some brands contain honey. Several companies make vegan graham crackers that work perfectly. The texture might be slightly different depending on which substitutes you use, but I’ve made vegan versions that tasted just as good as the original.
What if I don’t have a microwave to melt the chocolate?
No problem at all. Use a double boiler method instead. Fill a small pot with about an inch of water and bring it to a simmer. Place a heat-safe bowl on top, making sure the bottom doesn’t touch the water. Add your chocolate chips and peanut butter to the bowl and stir frequently as they melt together. This method actually gives you more control and reduces the risk of burning the chocolate. It takes a bit longer but works beautifully. Just make sure no water gets into your chocolate or it will seize up and become grainy.
Can I make these bars ahead of time for a party?
Absolutely, and I actually recommend it. These bars taste even better after sitting in the fridge for a day or two as the flavors meld together. You can make them up to five days before your event and keep them stored in an airtight container in the refrigerator. If you need to make them even further ahead, freeze them for up to three months. Wrap the whole uncut batch in plastic wrap and then foil before freezing. Thaw overnight in the fridge before cutting and serving. This makes party prep so much easier since you can knock out the dessert well in advance.
Why are my bars too soft and not holding their shape?
This usually comes down to either not chilling them long enough or your kitchen being too warm. These bars need at least two full hours in the refrigerator to set properly, and longer is even better. If your kitchen is really hot, the bars will soften quickly after you take them out. Try keeping them in the fridge until right before serving, and put them back in the fridge if they’ll be sitting out for more than an hour. You can also try adding a bit more graham cracker crumbs to the base next time, which will help them firm up better.
Can I use crunchy peanut butter instead of creamy?
You definitely can, and I’ve done it several times when that’s all I had in the pantry. The bars will have extra texture from the peanut pieces throughout the base, which some people really love. The texture will be a bit different – slightly more crumbly and not quite as smooth. If you’re specifically going for a crunchy texture, this works great. Just know that the bars might not stick together quite as well as they do with creamy peanut butter. Press the base extra firmly to compensate. Personally, I like mixing half creamy and half crunchy for the best of both worlds.
What size should I cut the bars?
It really depends on who you’re serving and what the occasion is. I usually cut a 9×13 pan into 24 squares by making six cuts lengthwise and four cuts across. This gives you nice medium-sized bars that aren’t too big or too small. For parties where people are eating lots of different foods, cut them smaller into 32 or even 40 pieces. For a family dessert, you can go bigger with just 16 large squares. These bars are pretty rich, so smaller portions often work better. You can always go back for seconds.
Do I need to use graham crackers or can I substitute something else?
Graham crackers work best but you have options. Vanilla wafer cookies make a great substitute and give a slightly different flavor. Digestive biscuits work well too if you’re outside the US. I’ve used crushed Ritz crackers in a pinch and they were surprisingly good with an interesting salty-sweet thing going on. Animal crackers work for a milder flavor. Even crushed pretzels mixed with a bit of sugar can work if you’re going for a salty-sweet vibe. Whatever you use, make sure it’s crushed to a similar consistency as graham cracker crumbs for the best texture.
Can I add protein powder to make these healthier?
Yes, and I’ve done this successfully multiple times. Add about a quarter to a third cup of protein powder to the peanut butter base mixture. Vanilla or chocolate protein powder both work well depending on your preference. You might need to add a tablespoon or two more of melted butter to compensate for the extra dry ingredient. The bars will be a bit denser and have a slightly different texture, but they’re still delicious. This turns them into a decent post-workout snack with added protein. Just don’t add too much protein powder or they’ll taste chalky and dry.
How do I prevent the chocolate layer from cracking when I cut the bars?
The cracking usually happens because the chocolate is too cold and brittle when you try to cut through it. Let the bars sit at room temperature for about five to ten minutes before cutting. This allows the chocolate to soften just slightly so it cuts cleanly instead of cracking. Use a large, sharp knife and wipe it clean with a warm, damp cloth between each cut. The warm knife slices through the chocolate more smoothly. You can also run the knife under hot water, dry it off, and then immediately cut. This little trick makes such a difference in getting clean edges.
I hope these bars become as much of a staple in your kitchen as they’ve been in mine. They’re proof that the best recipes don’t need to be complicated. Just grab those few simple ingredients, follow the steps, and you’ll have something absolutely delicious that everyone will ask you to make again and again.
Ingredients
Equipment
Method
- Tapisser un moule de 9x13 pouces avec du papier sulfurisé, en laissant un surplomb sur les côtés.
- Dans un grand bol, mélanger les miettes de craquelins Graham, le sucre en poudre, le beurre de cacahuète et le beurre fondu.
- Mélanger jusqu'à ce que le mélange soit bien combiné, en utilisant les mains si nécessaire, jusqu'à ce qu'il ressemble à du sable mouillé.
- Presser fermement le mélange dans le moule préparé en utilisant une tasse à mesurer ou les mains.
- Réfrigérer pendant que vous préparez la garniture au chocolat.
- Dans un bol adapté au micro-ondes, mélanger les pépites de chocolat et le beurre de cacahuète.
- Faire chauffer au micro-ondes par intervalles de 30 secondes, en remuant entre chaque, jusqu'à ce que le mélange soit lisse et brillant.
- Verser le mélange chocolaté sur la base au beurre de cacahuète réfrigérée et étaler uniformément.
- Réfrigérer pendant au moins 2 heures jusqu'à ce que le mélange soit ferme.
- Soulever les barres en utilisant le papier sulfurisé et couper en carrés.