Why You’ll Fall in Love with Classic Sourdough Bread with Crispy Crust
There’s something magical about the smell of fresh bread wafting through the house. I still remember the first time I baked my own Classic Sourdough Bread with Crispy Crust. The crackling sound as it came out of the oven was music to my ears, and that golden crust? Pure perfection. It wasn’t just bread; it was a masterpiece. Whether you’re a seasoned baker or a newbie, this recipe will make you feel like a pro.
A Little History Behind the Magic
Sourdough isn’t just a trend—it’s been around for thousands of years! Ancient Egyptians were probably the first to stumble upon the magic of wild yeast fermentation. Fast forward to today, and sourdough has become a symbol of slow, mindful cooking. My grandma used to say, “Good bread takes time.” She wasn’t wrong. The tangy flavor and airy texture of sourdough come from its natural fermentation process, which gives it that signature taste we all love.
Why You’ll Love This Recipe
This Classic Sourdough Bread with Crispy Crust is all about simplicity and satisfaction. No fancy ingredients—just flour, water, salt, and your trusty sourdough starter. The result? A loaf with a satisfying crunch on the outside and a soft, chewy interior. Plus, there’s nothing quite like the pride of baking your own bread. Your friends and family will think you’re some kind of kitchen wizard!
Perfect Occasions to Bake This Bread
Whether it’s a cozy Sunday morning breakfast, a dinner party centerpiece, or a thoughtful homemade gift, this bread fits every occasion. I love slicing it thick for avocado toast or pairing it with a steaming bowl of soup. It’s also perfect for holiday meals when you want something rustic yet impressive.
What You’ll Need
- 500g bread flour
- 350g water (room temperature)
- 100g active sourdough starter
- 10g salt
Substitution Options
- Bread flour: You can use all-purpose flour, but expect a slightly less chewy texture.
- Sourdough starter: If you don’t have one, you can start yours at home—it’s easier than you think!
- Salt: Sea salt works best, but kosher salt is a great alternative.
How to Make It Happen
Step 1: Mixing the Dough
Start by combining your flour and water in a large mixing bowl. Stir until no dry bits remain. This is called autolyse, and it helps develop gluten without much effort. Add your active sourdough starter and mix again. Watch how the dough transforms from shaggy to smooth—it’s almost hypnotic! Pro tip: Use a wooden spoon to avoid overworking your hands early on.
Step 2: Adding Salt
Once the dough feels stretchy, sprinkle in the salt. Knead gently to incorporate. Don’t skip the salt—it enhances the flavor and balances the tanginess of the sourdough. At this stage, the dough might feel sticky, but resist the urge to add more flour. Trust the process!
Step 3: Bulk Fermentation
Cover the bowl with a damp cloth and let the dough rest for 4-6 hours. During this time, you’ll perform a series of folds every 30 minutes. Each fold strengthens the gluten network, giving your bread structure. As the dough rises, it develops a lovely aroma—you’ll know it’s working when it doubles in size and feels light and bubbly.
Step 4: Shaping the Loaf
Gently turn the dough onto a floured surface. Shape it into a round boule or an oval bâtard, depending on your preference. Be gentle here—you don’t want to deflate all those precious air bubbles. Place the shaped dough seam-side up in a proofing basket dusted with flour.
Step 5: Final Proof
Cover the dough and let it proof overnight in the fridge. This slow fermentation builds flavor and ensures a crispier crust. When you wake up, your kitchen will thank you for the anticipation.
Step 6: Baking
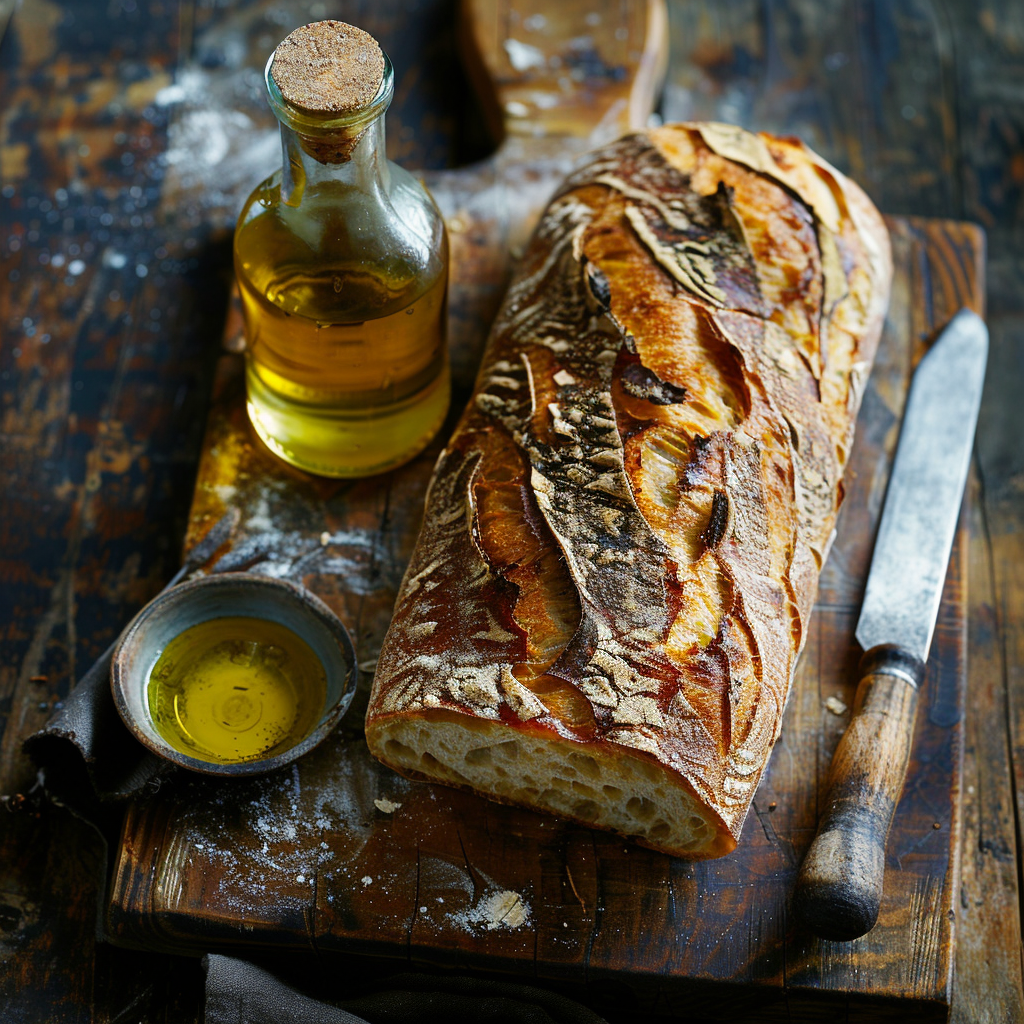
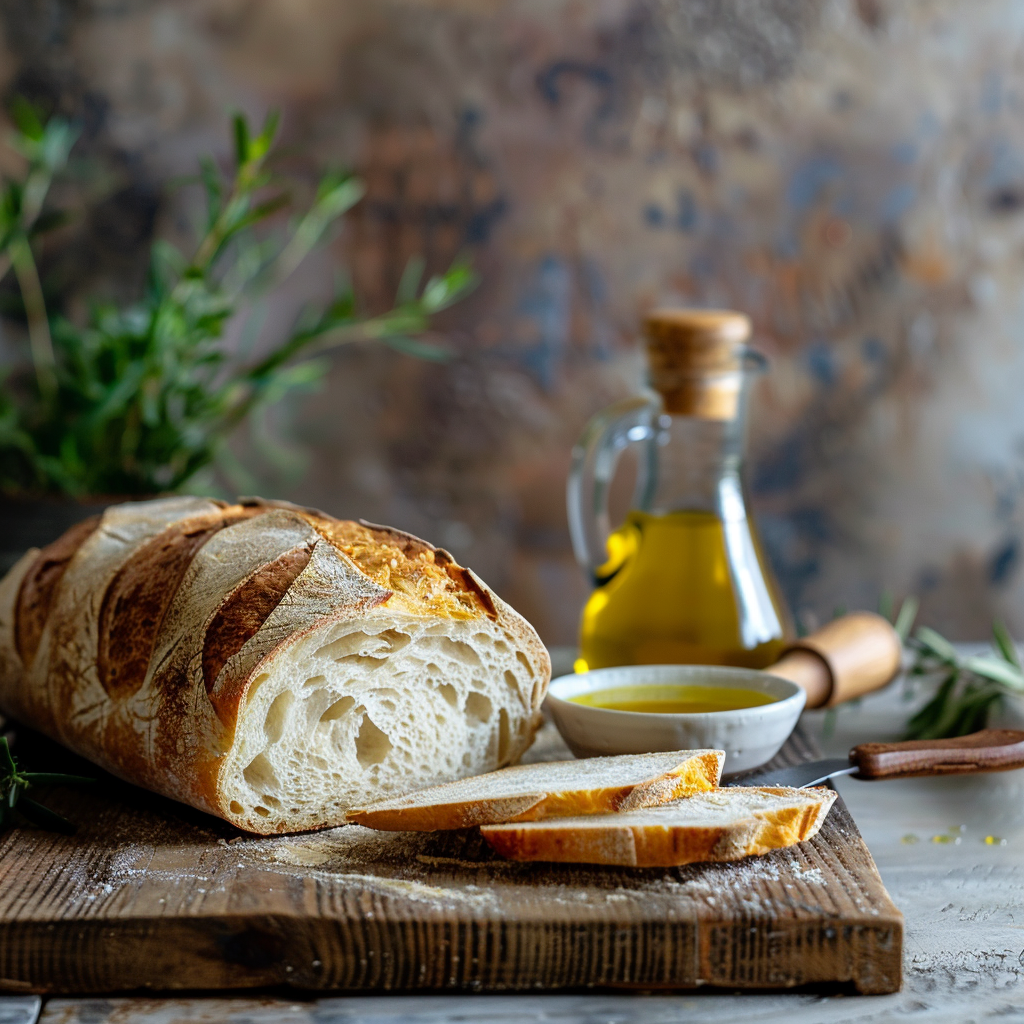
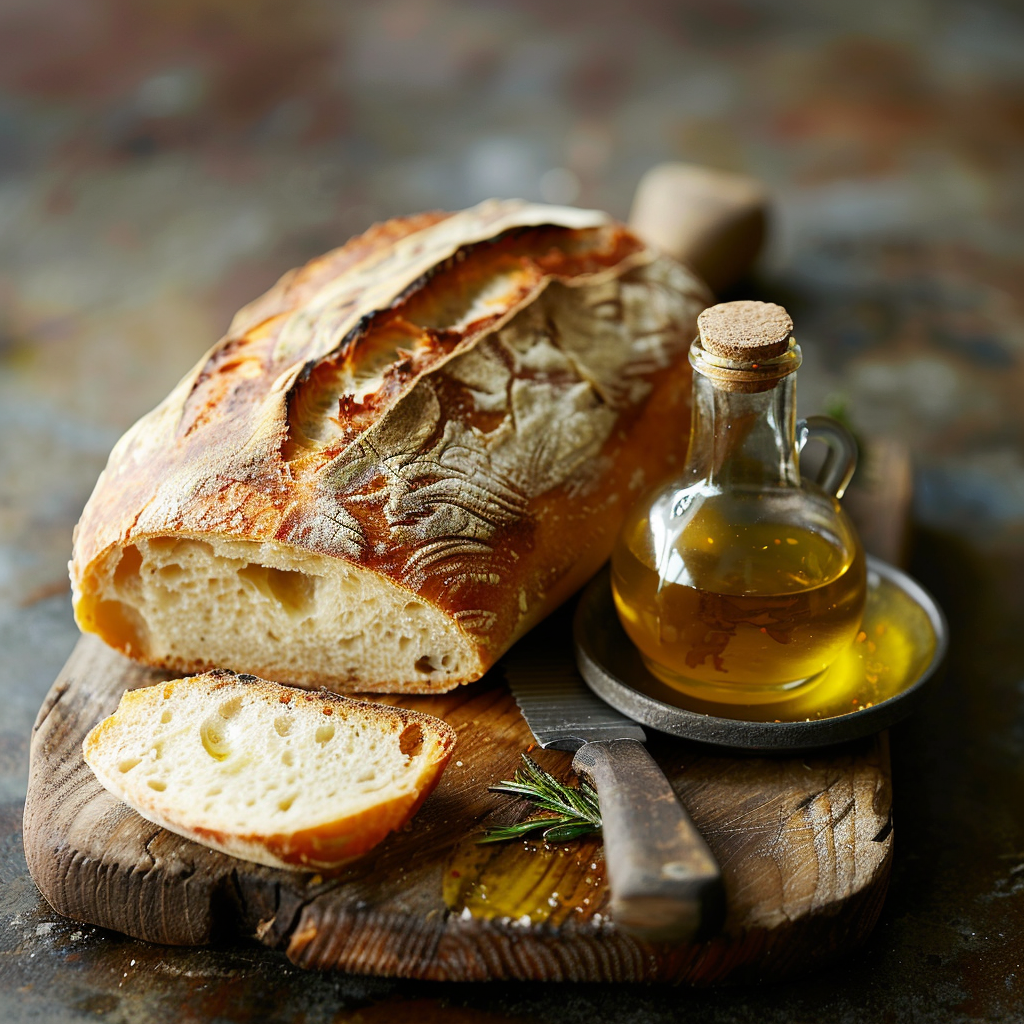
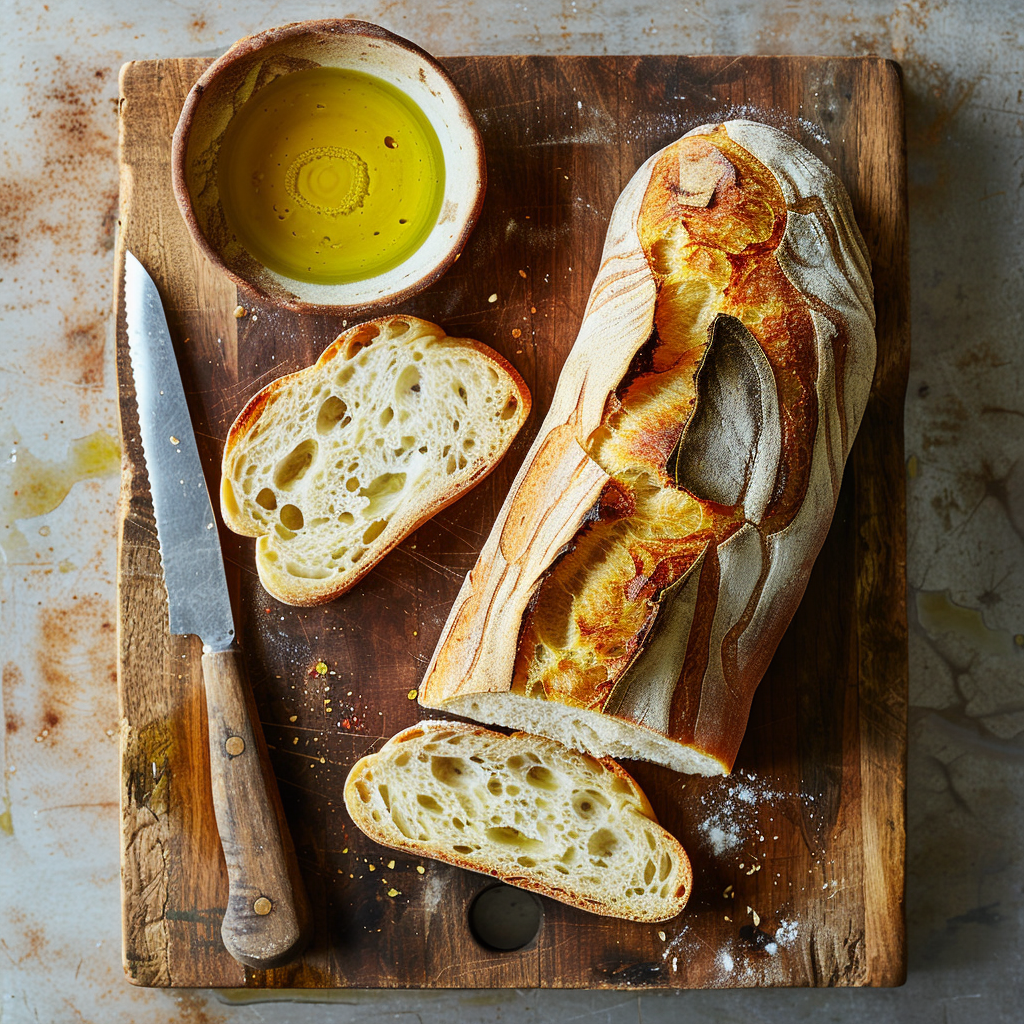
Preheat your oven to 475°F (245°C) with a Dutch oven inside. Carefully transfer the dough to the hot pot, score the top with a sharp knife, and bake covered for 20 minutes. Then uncover and bake for another 20-25 minutes until the crust turns deep golden brown. Chef’s tip: Spritz the loaf with water before scoring for extra crispiness.
Timing Breakdown
- Prep Time: 20 minutes
- Bulk Fermentation: 4-6 hours
- Final Proof: 8-12 hours (overnight)
- Baking Time: 40-45 minutes
- Total Time: Approximately 12-18 hours
Chef’s Secret
To get that ultra-crispy crust, place a small oven-safe dish of water on the bottom rack while baking. The steam helps the crust set beautifully.
A Fun Fact About Sourdough
Did you know that some sourdough starters are passed down through generations? There are stories of families maintaining their starters for over 100 years. Imagine baking with a piece of history!
Necessary Equipment
- Large mixing bowl
- Dutch oven or heavy pot with lid
- Proofing basket or bowl lined with a tea towel
- Sharp knife or lame for scoring
Storage Tips
Store your Classic Sourdough Bread with Crispy Crust in a paper bag to keep the crust crunchy. Avoid plastic bags, as they trap moisture and soften the crust. For longer storage, wrap the bread tightly in foil and freeze it.
If you slice the bread before storing, keep the slices separated with parchment paper to prevent them from sticking together. This trick is especially handy if you plan to toast individual slices later.
When reheating, pop the bread in a preheated oven at 350°F (175°C) for 5-10 minutes. It’ll come out warm and crispy, almost like freshly baked.
Tips and Advice
Keep your workspace clean and organized. Measure everything beforehand—it makes the process smoother. If your kitchen is cold, extend the fermentation times slightly. Patience is key with sourdough. Remember, practice makes perfect!
Presentation Ideas
- Serve slices on a wooden board with olive oil and balsamic vinegar for dipping.
- Pair with charcuterie boards for a chic appetizer spread.
- Wrap the loaf in linen cloth and tie it with twine for gifting.
Healthier Alternatives
Here are six ways to tweak this recipe:
- Whole Wheat: Replace half the bread flour with whole wheat for added fiber.
- Spelt Flour: Use spelt for a nutty flavor and extra nutrients.
- Seed Mix: Add sunflower, pumpkin, or flax seeds for texture and health benefits.
- Olive Oil: Incorporate a tablespoon of olive oil for richness.
- Lavender Honey: Drizzle honey over slices for a sweet twist.
- No-Knead Method: Skip intensive kneading by extending the fermentation time.
Common Mistakes to Avoid
Mistake 1: Using Inactive Starter
One of the biggest blunders is using a starter that hasn’t been fed recently. An inactive starter won’t rise properly, leaving you with dense bread. Always feed your starter 6-8 hours before baking. Pro tip: Look for bubbles and a slightly domed appearance to ensure it’s ready.
Mistake 2: Overhandling the Dough
Too much handling can deflate the dough, ruining its airy texture. Handle it gently during shaping and folding. Think of the dough as delicate—it needs care, not aggression.
Mistake 3: Skipping the Steam
Without steam, your crust won’t achieve that coveted crispiness. Always bake with a covered pot or add a tray of water to the oven. Trust me, it makes a world of difference.
Frequently Asked Questions
Can I make this without a Dutch oven?
Absolutely! While a Dutch oven traps heat and steam beautifully, you can use any heavy pot with a lid. Alternatively, bake directly on a baking stone with a steam pan below.
How do I know my starter is ready?
Your starter should double in size within 4-6 hours of feeding. It should smell mildly tangy and have visible bubbles. A float test—dropping a spoonful in water—can confirm readiness if it floats.
Why is my bread too sour?
Overfermentation can lead to excessive sourness. Keep an eye on your dough during bulk fermentation and final proof. Cooler temperatures slow fermentation, reducing sourness.
Can I speed up the process?
While shortcuts exist, sourdough thrives on patience. Rushing fermentation compromises flavor and texture. Embrace the wait—it’s worth it.
How do I store leftover starter?
Refrigerate your starter in a jar with a loose lid. Feed it once a week to keep it alive. Bring it back to room temperature and feed it again before using.
What if my bread doesn’t rise?
Check your starter’s activity and ensure your environment isn’t too cold. Also, verify that your measurements are accurate. Precision matters in baking.
Can I freeze the dough?
Yes, but freeze after shaping and before the final proof. Thaw in the fridge overnight, then proceed with baking.
Is sourdough gluten-free?
No, traditional sourdough contains gluten. However, some gluten-free versions use alternative flours like rice or almond flour.
Why does my crust crack?
Cracking often happens due to insufficient scoring. Make sure to cut deeply enough to guide the bread’s expansion during baking.
How long does sourdough last?
When stored properly, sourdough stays fresh for 3-5 days. Beyond that, freezing is your best bet.
Final Thoughts
Baking Classic Sourdough Bread with Crispy Crust is more than just following a recipe—it’s an experience. From the therapeutic process of kneading to the joy of sharing warm slices with loved ones, it’s a labor of love. So grab your apron, roll up your sleeves, and dive into the wonderful world of sourdough. Your taste buds will thank you!
Classic Sourdough Bread with Crispy Crust
Ingredients
Equipment
Method
- Combine flour and water in a large mixing bowl and stir until no dry bits remain (this is called autolyse).
- Add the active sourdough starter and mix until smooth.
- Sprinkle in the salt and knead gently to incorporate.
- Cover the bowl with a damp cloth and let the dough rest for 4-6 hours, performing a series of folds every 30 minutes.
- Turn the dough onto a floured surface and shape it into a round boule or an oval bâtard.
- Place the shaped dough seam-side up in a proofing basket dusted with flour.
- Cover and let it proof overnight in the fridge.
- Preheat your oven to 475°F (245°C) with a Dutch oven inside.
- Transfer the dough to the hot pot, score the top with a sharp knife, and bake covered for 20 minutes.
- Uncover and bake for another 20-25 minutes until the crust is deep golden brown.