
The Citrus and Berry Symphony of Your Dreams
Have you ever tasted a sunset? That’s what I ask my family when I serve this cake. It’s a burst of sunshine-soaked orange paired with the cheerful tang of cranberries. This Orange Cake with Cranberry Filling and White Chocolate Frosting is more than dessert. It’s a mood-lifter. I developed it for a gloomy November weekend. We needed something bright. The result was so good, my neighbor literally requested it for her birthday. It’s the kind of cake that makes people feel special.
From Holiday Tradition to Year-Round Joy
Cranberries and oranges are classic holiday partners. Think of them like a favorite holiday sweater—warm, familiar, and cozy. Traditional cranberry sauce often shares the table with orange zest. This cake takes that beloved duo and lets them be the star of the show. I wanted to capture that festive feeling but in a form we could enjoy any day. The white chocolate frosting is a modern twist. It adds a creamy sweetness that perfectly balances the tart berries. It’s tradition, reinvented for your dessert plate.
Why You’ll Adore This Orange Cranberry Layer Cake
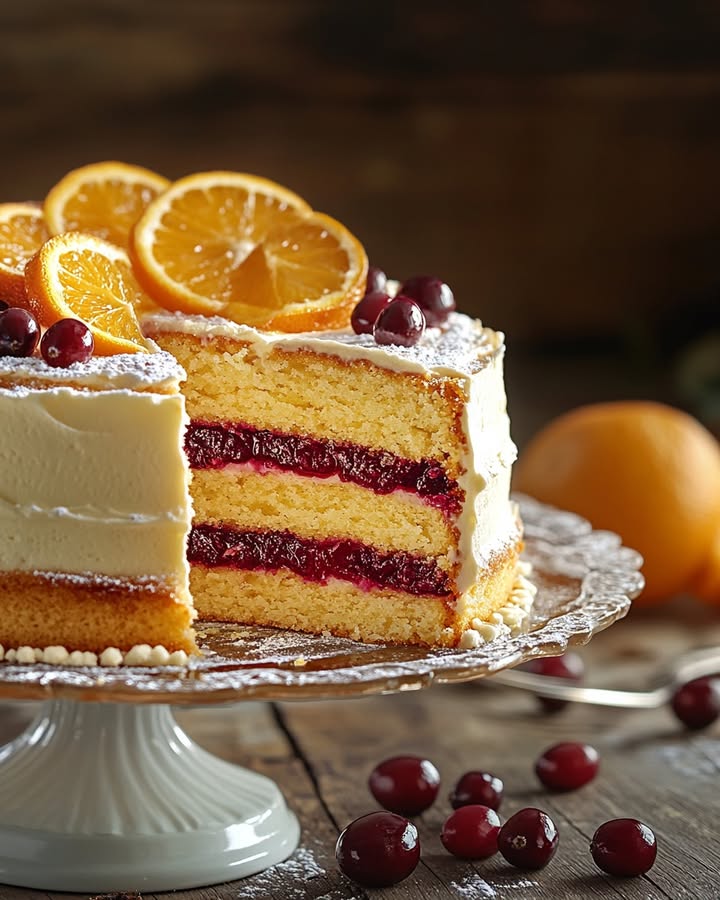
You will love this recipe because it works. The flavors are bold and clear. The cranberry filling is gloriously tart and a stunning ruby red. It cuts through the sweet, tender orange cake. The frosting is silky and rich. It’s also a visually stunning cake. The layers look impressive, but the steps are straightforward. This cake is a total crowd-pleaser. It bridges the gap between fancy bakery cake and heartfelt homemade treat perfectly.
Perfect Occasions for This Showstopper Cake
This cake is versatile. It’s perfect for any gathering where you want to impress.
- Thanksgiving or Christmas Dinner: It’s a festive, non-pie dessert option that guests adore.
- Birthday Celebrations: It feels extra special, especially for someone who loves fruity desserts.
- Brunch with Friends: Pair a slice with coffee for a truly decadent brunch treat.
- Just Because: Making a layer cake on a random Tuesday is a wonderful act of self-care.
Gathering Your Ingredients
Here is everything you’ll need. I always recommend using fresh orange juice and zest. It makes a world of difference in flavor.
For the Cranberry Filling:
- 5 cups cranberries, fresh or thawed
- ¾ cup water
- ¾ cup freshly squeezed orange juice
- 2 tablespoons cornstarch
- 1 cup granulated white sugar
- ¼ teaspoon cinnamon
For the Orange Cake:
- 3 cups all-purpose flour, spooned and leveled
- 1 tablespoon baking powder
- 1 teaspoon salt
- ½ cup unsalted butter, at room temperature
- ½ cup vegetable oil
- 1 ¾ cups granulated white sugar
- 3 large eggs
- 2 teaspoons vanilla extract
- 1 tablespoon orange zest
- 1 cup milk
- ½ cup freshly squeezed orange juice
For the White Chocolate Frosting:
- 1 cup unsalted butter, at room temperature
- 2 cups powdered sugar, sifted
- 6 oz white chocolate bars, melted and cooled
- 1-2 tablespoons orange juice
- Pinch of salt if needed
Smart Ingredient Substitutions
No worries if you’re missing something. Here are easy swaps.
- Cranberries: Frozen cranberries work perfectly. No need to thaw before cooking.
- Fresh Orange Juice: In a pinch, good-quality store-bought juice works. But fresh zest is non-negotiable for flavor.
- Vegetable Oil: Canola or any other neutral oil will do.
- Milk: Any milk you have—whole, 2%, or even a plain non-dairy milk.
- White Chocolate Bars: Use high-quality baking bars, not chips. Chips have stabilizers that can ruin the frosting texture.
Baking Your Orange Cranberry Masterpiece
Let’s bake! Clear your counter, put on some music, and get ready. The smell of orange cake baking is pure happiness.
Step 1: Prep and Preheat
First, get your oven ready. Turn it on to 350°F (175°C). This gives it time to heat evenly. Prepare your two 8-inch round cake pans. Line the bottoms with parchment paper circles. Grease the sides lightly. This little step is a cake life-saver. It guarantees your beautiful cakes will pop right out after baking.
Step 2: Make the Cranberry Filling
Combine all the filling ingredients in a large saucepan. Turn the heat to medium. Watch as the cranberries start to pop and sizzle. The kitchen will smell amazing. Cook for about 3-5 minutes until the berries are soft. Use an immersion blender to puree it slightly. I like it mostly smooth with a few bits for texture. Keep cooking for another 5-6 minutes. Pro tip: Stir constantly as it thickens. It should reduce by about one-third. Pour it into a bowl to cool completely. It will get much thicker as it sits.
Step 3: Bake the Orange Cake Layers
Whisk your flour, baking powder, and salt in a bowl. Set it aside. In a large bowl, beat the soft butter, oil, and sugar. Beat it for a full 2-3 minutes until it’s light and fluffy. Add the eggs one at a time. Then stir in the vanilla and that glorious orange zest. Now, add your dry ingredients and wet ingredients alternately. Start and end with the dry mix. Pour in the milk and orange juice in between. Mix just until you see no more flour streaks. Divide the batter between your pans. Bake for 28-32 minutes. A toothpick in the center should come out clean. Let them cool completely in the pans.
Step 4: Whip Up the White Chocolate Frosting
Beat the room-temperature butter until it’s super creamy. Add the sifted powdered sugar. Mix on low at first unless you want a sugar cloud in your kitchen! Once combined, pour in the melted, slightly cooled white chocolate. The chocolate should be fluid but not hot. Beat it all together. It will become silky and dreamy. Add a tablespoon or two of orange juice to make it perfectly spreadable. Give it a taste. Add a tiny pinch of salt if it tastes too sweet.
Step 5: Assemble the Layer Cake
This is the fun part. If your cake layers have domed tops, slice a thin layer off to make them flat. Then, carefully cut each cake in half horizontally. You’ll have four layers. Place the first layer on your cake stand. Spread a thin layer of frosting. Pipe or build a little “dam” of frosting around the edge. This holds the cranberry filling inside. Spoon on a generous amount of filling. Repeat with the next two layers. Place the final cake layer on top. Now, frost the outside with a thin “crumb coat.” Chill for 15 minutes. Then add the final, beautiful layer of frosting. Chef’s tip: Use a warm offset spatula to smooth the frosting for a professional look.
Time Investment for This Orange Cake
Great cakes aren’t rushed. Here is a realistic timeline.
- Prep Time: 45 minutes
- Cook Time: 35 minutes (cake) + 10 minutes (filling)
- Cooling Time: 2 hours
- Assembly & Chilling: 30 minutes + 4 hours
- Total Time: About 7.5 hours (mostly hands-off chilling)
Plan to make the filling and cakes in the morning. Assemble in the afternoon for a dinner dessert.
My Secret for the Best Orange Flavor
Here is my game-changer: use the whole orange. Before you juice your oranges, zest them. That bright, oily zest is packed with flavor. Rub the zest directly into the sugar for the cake. The sugar granules will become fragrant and orange-colored. This simple trick infuses the entire batter with intense citrus essence.
A Little Berry History
Did you know cranberries are one of only three major fruits native to North America? The other two are blueberries and Concord grapes. Native Americans used them for food, medicine, and dye. Their natural acidity acts as a preservative. This is why the cranberry filling in this cake stays so vibrant and fresh-tasting for days.
Helpful Kitchen Tools
You don’t need fancy gear. These basics will get the job done.
- Two 8-inch round cake pans
- Parchment paper
- Electric hand mixer or stand mixer
- Large saucepan
- Immersion blender, potato masher, or fork
- Mixing bowls in various sizes
- Fine grater or zester
- Juicer or reamer
- Offset spatula (very helpful for frosting)
- Serrated knife (for splitting cake layers)
How to Store Your Orange Cranberry Cake
Because of the fresh filling and frosting, this cake needs refrigeration. First, let the frosted cake chill for at least 4 hours. This sets everything beautifully. After that, you can cover it. I use a cake carrier. You can also place it on a plate and tent it loosely with foil.
It will keep happily in the fridge for up to 4 days. The flavors actually meld and get better! The key to serving is to let it come to room temperature. Take it out of the fridge about 30 minutes before you plan to serve it. The cake and frosting will soften up and taste their absolute best.
You can also freeze this cake. Freeze the whole, unfrosted cake layers wrapped tightly for up to a month. You can also freeze the assembled and frosted cake. Let it chill until firm, then wrap it well in plastic and foil. Thaw it overnight in the refrigerator before serving.
Tips for Cake Success
- Room Temperature is Key: Your butter, eggs, and milk for the cake should be at room temp. This helps the batter come together smoothly and rise evenly.
- Don’t Overmix: Once you add the flour, mix just until combined. Overmixing develops gluten and leads to a tough cake.
- Cool Completely: Never try to frost a warm cake. It will melt the frosting and make a huge mess. Patience is a virtue here.
- Thicken that Filling: Cook the cranberry mixture until it’s quite thick in the pan. It needs to be sturdy enough to hold between the cake layers.
Presentation Ideas to Wow Your Guests
A beautiful cake deserves a beautiful presentation.
- Top it with sugared cranberries and orange zest twists.
- Place edible gold leaf flakes lightly on the frosting for a holiday glow.
- Serve each slice on a plate with a drizzle of the extra cranberry filling and a dollop of whipped cream.
- Dust the serving plate with a little powdered sugar just before bringing it to the table.
Healthier & Creative Recipe Twists
Love the idea but want to mix it up? Try one of these delicious variations.
- Orange Cranberry Cupcakes: Turn the cake batter into cupcakes. Fill them with the cranberry filling using a piping tip. Top with a swirl of the white chocolate frosting.
- Gluten-Free Orange Cake: Substitute the all-purpose flour with a good 1:1 gluten-free baking blend. Make sure it contains xanthan gum.
- Dairy-Free Version: Use plant-based butter and milk. Choose a dairy-free white chocolate bar for the frosting.
- Reduced Sugar: Cut the sugar in the cranberry filling by one-quarter. Use a sugar substitute in the cake that bakes well, like monk fruit blend.
- Bundt Cake Simplicity: Bake all the batter in a greased Bundt pan. Serve the cranberry filling and frosting as a sauce and glaze on the side.
- Lemon Blueberry Swap: Replace the orange with lemon zest and juice. Swap the cranberry filling for a cooked blueberry filling. It’s a whole new summer sensation.
Common Mistakes to Avoid
Avoid these simple pitfalls for a perfect cake every time.
Mistake 1: Using Cold Ingredients
This is the biggest little mistake. Cold butter doesn’t cream well with sugar. Cold eggs can curdle the batter. Your cake won’t rise as high. It might be dense. Plan ahead. Take your butter, eggs, and milk out about an hour before you start baking. Your batter will be smooth, and your cake will be light and fluffy.
Mistake 2: Not Cooling the Filling and Cakes Enough
Impatience leads to a cake disaster. A warm cranberry filling will melt the frosting and make the layers soggy. A warm cake will literally melt the buttercream off. It becomes a slippery, sliding mess. Let the filling cool to room temperature in its bowl. Let the cakes cool completely in their pans, then on a rack. This is non-negotiable for a stable, beautiful cake.
Mistake 3: Adding Hot White Chocolate to the Frosting
If your melted white chocolate is too hot, it will melt the butter in your frosting. You’ll end up with a runny, greasy mess instead of a fluffy cloud. Melt the chocolate gently. Let it sit on the counter for a good 10 minutes after melting. It should be fluid but barely warm to the touch. Your frosting will be perfect.
Mistake 4: Overbaking the Cake Layers
A dry cake is a sad cake. Overbaking happens when we rely solely on the timer. Ovens vary. Start checking your cakes at the 28-minute mark. Insert a toothpick into the center. It should come out with a few moist crumbs clinging to it, not completely wet, but not bone-dry. The cake will continue to cook a bit from residual heat as it cools.
Mistake 5: Skipping the Frosting Dam
You frost a layer, slap on the cranberry filling, and the next cake layer squishes it all out the sides. What a mess! The simple fix is a frosting dam. After you spread a thin layer of frosting on the cake, pipe or spread a thicker ring of frosting around the very edge. This creates a wall. Then, spoon your filling inside this wall. It stays neatly contained. Your layers will be clean and defined.
Your Orange Cranberry Cake Questions, Answered
Can I make this cake a day ahead?
Absolutely! In fact, I recommend it. Baking the layers and making the filling a day ahead is a great plan. Let them cool completely. Wrap the cake layers tightly in plastic wrap. Keep the filling in a sealed container in the fridge. The next day, let the filling come to room temperature. Then, make your frosting and assemble the cake. This spreads the work out and makes the process much more relaxing.
My cranberry filling is too runny. Can I fix it?
Yes, you can fix a runny filling. Put it back into a saucepan over medium-low heat. In a small separate bowl, mix one more tablespoon of cornstarch with a tablespoon of cold water or orange juice. Make a smooth slurry. Whisk this into the simmering cranberry mixture. Cook for another 2-3 minutes, stirring constantly, until it thickens. Let it cool again. It will thicken even more as it cools.
What can I use instead of white chocolate in the frosting?
If you’re not a white chocolate fan, you have options. You can make a simple orange buttercream. Just use the butter, powdered sugar, orange juice, and extra zest. For a cream cheese twist, replace half the butter with room-temperature cream cheese. Omit the white chocolate. Add a little extra powdered sugar if it’s too soft. Both are delicious with the orange and cranberry flavors.
Can I use dried cranberries for the filling?
I don’t recommend it for this specific filling. Dried cranberries are much sweeter and have a different texture. They won’t break down and create the same lush, jammy consistency. Fresh or frozen cranberries are essential. They provide the perfect balance of tartness and that beautiful, vibrant color that makes this cake so special.
How do I get my cake layers to be perfectly flat?
Even with perfect batter, cakes often dome slightly. The easiest fix is to trim them. Once the cakes are completely cool, use a long serrated bread knife. Hold it level and gently saw off the domed top. You only need to remove a thin layer. Those cake scraps are your baker’s treat! This creates a stable, flat surface for stacking and frosting.
Why is my frosting gritty or lumpy?
Gritty frosting usually comes from un-dissolved powdered sugar. Always sift your powdered sugar. Lumps can come from the white chocolate if it wasn’t smoothly melted or if it started to re-harden. If your frosting is lumpy, you can try beating it a bit longer. If that doesn’t work, press it through a fine-mesh sieve. Then beat it again to fluff it up.
Can I use a different size pan?
You can, but it will change the baking time. Two 9-inch pans will make slightly thinner layers. They will bake faster, in about 22-25 minutes. If you use a 9×13 inch pan, you’ll make a sheet cake. Bake it for 30-35 minutes. You can still layer it with filling and frosting by cutting it in half. Just adjust your expectations for a taller, more dramatic layer cake look.
How do I prevent my cake from sticking to the pan?
The parchment paper circle is your best friend. Grease the pan, then place the parchment circle in the bottom. Grease the parchment lightly and the sides of the pan. After baking, let the cake cool for 10 minutes in the pan. Then, run a thin knife around the edge. Invert it onto a cooling rack. Peel off the parchment. Foolproof!
Is it okay to use bottled orange juice?
For the best, brightest flavor, fresh is always best. Bottled juice often has a cooked or flat taste. However, in the cake batter, good-quality bottled juice will work in a pinch. For the filling and the zest in the cake, though, fresh oranges are really important. The zest holds the powerful aromatic oils that make this cake smell and taste incredible.
My frosting is too soft to hold shape. What now?
Don’t panic. A soft frosting is often a temperature issue. First, make sure your butter wasn’t too warm. If the frosting is made and too soft, just chill it. Pop the bowl of frosting into the refrigerator for 15-20 minutes. Then, beat it again. This should firm it up perfectly. If it’s still too soft, you can add a little more sifted powdered sugar, a tablespoon at a time.
The Final Slice
This Orange Cake with Cranberry Filling is a labor of love. But every single minute is worth it. Seeing the smile on someone’s face when they take the first bite? That’s the real reward. It’s a cake that says “celebrate,” whether it’s a holiday, a birthday, or just making it through a long week. So tie on your apron, zest those oranges, and bake some joy. You’ve got this!
Creamsicle Orange Cookies
Ingredients
Equipment
Method
- Preheat the oven to 350°F (175°C) and prepare two 8-inch round cake pans by lining the bottoms with parchment paper and greasing the sides.
- In a large saucepan, combine all cranberry filling ingredients and cook on medium heat for about 3-5 minutes until soft. Puree slightly, then continue cooking for 5-6 minutes until thickened. Pour into a bowl to cool.
- In a bowl, whisk together flour, baking powder, and salt. In a large bowl, beat butter, oil, and sugar for 2-3 minutes until fluffy. Add eggs one at a time, then stir in vanilla and orange zest.
- Alternate adding the dry ingredients and wet ingredients (milk and orange juice) to the large bowl until combined. Divide batter between the pans and bake for 28-32 minutes, or until a toothpick comes out clean. Cool completely.
- Beat room temperature butter for frosting until creamy. Add sifted powdered sugar, then melted white chocolate. Mix and add orange juice as needed for spreadability.
- For assembly, trim domed tops of cooled cakes, then slice each layer in half horizontally, creating four layers.
- Place the first layer on a stand, frost the top, and add a generous amount of cranberry filling. Repeat with the next two layers and top with the final layer of cake.
- Apply a thin crumb coat of frosting all over the cake and chill for 15 minutes. Finish with a thicker layer of frosting.