A Slice of Pure Joy: My Triple Chocolate Cheesecake Obsession
You know that feeling when you want a dessert that feels like a warm hug? Something so decadent it makes you pause mid-bite and close your eyes? That, my friends, is this Triple Chocolate Cheesecake. I first made this for my husband’s birthday, aiming to impress. One bite and he declared it the best dessert he’d ever eaten. High praise from a man who thinks a perfect 10 is a bacon cheeseburger. The secret is in the layers—a fudgy crust, creamy chocolate filling, and not one, but two dreamy chocolate toppings. It’s a project of love, but oh, is it worth it.
From Humble Beginnings to Chocolate Heaven
Cheesecake itself is ancient, dating back to ancient Greece. But the chocolate cheesecake is a more modern love story. It really took off in popularity in the 20th century. This triple chocolate version is my own spin on that classic. I wanted to create a dessert that celebrated chocolate in all its glorious forms. The deep, almost bitter note of semisweet, the creamy sweetness of milk chocolate, and the smooth vanilla hint of white chocolate. It’s like having a full chocolate sampler in one gorgeous slice. While some may stick to a simple New York style, I say, go big or go home!
Why You’ll Fall Head Over Heels for This Cheesecake
Let me count the ways! First, the texture is everything. It’s unbelievably smooth and rich, without being heavy. The sour cream topping adds a lovely tang that cuts through all that sweetness perfectly. Second, it’s a showstopper. This cheesecake looks like it came from a fancy bakery. Finally, it’s incredibly forgiving. No water bath needed! The baking method is straightforward, leading to a perfectly set, crack-free top every single time. It’s the kind of recipe that builds your confidence as a baker.
The Perfect Moments for a Triple Chocolate Celebration
This isn’t your average Tuesday night dessert (although, no judgment if it is!). This is for the big moments. I always make it for birthdays and anniversaries. It’s a superstar at holiday parties—think Christmas, Thanksgiving, or New Year’s Eve. Bring it to a potluck and you’ll be the most popular person there. It’s also the ultimate “thank you” gift for a neighbor or friend. Basically, any time you want to say, “I love you,” “Congratulations,” or “Let’s celebrate,” this cheesecake is your messenger.
Gathering Your Chocolate Dream Team
Here’s what you’ll need to create this masterpiece. Make sure everything is at room temperature for the creamiest result!
- For the Crust: 2 cups chocolate cookie crumbs (like Oreo baking crumbs, filling removed), 1/4 cup unsalted butter, melted
- For the Filling: 3 packages (8 oz each) cream cheese, softened, 1 cup granulated sugar, 1/4 cup cocoa powder, 3 large eggs, 8 oz semisweet chocolate, melted and slightly cooled, 1 tsp vanilla extract
- For the Topping: 1/2 cup sour cream, 1/2 cup heavy cream
- For the Drizzle: 4 oz milk chocolate, melted and slightly cooled, 4 oz white chocolate, melted and slightly cooled
- For Garnish: Chocolate shavings or curls
No Stress Substitutions
Ran out of something? No worries! Here are some easy swaps:
- Cookie Crumbs: Graham cracker crumbs work in a pinch, though you’ll lose the deep chocolate base.
- Sour Cream: Full-fat Greek yogurt is a great substitute.
- Heavy Cream: For the topping, you can use more sour cream or full-fat coconut milk.
- Chocolate Types: Feel free to mix up the drizzle! Use dark chocolate instead of milk, or skip the white chocolate for a double dark version.
Crafting Your Masterpiece: Step-by-Step
Step 1: The Foundation – The Crust
Start by preheating your oven to 325°F (163°C). Give a 9-inch springform pan a light greasing. In a medium bowl, combine the dark chocolate cookie crumbs with the melted, unsalted butter. The mixture should look like wet sand and hold together when you pinch it. Pour it into the pan and press it firmly and evenly into the bottom. I like to use the bottom of a measuring cup to get it perfectly flat and smooth. This chocolatey base is what will support our rich filling, so a solid pack is key.
Pro tip: For extra flavor, you can add a tablespoon of granulated sugar to the crumb mixture, but it’s plenty sweet as-is!
Step 2: The Heart – The Chocolate Filling
In a large mixing bowl, beat the softened cream cheese and granulated sugar together. Keep going until it’s completely smooth, with no lumps. This could take 2-3 minutes. Scrape down the sides of the bowl. Now, add the cocoa powder and mix it in until it’s fully incorporated and the mixture turns a deep, dusty brown. Next, add the eggs one at a time. Mix well after each egg, but don’t overbeat once they’re in. Finally, pour in the slightly cooled, melted semisweet chocolate and the vanilla extract. The batter will become gloriously dark, shiny, and silky.
Chef’s tip: For the smoothest filling, ensure your cream cheese, eggs, and melted chocolate are all at room temperature before you start.
Step 3: Baking to Perfection
Pour this luxurious chocolate batter over your prepared crust. Gently tap the pan on the counter to release any air bubbles. Slide it into the preheated oven. Bake for 50 to 60 minutes. You’re looking for the edges to be slightly puffed and the center to be just set. It should have a slight jiggle, like Jell-O, not a liquid wobble. When you gently nudge the pan, the center should move as one unit. This is the sign of a perfectly baked cheesecake.
Step 4: The Cooling & Creamy Topping
Once baked, remove the cheesecake from the oven and place it on a wire rack. Let it cool completely to room temperature right in the pan. This gradual cooling helps prevent major cracking. While it cools, whip up the simple topping. In a small bowl, stir together the sour cream and heavy cream until smooth. Once the cheesecake is cool, spread this mixture evenly over the top. It adds a delightful tangy creaminess that balances the deep chocolate.
Step 5: The Grand Finale – Chocolate Drizzle
Now for the fun part! Take your slightly cooled melted milk chocolate and white chocolate. Using a spoon or a piping bag with a tiny tip, drizzle them back and forth over the cheesecake in a decorative pattern. Get creative—zigzags, swirls, whatever makes you happy! The contrast of the two chocolates against the white topping is stunning. Once decorated, it’s time for the most important step: patience. The cheesecake needs to refrigerate for at least 4 hours, but overnight is truly best.
Step 6: Serve & Savor
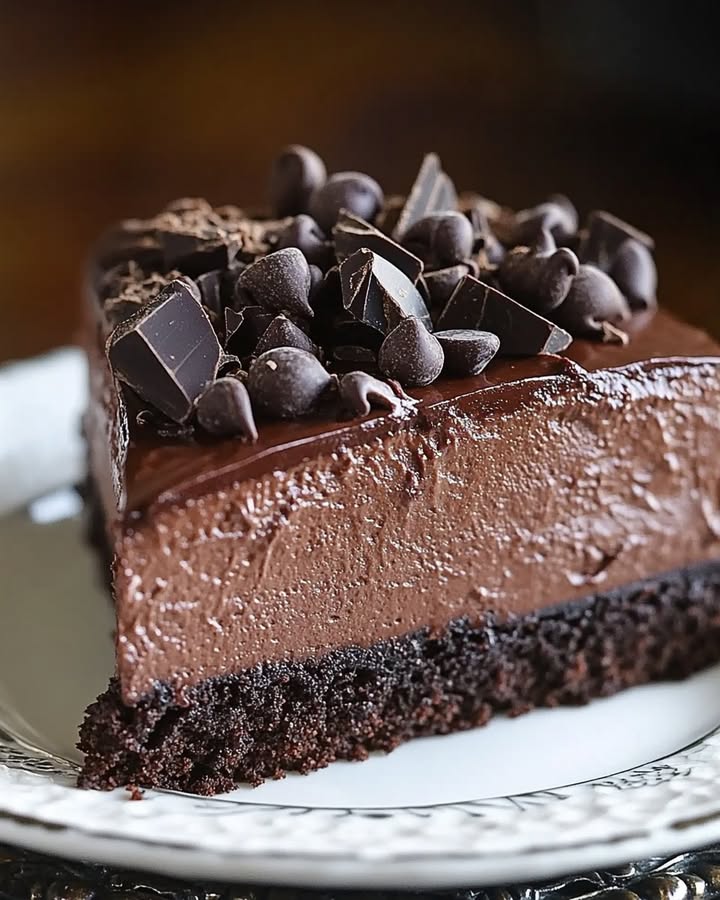
When you’re ready to serve, carefully run a thin knife around the edge of the springform pan before releasing the clamp. Garnish the top with generous chocolate shavings or curls. Use a sharp, thin knife dipped in hot water and wiped dry between each cut to get perfect, clean slices. Serve each slice on its own and watch the smiles appear. This is a dessert that demands to be enjoyed slowly.
Timing is Everything
Let’s break down the clock for this recipe. The active prep time is about 30 minutes. The cooking time is 1 hour. However, the non-negotiable chilling time is a minimum of 4 hours, ideally overnight. So, your total time from start to first delicious bite is about 5 hours and 30 minutes, with most of that being hands-off chilling. Plan ahead for the best results!
My Secret Weapon for a Flawless Top
Here’s my little secret: I always turn my oven off when the cheesecake is done, crack the door open just a tiny bit, and let it sit inside the cooling oven for about an hour. This super-gradual temperature change virtually guarantees a smooth, crack-free surface. It’s like giving your cheesecake a gentle transition from the oven’s heat to the room’s cool air.
A Chocolatey Fun Fact
Did you know the world’s most expensive cheesecake is valued at over $5,000? It’s decked out in gold leaf and rare chocolates. While our version won’t break the bank, it uses the simple, high-quality principle of layering different chocolates to create a taste that feels just as luxurious. Sometimes, the best things aren’t about the price tag, but the love stirred into them.
Tools of the Trade
You don’t need fancy equipment, but a few key items help:
- 9-inch Springform Pan (essential!)
- Electric Mixer (stand or hand-held)
- Mixing Bowls (various sizes)
- Microwave or Double Boiler (for melting chocolate)
- Spatula
- Wire Cooling Rack
Keeping Your Cheesecake Happy (Storage)
Once you’ve enjoyed your slices (or if you have willpower leftover), proper storage is key. Cover the cheesecake tightly with plastic wrap or store it in an airtight cake carrier. It must stay in the refrigerator.
Properly stored, your Triple Chocolate Cheesecake will stay fresh and delicious for up to 5 days. The flavors actually meld and deepen after a day or two, making it even better!
You can also freeze this cheesecake for longer storage. Wrap the whole cheesecake or individual slices tightly in plastic wrap, then in aluminum foil. It will keep well for up to 2 months. Thaw it overnight in the fridge before serving.
My Best Tips for Cheesecake Success
- Room Temp is Key: Seriously, don’t skip letting your cream cheese and eggs warm up. It prevents a lumpy batter.
- Don’t Overmix: Once the eggs are added, mix just until combined. Overmixing incorporates too much air, which can cause cracking.
- Cool Slowly: Let it cool in the oven with the door cracked, then on the counter, then in the fridge. Patience!
- Use a Hot Knife: For pristine slices, heat your knife under hot water, wipe it dry, and cut. Clean between each cut.
Presenting Your Prize
Make it look extra special! Serve each slice on a white plate with a dollop of freshly whipped cream and a few fresh raspberries. The red against the dark chocolate is gorgeous. You could also dust the rim of the plate with a little cocoa powder or powdered sugar. For a party, use edible gold flakes on the chocolate shavings for a touch of sparkle.
Mix It Up! Delicious Variations
Love the base but want to play? Try these twists:
- Mint Chocolate Chip: Add 1 tsp peppermint extract to the filling and fold in 1/2 cup mini chocolate chips before baking.
- Orange Dark Chocolate: Add 2 tbsp orange zest and 1 tsp orange extract to the filling. Use all dark chocolate for the drizzle.
- Salted Caramel Swirl: Before baking, dollop 1/2 cup of thick salted caramel sauce over the batter and swirl gently with a knife.
- Cookies and Cream: Use crushed Oreos (filling included) for the crust, and fold 1 cup chopped Oreos into the batter.
- Peanut Butter Cup: Swirl 1 cup of melted peanut butter into the batter before baking. Use milk chocolate for the drizzle and garnish with chopped peanut butter cups.
- Raspberry Chocolate: Before adding the sour cream topping, spread a thin layer of seedless raspberry jam over the cooled cheesecake.
Common Mistakes to Avoid
Mistake 1: Using Cold Ingredients
This is the number one reason for a lumpy cheesecake filling. Cold cream cheese doesn’t blend smoothly with sugar, leaving little lumps that bake into your final product. Cold eggs can also cause the batter to break or look curdled. Always plan ahead. Take your cream cheese, eggs, and even sour cream out of the fridge at least an hour before you start baking. They should feel cool to the touch, not cold.
Mistake 2: Overbeating the Batter After Adding Eggs
Once you add the eggs, your mixing style needs to change. Beating too much air into the batter at this stage is a prime cause of cracks. The air bubbles expand in the oven, then collapse as the cheesecake cools, creating fissures on the surface. After adding each egg, mix just until the yolk disappears and the batter is uniform. Use a lower speed on your mixer, and stop as soon as everything is combined.
Mistake 3: Skipping the Gradual Cool-Down
Pulling a hot cheesecake out of the oven and plopping it straight into the cold fridge is a shock to its system. The drastic temperature change causes the center to sink and the top to crack as it contracts too quickly. Always let your cheesecake cool on the counter to room temperature first. My oven-crack method is even better for a gentle transition. Only refrigerate it once it’s no longer warm.
Mistake 4: Not Testing for Doneness Correctly
Jiggling the whole pan wildly will give you a false read. The proper test is to gently nudge the side of the pan. The very center (about the size of a quarter) should have a slight, soft jiggle, while the outer edges should be set and look slightly puffed. If the center looks liquidy or sloshes, it needs more time. It will firm up dramatically as it chills. Overbaking leads to a dry, dense texture.
Mistake 5: Cutting with the Wrong Tool
Using a dull or serrated knife to slice cheesecake is a recipe for messy, crumbly pieces that ruin your beautiful presentation. The cleanest cut comes from a sharp, thin-bladed knife that’s been heated. The heat slides through the dense filling and crispy crust without dragging. Run the knife under very hot water, wipe it completely dry, make your slice, and then repeat for the next slice. Your serving plate will thank you.
Your Triple Chocolate Cheesecake Questions, Answered
Can I use a different size pan?
I strongly recommend sticking with the 9-inch springform pan. Using a smaller pan will cause the batter to overflow, while a larger pan will result in a thinner cheesecake that will bake much faster and can easily overbake and dry out. The baking time and texture are developed specifically for this size. If you must use a different pan, be prepared to adjust the baking time significantly and keep a very close eye on it.
Do I really need a springform pan?
For this recipe, yes, it’s essential. A regular cake pan won’t allow you to remove the cheesecake without destroying it. The removable sides of a springform pan let you release the cake cleanly from its crust and sides, giving you that perfect, professional-looking slice. It’s a worthwhile investment for any cheesecake lover and can be used for many other desserts like deep-dish pies and tarts.
My topping (sour cream/heavy cream mixture) is runny. What went wrong?
This usually happens if the cheesecake itself is still even slightly warm when you apply the topping. The residual heat can thin out the cream mixture. Make absolutely sure your cheesecake has cooled completely to room temperature—this can take a few hours. Also, ensure you’re using full-fat sour cream and heavy cream (whipping cream). Low-fat versions have more water and less fat, which can lead to a looser consistency.
Can I make this cheesecake ahead of time?
Absolutely! In fact, I highly recommend it. Cheesecakes taste better the next day after the flavors have fully melded. You can bake, top, drizzle, and refrigerate it up to two days before you plan to serve it. Just wait to add the final chocolate shavings garnish right before serving so they stay crisp and fresh. It’s the perfect make-ahead dessert for stress-free entertaining.
How do I prevent the white chocolate from seizing when I melt it?
White chocolate is very delicate and loves to seize (become a thick, clumpy mess) if it gets too hot or if even a drop of water gets in it. Melt it slowly using short bursts in the microwave (15-second intervals, stirring well between) or over a double boiler. Ensure your bowl and utensils are completely dry. If it does seize, you can sometimes rescue it by stirring in a teaspoon of vegetable oil or shortening until it smooths out again.
What’s the best way to get chocolate shavings for garnish?
You have a few easy options. For delicate curls, use a vegetable peeler on a room-temperature bar of chocolate. For shavings, you can use a microplane zester or the small holes on a box grater. If the chocolate is too hard and just crumbles, let it sit out for 10-15 minutes to soften slightly. For large, dramatic curls, gently scrape a Hershey’s kiss or a similar shaped piece of chocolate with a paring knife.
Why did my cheesecake crack in the middle?
Cracks are usually caused by one of three things: overmixing the batter after adding eggs (trapping too much air), a sudden temperature change (like going from oven to fridge), or overbaking. See the “Common Mistakes” section for detailed fixes. Remember, a small crack isn’t the end of the world! That’s what the beautiful sour cream topping and chocolate drizzle are for—they cover any imperfections perfectly.
Can I freeze the leftovers?
You sure can! Wrap individual slices or the whole cheesecake (if uneaten) tightly in plastic wrap, then in aluminum foil. Freeze for up to 2 months. To serve, thaw it overnight in the refrigerator. Do not thaw at room temperature, as this can make the texture gummy. The frozen and thawed cheesecake will be just as delicious as the day you made it.
Is there a way to make this without an electric mixer?
You can, but it will require some elbow grease. Ensure your cream cheese is very, very soft. Use a sturdy whisk and a strong arm to beat the cream cheese and sugar until completely smooth before moving on. When adding the eggs, switch to a folding motion with a spatula to avoid overworking the batter. It’s more labor-intensive, but absolutely doable if you’re mixer-less.
Can I use cocoa powder instead of melted chocolate in the filling?
The recipe already uses cocoa powder and melted chocolate for a reason. The cocoa gives a deep chocolate flavor, while the melted semisweet chocolate adds richness, smoothness, and structure. If you only use cocoa, the filling will be less firm and may lack that luxurious, fudgy quality. I don’t recommend omitting the melted chocolate—it’s a key component of the “triple chocolate” experience.
The Final, Sweet Slice
So there you have it—my heart and soul poured into one Triple Chocolate Cheesecake recipe. It might seem like a few steps, but each one is simple and leads to a result that will have everyone asking for your secret. Baking is about sharing joy, and this cheesecake is pure, unadulterated joy on a plate. Put on some music, melt that chocolate, and get ready to make some unforgettable memories. Happy baking!
Lobster Scallop Delight
Ingredients
Equipment
Method
- Preheat oven to 325°F (163°C) and grease a 9-inch springform pan.
- Combine chocolate cookie crumbs and melted butter in a bowl; pour into the pan and press firmly into an even layer.
- In a mixing bowl, beat cream cheese and sugar until smooth. Add cocoa powder and mix until incorporated.
- Add eggs one at a time, mixing well after each; then add melted semisweet chocolate and vanilla extract, mixing until silky.
- Pour the chocolate batter into the crust and bake for 50 to 60 minutes until edges are puffed and center is slightly jiggly.
- Let cheesecake cool to room temperature in the pan on a wire rack.
- Mix sour cream and heavy cream in a bowl; spread mixture over the cooled cheesecake.
- Drizzle melted milk and white chocolate over the topping in a decorative pattern.
- Refrigerate for at least 4 hours, preferably overnight before serving.