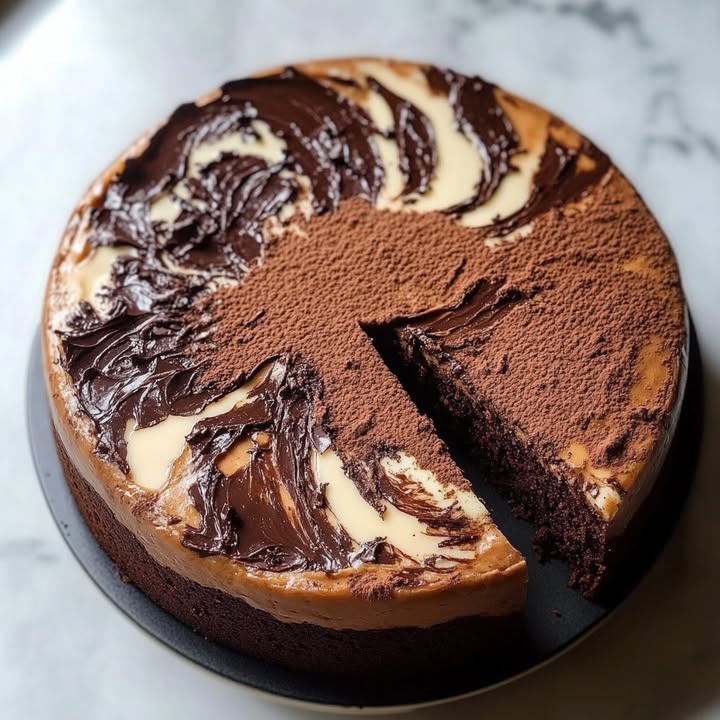
A Taste of Nostalgia: Why Marble Cake Delight is a Must-Try
There’s something about the smell of vanilla and chocolate wafting through the kitchen that takes me back to my childhood. I remember sitting at the table, eagerly waiting for my mom to slice into her famous homemade marble cake. The swirls of chocolate and vanilla were like little edible art pieces, and each bite was pure comfort. Recently, I decided to recreate this classic treat, and let me tell you, it did not disappoint. This Marble Cake Delight is everything you want in a cake: soft, flavorful, and oh-so-pretty. Whether you’re baking for your family or hosting a brunch, this recipe is a guaranteed crowd-pleaser.
A Little History Behind the Swirls
The origins of marble cake can be traced back to 19th-century Germany, where bakers loved experimenting with different flavors and textures. The iconic swirl pattern became popular because it was both beautiful and practical—a way to combine two contrasting tastes into one harmonious dessert. Over time, this humble cake made its way into kitchens around the world, becoming a timeless favorite. While some versions are rich and dense, others are light and airy. My version strikes the perfect balance, making it an ideal Marble Cake Delight for modern bakers.
Why You’ll Love This Recipe
This recipe is all about simplicity and flavor. With just a handful of pantry staples, you can whip up a cake that looks fancy but requires minimal effort. The vanilla batter is sweet and fragrant, while the chocolate layer adds a deep, indulgent note. Plus, the marbled effect makes every slice unique. Whether you’re a seasoned baker or a beginner, this recipe will make you feel like a pro. And trust me, once you taste it, you’ll understand why it’s called a Marble Cake Delight.
When to Bake This Classic Treat
This cake is incredibly versatile. Serve it at birthday parties, potlucks, or holiday gatherings—it always gets rave reviews. It’s also perfect for cozy family moments, like lazy Sunday breakfasts or afternoon tea. I love packing slices in lunchboxes or bringing them along on picnics. Honestly, there’s no wrong time to bake this Marble Cake Delight. It’s the kind of dessert that fits any occasion and makes everyone smile.
Ingredients for Your Marble Cake Delight
Here’s what you’ll need to create this delicious masterpiece:
- 200 g of flour
- 150 g of sugar
- 3 eggs
- 100 g of melted butter
- 1 sachet of baking powder (about 11 g)
- 20 g of unsweetened cocoa powder
- 2 tablespoons of milk
Substitution Options
Not everyone has the same ingredients on hand, and that’s okay! Here are some easy swaps:
- Butter: Use margarine or coconut oil for a dairy-free option.
- Milk: Any plant-based milk works well if you’re avoiding dairy.
- Sugar: Swap white sugar for brown sugar for a richer flavor.
- Cocoa Powder: If you’re out of cocoa, try using melted dark chocolate instead.
Step-by-Step Guide to Baking Perfection
Step 1: Preheat and Prep
Start by preheating your oven to 180°C (350°F). Grease and flour a loaf pan to prevent sticking. This step is crucial because nobody wants their cake stuck to the pan! Pro tip: Use parchment paper for extra insurance. As your oven heats up, gather all your ingredients. Having everything ready makes the process smoother and less stressful.
Step 2: Mix the Dry Ingredients
In a large mixing bowl, combine the flour, sugar, and baking powder. Whisk them together until evenly distributed. The dry mixture should look light and fluffy—almost like sand. This base gives your cake structure and ensures it rises beautifully during baking. Don’t skip sifting the flour; it helps keep the texture airy.
Step 3: Add the Wet Ingredients
Crack the eggs into the bowl one at a time, mixing well after each addition. Once they’re fully incorporated, pour in the melted butter. Stir until the batter becomes smooth and glossy. You’ll notice how the warmth of the butter blends seamlessly with the other ingredients, creating a luscious consistency. At this point, your kitchen will start smelling amazing!
Step 4: Divide and Conquer
Split the batter evenly between two bowls. In one bowl, stir in the cocoa powder and milk to create the chocolate layer. The contrast between the pale vanilla batter and the rich chocolate batter is stunning. Take a moment to admire your work—it’s almost too pretty to bake!
Step 5: Create the Marbled Effect
Now comes the fun part. Spoon alternating dollops of vanilla and chocolate batter into the prepared loaf pan. Use a skewer or knife to gently swirl the batters together. Be careful not to overmix—you want those gorgeous marbled patterns to shine through. Chef’s tip: Less is more when swirling. A few gentle strokes are enough to create magic.
Step 6: Bake to Perfection
Pop the pan into the oven and bake for about 40 minutes. To check if it’s done, insert a toothpick into the center. If it comes out clean, your Marble Cake Delight is ready. Let it cool slightly before slicing. The anticipation is half the fun!
Timing Breakdown
- Preparation Time: 15 minutes
- Cooking Time: 40 minutes
- Total Time: 55 minutes
Chef’s Secret
For an extra moist cake, brush the warm loaf with a simple syrup made from equal parts sugar and water. This trick locks in moisture and adds a subtle sweetness that pairs beautifully with the vanilla and chocolate flavors.
An Interesting Tidbit
Did you know that marble cakes were originally created as a way to use leftover batters? Clever bakers would mix whatever they had on hand, resulting in the iconic swirl we know today. Talk about turning scraps into gold!
Necessary Equipment
To make this recipe, you’ll need:
- A loaf pan
- Mixing bowls
- Whisk or electric mixer
- Measuring cups and spoons
- A skewer or knife for swirling
Storage Tips
Once cooled, wrap the cake tightly in plastic wrap or store it in an airtight container. It stays fresh at room temperature for up to three days. For longer storage, refrigerate it for up to a week. Just bring it back to room temperature before serving for the best texture.
If you live in a humid climate, consider freezing individual slices. Wrap each piece in foil and place them in a freezer-safe bag. They’ll keep for up to three months. Simply thaw overnight on the counter when you’re craving a slice.
Finally, never store your cake near strong-smelling foods like onions or garlic. Cakes absorb odors easily, which could ruin their delicate flavor.
Tips and Advice
For the fluffiest cake, don’t overmix the batter. Stop stirring as soon as the ingredients come together. Also, make sure your eggs and butter are at room temperature—they blend better and result in a smoother batter. Lastly, resist the urge to open the oven door while baking. Sudden temperature changes can cause the cake to sink.
Presentation Ideas
Sprinkle powdered sugar on top for a touch of elegance. Or drizzle a quick glaze made from powdered sugar and milk. Serve slices with a dollop of whipped cream or a scoop of vanilla ice cream for an extra indulgent treat. Pair it with a cup of coffee or tea for a cozy experience.
Healthier Alternatives
Looking to lighten up your Marble Cake Delight? Try these variations:
- Gluten-Free: Substitute regular flour with almond or oat flour.
- Low-Sugar: Use a sugar substitute like stevia or erythritol.
- Vegan: Replace eggs with flax eggs and butter with coconut oil.
- Protein-Packed: Add a scoop of vanilla protein powder to the vanilla batter.
- Fruit-Infused: Fold in fresh berries for added freshness.
- Spiced: Add cinnamon or nutmeg for a warm twist.
Common Mistakes to Avoid
Mistake 1: Skipping the Preheat
Putting the cake in a cold oven can lead to uneven baking. Always preheat your oven to ensure consistent results. Pro tip: Use an oven thermometer to verify the temperature.
Mistake 2: Overmixing the Batter
Overmixing develops gluten, which can make your cake dense instead of light. Stir just until the ingredients are combined. Remember, a few lumps are okay!
Mistake 3: Opening the Oven Door Too Soon
Peeking too early can cause your cake to collapse. Trust the timer and wait until the minimum baking time has passed before checking for doneness.
Mistake 4: Not Testing for Doneness
Relying solely on timing isn’t foolproof. Always test with a toothpick to ensure the center is fully baked. Underbaked cakes can be soggy and unappetizing.
Mistake 5: Rushing the Cooling Process
Letting the cake cool properly prevents it from breaking apart when you slice it. Patience pays off here!
FAQs About Marble Cake Delight
Can I double the recipe?
Absolutely! Just adjust the quantities accordingly and use two loaf pans or a larger bundt pan.
How do I know if my baking powder is still good?
Drop a teaspoon into hot water. If it fizzes, it’s active. If nothing happens, it’s time to replace it.
Can I freeze this cake?
Yes, wrap individual slices in foil and freeze them for up to three months. Thaw at room temperature before enjoying.
What type of cocoa powder should I use?
Unsweetened cocoa powder works best. Dutch-processed cocoa will give a deeper flavor, but natural cocoa is fine too.
Why did my cake crack on top?
A cracked surface is normal for loaf cakes. It happens due to the batter rising quickly. Don’t worry—it adds character!
Can I add nuts or chocolate chips?
Of course! Fold them into the batter before pouring it into the pan for added texture.
How do I fix a sunken cake?
This usually happens if the cake isn’t fully baked or if the oven door was opened too soon. Next time, bake a bit longer and avoid interruptions.
Is this cake kid-friendly?
Definitely! Kids love the playful swirls and balanced flavors. It’s a great way to get them excited about baking.
Can I use oil instead of butter?
Yes, vegetable oil works as a substitute. However, butter gives a richer flavor.
Why is my cake dry?
Dry cakes often result from overbaking. Check for doneness earlier next time and consider brushing the cake with syrup for added moisture.
Final Thoughts
Baking a Marble Cake Delight is more than just following a recipe—it’s about creating memories. Whether you’re sharing it with loved ones or enjoying a quiet moment alone, this cake is sure to bring joy. So grab your apron, gather your ingredients, and let’s get baking. After all, life is sweeter with a slice of homemade happiness!
Marble Cake Delight
Ingredients
Equipment
Method
- Preheat the oven to 180°C (350°F) and grease and flour a loaf pan.
- In a large mixing bowl, combine the flour, sugar, and baking powder; whisk until evenly distributed.
- Crack the eggs into the bowl one at a time, mixing well after each addition, then stir in the melted butter until smooth.
- Divide the batter evenly into two bowls; stir cocoa powder and milk into one bowl to create the chocolate layer.
- Spoon alternating dollops of vanilla and chocolate batter into the prepared loaf pan; swirl gently with a skewer or knife.
- Bake in the oven for about 40 minutes; insert a toothpick to check for doneness and let cool slightly before slicing.