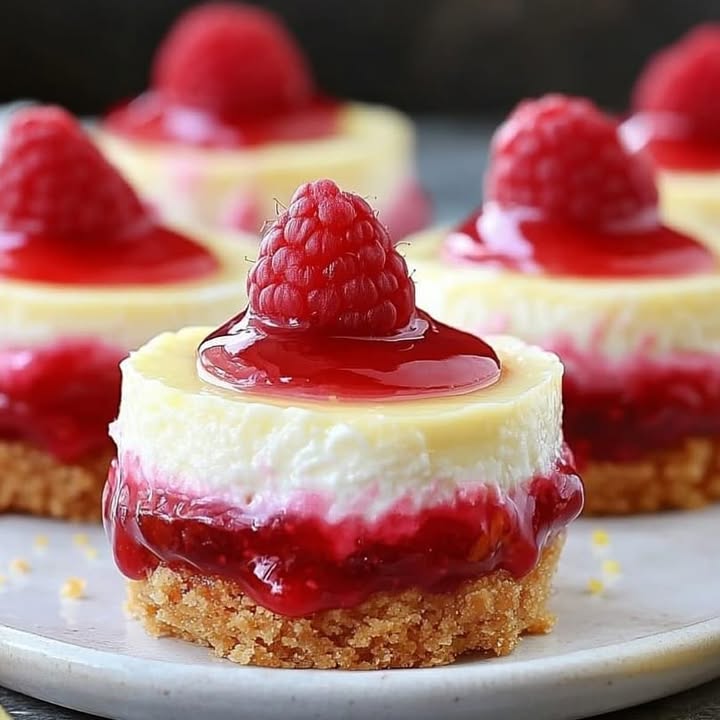
Sunshine in a Bite: My Mini Lemon Raspberry Cheesecakes
You know that feeling when you need a little burst of joy? I had one of those gray afternoons last week. The sky was cloudy, and my mood matched. I wanted something sweet, but not heavy. Something bright and cheerful to share with my book club. That’s when I dreamed up these Mini Lemon Raspberry Cheesecakes. They’re like portable sunshine! Each little cup is a perfect balance of tangy lemon, creamy cheesecake, and sweet raspberry tucked inside a buttery graham cracker crust. They disappeared in minutes, and the smiles they brought were the best compliment.
A Sweet Treat With a Long History
Cheesecake itself is an ancient food, loved by the Greeks and Romans. But the mini version? That’s a modern twist perfect for our busy lives. The classic New York style is rich and dense, served in big slices. My recipe is lighter and airier, thanks to whipped cream folded in. Adding lemon and raspberry is my nod to summer. It feels both classic and fresh. I love that something so simple can connect us to bakers from hundreds of years ago, all while fitting perfectly in our hands today.
Why You’ll Adore This No-Bake Recipe
First, they’re no-bake. No oven means no heating up the kitchen! That’s a win in my book. They are also incredibly easy. If you can mix things in a bowl, you can make these. The lemon zest and juice make the flavor pop beautifully. The fresh raspberry garnish makes them look like you ordered them from a fancy bakery. Best of all, you can make them ahead of time. Just pull them from the fridge when guests arrive. It’s the ultimate no-stress, high-reward dessert.
Perfect Occasions for Mini Cheesecakes
These little guys are party superstars! Here’s where they shine brightest:
- Baby or Bridal Showers: They’re dainty, pretty, and easy to eat while chatting.
- Summer Picnics & BBQs: Their cool, citrusy flavor is a refreshing finale to grilled foods.
- Holiday Parties: Use seasonal red berries for a festive Christmas look.
- Just Because: Making a batch for your family on a Tuesday is a sure way to become the week’s hero.
What You’ll Need: The Ingredients List
Everything here is simple and easy to find at your regular grocery store.
- For the Crust: 1 ½ cups graham cracker crumbs, ⅓ cup melted butter, 2 tablespoons sugar
- For the Filling: 16 oz cream cheese (softened!), ½ cup sugar, 1 teaspoon vanilla extract, 1 teaspoon lemon zest, 2 tablespoons lemon juice, 1 cup heavy whipping cream
- For the Swirl & Topping: 1 cup raspberry jam (a thicker type works best), Fresh raspberries and lemon twists for garnish
No Problem! Handy Substitution Options
Out of something? Don’t worry. Here are some easy swaps:
- Graham Crackers: Use digestive biscuits, vanilla wafers, or shortbread cookies.
- Raspberry Jam: Any berry jam will work wonderfully. Try blackberry or strawberry!
- Heavy Cream: For a lighter version, you can use an 8 oz tub of thawed frozen whipped topping (like Cool Whip). Fold it in at the end instead of whipping cream.
- Lemon Zest/Juice: Bottled lemon juice works in a pinch, but fresh zest really makes the flavor sing.
Let’s Make Some Magic! The Preparation Steps
Put on some happy music and let’s get started. This is the fun part.
Step 1: Make the Crust
Grab a medium bowl and combine your graham cracker crumbs, melted butter, and sugar. Mix it until it looks like wet sand. It should hold together when you pinch it. Now, spoon this mixture into your mini cheesecake pan or muffin liners. Use the bottom of a small glass or a spoon to press it down firmly and evenly. A solid crust means your cheesecakes won’t fall apart. Pop the whole tray into the fridge to set while you make the filling.
Step 2: Create the Lemon Cheesecake Filling
In a large bowl, beat the softened cream cheese until it’s perfectly smooth. No lumps allowed! This is key for a silky texture. Then, add in the sugar, vanilla, lemon zest, and fresh lemon juice. Beat it all together until it’s completely combined. You’ll see the pale yellow color and smell that beautiful citrus aroma. Pro Tip: Make sure your cream cheese is truly softened to room temperature. This prevents a grainy filling.
Step 3: Whip and Fold the Cream
Now, in a separate, clean bowl, pour your heavy whipping cream. Using a hand mixer or stand mixer, whip the cream until stiff peaks form. This means when you lift the beaters, the cream stands up straight. Be careful not to over-whip into butter! Next, gently add about one-third of the whipped cream into the cream cheese mixture. Fold it in with a spatula to lighten it up. Then, gently fold in the remaining whipped cream until no white streaks remain. The mixture will be fluffy and dreamy.
Step 4: Layer in the Raspberry Jam
Here’s my secret step. Don’t just mix the jam in. Spoon half of the cheesecake filling onto your chilled crusts. Then, add a small dollop (about ½ a teaspoon) of thick raspberry jam right in the center. Top with the remaining filling, covering the jam completely. Use a spoon or spatula to smooth the tops. This creates a lovely hidden raspberry surprise in the middle of each bite!
Step 5: Chill Until Perfectly Set
Patience is the final ingredient! Carefully place the tray in the refrigerator. Let them chill for at least 4 hours, but overnight is even better. This allows the flavors to marry and the texture to firm up perfectly. They should be cool and set all the way through. When you’re ready to serve, you can add one last smear of jam on top if you like, then garnish with fresh raspberries and a twist of lemon.
Timing is Everything
Good things take a little time, but most of it is hands-off.
- Prep Time: 25 minutes
- Chill Time: 4 hours (or overnight)
- Total Time: 4 hours 25 minutes
- Yields: About 12 mini cheesecakes
Chef’s Secret for the Best Texture
My biggest trick is to use full-fat, brick-style cream cheese. The spreadable kind in tubs has more water and stabilizers. It can make your filling too soft and prevent it from setting properly. The brick-style gives you that rich, firm, classic cheesecake texture we all love.
A Little Extra Berry Fact
Did you know each raspberry is actually made up of dozens of tiny individual fruits called drupelets? That’s why they have that beautiful clustered look. Each one holds a seed. This also makes them incredibly delicate. Handle your fresh raspberries gently when washing and garnishing!
Tools You’ll Need
No fancy equipment required!
- Mini cheesecake pan with removable bottoms OR a standard muffin tin with paper liners
- Mixing bowls (medium and large)
- Hand mixer or stand mixer
- Measuring cups and spoons
- Spatula
- Zester or fine grater (for the lemon zest)
Keeping Your Cheesecakes Fresh: Storage Tips
In the Refrigerator: These cheesecakes must be stored in the fridge. Cover the tray tightly with plastic wrap or transfer individual cheesecakes to an airtight container. They will stay fresh and delicious for 3-4 days.
Can You Freeze Them? Absolutely! They freeze wonderfully. Place the set cheesecakes (without the fresh fruit garnish) on a baking sheet and freeze until solid, about 2 hours. Then, wrap each one tightly in plastic wrap and place them all in a freezer bag. They can be frozen for up to 2 months. Thaw in the refrigerator overnight before serving and adding fresh berries.
Serving After Storage: Always add your fresh raspberry and lemon twist garnish right before serving. This keeps the berries from getting mushy and the lemon from drying out. Let them sit at room temperature for about 10 minutes before eating for the best creaminess.
My Best Tips for Success
- For the easiest release, use a mini cheesecake pan with removable bottoms. If using a muffin tin, definitely use paper liners.
- When zesting your lemon, only grate the bright yellow outer skin. The white pith underneath is bitter.
- If your jam is very runny, you can thicken it by mixing a teaspoon of cornstarch with a tablespoon of the jam, heating it until thick, then mixing it back into the rest.
- For super clean slices, dip your knife in hot water and wipe it dry between each cut.
Making Them Look Fancy: Presentation Ideas
- Dust the tops with a little powdered sugar just before serving.
- Drizzle the plates with a little extra melted jam thinned with a drop of water.
- Add a small sprig of mint next to the raspberries for a pop of green.
- Serve them on a beautiful tiered dessert stand for a party.
Mix It Up! 6 Delicious Recipe Variations
Love the base recipe? Try these fun twists!
- Blueberry Lemon: Swap the raspberry jam for blueberry. Top with a blueberry compote and a lemon slice.
- Key Lime: Use lime zest and juice instead of lemon. Pair with a mango puree swirl.
- Cookies and Cream: Use crushed Oreos for the crust. Fold crushed Oreo pieces into the filling and skip the fruit.
- Chocolate Raspberry: Use a chocolate graham cracker crust. Add a tablespoon of cocoa powder to the cheesecake filling.
- Strawberry Shortcake: Use a vanilla wafer crust. Swirl in strawberry jam and top with fresh diced strawberries.
- Triple Citrus: Use a mix of lemon, lime, and orange zest in the filling. Top with a candied citrus slice.
Common Mistakes to Avoid
Avoid these simple pitfalls for perfect cheesecakes every time.
Using Cold Cream Cheese
This is the number one reason for a lumpy filling. Cold cream cheese does not blend smoothly. It leaves little chunks that ruin the silky texture. Always take your cream cheese out of the fridge at least an hour before you start. Let it sit on the counter until it’s soft to the touch. You should be able to press your finger into it easily.
Not Letting Them Set Long Enough
Impatience leads to soup! These are no-bake, but they still need time in the fridge to firm up. The cream and cream cheese need the cold to set properly. If you try to eat them after just an hour or two, they will be a delicious but messy pudding. Plan for the full 4 hours, or better yet, make them the day before. Overnight chilling is your friend.
Over-mixing the Filling After Adding Cream
When you fold in the whipped cream, be gentle. Use a spatula and a light hand. If you use the mixer or stir too vigorously, you will deflate all the air you whipped into the cream. This makes the filling dense and heavy instead of light and fluffy. Fold just until the white streaks disappear, then stop.
A Soggy or Crumbly Crust
The crust needs to be packed down firmly. If you just sprinkle the crumbs in, they won’t hold together. Use a spoon or the bottom of a small glass to really press it into an even, compact layer. Also, make sure your butter is fully mixed in. It acts as the glue. If the crust is too dry, it will crumble. If it’s too wet, it becomes soggy.
Your Mini Cheesecake Questions, Answered
Can I make one big cheesecake instead of minis?
Yes, you absolutely can! Simply press the crust mixture into the bottom of a 9-inch springform pan. Make sure you press it up the sides about an inch. Then, pour all the filling in and swirl the jam on top. The chilling time will be longer for a full-size cheesecake. You should let it set in the fridge for at least 6 hours, but overnight is safest. This ensures the center is completely firm. Slice and serve just like a traditional cheesecake.
My filling is too runny. What did I do wrong?
A runny filling usually has two common causes. First, your cream cheese might not have been soft enough, leading to over-mixing as you tried to beat out the lumps. This can break the structure. Second, the heavy cream may not have been whipped to stiff peaks. If the cream is still soft, it won’t provide enough stability to the filling. Also, double-check that you’re using full-fat brick cream cheese, not a spreadable or low-fat version, which has more moisture.
How far in advance can I make these?
These are the perfect make-ahead dessert. You can prepare them fully, including the final jam topping (but not the fresh berry garnish), up to two days in advance. Keep them covered tightly in the refrigerator. In fact, the flavor gets better as it sits! The lemon zest infuses throughout, and the textures meld together beautifully. Add the fresh raspberries and lemon twists right before you serve them so they look and taste their best.
Can I use frozen raspberries instead of jam?
You can, but you’ll need to cook them down into a thicker sauce first. Thawed frozen berries release a lot of water. Simply cook about 1 ½ cups of frozen raspberries with a tablespoon of sugar and a teaspoon of lemon juice over medium heat. Mash them as they cook. Let it simmer until it thickens to a jam-like consistency, then let it cool completely before swirling it into your cheesecakes. This is a great fresh-tasting alternative!
What if I don’t have a mixer to whip the cream?
No problem! You can whip heavy cream by hand with a whisk. It takes some elbow grease, but it’s totally doable. Make sure your bowl and whisk are very cold (you can chill them in the freezer for 15 minutes). Start whisking vigorously. It will take about 5-8 minutes of steady whisking to get to stiff peaks. It’s a great arm workout! Alternatively, you can use the pre-made frozen whipped topping as a substitute mentioned earlier.
Why is my crust sticking to the pan?
If you’re not using paper liners, a little sticking can happen. To prevent it, make sure you press the crust in firmly. You can also give the pan a very light spritz of non-stick cooking spray before adding the crumbs. For pans with removable bottoms, run a thin knife around the edge of the cheesecake before popping the bottom up. If using a muffin tin, paper liners are the easiest solution for no-stick, easy cleanup.
Is there a way to make these gluten-free?
Easily! Just use gluten-free graham crackers or gluten-free cookies (like gluten-free shortbread or ginger snaps) to make your crumbs. Check that all your other ingredients, like the vanilla extract and jam, are certified gluten-free if you have a severe allergy. The filling is naturally gluten-free, so this simple swap gives you a perfect dessert for anyone avoiding gluten.
Can I use low-fat or Neufchâtel cream cheese?
You can, but the texture will be different. Lower-fat cream cheese has more water and less fat. This often results in a softer filling that may not set as firmly. The flavor might also be slightly less rich. For the best, creamiest results, I always recommend full-fat. But if you need to use Neufchâtel, your cheesecakes will still taste good, they just might be a bit more delicate.
How do I get a clean swirl of jam on top?
For a pretty swirl, let your cheesecakes set first. Then, warm the jam slightly in the microwave for 10-15 seconds until it’s just loose enough to drizzle. Don’t make it hot. Use a spoon or a squeeze bottle to drizzle lines or dots of jam over the top. Then, take a toothpick or a thin skewer and gently drag it through the jam to create swirls or marble patterns. It’s easy and looks so professional!
My lemon zest is bitter. Why?
You probably grated too deep. The bright yellow part of the lemon peel (the zest) is packed with fragrant oils. Right underneath it is the white pith, which is very bitter. When zesting, use a light touch and only grate the very outer layer of the peel. A microplane grater is perfect for this. Stop as soon as you see white. Also, always wash and dry your lemon well before zesting to remove any wax or residue.
Ready to Brighten Someone’s Day
I hope you feel inspired to make a batch of these sunny little treats. They truly are more than just a dessert. They’re little cups of happiness you can make with your own two hands. Whether it’s for a special party or just a regular Wednesday, sharing something homemade is a beautiful thing. So, grab your mixer, zest that lemon, and get ready for the compliments. Happy baking!
Shrimp Garlic Grilled Cheese
Equipment
Method
- Combine graham cracker crumbs, melted butter, and sugar in a medium bowl until it resembles wet sand; press into a mini cheesecake pan or muffin liners and chill.
- In a large bowl, beat softened cream cheese until smooth; add sugar, vanilla, lemon zest, and juice, and mix until combined.
- In a separate bowl, whip heavy cream until stiff peaks form; fold one-third of the whipped cream into the cream cheese mixture, then fold in the remaining whipped cream until no streaks remain.
- Spoon half of the cheesecake filling onto chilled crusts, add a dollop of raspberry jam, then top with remaining filling and smooth the tops.
- Chill for at least 4 hours or overnight until set; garnish with fresh raspberries and a twist of lemon before serving.