The Sweet Tart Delight You Didn’t See Coming
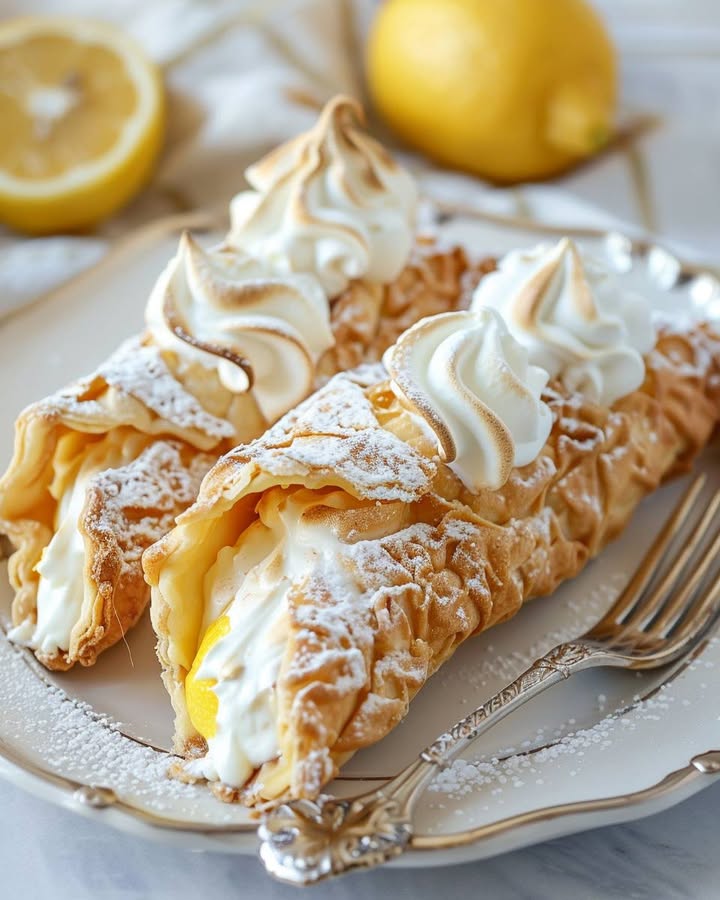
Picture my last book club meeting. We were discussing a serious novel, but all anyone could talk about was the zesty, creamy, crispy bites I brought. My secret? I took two all-time favorite desserts, gave them a gentle nudge, and watched them fall in love. Introducing my Lemon Meringue Pie Cannolis. This is more than a recipe; it’s a tiny, handheld party that combines the best textures and tastes into one perfect bite. Trust me, once you make these, you’ll be everyone’s favorite guest!
A Tale of Two Classics: The Story Behind the Bite
Cannoli, with their crisp fried shells and sweet ricotta filling, hail from the sunny island of Sicily. Lemon meringue pie is a sunny American classic, all tangy curd and cloud-like topping. I was cleaning my pantry one day, staring at a jar of lemon curd and a box of leftover cannoli shells from a holiday party. A lightbulb went off! Why not marry that signature Sicilian crunch with the bright, joyful flavor of a lemon pie? This recipe is my modern, hybrid creation. It respects tradition but isn’t afraid to play. It’s the perfect example of how happy kitchen accidents can lead to your new go-to dessert.
Why You’ll Cherish This Sweet Tart Delight
You will absolutely adore this recipe. First, it’s incredibly fast. Using premade shells cuts the hardest part. Second, the flavor balance is magic. The rich mascarpone, the punchy lemon, the sweet meringue—it’s a symphony. Third, they look stunning with minimal effort. That toasted meringue topping makes you look like a pastry pro. It’s a guaranteed showstopper that’s secretly simple. What’s not to love?
When to Whip Up This Zesty Treat
These cannolis are your secret weapon for so many events. They’re perfect for bridal or baby showers—so elegant on a tiered stand. Bring them to a summer picnic for a refreshing finish. They make a spectacular end to a fancy dinner party. Honestly, they’re also just right for a Tuesday when you need a little sweet tart delight in your life. Any occasion is brighter with a lemon meringue cannoli in hand.
Gathering Your Ingredients
Here’s your shopping list for this sunny adventure. I promise, it’s short and sweet!
- Cannoli Shells: 12 premade cannoli shells
- Lemon Cream Filling: 1 cup mascarpone cheese, 1/2 cup heavy cream, 1/3 cup lemon curd (store-bought is fine!), 1/4 cup powdered sugar
- Meringue Topping: 2 egg whites, 1/2 cup granulated sugar, 1/2 tsp cream of tartar
- Garnish: Fresh lemon zest, extra powdered sugar for dusting
No Stress Substitutions
Don’t fret if you’re missing something. Here are easy swaps:
- Mascarpone: Use full-fat cream cheese, softened at room temperature.
- Heavy Cream: Whipping cream works exactly the same.
- Premade Shells: For the ambitious, you can use wonton wrappers, mold them around cannoli tubes, and fry for 1-2 minutes until golden.
- Cream of Tartar: A tiny squeeze of lemon juice (about 1/4 tsp) can help stabilize the egg whites in a pinch.
Crafting Your Lemon Meringue Masterpiece
Let’s get our hands delightfully dirty. Follow these steps for a perfect batch every single time.
Step 1: Prepare the Dreamy Lemon Cream Filling
Grab a large mixing bowl. Plop in the cool, luxurious mascarpone cheese. Pour in the heavy cream, and add the glorious yellow lemon curd and snowy powdered sugar. Using a hand mixer, beat everything on medium speed. Watch as the separate ingredients swirl together, then thicken into a beautifully smooth, pale yellow cream. The aroma is pure sunshine. This filling should be firm enough to hold its shape. Pro tip: Chill this mixture for 15 minutes in the fridge if your kitchen is warm. It will pipe even easier.
Step 2: Fill Those Crispy Shells
Now for the fun part! You can spoon the filling carefully into each end of a cannoli shell. For a prettier look, I scoop the cream into a piping bag fitted with a large round tip. Gently insert the tip into a shell and squeeze, filling from the center out to both ends. You’ll see the creamy filling peek out. Wipe any excess away for a clean look. Lay all your filled shells on a baking sheet lined with parchment paper. This makes the next step a breeze.
Step 3: Whip the Fluffy Meringue Clouds
This step requires a spotlessly clean bowl. Any trace of grease will stop your egg whites from fluffing up. Add the egg whites and cream of tartar. Beat on high speed until you get soft peaks that flop over when you lift the beaters. Now, with the mixer still running, slowly rain in the granulated sugar. Keep beating! The mixture will become glossy, thick, and form stiff, gorgeous peaks that stand straight up. Chef’s tip: Rub a bit of the meringue between your fingers. If it still feels gritty, keep beating until the sugar fully dissolves.
Step 4: Top and Torch (or Broil!)
Pipe or dollop the fluffy white meringue onto each filled cannoli. You can make pretty swirls or rustic peaks. Now, for the magic turn on your oven’s broiler and let it get hot. Place the baking sheet with the cannolis on the top rack. Watch them like a hawk for just 1-2 minutes. The meringue will toast to a beautiful, golden brown. It happens fast! The smell is incredible. Pull them out immediately to avoid any burnt spots.
Step 5: The Final Garnish
Let your creations cool for just a minute. Then, using a fine mesh sieve, dust a little powdered sugar over the top like a light snowfall. Finally, take a fresh lemon and a zester, and sprinkle vibrant yellow lemon zest over everything. This adds a final pop of color and an extra burst of citrus aroma. Your sweet tart delight is ready to dazzle!
Timing Your Kitchen Adventure
This recipe is wonderfully quick.
- Prep Time: 20 minutes
- Cook Time: 2 minutes (under the broiler)
- Total Time: 22 minutes
My Chef’s Secret for the Best Cannoli
Fill your cannoli shells right before serving. If they sit filled for too long, the moisture from the cream can soften the crispy shell. I prepare all the components ahead—the filling in a bowl in the fridge, the meringue ready to go—and then I assemble, top, and torch just as my guests arrive. That first crisp bite is absolutely worth the last-minute effort!
A Zesty Slice of History
Did you know the original cannoli filling in Sicily was often made with sheep’s milk ricotta, sugar, and candied fruit? The shells were fried in lard. My version, with its mascarpone and lemon, is a delicious modern twist. It’s fun to think how recipes travel and change, bringing new joy to home cooks everywhere.
Tools You’ll Need
You likely have most of this in your kitchen already:
- Hand mixer or stand mixer
- Mixing bowls (2)
- Rubber spatula
- Piping bags and a large round tip (optional, but helpful)
- Baking sheet
- Parchment paper
- Fine mesh sieve (for dusting)
- Lemon zester
Keeping Your Sweet Tart Delight Fresh
These cannolis are truly best enjoyed the day they are made. The shell is at its peak crispness. If you have leftovers, place them in a single layer in an airtight container. Store them in the refrigerator for up to one day. Be aware the shells will soften slightly from the filling’s moisture.
I do not recommend freezing the assembled cannolis. The meringue weeps and becomes rubbery when thawed. The filling can also separate. For the best experience, think of this as a “make and eat” treat.
If you must prepare components ahead, keep the unfilled shells in an airtight container at room temperature. Store the lemon cream filling separately in the fridge for up to two days. Make the meringue and do the final assembly right before serving.
My Best Tips and Friendly Advice
- Let your mascarpone and lemon curd sit out for 10-15 minutes before mixing. This helps them blend smoothly without lumps.
- When beating egg whites, ensure no yolk gets in the bowl. Even a drop can prevent them from whipping up.
- If you have a kitchen torch, use it! It gives you more control for browning the meringue than the broiler.
- Taste your lemon curd first. If it’s very tart, you might want to add an extra tablespoon of powdered sugar to the filling.
Presentation Ideas to Impress
Make your dessert table shine!
- Stand the cannoli upright in a bed of granulated sugar or lemonhead candies in a serving dish.
- Drizzle a little extra lemon curd on the plate before laying the cannoli down.
- Serve with small cups of strong espresso or a glass of sparkling Moscato.
- For a party, create a “cannoli bar” with different fillings and toppings, with this lemon meringue as the star.
Healthier Twists on the Classic
Want to lighten things up? Try these tasty variations:
- Yogurt Swap: Use Greek yogurt instead of mascarpone for a protein-packed, tangier filling.
- Sugar-Free Version: Use a sugar-free lemon curd and a granulated sugar substitute approved for baking in the meringue.
- Mini Delights: Use mini cannoli shells. You get all the flavor in a smaller, portion-controlled bite.
- Berry Burst: Fold fresh raspberries or blueberries into the lemon cream for added fruit and fiber.
- Nutty Crunch: Dip the ends of the filled cannoli in finely chopped pistachios before adding meringue for healthy fats and crunch.
- Vegan Dream: Use coconut cream chilled and whipped for the filling, and use aquafaba (chickpea liquid) instead of egg whites for the meringue.
Common Mistakes to Avoid
Let’s sidestep these common pitfalls for perfect cannolis every time.
Soggy Shell Sadness
This happens when you fill the shells hours before serving. The moisture from the creamy filling slowly seeps into the crispy pastry, turning it soft and chewy. To avoid this heartbreak, treat the shell like a cracker. Fill them as close to serving time as possible. Keep components separate until the last moment for that perfect, satisfying crunch.
Meringue That Weeps or Slumps
If your beautiful toasted meringue starts leaking a syrupy liquid or deflates, sugar is often the culprit. Not beating the meringue long enough means the sugar doesn’t fully dissolve. Ensure you beat until the mixture is glossy and stiff. Rub a bit between your fingers—it should feel completely smooth, not gritty. Also, don’t let the meringue sit too long before broiling; get it onto the heat quickly.
Broiler Blunders and Burnt Tops
The broiler is intensely hot and unforgiving. Walking away for “just a second” can lead to blackened, bitter meringue. Always stay by the oven. Keep the door slightly ajar if you can, and watch continuously. Rotate the pan if your broiler has hot spots. Remember, you’re just toasting for color, not cooking through. One to two minutes is usually all it takes.
Overbeating the Cream Filling
While you want the lemon cream thick, overbeating heavy cream can turn it into butter. If you see the mixture starting to look grainy or separate, you’ve gone too far. Beat just until firm peaks form that hold their shape when you lift the beater. If you accidentally overbeat, you can sometimes salvage it by gently folding in another tablespoon of cold heavy cream.
Your Lemon Meringue Cannoli Questions, Answered
Can I make the lemon cream filling a day ahead?
Yes, absolutely! The lemon cream filling actually benefits from a little rest in the fridge. Make it up to two days in advance. Store it in an airtight container. The flavors will meld and deepen. Just give it a quick stir before you pipe it into the shells. This is a fantastic timesaver for parties.
I don’t have a piping bag. How else can I fill the shells?
No piping bag? No problem! You have a few easy options. A simple zip-top bag with a corner snipped off works perfectly. You can also use a small spoon to carefully push the filling into both ends of the shell. For the meringue, you can just use a spoon to make pretty dollops and peaks on top. It will taste just as amazing.
My meringue won’t form stiff peaks. What did I do wrong?
This is usually due to a few common issues. First, check that your bowl and beaters are completely clean and dry. Any grease or yolk will prevent the whites from whipping. Second, make sure you’re using room temperature egg whites; they whip up higher. Third, be patient! Adding the sugar too quickly can slow things down. Beat on high speed and give it time. Adding the cream of tartar helps stabilize it, too.
Can I use homemade lemon curd?
Please do! Homemade lemon curd will take this sweet tart delight to a whole new level of amazing. The flavor will be brighter and more vibrant than most store-bought versions. Just make sure it’s completely cooled before you mix it into the mascarpone and cream. If it’s warm, it will melt the filling and make it runny.
How long do the assembled cannolis last?
Honestly, they are at their absolute best within the first few hours of assembly. The shell is crisp, the meringue is fresh. If you must store them, keep them in the fridge for up to a day. Expect the shell to soften. I really recommend assembling in batches so you always have a fresh, perfect bite to enjoy.
What can I use instead of cream of tartar?
If you’re out of cream of tartar, a small amount of lemon juice or white vinegar can act as a stabilizer. Use about 1/4 teaspoon for this recipe. The acid helps the egg whites form a stable structure. The flavor difference is minimal, especially with the lemon theme of this dessert.
Is there a way to make this without an electric mixer?
You can, but it will be a workout! For the filling, a sturdy whisk and some strong arm muscles can blend the ingredients. For the meringue, it’s much harder by hand. If you don’t have a mixer, consider topping the cannolis with just a dollop of whipped cream and toasting that briefly, or simply dusting with powdered sugar and zest.
Can I freeze the unfilled cannoli shells?
Yes, premade cannoli shells freeze beautifully. Seal them tightly in an airtight container or freezer bag. They can last for a couple of months. When ready to use, let them thaw at room temperature in their package. This prevents moisture from making them soggy. Then fill and enjoy!
My filling is too runny. How can I fix it?
A runny filling often means the heavy cream wasn’t whipped enough, or the kitchen was very warm. Pop the whole bowl of filling into the refrigerator for 20-30 minutes to chill it thoroughly. Then, whip it again for a minute or two. It should thicken up nicely. If it’s still too soft, you can gently fold in a tablespoon more of powdered sugar.
What’s the best way to zest a lemon?
Use a fine microplane zester. It gives you fluffy, pile of zest without the bitter white pith underneath. Just rub the lemon gently against the tiny blades. Roll the lemon on the counter first to release the oils for even more fragrance. Always zest your lemon before you juice it—it’s much easier!
Go Forth and Create Your Sweet Tart Delight!
There you have it, my friend. My full heart-to-heart on creating these magical Lemon Meringue Pie Cannolis. This recipe is about joy, creativity, and sharing something wonderfully delicious. It’s not fussy, but the result looks and tastes like a million bucks. So grab those shells, whip that cream, and get ready for the compliments to roll in. Happy baking, and enjoy every last bite of your creation!
Sweet Tart Delight
Ingredients
Equipment
Method
- In a large bowl, mix mascarpone, heavy cream, lemon curd, and powdered sugar using a hand mixer until smooth.
- If warm, chill the filling for 15 minutes in the fridge.
- Fill cannoli shells with the lemon cream filling using a piping bag or spoon.
- In a clean bowl, beat egg whites and cream of tartar until soft peaks form.
- Gradually add granulated sugar while continuing to beat until stiff peaks form.
- Pipe or dollop meringue onto filled cannoli.
- Broil for 1-2 minutes until the meringue is toasted, keeping an eye to prevent burning.
- Dust with powdered sugar and garnish with lemon zest before serving.