Welcome to My Kitchen: Turkish Yogurt Beef Pasta
Last summer, I sat at a small café in Istanbul, watching the sunset paint the Bosphorus golden. The waiter placed a steaming plate in front of me. I took one bite and my eyes widened. The creamy yogurt sauce mixed with tender beef and perfectly cooked pasta created something magical. That moment changed how I think about comfort food forever.
I knew I had to bring this recipe home. After months of testing in my kitchen, I finally nailed it. Now I’m thrilled to share this Turkish Yogurt Beef Pasta with you. This isn’t your average pasta dish. It brings together East and West in the most delicious way possible.
What makes this dish special? The tangy yogurt sauce cools down the warm, spiced beef. The pasta acts as the perfect carrier for all those rich flavors. Every forkful gives you something different yet everything works together beautifully. My kids ask for this at least twice a month now.
You don’t need fancy cooking skills to pull this off. I promise you can make this at home with basic kitchen tools. The ingredient list is simple and you probably have half of what you need already. The cooking process is straightforward and actually quite fun.
This Turkish Yogurt Beef Pasta serves six people comfortably. It works great for busy weeknight dinners when you want something special without spending hours in the kitchen. I also make it for guests because it always impresses. People love the unique combination of flavors they’ve never tried before.
The best part? You can prepare parts of this dish ahead of time. I often cook the beef in the morning and finish everything up right before dinner. This makes entertaining so much easier. Less stress means more time to enjoy your meal with loved ones.
Essential Ingredients for Turkish Yogurt Beef Pasta
Let me walk you through everything you need to make this amazing dish. Getting your ingredients ready before you start cooking makes the whole process smoother. I learned this the hard way after scrambling mid-recipe too many times.
For the Pasta Base:
- 1 pound of pasta (fusilli or penne work best)
- 2 tablespoons of salt for the pasta water
- 2 tablespoons of olive oil
I recommend fusilli or penne because their shapes hold the yogurt sauce perfectly. Those little ridges and curves catch every bit of flavor. I’ve tried this with spaghetti and it just doesn’t work as well. The sauce slides right off instead of coating each piece.
For the Beef Component:
- 1.5 pounds of lean beef (sirloin or tenderloin cuts)
- 1 teaspoon of salt
- 1 teaspoon of black pepper
- 2 teaspoons of paprika
- 1 teaspoon of cumin
- 3 tablespoons of olive oil
- 1 large onion, finely diced
- 4 garlic cloves, minced
The beef is the heart of this dish. Choose a lean cut like sirloin or tenderloin for the best texture. Fattier cuts can make the sauce greasy. Trust me on this one. I once used chuck roast and spent twenty minutes skimming oil off the top.
Cut your beef into small, bite-sized pieces. About half an inch works perfectly. They should be small enough to eat easily but large enough to stay tender and juicy. I cut mine while the beef is slightly frozen. This makes getting even pieces so much easier.
The paprika adds a beautiful color and subtle sweetness. Don’t skip it. I use sweet paprika, not the smoked kind. Smoked paprika can overpower the delicate yogurt sauce. Save that for your barbecue recipes instead.
For the Yogurt Sauce:
- 2 cups of thick Greek yogurt
- 2 egg yolks
- 1 teaspoon of salt
- 4 garlic cloves, minced
- 1 cup of reserved pasta water
Here’s where the magic happens. The yogurt is absolutely crucial to getting this right. You need thick, high-quality Greek yogurt. The watery stuff from the supermarket won’t work. It will break and curdle when you heat it.
I buy full-fat Greek yogurt from my local Middle Eastern market. If you can’t find that, Fage or Chobani work well too. Just make sure it’s the whole milk version. Low-fat yogurt doesn’t have enough richness for this dish.
The egg yolks might seem strange but they’re important. They help stabilize the yogurt sauce so it doesn’t separate when heated. This technique comes straight from traditional Turkish cooking. My grandmother taught me this trick years ago.
For the Final Touch:
- 4 tablespoons of butter
- 2 teaspoons of dried mint
- 1 teaspoon of red pepper flakes
- Fresh parsley for garnish
The butter and mint topping transforms this from good to outstanding. In Turkey, they drizzle melted butter mixed with spices over yogurt dishes. It adds a whole new layer of flavor. The mint brings freshness while the red pepper flakes add gentle heat.
I use dried mint, not fresh, for the topping. When you heat dried mint in butter, it releases this incredible aroma. Fresh mint would just wilt and taste grassy. Keep fresh herbs for the garnish at the end.
Make sure all your ingredients are at room temperature before you start cooking. Cold yogurt can shock when mixed with hot pasta water. I take my yogurt and eggs out of the fridge about thirty minutes before cooking. This small step prevents clumping and ensures a silky smooth sauce.
One more tip about the pasta water. Don’t throw it away after draining your pasta. That starchy water is liquid gold for this recipe. It helps thin the yogurt sauce to the perfect consistency. I always keep at least two cups on hand just in case I need extra.


Getting Your Beef Ready for Turkish Yogurt Pasta
Now that everything’s measured and ready to go, we can jump into the actual cooking. This is where your kitchen starts smelling absolutely incredible.
I always begin with the beef because it needs the most attention. Grab your cutting board and a sharp knife. You want to slice that sirloin or tenderloin into pieces roughly the size of your thumbnail. Maybe a bit bigger, but definitely not smaller. Here’s something I learned after ruining a batch: if you cut them too small, they dry out and get tough. Nobody wants chewy beef in their pasta.
The trick I use is putting the beef in the freezer for about fifteen minutes before cutting. Not frozen solid, just firm enough that your knife glides through cleanly. My mother-in-law taught me this years ago when I complained about my ragged beef chunks. She just laughed and said I was making it harder than it needed to be. She was right.
Once everything’s cut, pat the pieces dry with paper towels. This step matters more than you’d think. Wet beef steams instead of browning. You want that beautiful golden crust on each piece. That’s where the flavor lives.
Heat up your largest skillet or pan over medium-high heat. Add those three tablespoons of olive oil and wait until it shimmers. You’ll see little ripples across the surface when it’s ready. Drop in a tiny piece of beef first as a test. If it sizzles immediately, you’re good to go.
Now here’s the thing about cooking the beef. Don’t dump it all in at once. I know you’re hungry and want to rush, but resist that urge. Overcrowding the pan drops the temperature and you end up with gray, sad beef instead of the caramelized pieces we’re after. Work in batches if you need to.
I usually do two batches with half the beef each time. Let each piece sit undisturbed for about two minutes before flipping. That patience pays off with a gorgeous brown crust. The beef should cook for about six to eight minutes total. You’re looking for it to be just cooked through but still tender.
While the first batch cooks, sprinkle half your salt, pepper, paprika, and cumin over the top. The spices will toast slightly in the hot pan and smell amazing. Funny enough, my neighbors once knocked on my door asking what I was cooking because the aroma drifted into the hallway. That’s how good this smells.
Remove the first batch to a plate and repeat with the remaining beef. Once all the meat is cooked and set aside, you’ll notice brown bits stuck to the bottom of your pan. Don’t clean them off. That’s pure flavor right there.
Turn the heat down to medium and add your diced onion to the same pan. Those brown bits will dissolve into the onions as they cook. This process, called deglazing, adds incredible depth to the dish. Something similar happens when I make my Creamy Spinach Garlic Parmesan Pasta, where building layers of flavor makes all the difference.
Cook the onions for about five minutes, stirring occasionally. They should turn translucent and soft. Then add your minced garlic. Give it just one minute in the pan. Garlic burns quickly and turns bitter, so watch it carefully. I set a timer because I’ve definitely forgotten and scorched it before.
Return all that beautiful browned beef back into the pan with the onions and garlic. Give everything a good stir to combine. Turn the heat to low and let it hang out there while you handle the pasta. The flavors will meld together beautifully.
Cooking Pasta the Right Way
Okay, let’s talk pasta. This seems simple but getting it exactly right makes a huge difference in the final dish.
Fill your biggest pot with water. I mean really fill it. You want at least six quarts of water for one pound of pasta. This isn’t one of those times to conserve. Lots of water keeps the pasta from sticking together and helps it cook evenly.
Add those two tablespoons of salt once the water starts boiling. People always ask me if that’s too much salt. It’s not. Pasta water should taste like the ocean. This is your only chance to season the pasta itself from the inside out. The salt doesn’t just sit on the surface, it actually penetrates each piece as it cooks.
By the way, don’t add oil to your pasta water. I know some people swear by this, but it’s actually counterproductive. The oil coats the pasta and prevents the yogurt sauce from sticking properly later. Just skip it entirely.
Once your water is at a rolling boil and properly salted, add the pasta. Give it a good stir right away to prevent any pieces from clumping at the bottom. Then stir occasionally throughout cooking.
Check your package for the cooking time, but here’s my rule: subtract two minutes from whatever it says. If the box says ten minutes, cook for eight. We want al dente pasta, which means it should have a slight firmness when you bite into it. The pasta will continue cooking a bit when we combine everything with the hot beef and sauce.
I test my pasta starting about two minutes before I think it’s done. Fish out a piece with a slotted spoon, let it cool for a second, then bite into it. You should feel just a tiny bit of resistance in the center. That’s perfect. If it’s mushy all the way through, you’ve gone too far.
Here’s something crucial that people mess up all the time. Before you drain the pasta, scoop out at least two cups of that starchy pasta water. I keep a measuring cup right by the stove specifically for this. That water is essential for creating the yogurt sauce later. It’s like liquid magic that brings everything together.
Drain the pasta in a colander but don’t rinse it. I repeat: do not rinse your pasta. That starchy coating on each piece helps the sauce cling to it. Rinsing washes away all that good stuff. Just shake the colander a few times to get rid of excess water.
Drizzle those two tablespoons of olive oil over the drained pasta and toss it gently. This prevents sticking while we finish preparing everything else. Set the pasta aside but keep it somewhere warm. I usually put it back in the empty pot with the lid on.
The timing here doesn’t have to be perfect. If your pasta finishes before you’re ready to combine everything, it’s fine. If the beef is done first, that’s fine too. Just keep both components warm and ready. This is way more forgiving than something like a soufflé or a stir-fry where timing is everything.
Quick side note: I learned this timing flexibility when making dishes like my Salmon Avocado Rice Bowl, where components come together at different times but still create a cohesive meal. The key is keeping everything at the right temperature until assembly.
One thing I wish someone had told me earlier: invest in a good colander with feet that sits in your sink. Trying to drain pasta while holding a flimsy colander over the sink is a recipe for disaster. I once dropped an entire pot of penne down the drain because my colander collapsed. My husband still brings it up at dinner parties.
If you’re making this for a crowd, you can cook the pasta slightly ahead of time. Toss it with olive oil and spread it on a baking sheet to cool. When you’re ready to serve, just dip it briefly in boiling water to warm it up. This technique saves so much stress when entertaining. Similar to how I prep components for my High Protein Cottage Cheese Egg Bake the night before big family breakfasts.
The pasta and beef are now ready and waiting. You’ve done the hard part. The next step involves creating that signature yogurt sauce that makes this Turkish dish so special. But right now, take a moment to appreciate how your kitchen smells. That combination of sautéed beef, garlic, and onions mixed with freshly cooked pasta is pretty wonderful on its own.
Also, if you’re anything like me, you’ve probably snacked on a few pieces of that seasoned beef while cooking. No judgment here. Quality control is important. My kids always hover around the stove during this part, hoping I’ll share a taste before dinner. Usually I cave and hand over a piece or two. It builds anticipation for the final dish.
Keep everything warm and ready. We’re about to bring all these elements together with that creamy, tangy yogurt sauce that makes this recipe sing. The assembly process moves quickly, so having your beef and pasta prepped and standing by makes everything flow smoothly. Much like when I’m juggling multiple components for my Weight Loss Cabbage Detox Soup, organization at this stage is everything.
Bringing Your Turkish Yogurt Beef Pasta Together
Alright, this is the moment where everything comes together. You’ve got your perfectly cooked pasta sitting warm, your beautifully seasoned beef waiting, and now we’re going to create that signature creamy sauce that makes this dish unforgettable.
First things first, let’s talk about preparing the yogurt mixture properly. This step intimidates people more than it should, but I promise it’s straightforward once you understand the science behind it. Remember those egg yolks we set aside? They’re about to become your best friend.
In a medium bowl, whisk together your Greek yogurt, the two egg yolks, minced garlic, and salt. Whisk it really well until everything is completely smooth and unified. You don’t want any streaks of egg yolk visible. This should take about a minute of steady whisking. I use a regular wire whisk for this, nothing fancy required.
Here comes the critical part that separates success from disaster. You need to temper the yogurt mixture before adding it to the hot pasta. What does tempering mean? Basically, you’re gradually raising the temperature of the cold yogurt so it doesn’t curdle when it hits the heat. I learned this lesson the hard way when I dumped cold yogurt directly onto hot pasta and ended up with scrambled egg chunks floating in separated yogurt. Not pretty.
Take that reserved pasta water you saved earlier. Make sure it’s still hot. If it cooled down, just heat it back up in a small pot. Now, very slowly, add about half a cup of the hot pasta water to your yogurt mixture while whisking constantly. And I mean constantly. Don’t stop whisking even for a second.
The yogurt mixture will thin out considerably, which is exactly what we want. Add another half cup of pasta water, still whisking. By now, your yogurt sauce should look like thick cream, smooth and pourable. This technique is similar to what I do when making Fresh Homemade Egg Pasta, where temperature control makes or breaks the final result.
Now pour this tempered yogurt sauce over your warm pasta. Use a large serving bowl for this if you have one, or you can work right in the pasta pot if it’s big enough. I prefer a big ceramic bowl because it looks gorgeous when serving family-style at the table.
Toss the pasta gently with the yogurt sauce. Use two large spoons or tongs and lift the pasta from the bottom, folding it over itself. You want every single piece coated in that creamy sauce. Take your time with this. Rushed mixing leads to uneven distribution and some bites will be dry while others are swimming in sauce.
Add your beef mixture on top, including all those delicious onions and garlic from the pan. Don’t leave any of that flavor behind. Again, gently fold everything together. The beef should be distributed throughout but not completely mixed in. You want distinct pockets of meat in every serving.
Here’s something I discovered by accident: if your sauce seems too thick, add more pasta water a tablespoon at a time. If it’s too thin, just let it sit for a minute or two. The pasta will absorb excess liquid. This dish is forgiving and adjustable, which I love. Making pasta and noodles recipes has taught me that getting the sauce consistency right is more art than science sometimes.
While everything sits for a moment, prepare your final flourish. This butter and mint topping is what makes people’s eyes light up when they taste this dish. Heat those four tablespoons of butter in a small pan over medium heat. Watch it carefully as it melts and starts to foam.
Once the butter is completely melted and just beginning to turn golden, remove it from heat. Immediately add your dried mint and red pepper flakes. The residual heat will toast the spices and release their essential oils. The aroma is absolutely intoxicating. My husband can be upstairs with headphones on and he’ll still smell this and come running to the kitchen.
Drizzle this spiced butter over your assembled pasta in a zigzag pattern. Don’t stir it in completely. You want some bites to have more of that buttery, minty flavor than others. This variation makes eating the dish more interesting. Every forkful offers a slightly different experience.
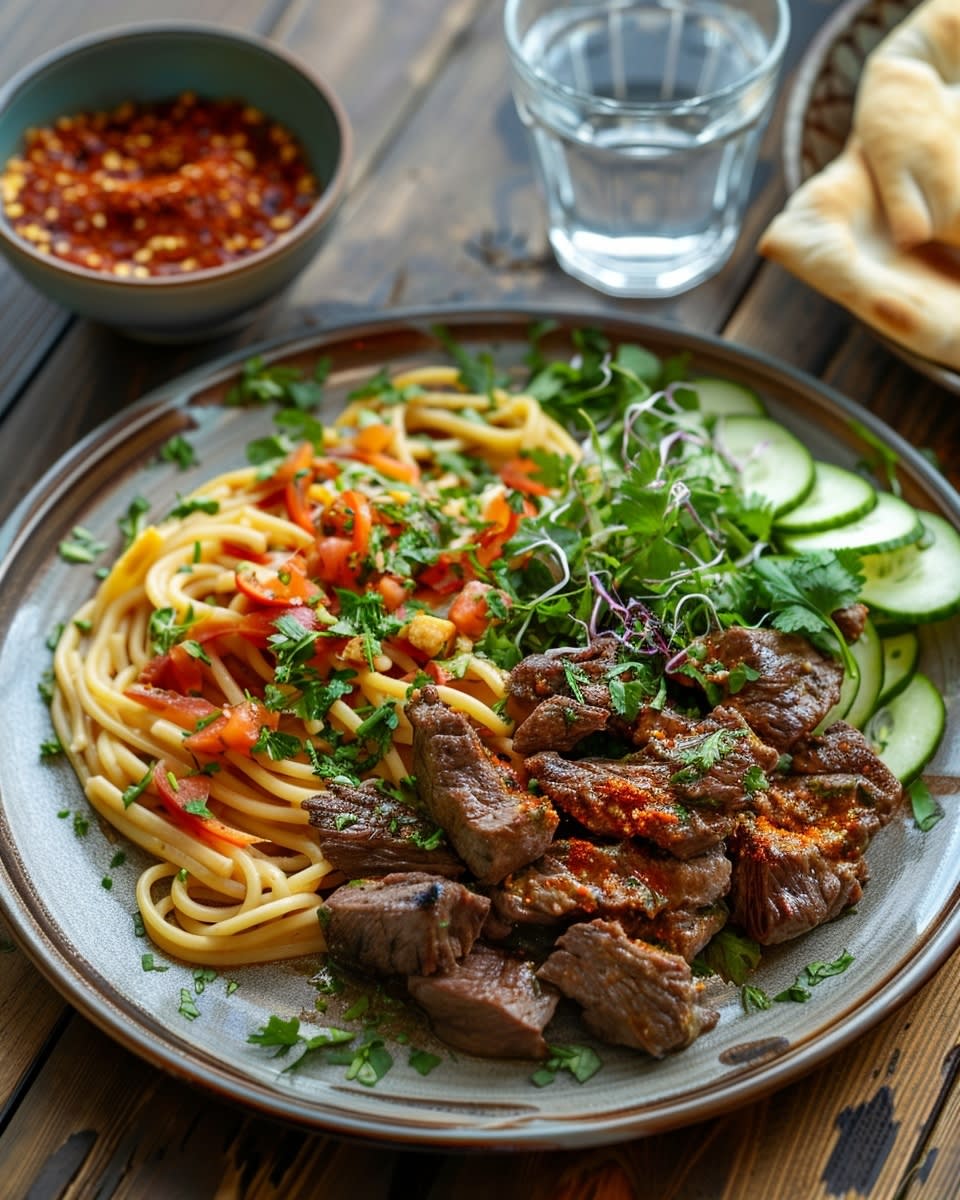
Now for the fresh garnishes. Chop up a good handful of fresh parsley. I like flat-leaf parsley better than curly for this, but use what you have. Sprinkle it generously over the top. The bright green against the creamy white yogurt and golden butter looks stunning.
By the way, if you want to add other fresh herbs, go for it. Dill works beautifully with yogurt. Fresh mint would be nice too, though remember we already have dried mint in the butter. Sometimes I throw in some chopped fresh cilantro if I have it on hand. My neighbor grows it in her garden and brings me bunches all summer long.
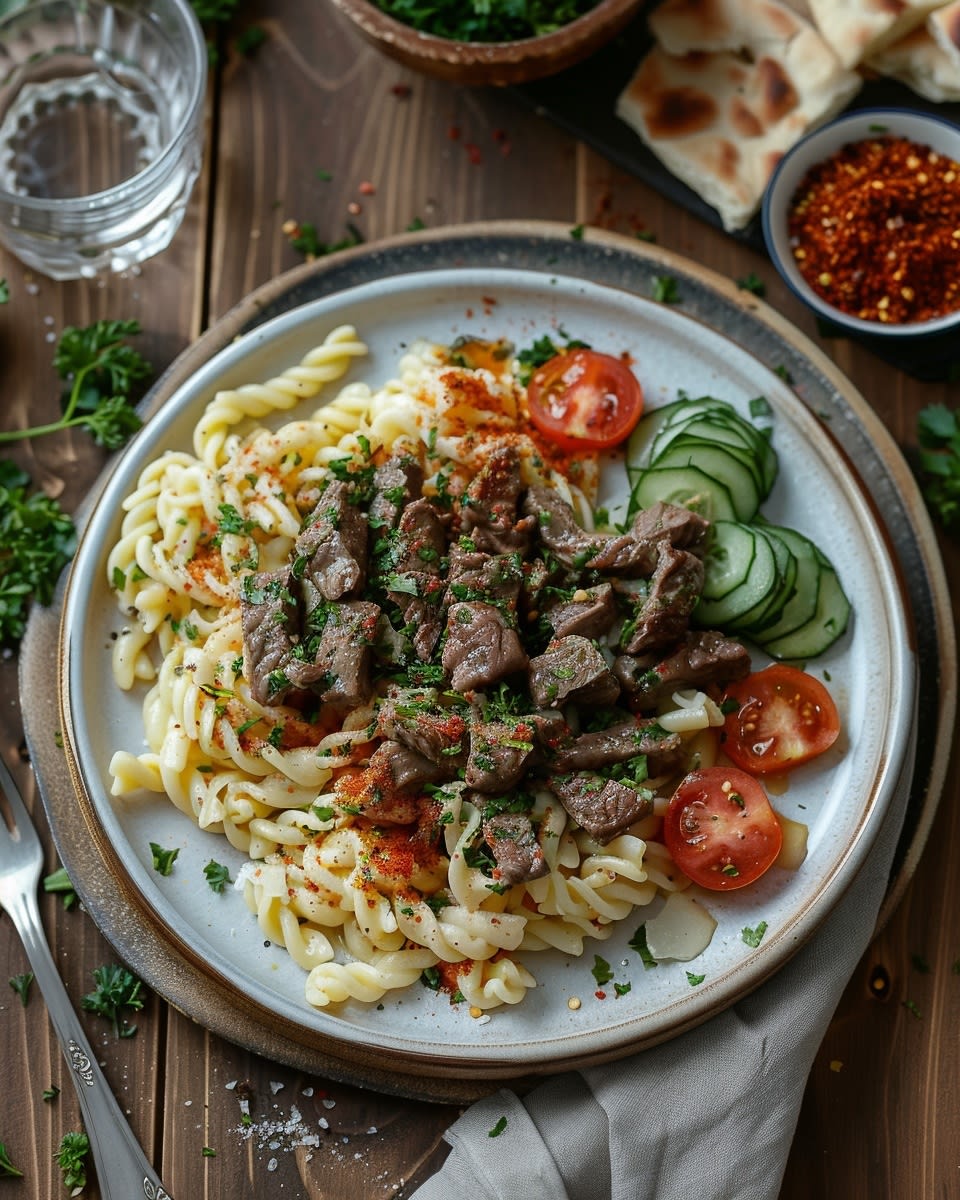
Some people like adding vegetables to this dish. I totally understand that impulse to sneak in some nutrition. Cherry tomatoes, halved and scattered on top, add brightness and acidity. Roasted red peppers bring sweetness. Sautéed spinach folds in nicely without disrupting the texture. Just don’t go overboard. This is fundamentally about the interplay between yogurt, beef, and pasta.
When choosing ingredients for any recipe, I try to think about sustainable food choices that support both quality and nutrition. Using grass-fed beef when possible and selecting organic dairy products makes a difference in flavor and supports better farming practices.
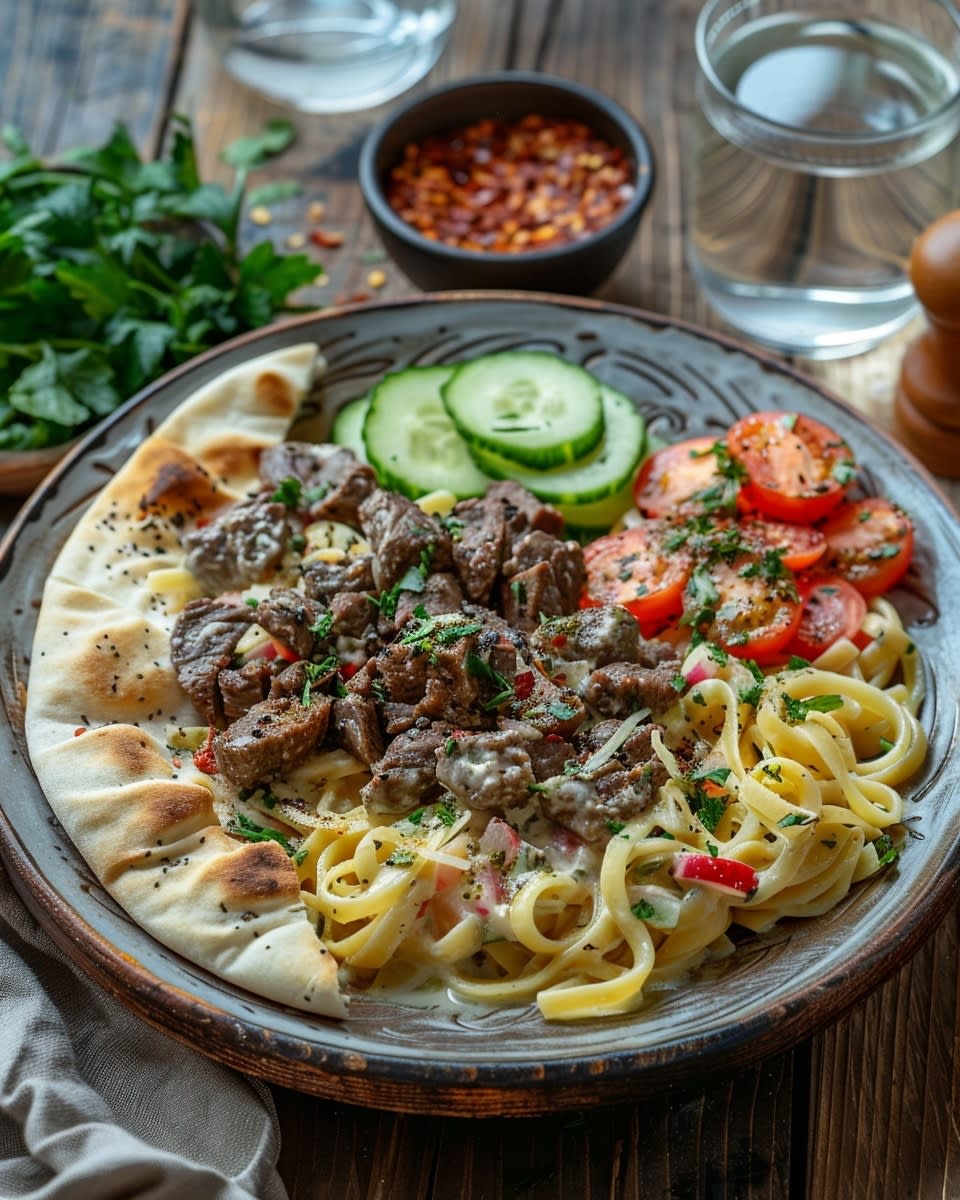
Here’s a little trick for presentation that makes this dish look restaurant-quality. Use a large serving fork to twirl some pasta onto each plate individually rather than just plopping it down with a spoon. Create a little nest shape. Place a few pieces of beef prominently on top. Drizzle extra spiced butter over each portion. Add a final sprinkle of paprika for color.
Serve this immediately while everything is still warm. The contrast between the cool, tangy yogurt and the warm pasta and beef is part of what makes this special. As it sits, everything comes to a uniform temperature and you lose some of that dynamic quality.
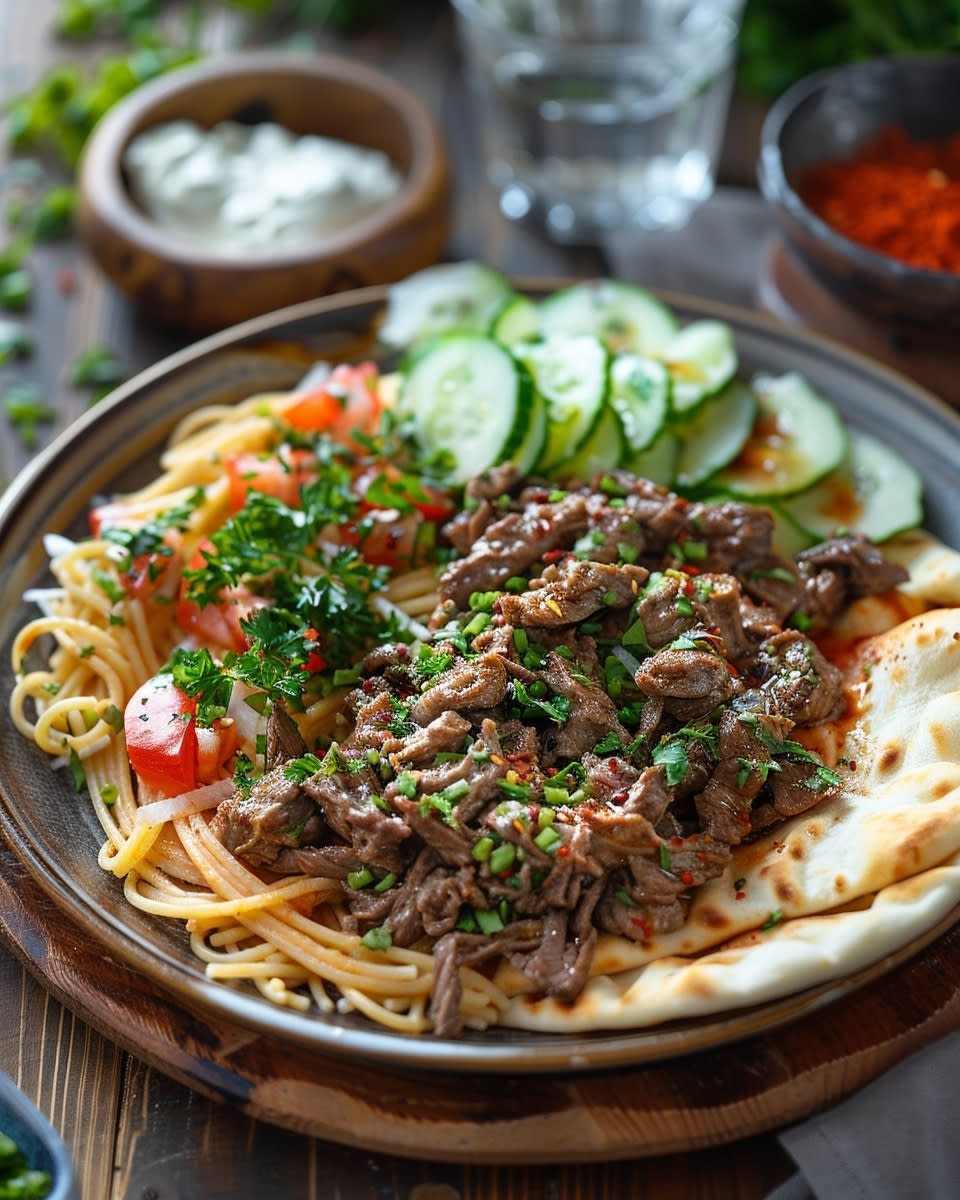
I like to serve this with simple sides. A crisp cucumber and tomato salad with lemon dressing cuts through the richness nicely. Some warm pita bread for scooping is traditional and delicious. A glass of cold ayran, the Turkish yogurt drink, complements this perfectly, though I know that’s not easy to find everywhere.
Funny enough, my kids prefer this with just a simple green salad on the side. They fight over the last servings of the pasta itself. My daughter once ate three helpings in one sitting and declared it her favorite meal ever. Coming from a thirteen-year-old who usually lives on chicken nuggets, that’s high praise.
If you’re entertaining, you can make this dish look even more special. Serve it in individual shallow bowls. Top each one with a small dollop of extra yogurt in the center. Garnish with a whole mint leaf and a light dusting of sumac if you can find it. Sumac adds a beautiful burgundy color and tangy flavor that pairs wonderfully with yogurt.
One more thing about leftovers, because I always make extra intentionally. This dish is actually fantastic the next day, though the texture changes slightly. The pasta absorbs more of the yogurt sauce overnight, becoming creamier and more unified. Some people actually prefer it this way. I reheat portions gently in the microwave with a splash of water to loosen things up.
You can also eat leftovers cold, straight from the fridge. It transforms into something more like a pasta salad, which is perfect for lunch. I pack it in containers for work and my colleagues always ask what smells so good when I heat it up in the break room.
This Turkish Yogurt Beef Pasta has become one of those recipes I return to again and again. It satisfies on multiple levels – the comfort of pasta, the heartiness of beef, the tang and creaminess of yogurt, and those warm spices that make everything feel special. Plus, it’s genuinely fun to make once you get the hang of it.
If you want to explore more dishes that bring together unexpected flavor combinations like this one does, there are so many directions you can go. Turkish cuisine has countless recipes built around yogurt. Greek cooking shares many similar techniques. Middle Eastern food in general is full of these wonderful contrasts between cool dairy and warm spices.
The beauty of this recipe is how it opens doors to a whole world of cooking you might not have explored before. Once you master the technique of tempering yogurt, you can apply it to dozens of other dishes. That skill alone is worth the price of admission, so to speak.
Common Questions About Turkish Yogurt Beef Pasta
What type of yogurt should I use for Turkish Yogurt Beef Pasta?
You absolutely need thick, full-fat Greek yogurt for this recipe. Regular yogurt contains too much water and will separate when heated, ruining the sauce. Look for yogurt that’s strained and has a thick, almost cream-cheese-like consistency. Brands like Fage Total or any authentic Greek or Turkish yogurt from a Middle Eastern market work perfectly. Low-fat or non-fat versions won’t give you the rich, creamy texture this dish needs. The fat content is essential for both flavor and stability when you mix the yogurt with hot pasta water.
Can I use a different type of meat instead of beef?
Definitely, this recipe is quite flexible with proteins. Ground lamb is actually traditional in many Turkish variations and adds a wonderful richness. Chicken breast or thigh meat works well if you prefer poultry, though you’ll want to cut it small and season it generously since chicken is milder than beef. I’ve even made this with ground turkey for a lighter version, though it lacks some of the depth that beef or lamb provides. Whatever meat you choose, make sure it’s well-seasoned and properly browned to develop those flavorful crispy bits. The key is using a protein that can stand up to the tangy yogurt sauce.
How do I make the yogurt sauce for this dish?
The sauce comes together by whisking Greek yogurt with egg yolks, minced garlic, and salt until completely smooth. The crucial step is tempering the mixture by slowly adding hot pasta water while whisking constantly. This gradually warms the yogurt and prevents it from curdling when it meets the hot pasta. Start with half a cup of pasta water, whisking vigorously, then add another half cup until the yogurt reaches a pourable, cream-like consistency. The egg yolks act as a stabilizer that keeps everything smooth and silky. Never skip the tempering process or add cold yogurt directly to hot pasta.
Is there a vegetarian version of this recipe?
Absolutely, and it’s delicious! Replace the beef with roasted chickpeas for protein and texture, or use sautéed mushrooms for that meaty, umami quality. You could also try roasted eggplant cut into cubes, which is very traditional in Turkish cooking. Season your vegetable protein with the same spices – paprika, cumin, salt, and pepper – to maintain those warm flavors. Some people use cooked lentils as a meat substitute, which adds protein and holds up well in the creamy sauce. The yogurt sauce and pasta remain exactly the same, so you still get that signature tangy, creamy character that makes this dish special.
Can I add vegetables to the dish?
Yes, vegetables work beautifully in this recipe. Roasted cherry tomatoes add acidity and brightness that cuts through the rich yogurt. Sautéed spinach or wilted kale fold in nicely without overwhelming the dish. Roasted red peppers bring sweetness and color. Some people add sautéed zucchini or mushrooms for extra substance. Just be mindful not to add too many vegetables or they’ll compete with the main flavors of yogurt and beef. I recommend adding no more than one or two cups of vegetables total for the whole recipe. Add them when you combine the pasta and beef, folding them in gently.
How long does it take to prepare this dish?
From start to finish, you can have this on the table in about 45 minutes, which makes it perfect for weeknight dinners. The actual hands-on cooking time is around 30 minutes – about 10 minutes for prep, 15 minutes for cooking the beef and pasta simultaneously, and 5 minutes for assembly. If you’re new to the recipe, give yourself an extra 10 minutes while you get comfortable with the process. The beauty of this dish is that while it tastes impressive and complex, the actual cooking steps are straightforward and forgiving. Once you’ve made it a couple times, you can easily get dinner ready in half an hour.
Is this dish suitable for a special occasion?
This Turkish Yogurt Beef Pasta is absolutely impressive enough for entertaining guests. The unique flavor combination of tangy yogurt with spiced beef surprises people in the best way, and the presentation with that drizzled spiced butter and fresh herbs looks restaurant-quality. I’ve served this at dinner parties many times and it always generates conversation and compliments. The fact that it comes together relatively quickly and can be partially prepped ahead makes it practical for entertaining. It’s also substantial enough to be a main course without needing much else besides a simple salad and bread.
Can I make this dish ahead of time?
You can definitely prep components ahead, which makes life easier. Cook the beef mixture in the morning and refrigerate it, then reheat gently before serving. You can also prepare the yogurt mixture several hours ahead and keep it cold until you’re ready to temper it with pasta water. The one thing you shouldn’t do ahead is cook the pasta – it needs to be fresh for the best texture. However, if you must make everything in advance, slightly undercook the pasta, toss it with olive oil, and refrigerate. Then briefly dip it in boiling water to reheat before combining with the yogurt sauce. The assembled dish keeps well in the fridge for up to three days.
What can I serve alongside Turkish Yogurt Beef Pasta?
Keep sides simple since the pasta itself is quite rich and flavorful. A fresh cucumber and tomato salad with lemon juice and olive oil provides a refreshing contrast. A simple arugula salad with a light vinaigrette cuts through the creaminess nicely. Warm pita bread or crusty bread for scooping is traditional and always welcome. Some people like serving pickled vegetables on the side – pickled turnips, cucumbers, or peppers add acidity and crunch. A glass of cold ayran (Turkish yogurt drink) is authentic, though sparkling water with lemon works great too. You really don’t need much because the pasta is satisfying on its own.
How do I store and reheat leftovers?
Store any leftovers in an airtight container in the refrigerator for up to three days. The pasta will absorb more yogurt sauce as it sits, becoming creamier and more unified in texture. To reheat, add a splash of water or milk to the portion you’re warming to loosen the sauce, then microwave in 30-second intervals, stirring between each interval. You can also reheat gently on the stovetop over low heat, stirring frequently and adding liquid as needed. Interestingly, some people actually prefer eating this cold or at room temperature the next day, like a pasta salad. The flavors meld together beautifully overnight and it makes a fantastic lunch straight from the fridge.
I hope this recipe brings as much joy to your kitchen as it has to mine. There’s something wonderful about mastering a dish from another culture and making it your own, and this Turkish Yogurt Beef Pasta is absolutely worth adding to your regular rotation.