The Only Sweet-Crunchy Snack You’ll Ever Need: My 5-Minute Candied Walnuts
You know that moment when unexpected guests show up, or you just need a little “something sweet” to make a Tuesday feel special? I’ve been there more times than I can count. That’s why my 5-Minute Candied Walnuts are my kitchen superhero. In the time it takes to brew a cup of tea, you can transform humble walnuts into glistening, crunchy, sweet-and-salty jewels. They’re so dangerously good, I have to hide them from my husband.
From Ancient Treats to Modern Date Night Delight
Candying nuts isn’t a new trick. Cultures around the world have been coating nuts in honey or sugar for centuries, often for festivals or as precious travel food. My version, though, is stripped down for our busy lives. I traded complicated sugar thermometers for a simple honey-butter glaze that works every single time. I first made these for a last-minute book club, and they were gone before the first chapter was discussed. Now, they’re my secret weapon to elevate any gathering, big or small. They’re the perfect modern date night delight, adding a touch of gourmet charm to cheese boards or ice cream sundaes with zero fuss.
Why You’ll Fall Head Over Heels for This Recipe
Let me count the ways! First, the speed. Five minutes is no joke. Second, the flavor. That combo of rich butter, floral honey, toasted walnut, and a pinch of salt creates pure magic. Adding cinnamon makes it taste like a cozy dessert. Third, the versatility. You can snack on them straight from the pan, or use them to make salads, yogurt, or oatmeal absolutely incredible. They add a “wow” factor that makes people think you spent hours in the kitchen.
Perfect Occasions for Your Candied Creation
These walnuts are incredibly social. I always make a double batch because they disappear so fast. Here are my favorite times to whip them up:
- Impromptu Gatherings: The ultimate quick hostess gift or party snack.
- Salad Topper Supreme: They turn a simple green salad into a special meal.
- Cheese Board Champion: Paired with blue cheese and fruit? Perfection.
- Dessert Garnish: Sprinkle over vanilla ice cream or brownies.
- Homemade Food Gift: Jar them up with a ribbon – a truly thoughtful present.
- Your Private Date Night Delight: A bowl of these, some dark chocolate, and good conversation. That’s a perfect evening.
What You’ll Need: The Simple Lineup
Just five simple ingredients come together for snack perfection. It’s all about quality here.
- 1 cup walnuts – I like to use halves or large pieces for the best crunch.
- 1/4 cup honey – Any pure honey works. The flavor will shine through!
- 1 Tbsp unsalted butter – This adds a rich, caramel-like depth.
- 1/4 tsp salt – Trust me, salt makes the sweet pop.
- 1/2 tsp ground cinnamon (optional) – My favorite “warm hug” addition.
No Honey? No Walnuts? No Problem! Handy Substitutions
Don’t let a missing ingredient stop you. Here are easy swaps I’ve tested myself.
- For Honey: Pure maple syrup is a fantastic substitute. It gives a lovely, deep flavor.
- For Butter: Coconut oil works beautifully for a dairy-free version.
- For Walnuts: Pecans, almonds, or even cashews are wonderful here. Just keep the same quantity.
- For Cinnamon: Try a pinch of nutmeg, allspice, or even a dash of vanilla extract after cooking.
Your Foolproof, Step-by-Step Guide to Crunchy Bliss
Ready? Let’s cook! This is where the magic happens, fast. Have your parchment-lined sheet pan ready before you start.
Step 1: Melt the Butter Foundation
Place your skillet on the stove over medium heat. Drop in that tablespoon of butter. Watch it slowly melt, swirling the pan gently. You’ll see it foam slightly and smell that rich, comforting aroma. This buttery base is what prevents the honey from seizing up and gives our coating a lovely smooth texture. Pro tip: Don’t use high heat here. We want gentle melting, not browning the butter just yet.
Step 2: Create the Sweet & Salty Syrup
Pour the honey right into the melted butter. It will sizzle pleasantly. Add the salt and your cinnamon (if you’re using it). Now, take your spoon and stir, stir, stir! You’re combining these beautiful golden liquids into one unified, fragrant syrup. The colors blend into a deep amber. This only takes about 30 seconds. You’ll know it’s ready when it’s perfectly smooth and bubbling lightly.
Step 3: Coat Those Walnuts
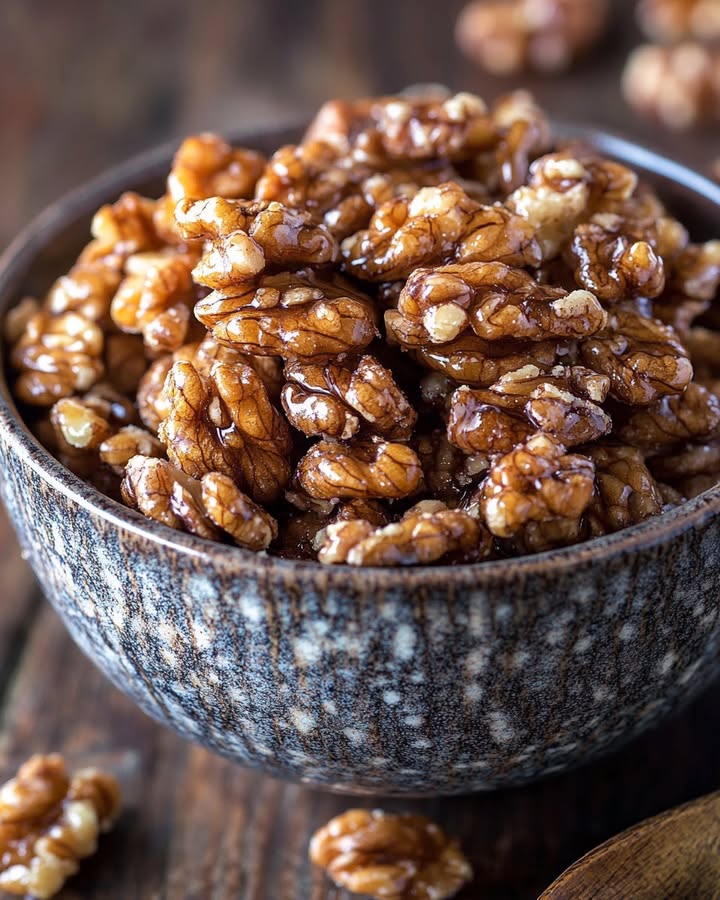
Here come the stars! Dump your cup of walnuts into the shimmering syrup. Immediately start folding and stirring so every single nook and cranny gets glossed up. The sound changes from a sizzle to a thicker, sticky clatter as the nuts get thoroughly dressed. They go from a pale, matte brown to a shiny, jewel-toned treat. Make sure no walnut is left behind!
Step 4: The Caramelization Dance
Keep cooking for 2-3 minutes, stirring almost constantly. This is crucial. The syrup will bubble vigorously and start to thicken, clinging to the nuts. You’ll see the color deepen to a gorgeous, glossy caramel. The smell intensifies into the most amazing sweet, nutty perfume. Pro tip: Set a timer! Three minutes goes fast, and this prevents burning.
Step 5: Cool to Crisp Perfection
As soon as the walnuts look richly coated and caramelized, quickly transfer them to your waiting parchment-lined sheet. Use your spoon to spread them into a single layer. They will be hot and sticky. This is where they transform. As they cool, the glossy coating hardens into that irresistible, candy-like, crunchy shell. Try not to eat them all while they’re warm (it’s a real challenge!).
Chef’s Tip for the Ultimate Date Night Delight
For an extra fancy touch, while the nuts are still hot on the parchment, sprinkle just a tiny extra pinch of flaky sea salt over them. It creates little salty bursts that contrast the sweet honey perfectly. This is my signature move when I’m plating them as part of a date night delight cheese spread.
Timing is Everything: Your Quick Snack Schedule
This recipe is faster than most TV commercials.
- Prep Time: 2 minutes (getting ingredients out and measuring)
- Cooking Time: 3 minutes (active stove time)
- Cooling Time: 10-15 minutes (for full crunch)
- Total Time: About 20 minutes start to finish, mostly hands-off cooling.
- Servings: Makes about 1 cup, perfect for 4 people to snack on.
A Little Extra Secret from My Kitchen to Yours
My secret? I always use a light-colored, non-stick skillet. It lets me see the true color of the caramelizing honey, so I never accidentally burn it. A dark skillet can hide those subtle changes, making it easy to overcook.
Fun Fact: The Walnut’s Brainy Connection
Isn’t it funny that walnuts look like little brains? For centuries, people believed they were good for brain health. While that’s charming folklore, we do know walnuts are packed with healthy fats and antioxidants. So you’re not just making a tasty snack; you’re making a nutritious one! Every time I make these, my kids call them “smart candies.”
Gear You’ll Need
You likely have everything already.
- A medium skillet (non-stick is my preference)
- A silicone spatula or wooden spoon for stirring
- A baking sheet lined with parchment paper (wax paper works in a pinch)
- Measuring cups and spoons
Keeping Your Crunch: The Best Ways to Store Them
Once your walnuts are completely cooled, the key to keeping their incredible crunch is an airtight container. I use a glass jar with a tight-sealing lid. Any moisture in the air is the enemy of crispiness, so sealing them out is the goal.
You can store them at room temperature in your pantry or cupboard. They will stay perfectly snappy for about a week. If you live in a very humid climate, you might find they start to soften after a few days.
For longer storage, you can keep them in the refrigerator in an airtight container for up to two weeks. Some people even freeze them for a month! Just let them come to room temperature before serving to restore the best texture.
My Top Tips for Candied Walnut Success
- Always stir. Seriously, don’t walk away. Constant stirring prevents hot spots and burning.
- Use fresh nuts. Older walnuts can taste bitter. Give them a sniff before you start.
- Don’t crowd the pan. Stick to one cup of nuts per batch. More than that and they won’t coat evenly.
- Line your sheet with parchment. Foil can stick, and a bare sheet is a cleaning nightmare.
- Let them cool completely before breaking them apart if they’ve clumped. They’ll snap right apart.
Presentation Ideas to Impress Your Guests
A beautiful dish makes everything taste better. Here’s how I plate my candied walnuts.
- Pile them high in a small, elegant bowl for a simple, chic look.
- Scatter them over a green salad with goat cheese and sliced pears.
- Create a dessert board with dark chocolate squares, dried figs, and a bowl of these walnuts.
- For a true date night delight, serve them in individual little ramekins alongside a glass of port or dessert wine.
- Package them in clear cellophane bags tied with twine for a lovely homemade gift.
6 Tasty Twists: Healthier & Fun Variations
Love the base recipe? Try these fun spins!
- Spicy Chipotle Walnuts: Swap cinnamon for 1/4 tsp chipotle powder and a pinch of smoked paprika. Sweet, smoky, and spicy!
- Orange Zest Walnuts: Add 1 tsp finely grated orange zest with the honey. It’s bright, fresh, and fantastic on salads.
- Maple Rosemary Walnuts: Use maple syrup instead of honey. Add 1 tsp finely chopped fresh rosemary. Savory and sublime.
- Protein-Packed Seed Mix: Use 1/2 cup walnuts and 1/2 cup pumpkin seeds (pepitas). Adds great texture and nutrients.
- Lower-Sugar Option: Use a monk fruit-sweetened maple syrup blend instead of honey for a lower glycemic index.
- “Everything Bagel” Spiced Walnuts: After cooking, toss warm nuts with a mix of sesame seeds, poppy seeds, dried garlic, and onion flakes.
Common Mistakes to Avoid
Avoid these simple pitfalls for perfect candied walnuts every single time.
Mistake 1: Using Too High Heat
This is the biggest mistake. High heat causes the honey and butter to burn in seconds, creating a bitter, acrid taste before the nuts even toast. The outside burns, but the inside stays soft. Always keep your burner at a solid medium heat. You want a steady, active bubble, not a raging boil. If your nuts seem to be coloring too fast, simply pull the pan off the heat for a moment.
Mistake 2: Not Stirring Constantly
Walking away for even 30 seconds can lead to disaster. The sugar in the honey caramelizes quickly and unevenly. The nuts on the bottom of the skillet will overcook while the top ones are barely warm. Stand by your pan and keep those nuts moving with a spoon or spatula. Think of it as a quick 3-minute workout for your arm. Consistent motion equals even coating and perfect color.
Mistake 3: Not Lining Your Baking Sheet
Pouring hot, sticky candied walnuts directly onto a bare baking sheet is a recipe for frustration. They will glue themselves on like cement. You’ll spend ages scrubbing. Parchment paper or a silicone baking mat is non-negotiable. It makes cleanup a dream and lets you easily break apart any clusters once cooled. Wax paper can work in a pinch, but parchment is best.
Mistake 4: Not Letting Them Cool Completely
I know it’s tempting to taste them right away. But if you break into a clump before they’ve cooled and hardened, you’ll get a chewy, sticky texture instead of that satisfying crunch. The cooling process is when the candy shell solidifies. Let them sit for a full 10-15 minutes. You’ll hear them make little crackling sounds as they harden. Patience is rewarded with the perfect snap.
Mistake 5: Storing Them While Still Warm
Putting slightly warm nuts into a container traps steam. That steam turns into moisture, which makes your beautifully crisp walnuts soft and soggy. Always, always let them cool to room temperature on the counter first. Once they are no longer warm to the touch and feel hard, then transfer them to your airtight container. This keeps them crunchy for days.
Your Candied Walnut Questions, Answered!
Can I use a different type of nut?
Absolutely! This recipe is wonderfully flexible. Pecans are a classic and delicious alternative with their buttery flavor. Almonds or cashews also work beautifully. Just keep the measurement the same: one cup of your chosen nut. Be aware that larger nuts like whole almonds might need an extra minute of stirring to get fully coated and toasted. The method remains identical, so feel free to experiment with your favorite nuts.
My walnuts turned out chewy, not crunchy. What did I do wrong?
Chewy walnuts usually mean one of two things. First, you might not have cooked the honey mixture long enough. The syrup needs those full 2-3 minutes to boil and thicken properly so it can harden into a shell. Second, and more commonly, you didn’t let them cool completely before eating or storing. The hardening happens as they cool. If they’re still warm, they’ll be sticky. Next time, be patient and let them sit on the parchment until they are fully room temperature and snap when you break one.
How long do these candied walnuts last?
When stored correctly in an airtight container at room temperature, they stay crispy and delicious for about one week. If your kitchen is very humid, they might soften a day or two sooner. For longer storage, you can keep them in the fridge for up to two weeks. The cold, dry environment of the fridge helps preserve their crunch. You can even freeze them for a month in a freezer-safe bag. Just thaw them at room temperature before serving.
Can I make these sugar-free?
You can certainly try a sugar-free alternative, but the results will be different. Liquid sweeteners like pure maple syrup or honey are what create the hard, candied shell as they cool. Many sugar-free syrups (like those based on monk fruit or stevia blends with added fiber) don’t caramelize and harden in the same way. They might stay sticky or have a different texture. For the best classic result, I recommend sticking with honey or maple syrup, but a sugar-free maple syrup blend is your best bet for a lower-sugar version.
Are these gluten-free and vegan?
Yes, with one simple swap! The basic recipe with honey is naturally gluten-free, as none of the ingredients contain gluten. However, standard honey is not considered vegan. To make a fully vegan version, simply replace the honey with an equal amount of pure maple syrup or agave nectar, and use coconut oil instead of butter. The process and the delicious, crunchy result will be exactly the same. It’s a fantastic allergy-friendly treat.
What can I do with leftover candied walnuts?
Oh, the possibilities are endless! Don’t think of them as just a snack. Chop them up and sprinkle them over your morning oatmeal or yogurt. Toss them into a spinach and apple salad for a sweet crunch. Use them as a topping for sundaes or a garnish for frosted cupcakes. Crumble them over roasted sweet potatoes or butternut squash. You can even chop them finely and use them as a crust for cheesecake or a coating for chicken. Get creative!
My honey and butter separated. Can I fix it?
Don’t panic! This can happen if the heat is too low or if you add cold ingredients too quickly. Simply remove the pan from the heat for a moment. Add a tiny splash (like a teaspoon) of very hot water and whisk vigorously. The extra liquid and agitation can help the honey and butter re-emulsify into a smooth syrup. Then return it to medium heat and proceed. To prevent it, make sure your butter is fully melted and bubbly before adding the honey.
Can I double or triple this recipe?
I would be cautious about doubling it in the same skillet. The key is that every walnut piece needs to be in contact with the hot pan to caramelize evenly. If you crowd the skillet, the nuts will steam instead of toast, and they won’t get that perfect coating. For a larger batch, it’s better to cook multiple single batches one after the other. Clean your skillet quickly between batches if needed. It only takes 5 minutes per batch, so it’s still very fast!
Why add salt to a sweet recipe?
Salt is the secret weapon in all great sweet recipes, from chocolate chip cookies to caramel. It doesn’t make the walnuts taste salty; it enhances and deepens all the other flavors. It balances the sweetness of the honey, brings out the rich, toasty flavor of the nuts, and makes every bite more complex and interesting. Think of it as a flavor booster, not a seasoning. Don’t skip it!
Can I make these in the oven or microwave?
You can, but the stovetop method is superior for control and speed. Oven versions often require a longer bake time and can result in uneven coating. The microwave can be tricky because honey heats up extremely quickly and can burn in an instant. The stovetop skillet method gives you direct visual and aromatic cues. You can see the color change and smell the caramelization happening, which leads to a perfect result every time. I highly recommend sticking with the tried-and-true skillet.
Go Forth and Create Something Crunchy!
And there you have it! My absolute favorite, no-fail, 5-minute trick to feeling like a kitchen genius. These candied walnuts have saved my hosting pride more times than I can remember. They prove that the most impressive things don’t have to be complicated. Whether you’re making a solo snack, prepping for a party, or crafting a special date night delight, this recipe is your friend. So grab that skillet, melt that butter, and get ready for the easiest, crunchiest victory of your week. Happy cooking!
Date Night Delight
Ingredients
Equipment
Method
- Melt the butter in a skillet over medium heat.
- Pour the honey into the melted butter and add salt and cinnamon, stirring to combine.
- Add the walnuts and stir to coat them evenly in the syrup.
- Cook for an additional 2-3 minutes, stirring constantly until the syrup thickens and caramelizes.
- Transfer the walnuts to a parchment-lined baking sheet to cool.