Homemade Hamburger Buns: Your Burger’s Best Friend
Let’s be honest. A burger is only as good as its bun. I learned this the hard way at a family barbecue when my juicy masterpiece collapsed into a sad, soggy mess. That was the day I swore off store-bought buns for good. Making your own soft, pillowy, perfectly golden hamburger buns is easier than you think. It’s a game of flour, yeast, and a little bit of love that turns a simple meal into something truly memorable. I promise, once you try these, you’ll never go back. They’re sturdy enough for the juiciest patty but soft enough to melt in your mouth with every bite.
The Humble Bun’s Journey to Your Table
The hamburger bun has a surprisingly grand story. Many believe the modern soft bun was created specifically to hold messy ground beef patties in the late 1800s and early 1900s. They needed something that could soak up juices without falling apart! Today, while bakeries and grocery stores offer countless options, nothing beats the old-fashioned method. This recipe brings it back to basics. It’s a simple, enriched dough—just butter, sugar, and yeast working their magic. It’s the same timeless technique used for generations, now made easy for your home kitchen. You’re not just baking buns; you’re baking a little piece of delicious history.
Why You’ll Love Making Your Own Buns
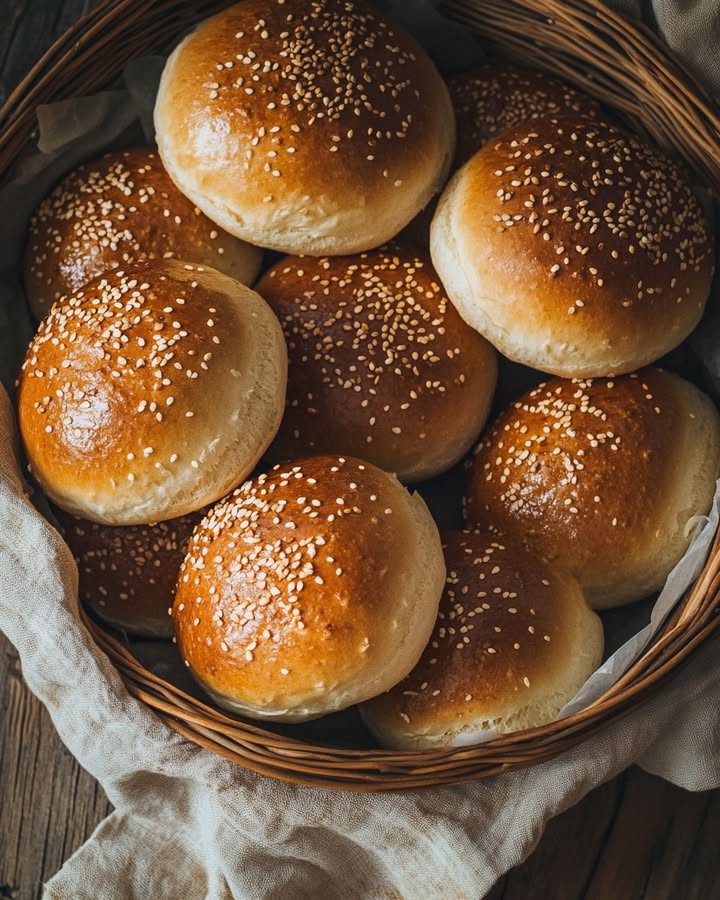
First, the smell. There is no scent on earth better than fresh-baked bread wafting through your house. Second, the pride. Placing a basket of warm, golden buns you made from scratch on the table is a feeling you can’t buy. And third, the taste! These buns are fresh, with a slight sweetness, chewy texture, and no strange preservatives. They freeze beautifully, so you can have a stash of gourmet buns ready anytime a burger craving hits. They make weeknight dinners feel special and turn cookouts into legendary events.
Perfect Occasions for These Homemade Buns
These buns are your secret weapon for any gathering where food is the star. Obviously, they are perfect for Friday night burger nights and summer barbecues. But don’t stop there! Use them for pulled pork sliders at a game-day party, or for epic breakfast sandwiches. Turn them into bread for a fancy chicken salad lunch. I even use day-old buns to make the best bread pudding or croutons. They bring a handmade, caring touch to potlucks and are always the first thing to disappear.
Ingredients for Amazing Hamburger Buns
- For Proofing the Yeast:
- 1/2 cup warm water (105-110°F)
- 1 tablespoon instant or active dry yeast
- 1 teaspoon granulated sugar
- For the Dough:
- 2 cups warm water
- 1/2 cup melted unsalted butter
- 1/2 cup granulated sugar
- 1 tablespoon salt
- 6-7 cups all-purpose or whole wheat flour
- For the Egg Wash and Topping:
- 1 egg
- 1 tablespoon water
- 1/4 cup sesame seeds (optional)
Easy Ingredient Substitutions
No problem! Cooking is about flexibility. If you don’t have unsalted butter, use salted and just reduce the added salt in the dough by half. Out of granulated sugar? Honey or maple syrup will work beautifully. For a dairy-free version, swap the melted butter for a neutral oil like avocado or canola. Want to go egg-free? Skip the egg wash. The buns will be slightly less shiny but just as tasty. You can use a mix of all-purpose and whole wheat flour, but start with the lesser amount of flour listed, as whole wheat absorbs more liquid.
Crafting Your Perfect Hamburger Buns: A Step-by-Step Guide
Step 1: Wake Up the Yeast
This first step is like a morning alarm for your yeast. In a small bowl, whisk together the half cup of warm water, yeast, and that teaspoon of sugar. The water should feel like a warm bath, not hot. Hot water will kill the yeast and your buns won’t rise. Let this mixture sit for about 10 minutes. You’ll see it become frothy and bubbly, almost like a tiny yeast cappuccino. This is how you know your yeast is alive and ready to make your dough light and airy. Pro tip: If your mixture doesn’t bubble, your yeast might be old. Start over with a fresh packet.
Step 2: Create the Dough
Now, let’s bring the dough together. In the bowl of your stand mixer (or a very large bowl if kneading by hand), combine the 2 cups of warm water, melted butter, sugar, and salt. Give it a good stir. Pour in that bubbly yeast mixture. The scent is already amazing—buttery and sweet. Attach the dough hook. Start the mixer on low and begin adding the flour, one cup at a time. Let each cup get mostly incorporated before adding the next. After about 5 cups, watch the dough closely. You want it to form a smooth ball that pulls away from the sides of the bowl but is still slightly tacky to the touch. Add the remaining flour slowly until you reach this perfect texture.
Step 3: The First Rise
Grease a large, clean bowl with a little oil or butter. Place your beautiful ball of dough in the bowl, turning it once to coat it lightly. This prevents a dry crust from forming. Cover the bowl tightly with plastic wrap or a damp kitchen towel. Now, find a warm, draft-free spot for it to rest. I often turn my oven light on and place the bowl inside (oven OFF!). Let the dough rise until it’s doubled in size. This usually takes about an hour. It’s a perfect time to clean up or prep your burger toppings!
Step 4: Shape the Buns
After an hour, the dough will be puffy and full of air. Gently punch it down in the center to release all that gas—it’s very satisfying! Turn the dough out onto a lightly floured surface. Divide it into 18 equal portions. To shape each bun, roll a portion into a smooth ball, pinching the seam tightly on the bottom. Place the balls on parchment-lined baking sheets, leaving about 2 inches between them so they have room to grow. Cover them loosely with that kitchen towel again and let them rise for another 30 to 90 minutes. They should look puffy and nearly doubled.
Step 5: Bake to Golden Perfection
Preheat your oven to 350°F (175°C). Just before baking, make your egg wash. Whisk one egg with a tablespoon of water until smooth. Using a pastry brush, gently coat the top of each risen bun with this wash. Be gentle so you don’t deflate them. This is what gives them that gorgeous, glossy, golden-brown finish. If you like, sprinkle sesame seeds (or everything bagel seasoning!) over the top. Bake for 20-25 minutes. You’ll know they are done when they sound hollow if tapped on the bottom and are a deep, rich golden color. The smell will be incredible.
Chef’s Tip
For super soft buns with a professional finish, brush the hot buns with a little melted butter as soon as they come out of the oven. This keeps the crust soft and adds an extra layer of flavor. It’s my never-fail secret for bakery-quality results at home.
Total Time Breakdown
- Prep Time: 30 minutes
- Rise Time: 1.5 – 2.5 hours
- Cook Time: 20-25 minutes
- Total Time: Approx. 2.5 – 3.5 hours
An Extra Pinch of Info
Did you know the world’s largest hamburger bun was baked in 1999? It weighed a whopping 122 pounds! Thankfully, our recipe makes 18 normal-sized, perfectly portable buns. The use of sesame seeds as a topping became popular in the 20th century, inspired by a burger chain’s decision to make their buns look more distinctive. So when you sprinkle those seeds, you’re adding a classic touch of burger history.
What You’ll Need to Make Them
You don’t need fancy equipment. A stand mixer with a dough hook makes it incredibly easy, but strong arms and a sturdy wooden spoon work just fine for hand-kneading. You’ll also need: Two large mixing bowls, a liquid measuring cup, a kitchen scale (optional but great for even buns), baking sheets, parchment paper, a pastry brush, and a clean kitchen towel or plastic wrap for covering the dough.
How to Store Your Homemade Buns
Once your buns are completely cool, store them in an airtight container or a resealable plastic bag at room temperature. They will stay fresh and soft for 4 to 5 days. The lack of preservatives means they will stale faster than store-bought, but they still taste wonderful toasted after a few days.
For longer storage, freezing is your best friend. Place the cooled buns in a single layer on a baking sheet and freeze until solid. Then, transfer them to a freezer-safe bag. They will keep for up to 3 months. This prevents them from sticking together in one big lump. You can pull out exactly how many you need for any meal.
To thaw, simply leave the buns at room temperature for a few hours or overnight. For that just-baked warmth and softness, wrap a thawed bun in foil and warm it in a 300°F oven for 5-10 minutes. You can also split and toast them directly from frozen in a toaster or toaster oven.
Tips and Advice for Bun Success
- Flour is a Guide: The exact amount can vary based on humidity and flour brand. Add flour until the dough is smooth and tacky, not dry and stiff.
- Patience is a Virtue: Don’t rush the rise times. Letting the dough double ensures a light, airy texture instead of dense buns.
- Even Sizing: For uniform buns (great for a crowd), use a kitchen scale to weigh your dough portions. Aim for about 3 ounces each.
- No Stand Mixer? Knead by hand on a floured surface for 8-10 minutes until the dough is smooth and elastic. It’s a great workout!
Presentation Ideas
Serve these buns with style! Pile them high in a bread basket lined with a checkered napkin for a rustic feel. For a party, make sliders and spear each one with a cute, colorful food pick. Use different toppings to differentiate burgers: sesame seeds for classic, poppy seeds for a twist, or a sprinkle of sea salt and rosemary for gourmet. Let guests build their own burgers with a toppings bar—it makes the homemade buns the star of the show.
6 Delicious Recipe Variations to Try
- Everything Bagel Buns: Replace sesame seeds with a generous sprinkle of everything bagel seasoning before baking. Perfect for breakfast sandwiches or salmon burgers.
- Brioche-Style Buns: Replace 1/4 cup of water in the dough with 2 extra egg yolks. This creates an even richer, more decadent, and yellow-tinged bun fit for a gourmet steak burger.
- Whole Wheat Honey Buns: Substitute half the all-purpose flour with whole wheat flour and swap the white sugar for honey. These have a nutty, wholesome flavor and are slightly denser.
- Cheddar Jalapeño Buns: Knead 1 cup of shredded sharp cheddar cheese and 2 finely diced jalapeños (seeds removed) into the dough during the last minute of mixing. Spicy, cheesy, and amazing with a basic beef patty.
- Potato Burger Buns: Replace 1/2 cup of the flour with 1/2 cup of instant potato flakes. This creates an unbelievably soft, moist, and tender bun that stays fresh for days.
- Mini Slider Buns: Divide the dough into 24-30 small balls instead of 18. Adjust baking time down to 15-18 minutes. Ideal for party sliders or kids’ meals.
Common Mistakes to Avoid
Mistake 1: Using Water That’s Too Hot
This is the number one reason dough doesn’t rise. If your water is too hot, it will kill the yeast. Your dough will stay a sad, dense lump. Always use warm water, between 105-110°F. It should feel comfortably warm on your wrist, not hot. A simple kitchen thermometer is a cheap and foolproof tool to ensure you get it right every single time.
Mistake 2: Adding Too Much Flour
It’s easy to keep adding flour until the dough isn’t sticky at all. But this is a trap! A dough that’s too dry makes hard, tough buns. The dough should be tacky—it might stick a little to your clean fingers but shouldn’t leave a ton of residue. Add flour slowly at the end and stop as soon as the dough forms a cohesive, slightly sticky ball that clears the sides of the mixer bowl.
Mistake 3: Rushing the Rise
Life is busy, but bread has its own schedule. If you don’t let the dough double in size during either rise, your buns will be small and dense. They need time for the yeast to create air bubbles, which gives them that light, airy texture. Find a warm spot and be patient. A good test: poke the risen dough with a floured finger. If the indentation slowly fills back in, it needs more time. If it stays, it’s ready.
Mistake 4: Overcrowding the Baking Sheet
Placing the dough balls too close together on the pan is a common error. As they rise a second time and then bake, they will expand and fuse into one giant, connected “bun-wich.” Leave at least 2 inches between each ball so they have room to grow into perfect, individual buns with lovely, separate crusts.
Frequently Asked Questions
Can I make hamburger buns without a stand mixer?
Absolutely! While a stand mixer is convenient, you can definitely make these by hand. After combining the wet ingredients and yeast, stir in the flour with a sturdy wooden spoon until it becomes too difficult. Then, turn the shaggy dough out onto a floured surface and knead for 8 to 10 minutes. Use the heels of your hands to push the dough away, then fold it back. You’ll know it’s ready when it’s smooth, elastic, and springs back slowly when poked. Hand-kneading is a wonderfully tactile and satisfying part of baking.
Why didn’t my buns rise very much?
If your buns are flat, the cause is usually one of three things. First, the yeast may have been old or killed by too-hot liquid. Second, the rise might have been in a spot that was too cold. Yeast loves warmth. Third, you may have used too much flour, making the dough too heavy to rise properly. Always proof your yeast first to check it, and ensure your rising spot is draft-free and warm, like an oven with just the light on.
Can I use whole wheat flour entirely?
You can, but the results will be different. Using 100% whole wheat flour will make a denser, heavier, and more nutritious bun. The bran in whole wheat absorbs more liquid and can inhibit gluten development. For a lighter bun, I strongly recommend starting with a 50/50 mix of whole wheat and all-purpose flour. You will also likely need to add a bit more liquid, so add the flour gradually and stop when the dough reaches the right tacky consistency.
How do I get a super soft bun crust?
The secret is steam and butter. Right when the buns come out of the oven, brush the tops with melted butter. This immediately adds moisture and softens the surface. For an even softer all-around crust, you can place a pan of hot water on the bottom rack of the oven while baking. The steam created helps keep the crust from hardening too quickly. This is a professional baker’s trick you can use at home.
Can I make the dough ahead of time?
Yes, you can! This is a great time-saver. After the first rise and punching down, you can cover the bowl tightly and refrigerate the dough for up to 24 hours. The cold slows the yeast way down. When you’re ready, take the dough out, shape it into buns, and let them complete their second rise at room temperature. This may take longer since the dough is cold, but the flavor actually deepens with this slow, cold fermentation.
My buns are browning too fast. What should I do?
All ovens have hot spots and can run hot. If your buns are getting dark brown before the baking time is up, they can burn. Simply tent a piece of aluminum foil loosely over the top of the baking sheet. This acts like a little sun hat for your buns, shielding them from direct heat and allowing the insides to finish baking without the tops burning. Check them a few minutes earlier than the recipe states, just in case.
What’s the difference between instant yeast and active dry yeast?
Instant yeast has smaller granules and can be mixed directly into the dry flour without proofing first. Active dry yeast has larger granules and generally benefits from being dissolved in warm water first (the proofing step in this recipe). I recommend proofing it anyway—it gives you peace of mind knowing your yeast is active. If you only have instant yeast, you can skip the proofing bowl and add it directly to the flour.
Can I use this recipe to make hot dog buns?
You can! Instead of rolling the dough into balls, divide it into 18 portions and shape them into short, fat logs about 5 inches long. Place them on the baking sheet with the seam side down. Let them rise and bake as directed. You’ll have fantastic, bakery-style hot dog buns that are miles better than the spongy ones from the store. They’re perfect for summer cookouts.
Why are my homemade buns so crumbly?
Crumbly buns are often a sign of too much flour or not enough kneading. Too much flour dries out the dough, and under-kneading means the gluten network isn’t strong enough to hold everything together, causing it to break apart easily. Next time, be more cautious with flour and knead a few minutes longer until the dough is very smooth and stretchy. This creates a strong structure for a tender yet sturdy crumb.
How can I tell if the buns are fully baked inside?
The golden color is a good indicator, but the best test is internal temperature. An instant-read thermometer inserted into the side of a bun should read 190°F. If you don’t have a thermometer, tap the bottom of a bun—it should sound hollow. Also, the sides of the bun should feel firm, not soft or doughy. If they seem pale or soft, bake for another 2-3 minutes and check again.
The Final Slice
Baking your own hamburger buns might seem like an extra step, but I promise it’s worth it. That moment you pull those golden, fragrant buns from your own oven is pure magic. It turns an ordinary meal into a celebration. You control the ingredients, the size, and the flavor. Give this recipe a try on your next burger night. Share them with friends, pack them for a picnic, or simply enjoy the quiet pride of having made something wonderful from scratch. Happy baking, and happier eating!
Cinnamon Toast Roll-Ups
Ingredients
Equipment
Method
- In a small bowl, whisk together warm water, yeast, and sugar; let sit for 10 minutes.
- In the bowl of a stand mixer, combine warm water, melted butter, sugar, and salt; stir and add the yeast mixture.
- Attach the dough hook and start adding flour one cup at a time until a smooth, slightly tacky dough forms.
- Grease a large bowl, place the dough inside, cover, and let rise in a warm place until doubled in size (about 1 hour).
- Gently punch down the dough, turn it out onto a floured surface, and divide into 18 equal portions.
- Shape each portion into a smooth ball and place them on parchment-lined baking sheets, allowing space between each.
- Cover loosely and let the dough rise again for 30 to 90 minutes.
- Preheat the oven to 350°F (175°C).
- Prepare the egg wash and gently coat each risen bun with it.
- Bake for 20-25 minutes until golden brown and hollow-sounding when tapped.