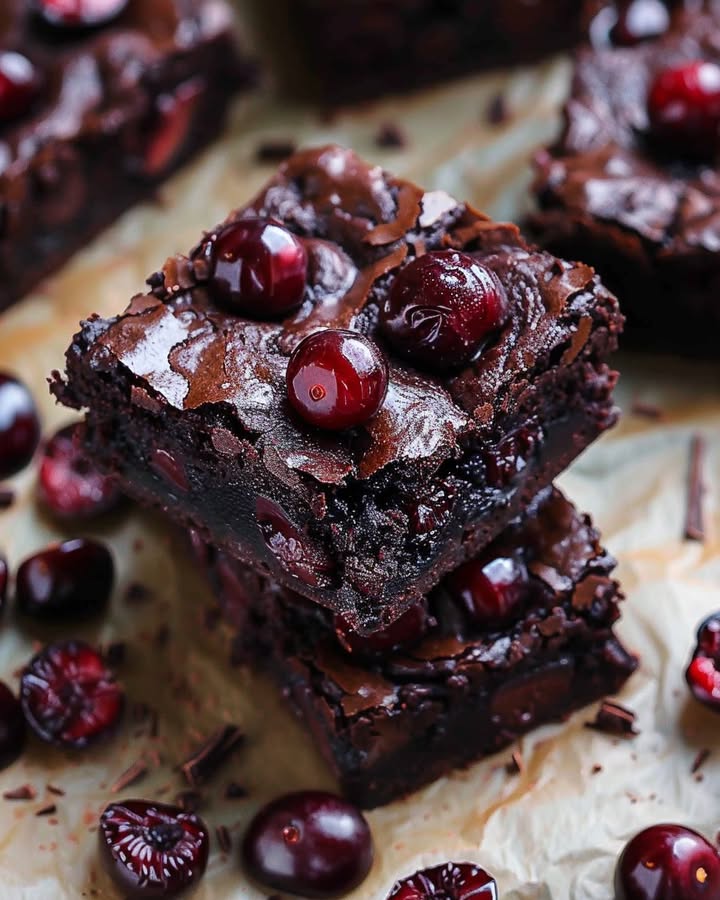
Roasted Cherry Brownies: A Sweet and Tart Dessert Dream
There’s something magical that happens when you roast cherries. Their natural sugars begin to caramelize, creating an intense, jammy flavor that’s both sweet and slightly tart. I first tried adding them to brownies on a whim when my cherry tree was overflowing. Let me tell you, the result was so good my friends now request a batch for every single gathering. These aren’t just any brownie; they’re a rich, fudgy canvas for those beautiful, jewel-like roasted cherries. Get ready to make your new favorite treat.
The Story Behind the Recipe: From Happy Accident to Family Favorite
This recipe was born from a happy kitchen accident. One summer, I roasted a big tray of cherries for a breakfast compote but got distracted (probably by my kids’ latest art project!). They roasted a tad too long, becoming wonderfully concentrated. Not wanting to waste them, I folded the sticky, gorgeous cherries into my classic brownie batter. The smell that filled the kitchen was divine. The tartness of the cherries cut through the deep chocolate richness in a way that made everyone ask for seconds. It’s become our official “summer is here” dessert.
Why You’ll Love These Cherry Chocolate Brownies
You will adore this recipe because it’s the perfect mix of familiar and special. It uses simple brownie basics but the roasted cherries make it feel gourmet. The contrast is everything: gooey, dark chocolate against bursts of fruity sweetness. They are incredibly easy to make but look so impressive. Plus, your house will smell absolutely amazing. It’s a dessert that feels both comforting and a little bit fancy.
Perfect Occasions for Your Brownie Masterpiece
These brownies are wonderfully versatile for any event. They’re casual enough for a backyard barbecue, yet elegant enough for a dinner party. Bring them to a potluck and watch them disappear first. They make a fantastic homemade gift during the holiday season, packed in a cute tin. I love baking them for birthday parties instead of a traditional cake. Honestly, a quiet Tuesday afternoon with a cup of coffee is also a perfect occasion.
What You Need: Roasted Cherry Brownie Ingredients
Gather these simple ingredients for a truly special dessert. Using good-quality cocoa powder makes a big difference here.
For the Roasted Cherries:
- 1 1/2 cups fresh cherries, pitted and halved
- 2 tablespoons granulated sugar
For the Brownie Batter:
- 1/2 cup unsalted butter
- 1 cup granulated sugar
- 2 large eggs
- 1 teaspoon vanilla extract
- 1/3 cup unsweetened cocoa powder
- 1/2 cup all-purpose flour
- 1/4 teaspoon salt
- 1/4 teaspoon baking powder
- 1/2 cup semi-sweet chocolate chips
Easy Ingredient Swaps and Substitutions
Don’t stress if you’re missing something! Here are some easy swaps:
- Fresh Cherries: In a pinch, you can use frozen, pitted cherries. Thaw and pat them very dry before roasting. Avoid canned cherries in syrup as they are too wet.
- Cocoa Powder: Any unsweetened cocoa works, but Dutch-processed will give a deeper, mellower chocolate flavor.
- Chocolate Chips: Feel free to use dark chocolate chunks, milk chocolate chips, or even white chocolate for a different twist.
- Flour: For a gluten-free version, a 1:1 gluten-free all-purpose flour blend works perfectly.
How to Make Irresistible Roasted Cherry Brownies
Follow these simple steps for decadent, fruity brownies every time.
Step 1: Prep and Roast Your Cherries
First, heat your oven to 350°F (175°C). Line your 8-inch square pan with parchment paper, letting it overhang the sides for easy lifting. Now, for the star ingredient! Pit your cherries and slice them in half. Toss them on a small baking sheet in a single layer. Sprinkle over the two tablespoons of sugar. As they roast for 20 minutes, the sugar will melt and the cherries will release their juices, bubbling and becoming beautifully glossy and wrinkled. Stir them halfway through for even roasting. Let them cool slightly while you make the batter. The smell is already incredible.
Step 2: Create the Simple Brownie Batter
In a medium saucepan, gently melt the butter over medium heat. Once it’s fully melted and just starting to bubble, take the pan off the heat. This is key for a fudgy texture. Carefully whisk in the cup of sugar. The mixture will look grainy and separated, but that’s okay. Next, whisk in the eggs and vanilla extract vigorously until the mixture becomes smooth, thick, and shiny. This step adds air and combines everything perfectly.
Step 3: Combine Dry and Wet Ingredients
Place a sieve over your saucepan. Sift the cocoa powder, flour, salt, and baking powder directly into the wet ingredients. Pro tip: Sifting prevents lumps and ensures your brownies are perfectly smooth. Use a spatula to gently fold the dry ingredients into the wet. Stir just until you no longer see streaks of flour. Overmixing leads to tough brownies, so be gentle.
Step 4: Fold in the Goodies and Bake
This is the fun part! Add the chocolate chips and most of your slightly cooled roasted cherries to the batter. Gently fold them in, saving a small handful of cherries for the top. Pour the thick, lumpy batter into your prepared pan. Use your spatula to spread it evenly into the corners. Artfully dot the top with the reserved roasted cherries, pressing them in slightly. Chef’s tip: This makes them look stunning straight from the oven.
Step 5: Bake, Cool, and Slice for Perfection
Slide the pan into your preheated oven. Bake for 25 to 30 minutes. You want a toothpick inserted into the center to come out with a few sticky, moist crumbs attached—not wet batter, but not completely clean either. This is the secret to fudgy, not cakey, brownies. Let the pan cool completely on a wire rack. I know it’s hard to wait, but cutting warm brownies makes them crumble. Once cool, use the parchment paper to lift the whole slab out before cutting into neat squares.
Your Roasted Cherry Brownie Timeline
Plan your baking session with this handy guide. Most of the time is hands-off!
- Prep Time: 20 minutes (pitting cherries, making batter)
- Roasting Time: 20 minutes
- Baking Time: 25-30 minutes
- Cooling Time: 1 hour (very important!)
- Total Time: About 1 hour 50 minutes (including cooling)
- Kcal: Approximately 350 per brownie
- Servings: 12 generous squares
A Chef’s Secret for the Best Brownies
My biggest secret is letting the brownies cool completely before you even think about cutting them. I know, the smell will be tempting you! But this waiting period allows the structure to set. It gives you those clean, sharp edges and the perfect fudgy, dense texture inside. If you cut them warm, they will be a delicious but messy pile of crumbs. Patience is a virtue that pays off in perfect brownie squares.
A Little Extra Cherry Info
Did you know that cherries are part of the rose family? It’s true! They’re related to almonds, peaches, and apricots. The practice of roasting fruit to concentrate its flavor is ancient, but it feels so modern in a dessert like this. Using fresh, in-season cherries at their peak makes the flavor pop, but this recipe is a brilliant way to celebrate summer fruit all year round.
Kitchen Tools You’ll Need
You likely have everything already. Here’s your checklist:
- 8-inch square baking pan
- Parchment paper
- Small baking sheet (for roasting cherries)
- Medium saucepan
- Cherry pitter (a lifesaver!) or a paring knife
- Mixing bowls
- Whisk and spatula
- Wire cooling rack
Storing Your Delicious Brownies
Keep your brownies fresh and tasty with these storage tips. Once completely cool, store the cut squares in an airtight container at room temperature. Place a sheet of parchment paper between layers if you stack them. They will stay perfectly moist and delicious for up to 3 days this way.
For longer storage, these brownies freeze beautifully. Wrap individual squares tightly in plastic wrap, then place them all in a freezer-safe bag or container. They can be frozen for up to 2 months. This is perfect for having a ready-made dessert or a sweet treat whenever the craving strikes.
To enjoy frozen brownies, simply let them thaw at room temperature for an hour or so. You can also pop a frozen square in the microwave for about 15 seconds for a warm, gooey, almost-fresh-from-the-oven experience.
Top Tips and Advice for Brownie Success
- Use a metal pan if possible. Glass pans can cause the edges to overcook before the center is done.
- Really let those roasted cherries cool before folding them in. If they’re too hot, they can start to cook the eggs in the batter.
- For super clean cuts, wipe your knife clean with a damp cloth between each slice.
- If your cherries are very juicy after roasting, you can drain off a tiny bit of the excess liquid so your batter doesn’t get too wet.
Fun Ways to Present Your Brownies
- Dust the tops with a light sprinkle of powdered sugar or cocoa powder for a bakery-style finish.
- Serve warm with a scoop of vanilla ice cream and a drizzle of the cherry juices from the roasting pan.
- For a party, cut them into smaller, bite-sized pieces and serve on a tiered dessert stand.
- Place each brownie square on a small plate with a fresh, unpitted cherry on the side for decoration.
6 Tasty Recipe Variations to Try
Love this base recipe? Mix it up with one of these delicious twists.
- Black Forest Brownies: Add a teaspoon of almond extract to the batter. After baking and cooling, top with whipped cream and shaved dark chocolate.
- Cherry Cordial Brownies: Soak the roasted cherries in 1 tablespoon of kirsch or cherry liqueur before folding them in for an adult-only treat.
- Double Chocolate Cherry: Substitute half of the semi-sweet chocolate chips with white chocolate chips for a pretty marbled effect and sweeter flavor.
- Nutty Cherry Delight: Fold in 1/2 cup of chopped walnuts or pecans along with the cherries for a wonderful crunch.
- Mint Cherry Brownies: Add 1/2 teaspoon of peppermint extract to the batter for a cool, refreshing flavor that pairs beautifully with chocolate and cherry.
- Gluten-Free & Dairy-Free: Use your favorite gluten-free flour blend and replace the butter with an equal amount of coconut oil or a plant-based butter.
Common Mistakes to Avoid
Steer clear of these simple errors for the best brownies ever.
Mistake 1: Using Hot, Juicy Cherries in the Batter
This is a very common error. Folding in the roasted cherries straight from the oven seems logical, but it’s a bad idea. The hot cherries can actually start to cook the eggs in your batter on contact. This can lead to weird, scrambled egg-like bits and an uneven bake. Worse, the extra heat can cause the chocolate chips to melt prematurely. Always let your roasted cherries cool on the pan for at least 10-15 minutes. They should be warm to the touch, not piping hot.
Mistake 2: Overbaking the Brownies
It’s easy to think a clean toothpick means they’re done. For cake, that’s true. For fudgy brownies, it’s a disaster. Overbaking is the number one reason for dry, crumbly brownies. Chocolate continues to cook from residual heat after it comes out of the oven. Start checking at the 25-minute mark. You want the toothpick to have a few moist, fudgy crumbs clinging to it. If it comes out with wet, glossy batter, give it a few more minutes. If it’s clean, they’re already overdone. Remember, they will firm up as they cool.
Mistake 3: Overmixing the Batter After Adding Flour
Once the flour hits the wet ingredients, gluten development begins. Gluten is great for chewy bread but terrible for tender brownies. The more you stir, the tougher and more cake-like your brownies become. When you sift in the dry ingredients, use a gentle folding motion with a spatula. Mix just until you no longer see any dry streaks of flour. It’s okay if the batter looks a little lumpy. Those lumps will melt away into fudgy perfection in the oven.
Mistake 4: Skipping the Parchment Paper Lining
You might think you can just grease the pan. Don’t do it. These brownies are sticky, especially with the juicy cherries. Without parchment paper, you’ll have a terrible time getting the first brownie out of the pan in one piece. The rest will be a messy wreck. Lining the pan with parchment paper, with some overhang on two sides, creates a “sling.” Once cooled, you just lift the entire brownie slab out effortlessly for perfect, clean slicing.
Your Roasted Cherry Brownie Questions, Answered
Can I use frozen cherries instead of fresh?
Absolutely, frozen cherries are a great year-round option. There’s no need to thaw them first. Just spread the frozen cherries on your baking sheet, sprinkle with sugar, and roast them. You might need to add 3-5 extra minutes to the roasting time because they start out colder. Be sure to pat away any excess ice crystals before roasting if you can. The key is to roast them until they look soft and have released their juices, even if they started from frozen.
My brownies are very cakey, not fudgy. What did I do wrong?
A cakey texture usually comes from two things: too much flour or overmixing. First, make sure you are measuring your flour correctly. The best way is to spoon the flour into your measuring cup and level it off with a knife. Scooping directly packs in too much flour. Second, double-check your mixing technique. Once you add the flour, mix only until just combined. Overmixing develops the gluten in the flour, leading to a more bread-like, cakey structure instead of a dense, fudgy one.
How do I pit cherries without a special tool?
No cherry pitter? No problem! You have a few kitchen-hack options. The easiest method is to use a sturdy straw (like a metal reusable one) or a chopstick. Just push it through the stem-end of the cherry until the pit pops out the other side. You can also use a paring knife. Slice the cherry in half along its natural seam, then pop the pit out with the tip of your knife. It’s a bit more time-consuming but works perfectly well for a cup or two of cherries.
Can I make these brownies gluten-free?
Yes, you can make excellent gluten-free roasted cherry brownies. Simply replace the half-cup of all-purpose flour with a trusted 1:1 gluten-free all-purpose flour blend. Brands like Bob’s Red Mill or King Arthur Measure for Measure work very well. Do not use a single flour like almond or coconut flour, as they behave very differently. The rest of the recipe stays exactly the same. Your brownies will be just as fudgy and delicious, and no one will know the difference.
Why do I have to roast the cherries first? Can’t I just add them fresh?
Roasting is a crucial step for both flavor and texture. Fresh cherries contain a lot of water. If you add them raw, that water will seep into the brownie batter during baking. This can make the brownies soggy and prevent them from setting properly. Roasting concentrates the cherry flavor, making it sweeter and more intense. It also cooks off a lot of that excess moisture. The result is a powerful burst of flavor without a wet, gummy brownie. Trust the process—it’s worth the extra step.
How can I tell when the brownies are perfectly done?
Forget a clean toothpick! The perfect test for fudgy brownies is the “moist crumb” test. At around 25 minutes, insert a toothpick into the center of the pan. Pull it out and look closely. You want to see a few sticky, moist crumbs clinging to the toothpick. It should not be covered in wet, shiny batter. It should also not be completely clean. If it’s clean, the brownies are overbaked. The residual heat will finish cooking those moist crumbs, leaving you with the ideal fudgy center.
Can I add nuts to this recipe?
Of course! Nuts add a wonderful crunch and flavor. Walnuts or pecans are classic choices that pair beautifully with chocolate and cherry. Add about half a cup of chopped nuts to the batter when you fold in the chocolate chips and roasted cherries. You can also toast the nuts in a dry skillet for a few minutes first to bring out their natural oils and make them extra fragrant. Just let them cool before adding them to the batter so they don’t melt the chocolate chips.
What’s the best way to get clean, neat slices?
Clean slices are all about the right tool and timing. First, you must let the brownies cool completely in the pan. I know it’s hard to wait! Then, lift the entire slab out using the parchment paper. Use a long, sharp chef’s knife (not a serrated bread knife). For the cleanest cuts, run the knife under very hot water, wipe it dry, and make your first slice. Wipe the blade clean with a damp cloth after each cut and reheat it if needed. The heat helps the knife glide through the fudgy texture without dragging.
How long will these brownies stay fresh?
Stored properly in an airtight container at room temperature, these brownies will stay fresh and delicious for about 3 to 4 days. The moisture from the cherries helps keep them from drying out. If your kitchen is very warm or humid, you might want to store them in the fridge after the second day to be safe. They will last up to a week in the refrigerator. Just let them come to room temperature for about 30 minutes before serving for the best texture and flavor.
Can I double this recipe?
Doubling the recipe is a great idea for a crowd or for gifting. You will need to use a 9×13-inch baking pan instead of the 8-inch square. The roasting step for the cherries can stay the same, though you might use two baking sheets. The bake time will be slightly longer. Start checking at around 30-35 minutes, using the same “moist crumbs” toothpick test. Watch the edges to make sure they don’t burn before the center is set. Everything else in the method stays exactly the same.
The Final Slice on These Decadent Brownies
These roasted cherry brownies are more than just a dessert. They are a little piece of kitchen magic. They take a simple, beloved classic and elevate it with the sweet-tart punch of summer fruit. I promise they will become a requested favorite in your home, just like they are in mine. So preheat that oven, pit those cherries, and get ready for the most delicious, fudgy, fruity brownies you’ve ever made. Don’t forget to save one for the baker!
Cheesy Cajun Rotini
Ingredients
Equipment
Method
- Preheat your oven to 350°F (175°C) and line an 8-inch square pan with parchment paper.
- Toss the halved cherries with sugar on a small baking sheet and roast for 20 minutes, stirring halfway through, until glossy and wrinkled.
- In a medium saucepan, melt the butter over medium heat, then remove from heat and whisk in the granulated sugar until combined.
- Whisk in the eggs and vanilla extract until the mixture is smooth and shiny.
- Sift together cocoa powder, flour, salt, and baking powder directly into the wet ingredients and gently fold until combined.
- Fold in chocolate chips and most of the roasted cherries, saving a few for the top.
- Pour the batter into the prepared pan, spread evenly, and dot with reserved cherries.
- Bake for 25-30 minutes or until a toothpick comes out with a few moist crumbs attached.
- Let cool completely on a wire rack before lifting out and cutting into squares.