A Little Slice of Sunshine, No Oven Required
Let me tell you a secret. I used to be terrified of making pie crust. All that butter, the chilling, the dreaded *soggy bottom*. Then I discovered the magic of no-bake desserts. It was a game-changer for my summer sanity. These No-Bake Mini Banana Cream Pies are my proudest kitchen hack. They taste like a dreamy, tropical vacation but come together faster than you can say “is it hot in here or is it just my oven?”. They’re individual servings of pure joy, perfect for when you need a little treat without the heat.
From Southern Classic to Mini Marvel
The classic Banana Cream Pie is a staple of Southern diners and family reunions. It’s a pie that whispers of comfort and home. Traditionally, it involves a baked pastry crust, a silky custard cooked on the stove, and a mountain of meringue or whipped cream. My version is a playful, modern spin. We swap the finicky pastry for a simple, press-in graham cracker crust. Instead of cooking custard, we use instant pudding for a foolproof, creamy filling. It honors the spirit of the original—the creamy filling, the fresh banana, the crunch—but makes it accessible for any cook, any day of the week.
Why You’ll Fall in Love With This Banana Cream Pie Recipe
You will love this recipe because it’s a lifesaver! First, there’s zero baking involved. Your kitchen stays cool, and you save so much time. Second, the flavor is unbelievable. The sweet, vanilla-kissed pudding pairs perfectly with the ripe bananas and that buttery crumb crust. It’s a texture party in every bite. Finally, they’re just so cute! Mini desserts make everyone feel special. Kids adore them, and they’re the star of any potluck or picnic. It’s a guaranteed smile on a plate.
Perfect Occasions for Your Mini Pies
These little pies are incredibly versatile. I make them for all sorts of events! They’re a superstar at summer BBQs and pool parties where no one wants to turn on the oven. They’re perfect for baby showers or bridal luncheons—so elegant in their individual cups. I pack them for picnics because they travel well in their muffin tin. Honestly, a Tuesday night after a long day is a perfect occasion too. Sometimes you just deserve a mini pie.
Gathering Your Ingredients
Here’s what you’ll need to make about 12 mini pies:
- 1 1/2 cups graham cracker crumbs
- 1/2 cup melted butter
- 1/4 cup sugar
- 1 package (3.4 oz) instant banana cream pudding mix
- 2 cups cold milk
- 1 cup heavy cream
- 2 tbsp powdered sugar
- 1 tsp vanilla extract
- 2 ripe (but firm) bananas, sliced
- Whipped cream, for topping
- Honey, for drizzling
Simple Swaps and Substitutions
Don’t have something? No problem! This recipe is very flexible.
- Graham Cracker Crumbs: You can use crushed vanilla wafers, digestive biscuits, or even gluten-free graham crackers.
- Butter: For a dairy-free version, a plant-based butter works well in the crust.
- Milk: Any milk you like will work with the instant pudding—dairy, almond, oat, or soy.
- Heavy Cream: For the whipped topping, you can use a can of full-fat coconut cream (chilled overnight) for a dairy-free option.
- Banana Pudding Mix: If you can’t find banana, vanilla pudding is a delicious alternative. Just add an extra half a banana, mashed, into the pudding mix.
Creating Your No-Bake Banana Cream Pies
Let’s get our hands busy and make some magic. Put on some fun music!
Step 1: Crafting the Crust
This is the fun, hands-on part. In a medium bowl, combine the golden graham cracker crumbs, melted butter, and granulated sugar. Stir it until it looks like wet sand and holds together when you pinch it. Now, scoop this mixture into a standard muffin tin. Use a small glass or your fingers to press it firmly into the bottom and up the sides. You want a solid little cup. The smell is already amazing—toasty and sweet. Pop the whole tin into the fridge for at least an hour to let the crusts set and become firm.
Step 2: Whipping Up the Pudding
In a large mixing bowl, pour your two cups of very cold milk. Cold milk is the key to a thick, set pudding. Sprinkle the entire package of instant banana cream pudding mix over the milk. Grab your whisk and start beating! You’ll see it transform from a thin liquid to a glorious, thick, creamy pudding in just a minute or two. Give it a taste—it’s heavenly. Once thickened, cover the bowl and refrigerate it for about 5 minutes to let it set completely. Pro tip: Chilling the pudding for a few minutes makes it easier to fold in the whipped cream later.
Step 3: Making the Cloud-Like Topping
While the pudding chills, let’s make the whipped cream. Pour the heavy cream into a clean, chilled bowl. Chilled cream whips up faster and gets fluffier. Add the powdered sugar and vanilla extract. Using a hand mixer or a stand mixer, beat the cream. Start on low, then increase to medium-high. Watch as soft peaks form, then stiff peaks. You’ll know it’s ready when you lift the beaters and the cream stands straight up. This fluffy, vanilla-scented cloud is the crown for our pies.
Step 4: Bringing It All Together
Time for the final mix! Take about half of your beautiful whipped cream and gently fold it into the banana pudding. Use a spatula and a light hand. You want to keep the mixture light and airy, not deflated. This step creates the most luxurious, mousse-like filling. The color becomes a soft, creamy yellow. Set the remaining whipped cream aside for the final topping.
Step 5: The Grand Assembly
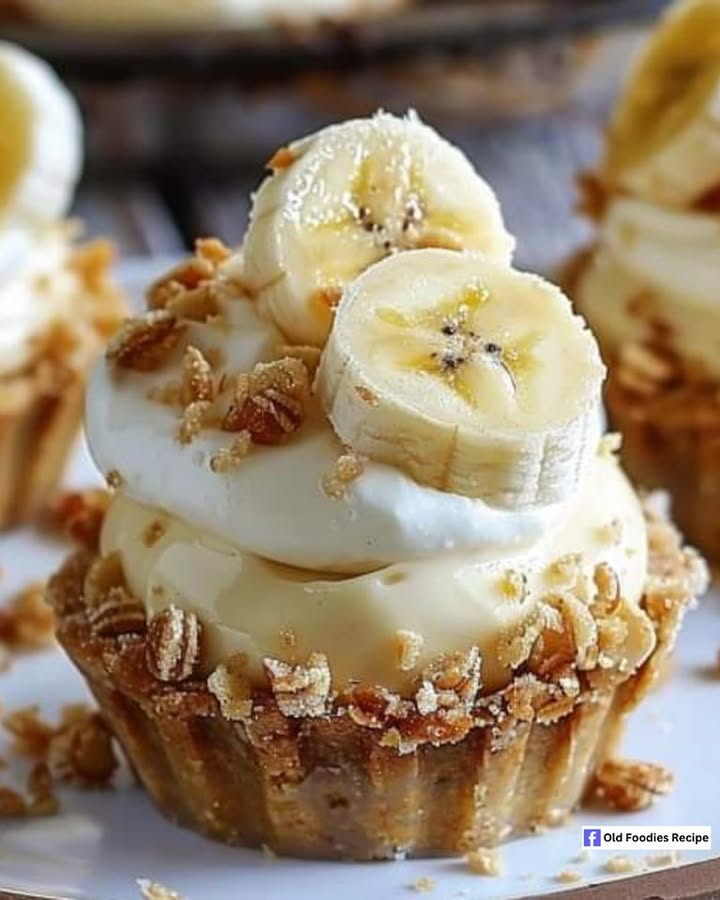
Pull your chilled crusts from the fridge. They should be firm and hold their shape. Grab a spoon and carefully divide the banana cream filling among all the crusts. Smooth the tops gently. Now, dollop or pipe the reserved whipped cream onto each little pie. The visual contrast is already stunning—golden crust, creamy filling, white topping.
Step 6: The Final Flourish
Just before serving, slice your ripe bananas. The aroma of fresh banana is the final signal that something wonderful is about to happen. Place a couple of slices artfully on top of each pie. For a gorgeous, glistening finish, take a bottle of honey and drizzle a thin, golden stream over each one. Chef’s tip: Add the banana slices right before serving to prevent them from turning brown and getting soggy.
Your Pie Timeline
Here’s a quick breakdown of how your time will be spent:
- Prep Time: 20 minutes (active assembling and mixing)
- Chill Time: 1 hour (for the crusts to set)
- Total Time: 1 hour 20 minutes (most of it is hands-off chilling!)
A Chef’s Special Secret
My secret weapon? A tiny pinch of salt in the graham cracker crust. It sounds simple, but it makes all the difference. It balances the sweetness and makes the buttery, toasty flavor of the crust really pop against the creamy filling. Just about 1/8 of a teaspoon will do the trick. Trust me on this one.
A Fun Fact About Bananas
Did you know the bananas we eat today are different from the original ones? The variety called the Gros Michel was the main banana exported until the 1950s. It was supposedly even creamier and more flavorful. A fungus wiped most of them out, leading to the rise of the Cavendish banana we eat now. So when you taste the banana cream in this pie, you’re tasting a little bit of agricultural history!
What You’ll Need to Make Them
You don’t need fancy equipment at all.
- Standard 12-cup muffin tin
- Mixing bowls (2 medium, 1 large)
- Whisk
- Hand mixer or stand mixer (for the whipped cream)
- Spatula
- Measuring cups and spoons
Storing Your Delicious Creations
These pies are best enjoyed the day they are made, especially because of the fresh bananas. However, you can store them if needed.
If you need to keep them for a few hours, just leave them in the muffin tin, cover the whole tin tightly with plastic wrap, and keep them in the refrigerator. The crust will stay nice and crisp this way.
For overnight storage, I recommend assembling the pies but waiting to add the banana slices and honey until just before you serve. Store the covered pies in the fridge. The whipped cream topping may soften a little but will still taste wonderful.
My Best Tips for Success
- Use very cold milk for the pudding and chilled cream for whipping. Temperature is your friend here.
- Press the crust mixture very firmly into the muffin cups. A loose crust will crumble when you try to eat it.
- Let the crust chill for the full hour. This step is not optional if you want a crust you can pick up.
- Have fun with toppings! Try a sprinkle of cinnamon, crushed nuts, or even a dark chocolate drizzle instead of honey.
Making Them Look Fancy
Presentation is a breeze with these minis.
- Serve them right in the muffin tin for a casual, rustic feel at a gathering.
- Carefully run a knife around the edge of each pie and lift them out with a small spoon. Place each on a colorful napkin or small plate.
- Use a piping bag with a star tip for the final whipped cream layer. It looks professionally beautiful.
- Add a tiny sprig of fresh mint beside the banana slices for a pop of green color.
Healthier Twists on the Classic
Want to lighten things up? Here are six delicious variations:
- Greek Yogurt Swirl: Replace half the whipped cream folded into the pudding with plain Greek yogurt. It adds a tangy protein boost.
- Nutty Crunch: Use a crust made from blended dates and almonds instead of graham crackers. It’s naturally sweet and gluten-free.
- Tropical Twist: Fold a handful of toasted coconut into the crust. Top the pies with diced mango or pineapple alongside the banana.
- Chocolate Banana: Add a tablespoon of unsweetened cocoa powder to the graham cracker crust mixture. It’s a classic flavor combo everyone loves.
- Peanut Butter Lover’s: Swirl a spoonful of natural peanut butter into the pudding filling before assembling. Drizzle with melted dark chocolate.
- Berry Bliss: Skip the banana slices and top each pie with a mix of fresh raspberries, blueberries, and a sprinkle of lemon zest.
Common Mistakes to Avoid
Mistake 1: Using Warm Ingredients
This is the number one reason for a soupy pie. If your milk is not cold, the instant pudding will not set properly. If your cream or bowl is warm, the whipped cream will never form stiff peaks. Always pull your milk and cream straight from the fridge. You can even chill your mixing bowl in the freezer for 10 minutes before whipping. Cold is key for the perfect texture.
Mistake 2: A Loose, Crumbly Crust
If you just sprinkle the crumb mixture into the tin, you’ll end up with a pile of crumbs, not a crust. The pressing step is vital. Use a small glass or a tamper and really press down hard. You want it compacted. Don’t be shy! A firm press ensures your crust holds together when you take a bite.
Mistake 3: Slicing Bananas Too Early
Bananas start to oxidize and turn brown within minutes of being sliced. If you add them hours before serving, you’ll have mushy, brown toppings. It’s not awful for taste, but it doesn’t look fresh. Always slice your bananas at the very last second, right before you garnish the pies. A little lemon juice on the slices can help if you must prep them slightly ahead.
Mistake 4: Overmixing the Whipped Cream
It’s easy to get distracted and keep mixing the cream. First you get beautiful stiff peaks, then suddenly it looks grainy and starts to separate. This is over-whipped cream, and it’s on its way to becoming butter. Stop mixing as soon as the cream holds a firm peak when you lift the beater. If it does go too far, you can try to save it by gently folding in a few more tablespoons of liquid cream.
Your Questions, Answered
Can I make these pies ahead of time?
Yes, you can prepare components ahead. Make and chill the crusts a day in advance. Prepare the pudding and whipped cream filling a few hours ahead, but keep them separate in the fridge. Assemble the pies (without the fresh banana and honey) up to 4-6 hours before serving. Add the final banana slices and drizzle just before you serve them to keep everything fresh and pretty. This plan makes entertaining so much easier.
What can I use instead of a muffin tin?
You have a few great options! A 12-cup standard muffin tin is ideal, but you can also use a mini muffin tin for bite-sized treats—just reduce the baking time (they’ll set faster). Small glass jars or ramekins work beautifully for a layered parfait style. You can even press the crust into a single pie dish for one large no-bake pie. Just remember to adjust the chilling time; a large pie will need longer to set firmly.
How do I prevent the crust from sticking?
You typically don’t need to grease the muffin tin for this recipe. The butter in the crust acts as a natural release. If you’re very worried, you can give the cups a very light spray with cooking spray. The best trick for clean removal is to use a small, thin knife or a small offset spatula. Gently run it around the edge of each pie to loosen it before carefully lifting it out with a spoon or your fingers.
My pudding didn’t get thick. What happened?
This usually means the milk wasn’t cold enough. Instant pudding needs the cold temperature to activate the thickening agents. If it’s still runny after the full whisking time, try putting the whole bowl in the freezer for 10-15 minutes, stirring every 5 minutes. It might still set up. For next time, ensure your milk is straight from the fridge, not the counter.
Can I use homemade pudding instead of instant?
Absolutely! A homemade vanilla or banana custard would be delicious. Just make sure it’s completely cooled to room temperature before you fold in the whipped cream. If the homemade pudding is even a little warm, it will melt the whipped cream and make the filling thin. The instant pudding is just a fantastic shortcut for guaranteed thickness and ease.
Is there a way to make this recipe gluten-free?
Yes, it’s very easy to adapt. Simply use gluten-free graham cracker crumbs or other gluten-free cookies for the crust. Double-check that your instant pudding mix is labeled gluten-free (most major brands are). All the other ingredients—milk, cream, bananas—are naturally gluten-free. With those two simple swaps, you have a delicious gluten-free dessert everyone can enjoy.
Can I freeze these mini banana cream pies?
I do not recommend freezing the fully assembled pies. The texture of the creamy filling and the whipped cream will change and become watery when thawed. The bananas will turn completely brown and mushy. However, you can freeze the plain graham cracker crusts! Once they are set in the muffin tin, pop them out and store them in a freezer bag for up to a month. Thaw in the fridge before filling.
What’s the best way to whip cream without a mixer?
You can definitely do it by hand! It’s a bit of an arm workout, but it works. Use a large, deep bowl and a balloon whisk. Make sure everything is very cold. Start whisking vigorously in a fast, circular motion. It will take several minutes. You’ll see it go from liquid, to frothy, to soft peaks, and finally to stiff peaks. Pro tip: Chill the bowl and whisk in the freezer for 20 minutes first to make the process faster.
How long will the leftovers keep in the fridge?
Leftovers are best eaten within 24 hours. The crust will start to soften the longer it sits next to the creamy filling, but it will still taste good. The banana slices on top will brown, even in the fridge. If you have leftovers, you can scrape off the brown bananas and still enjoy the pie underneath. For the best experience, try to make only what you’ll eat in one day.
Can I use a different pudding flavor?
Of course! This recipe is a wonderful template. Vanilla pudding is a classic and lets the fresh banana flavor shine. Cheesecake flavor pudding would be rich and decadent. Butterscotch or chocolate pudding would also be fantastic. Feel free to mix and match your favorite pudding with different crusts and toppings. It’s your kitchen—have fun and experiment!
The Joy of a No-Bake Treat
So there you have it. My favorite way to make a classic pie feel new, easy, and incredibly fun. These No-Bake Mini Banana Cream Pies prove that you don’t need fancy skills or a hot oven to make something truly special. They are a little bite of creamy, dreamy happiness. I hope you make them for someone you love, or just for yourself on a day that needs a bright spot. Now go on, grab that muffin tin and make some magic. You’ve got this!
Banana Oatmeal Cookies
Ingredients
Equipment
Method
- In a medium bowl, combine graham cracker crumbs, melted butter, and sugar; stir until it resembles wet sand.
- Press the mixture into a standard muffin tin and refrigerate for at least an hour to set.
- In a large bowl, whisk together cold milk and banana cream pudding mix until it thickens; refrigerate for 5 minutes.
- In a chilled bowl, beat the heavy cream, powdered sugar, and vanilla extract until stiff peaks form.
- Fold half of the whipped cream into the cooled pudding until well combined.
- Scoop the pudding mixture into the chilled crusts and smooth the tops.
- Pipe or dollop the reserved whipped cream on top of each mini pie.
- Add fresh banana slices atop each pie and drizzle with honey just before serving.