A Slice of Sunshine: Welcome to Your New Favorite Cake
Have you ever wanted a dessert that feels like a vacation? That’s exactly what happened to me last summer. I needed a showstopper for a backyard luau, and after several, let’s say, “creative experiments” (one involving far too much coconut!), I landed on this Hawaiian Pineapple Cake. It was an instant hit. The moist, fruity layers with that cloud of whipped cream… let’s just say it vanished before I could even take a decent photo! This isn’t just a cake; it’s a little piece of tropical heaven on a plate.
From Island Potluck to My Kitchen Table
While the exact origin is a bit of a sweet mystery, this cake is deeply rooted in the spirit of Hawaiian hospitality. Think of potlucks, family gatherings, and the joy of using the islands’ abundant, glorious pineapple. My version takes inspiration from those classic “pineapple dream cakes” but focuses on a from-scratch, supremely moist base. I skipped the box mix to control the flavor and texture, and adding sour cream was my grandma’s secret trick for keeping cakes tender for days. It’s a modern take on a tradition that’s all about sharing and sweetness.
Why You’ll Absolutely Adore This Pineapple Paradise
First, the flavor is pure sunshine. It’s bright, tangy, and not overly sweet. Second, the texture is magical—incredibly moist and light at the same time. Third, it’s a forgiving recipe. Even if your layers aren’t perfectly even, the fluffy whipped cream frosting is a dream to work with and covers a multitude of sins! Finally, it just makes people happy. Serving this cake is like giving everyone a big, delicious hug.
Perfect Occasions for Your Hawaiian Masterpiece
This cake is your secret weapon for any event that needs a touch of joy and whimsy. It’s perfect for:
- Summer BBQs & Luau Parties: The obvious choice! It’s the star of any tropical spread.
- Birthdays: For someone who loves fruity desserts more than chocolate.
- Potlucks: It travels well and always stands out from the crowd of cookies and brownies.
- Just Because: Sometimes, a Tuesday afternoon needs a little slice of heaven.
What You’ll Need: The Ingredients List
Gather these simple ingredients for your journey to dessert paradise:
- 2 cups all-purpose flour
- 2 teaspoons baking powder
- 1 teaspoon baking soda
- 1/2 teaspoon salt
- 1 cup unsalted butter, softened
- 1 1/2 cups granulated sugar
- 4 large eggs
- 2 teaspoons vanilla extract
- 1 cup sour cream
- 1 1/2 cups crushed pineapple, drained
- 2 cups heavy cream (for frosting)
- 1/2 cup powdered sugar (for frosting)
- 2 teaspoons vanilla extract (for frosting)
- 2 cups diced pineapple (for filling & garnish)
No Stress Substitutions
Out of something? No problem! Cooking is about creativity.
- Sour Cream: Full-fat plain Greek yogurt works beautifully.
- Heavy Cream: For the frosting, ensure it’s very cold. There’s no great substitute here for the right texture.
- Fresh Pineapple: Canned pineapple in juice (not syrup!) is perfectly fine. Just drain it very, very well.
- All-Purpose Flour: For a slightly denser cake, you can use cake flour. I’ve done it and loved the result.
Creating Your Pineapple Paradise Cake: Step-by-Step
Step 1: Prep Your Pans and Oven
First, let’s get our workspace ready. Preheat your oven to 350°F (175°C). Now, take your four 8-inch round pans and give them a good coat of butter or non-stick spray. Then, dust them with a light shower of flour, tapping out the excess. This little ritual ensures your beautiful golden cakes will pop right out after baking. There’s something soothing about this prep work—it sets the stage for baking success.
Step 2: Mix the Dry Ingredients
In a medium bowl, grab your whisk. Add the flour, baking powder, baking soda, and salt. Whisk it all together until it’s one uniform, pale mixture. This aerates the flour and guarantees the leaveners are evenly distributed. No one wants a bite with too much baking soda! You’ll see little clouds of the dry ingredients puff up as you whisk. Pro tip: Doing this now means you won’t overmix the batter later, which keeps the cake tender.
Step 3: Cream the Butter and Sugar
In your large mixing bowl, add the softened butter and granulated sugar. Beat them together on medium-high speed. Watch the magic happen! The mixture will go from grainy to light, fluffy, and almost white. This can take a good 3-5 minutes. Don’t rush it! Creaming incorporates tiny air bubbles that are essential for a fine, soft crumb. Next, add your eggs one at a time, beating well after each addition. The batter will become beautifully glossy and smooth. Finally, stir in the vanilla—that warm, comforting aroma starts to fill the kitchen.
Step 4: Combine Wet and Dry
Now, with your mixer on low, we’ll combine everything. Add about one-third of your flour mixture to the butter bowl, mixing just until combined. Then, add half of the sour cream. Repeat: flour, the rest of the sour cream, then the last of the flour. The batter will be thick, lush, and creamy. Finally, take your very well-drained crushed pineapple and fold it in gently with a spatula. You’ll see lovely specks of golden fruit throughout. Chef’s tip: Squeeze the crushed pineapple in a clean kitchen towel to remove every last drop of juice. Extra liquid is the enemy of a perfectly structured cake layer!
Step 5: Bake to Golden Perfection
Divide the beautiful, speckled batter evenly among your four prepared pans. Smooth the tops gently. Slide them into your preheated oven. The smell that will waft through your house is incredible—sweet, buttery, and tropical. Bake for 20-25 minutes. You’ll know they’re done when the tops spring back lightly to the touch and a toothpick inserted in the center comes out clean. The edges will be a lovely light golden brown.
Step 6: Cool the Layers
Patience is key here! Let the cakes cool in their pans on a wire rack for 10 full minutes. This allows them to firm up slightly. Then, run a thin knife around the edges to loosen them. Invert them onto the wire racks, peel off the parchment if you used it, and let them cool completely. Warm cake layers will melt your whipped cream frosting into a sad puddle, and we can’t have that!
Step 7: Whip Up the Cloud-Like Frosting
For the frosting, ensure your heavy cream, bowl, and beaters are ice cold. Pour the cold cream into your chilled bowl. Add the powdered sugar and vanilla. Start beating on medium-low, then gradually increase to high. Watch as it transforms from liquid to soft peaks, then to beautiful, stiff peaks that hold their shape. This fresh “frosting” is light, not too sweet, and the perfect contrast to the dense, fruity cake.
Step 8: Assemble Your Masterpiece
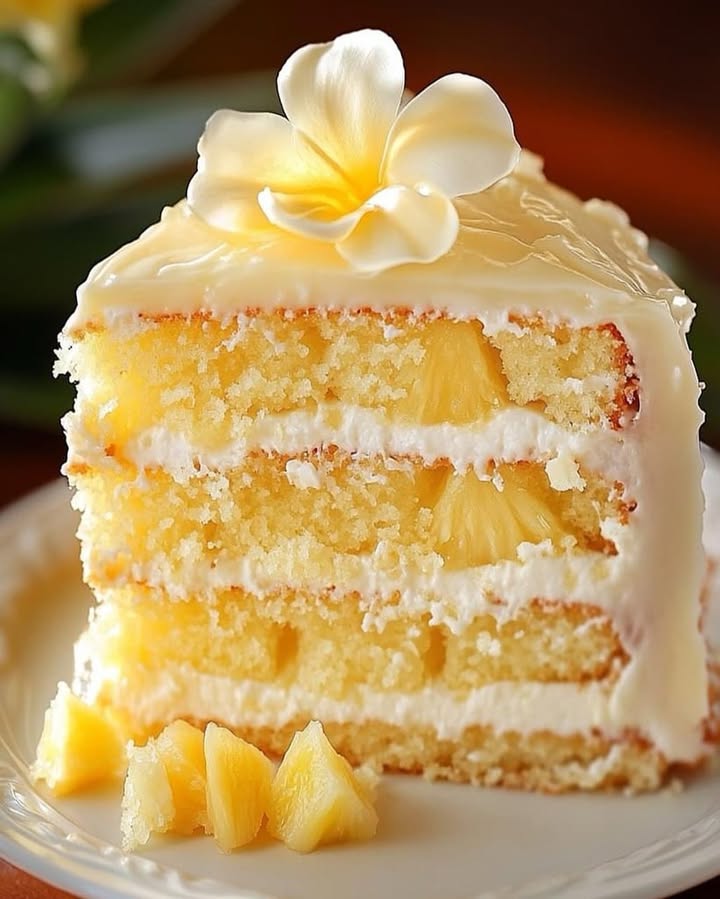
Place your first cake layer on a serving plate or cake stand. Dollop a generous amount of whipped cream and spread it evenly. Sprinkle a handful of the diced pineapple over the cream. Repeat with the next two layers. Top with the final layer. Now, use the remaining whipped cream to frost the top and sides of the cake. Don’t worry about it being perfectly smooth—a rustic, swirly look is charming! Garnish the top with the remaining diced pineapple or some pretty pineapple chunks.
Timing Your Tropical Treat
Here’s a quick timeline to help you plan:
- Preparation Time: 25 minutes (active mixing and prepping)
- Cooking Time: 25 minutes (for the cake layers)
- Cooling Time: 1 hour (crucial for assembly!)
- Assembly Time: 15 minutes
- Total Time (including cooling): About 1 hour 50 minutes
Chef’s Secret: The Squeeze Test
My number one secret for the best texture? Draining the pineapple twice. First, drain it in a sieve. Then, pour it onto a clean kitchen towel or several layers of paper towels. Gather the edges and squeeze with all your might. You’ll be shocked how much extra liquid comes out. This step is the difference between a good, moist cake and an extraordinary, perfectly-structured one that holds its layers proudly.
A Little Pineapple History
Did you know the pineapple is a symbol of hospitality and welcome? In the American colonies, hosts would place a fresh pineapple in the center of their dining table when guests came to visit. It was a rare and expensive treat. So when you serve this cake, you’re carrying on a centuries-old tradition of saying, “We’re so glad you’re here!” I love that thought every time I make it.
Necessary Equipment
You don’t need anything fancy!
- Four 8-inch round cake pans
- Stand mixer or hand mixer
- Large and medium mixing bowls
- Whisk
- Spatula
- Wire cooling racks
- Knife or cake leveler (optional)
- Parchment paper (optional, but helpful)
Storing Your Slice of Heaven
Because of the fresh whipped cream frosting, this cake must be stored in the refrigerator. Cover it loosely with a cake dome or tent some plastic wrap over it (use toothpicks to keep the wrap from touching the frosting). It will stay fresh and delicious for up to 3 days.
The cake layers themselves can be made ahead of time! Once completely cool, wrap them tightly in plastic wrap and then aluminum foil. You can store them at room temperature overnight or freeze them for up to a month. Thaw in the refrigerator before assembling. This is a huge time-saver for parties!
I do not recommend freezing the fully assembled cake, as the whipped cream can become watery and separate when thawed. For best results, assemble it the day you plan to serve it.
Tips and Advice for Success
- Room Temperature Matters: Your butter, eggs, and sour cream should be at room temperature for a smooth, even batter that bakes uniformly.
- Don’t Overmix: Once you add the flour, mix only until the ingredients are combined. Overmixing develops gluten and leads to a tough cake.
- Cool Completely: I can’t say it enough. Warm cake + cold cream = soupy mess. Be patient!
- Chill Your Bowl: For the whipped cream, pop your metal bowl and beaters in the freezer for 15 minutes before you start. Cold tools are the secret to stiff peaks.
Presentation Ideas to Wow Your Guests
- Top with toasted coconut flakes for extra texture and a pretty white-and-gold look.
- Add a border of fresh berries like raspberries or strawberries for a pop of color.
- Serve each slice with a tiny paper umbrella for a fun, festive touch.
- Place edible flowers like orchids or hibiscus around the base of the cake stand.
Healthier Twists on the Tropical Classic
Want to lighten it up? Here are some ideas:
- Whole Wheat Version: Substitute half the all-purpose flour with whole wheat pastry flour for added fiber.
- Greek Yogurt Frosting: Use sweetened, strained Greek yogurt mixed with a touch of honey as a frosting alternative. It’s tangy and protein-rich.
- Sugar Reduction: You can often reduce the sugar in the cake by 1/4 cup without a major texture change. The pineapple adds natural sweetness.
- Mini Cakes: Bake the batter in a muffin tin (line with liners) for portion-controlled “pineapple cupcakes.” Reduce baking time to about 15-18 minutes.
- Dairy-Free Delight: Use vegan butter, a flax egg substitute, coconut yogurt, and coconut whipped cream for a fully plant-based version.
- Gluten-Free Goodness: Use a 1:1 gluten-free flour blend in place of the all-purpose flour. The sour cream and pineapple help keep it moist.
Common Mistakes to Avoid
Mistake 1: Not Draining the Pineapple Enough
This is the most common error. That extra juice in the canned pineapple will throw off your entire batter’s liquid balance. Your cake layers can turn out gummy, dense, or even sink in the middle. They might not cook through properly. To avoid this, drain the crushed pineapple in a sieve, then press it firmly with the back of a spoon. For the best results, follow the chef’s tip and squeeze it in a kitchen towel. Your cake’s texture will thank you!
Mistake 2: Using Cold Ingredients
If your butter, eggs, or sour cream are straight from the fridge, they won’t incorporate properly. Cold butter won’t cream fully with the sugar, leading to a dense cake. Cold sour cream can curdle the batter. Always plan ahead. Take these items out about an hour before you start baking. The ingredients should feel cool to the touch, not cold. This simple step ensures a smooth, emulsified batter that bakes up light and fluffy.
Mistake 3: Overmixing the Batter After Adding Flour
Once you add the flour mixture, gluten development begins. The more you mix, the tougher and chewier your cake can become. You want a tender crumb, not bread! Mix on low speed and stop as soon as you no longer see streaks of dry flour. When folding in the pineapple, use a gentle hand with a spatula. A few small lumps are far better than an overworked batter. Remember, less mixing means a more delicate cake.
Mistake 4: Assembling with Warm Cake Layers
Impatience is the enemy of a beautiful layered cake. If the layers are even slightly warm, they will melt the whipped cream frosting on contact. The cream will become runny, the layers might slide, and you’ll end up with a collapsed, messy cake. Let the layers cool in the pans for 10 minutes, then cool completely on a wire rack. You can even wrap them and chill them in the fridge for an hour before assembling. A cool cake is a stable cake.
Mistake 5: Under-whipping or Over-whipping the Cream
Whipped cream frosting needs to hit that perfect “stiff peaks” stage. Under-whipped cream will be too soft to hold the layers and will weep. Over-whipped cream turns grainy and starts to become butter. Start with a cold bowl and beaters. Whip on medium-high, watching closely. It will first thicken, then form soft peaks that curl over, and finally stiff peaks that stand straight up when you lift the beaters. Stop right then!
Frequently Asked Questions
Can I make this cake in a 9×13 pan?
Absolutely! This recipe adapts beautifully to a sheet cake. Grease and flour a 9×13 inch pan. Pour all the batter in and bake at the same temperature. The baking time will be longer, likely 35-45 minutes. Use the toothpick test in the center to check for doneness. You can frost it right in the pan and cut into squares. It’s perfect for a crowd and much easier to transport!
Can I use fresh pineapple instead of canned?
Yes, you can! Fresh pineapple will give a brighter, more vibrant flavor. The key is to make sure it’s very finely crushed or pulsed in a food processor for the cake batter, and finely diced for the filling. Also, fresh pineapple contains an enzyme called bromelain that can prevent gelatin from setting, but it doesn’t affect the baking process in this cake. Just ensure you drain any excess juice well, following the same squeezing method.
My whipped cream is runny. Can I fix it?
If your cream is still runny, it likely just needs more whipping. Ensure your bowl and cream are very cold. Continue whipping on high speed. If it’s truly not thickening, it’s possible your cream wasn’t heavy enough (look for “heavy whipping cream” on the label) or your bowl was too warm. As a last resort, you can chill the runny cream in the fridge for 30 minutes, then try whipping it again with a new, cold bowl.
How far in advance can I assemble the cake?
Because the frosting is fresh whipped cream, I recommend assembling the cake no more than 6-8 hours before serving. You can prepare all the components the day before: bake and wrap the cake layers, and dice the pineapple. Keep the cream cold in the fridge. Then, whip the cream and assemble the cake the morning of your event. Store it covered in the refrigerator until ready to serve.
Can I use a different frosting?
Of course! While the light whipped cream is traditional and balances the sweetness, you can use cream cheese frosting for a tangier, sturdier option. A simple vanilla buttercream would also be delicious, though much sweeter. If you need a frosting that holds up well in heat, consider a stabilized whipped cream (with a bit of gelatin or pudding mix) or opt for the cream cheese frosting.
Why did my cake layers sink in the middle?
Sinking is usually caused by too much moisture, underbaking, or an issue with leavening. Double-check that you drained your pineapple extremely well. Also, ensure your baking powder and baking soda are fresh (they lose potency over time). Don’t open the oven door during the first 15 minutes of baking, as a rush of cold air can cause a cake to fall. Finally, verify your oven temperature with an oven thermometer for accuracy.
Is it necessary to use four pans? Can I bake in two and split the layers?
Using four pans gives you nice, even, thin layers without the hassle of splitting cakes, which can be tricky. However, you can bake the batter in two 8-inch pans. You will need to increase the baking time to about 30-35 minutes. Once cooled, you can very carefully split each layer in half horizontally with a long serrated knife to create four layers total.
Can I add coconut to this recipe?
You certainly can! Toasted coconut is a wonderful addition. Fold 1 cup of sweetened shredded coconut into the batter with the pineapple for a pina colada effect. You can also sprinkle toasted coconut on the whipped cream between the layers and on top of the finished cake for extra flavor and a lovely crunch.
What’s the best way to cut a pineapple for this cake?
To easily dice a fresh pineapple, slice off the top and bottom. Stand it upright and cut away the tough skin in strips from top to bottom. Then, lay it on its side and slice it into rounds. Use a small knife or a round cookie cutter to remove the hard core from the center of each round. Finally, chop the rounds into small, bite-sized pieces for your filling and garnish.
My cake is very dense. What did I do wrong?
A dense cake often points to overmixing or using cold ingredients. Overmixing develops the gluten in the flour, making it tough. Cold ingredients don’t incorporate air properly during creaming. Also, measure your flour correctly: spoon it into your measuring cup and level it off with a knife. Don’t scoop directly from the bag, as that packs it down and adds too much flour. Lastly, check your expiration dates on baking powder and soda.
The Final Sweet Slice
This Hawaiian Pineapple Cake is more than just a dessert. It’s a celebration in every bite. It brings a little sunshine to your table and a big smile to everyone who tries it. I’ve made this for neighbors, for potlucks, and just for my family on a regular Sunday, and the reaction is always the same: pure joy. So gather your ingredients, put on some happy music, and bake yourself a little piece of heaven. I promise, the effort is worth the blissful, tropical flavor you’ll create. Happy baking!
Caramelized Apple Delight
Ingredients
Equipment
Method
- Preheat your oven to 350°F (175°C) and prepare four 8-inch round pans with butter and flour.
- Whisk together flour, baking powder, baking soda, and salt in a medium bowl.
- In a large mixing bowl, beat the softened butter and granulated sugar until light and fluffy, then add eggs one at a time followed by vanilla.
- Gradually mix in the dry ingredients and sour cream, alternating between them until just combined, then fold in the crushed pineapple.
- Divide the batter evenly among the prepared pans and smooth the tops.
- Bake for 20-25 minutes until tops spring back and a toothpick comes out clean.
- Cool the cakes in pans for 10 minutes before transferring to a wire rack to cool completely.
- Whip the heavy cream with powdered sugar and vanilla until stiff peaks form.
- Assemble the cake by layering with whipped cream and diced pineapple between each layer, finishing with whipped cream on the top and sides.