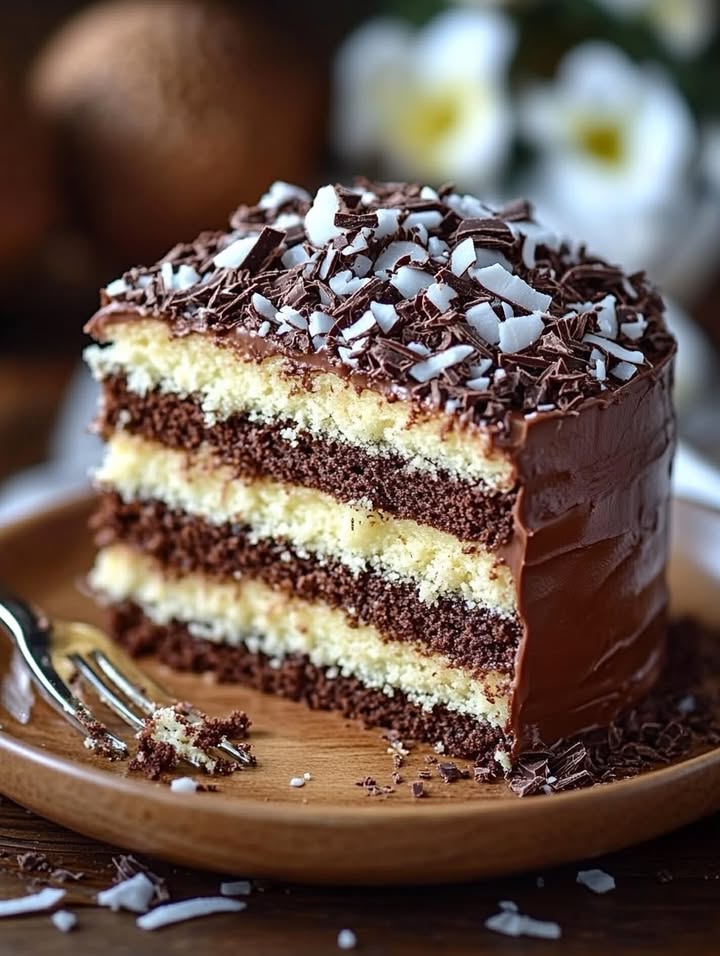
Is there anything better than slicing into a spectacular layer cake you made yourself? That moment of quiet pride before the “oohs” and “ahhs” from your friends and family… it’s pure kitchen magic. Today, I’m sharing one of my all-time favorite showstoppers. This triple-layer chocolate cake with creamy coconut and glossy ganache is so much easier than it looks. It’s the dessert I bring to every potluck, and without fail, someone always asks for the recipe. Let’s get baking!
From My Grandmother’s Kitchen to Yours
This recipe has a special place in my heart. It’s a mash-up of two classics: a rich, tender chocolate cake and the nostalgic coconut filling often found in old-fashioned German or Eastern European tortes. My grandmother would make a simpler version for birthdays, and the aroma of chocolate and toasting coconut would fill her whole house. Over the years, I’ve tweaked it, adding the third layer for extra drama and that silky-smooth ganache topping. It feels both wonderfully traditional and excitingly new. It’s proof that the best recipes are living things, passed down and perfected with love.
Why You’ll Fall for This Heavenly Velvet Cheesecake
I know, I know, it’s not technically a cheesecake! “Heavenly Velvet” is our family’s nickname for it because the texture is just that—unbelievably soft, moist, and velvety. You’ll love it because it’s a perfect balance. The chocolate cake is deep and dark but not overly sweet. The coconut filling is creamy and chewy, adding a lovely tropical note. And the chocolate ganache? It’s the glossy, decadent finish that makes everyone’s eyes light up. Plus, while it looks like it came from a professional bakery, the steps are straightforward and forgiving. Even if you’re a layer cake novice, you can absolutely nail this.
The Perfect Moment for a Slice of Heaven
This isn’t just a dessert; it’s a celebration centerpiece. It’s perfect for:
- Birthdays and Anniversaries: Forget store-bought! A homemade cake says “I love you” more than anything.
- Holiday dinners, especially Christmas or Easter.
- Potlucks and picnics (it travels surprisingly well if chilled first).
- Just because! A Sunday family dinner deserves a special treat, too.
Gathering Your Ingredients for Success
Let’s gather everything. Using good-quality basics makes a real difference here.
- For the Cake Layers:
- 1 1/2 cups all-purpose flour
- 1 cup granulated sugar
- 1/2 cup unsweetened cocoa powder (I love Dutch-processed for a richer color)
- 1 1/2 teaspoons baking powder
- 1/2 teaspoon baking soda
- 1/2 teaspoon salt
- 2 large eggs, at room temperature
- 1/2 cup whole milk
- 1/2 cup vegetable oil (or a neutral oil like canola)
- 1 teaspoon pure vanilla extract
- 1/2 cup boiling water
- For the Coconut Filling:
- 2 cups shredded sweetened coconut
- 1/2 cup sweetened condensed milk (that sticky-sweet stuff from a can)
- 1/4 cup powdered sugar (confectioners’ sugar)
- For the Chocolate Ganache:
- 1 cup heavy whipping cream
- 1 cup semi-sweet chocolate chips (or chopped chocolate bars)
No Problem! Handy Ingredient Substitutions
Out of something? Don’t run to the store. Here are some easy swaps:
- Cocoa Powder: Natural or Dutch-process will both work beautifully in this recipe.
- Milk: Any milk you have—2%, whole, or even a plain, unsweetened non-dairy milk—will do the job.
- Shredded Coconut: If you only have unsweetened coconut, just add an extra tablespoon or two of powdered sugar to the filling to taste.
- Semi-Sweet Chocolate: Use dark chocolate chips for a less sweet ganache, or milk chocolate for a sweeter, milder topping.
Creating Your Heavenly Velvet Masterpiece
Ready? Put on your favorite apron, and let’s create some magic step-by-step.
Step 1: Preheat and Prep Your Pans
First things first, get that oven heating to 350°F (175°C). This gives it time to reach the perfect, even temperature. While it warms up, grab your three 8-inch round cake pans. Grease the bottoms and sides generously with butter or baking spray. Then, add a spoonful of flour to each, tap, and tilt the pan until it’s lightly coated. Tap out any extra. This little ritual ensures your beautiful cake layers will pop out cleanly after baking. Pro tip: For extra security, you can cut out circles of parchment paper for the pan bottoms after greasing.
Step 2: Mix the Divine Chocolate Batter
In a large mixing bowl, whisk together your dry ingredients: flour, sugar, cocoa powder, baking powder, baking soda, and salt. Watch as the cocoa dusts everything in a rich, brown veil. Now, add the wet ingredients: eggs, milk, oil, and vanilla. Use a hand mixer or stand mixer on medium speed to beat it all together. You’ll get a thick, fudgy batter. Now for the secret! Slowly pour in the half cup of boiling water. The batter will become wonderfully thin and liquid. Don’t worry—this is what makes the cake incredibly moist and tender.
Step 3: Bake and Cool to Perfection
Carefully divide the thin batter evenly among your three prepared pans. I like to use a ladle or a measuring cup to ensure they’re the same. Slide them into the center of your preheated oven. Bake for 25 to 30 minutes. You’ll know they’re done when the tops look set and a toothpick poked into the center comes out clean, maybe with a few moist crumbs. The smell will be amazing! Let the cakes cool in their pans on a wire rack for about 10 minutes. Then, run a knife around the edges and invert them onto the rack to cool completely. Patience is key here—assembling with warm layers will make the filling runny.
Step 4: Whip Up the Sweet Coconut Filling
While the cakes cool, make the simple filling. In a medium bowl, combine the shredded coconut, sweetened condensed milk, and powdered sugar. Stir it with a spatula or fork until every strand of coconut is glossy and coated in the sticky-sweet milk. It will clump together beautifully. Set this aside. If your kitchen is very warm, you can pop it in the fridge for 10 minutes to firm up slightly, making it easier to spread.
Step 5: Assemble Your Triple-Layer Dream
Time for the fun part! Place your first completely cool cake layer on a serving plate or cake stand. Scoop about half of the coconut filling onto the center. Use an offset spatula or the back of a spoon to spread it evenly to the edges. Gently place the second cake layer on top and repeat with the remaining filling. Top with the third and final cake layer. Press down lightly so everything sticks together. Take a step back and admire your beautiful stack!
Step 6: Create the Glossy Chocolate Ganache
Pour the heavy cream into a small saucepan. Heat it over medium heat until you see small bubbles form around the edges and it’s just beginning to simmer—don’t let it boil. Place your chocolate chips in a heatproof bowl. Pour the hot cream over the chocolate. Let it sit for 3-4 minutes to melt the chocolate. Then, stir slowly and steadily, starting from the center, until you have a smooth, luxurious, glossy ganache. Let it cool for about 5 minutes so it thickens just a bit. Now, pour it over the top of your stacked cake. Use a spatula to gently guide it over the edges, letting it drip down the sides in elegant rivulets.
Step 7: Chill, Slice, and Savor the Victory
To set the ganache beautifully, carefully transfer your finished cake to the refrigerator. Let it chill for at least 30 minutes. This makes slicing much cleaner. When you’re ready, use a long, sharp knife, dipping it in hot water and wiping it dry between each cut for perfect slices. Serve it up and get ready for the compliments! Chef’s tip: For an extra touch, toast a handful of coconut flakes in a dry pan until golden and sprinkle them on top of the ganache right after you pour it.
Your Heavenly Velvet Cheesecake Timeline
Here’s a realistic breakdown of the time investment:
- Prep Time: 30 minutes (gathering, measuring, mixing)
- Bake Time: 30 minutes
- Cooling Time: 1 hour (crucial—don’t rush this!)
- Assembly & Ganache Time: 20 minutes
- Chilling Time: 30 minutes
- Total Time: About 2 hours 50 minutes (mostly hands-off)
A Little Extra Secret From My Kitchen
Want an even more intense chocolate flavor? Add a teaspoon of instant espresso powder to the dry ingredients. You won’t taste coffee at all. It just deepens and enriches the chocolate flavor, making it taste more… well, chocolatey! It’s my not-so-secret weapon for all chocolate cakes.
The Magic of Boiling Water in Cake
You might wonder why we add boiling water to the cake batter. It’s a fantastic trick! The hot water “blooms” the cocoa powder, dissolving it fully and releasing its deepest flavor. It also helps dissolve the sugar, creating a smoother batter. Most importantly, the added liquid makes for a supremely moist crumb that stays soft for days. It’s science that tastes like love.
Tools You’ll Need
You don’t need fancy equipment:
- Three 8-inch round cake pans
- Mixing bowls (large and medium)
- Whisk and spatula
- Hand mixer or stand mixer (optional, but helpful)
- Measuring cups and spoons
- Small saucepan
- Wire cooling rack
- Cake stand or serving plate
- Offset spatula (makes frosting much easier!)
Keeping Your Cake Fresh and Fabulous
This cake stores wonderfully. Because of the moist texture, it stays delicious for several days.
For short-term storage, cover the cut cake loosely with plastic wrap or place it in a cake carrier. Keep it in the refrigerator for up to 5 days. The cool temperature helps the ganache and coconut filling stay set. Let slices sit at room temperature for 15-20 minutes before serving to take the chill off.
You can also freeze this cake for longer storage. Wrap individual slices or the whole cake (place it on a cardboard round first) tightly in plastic wrap, then in aluminum foil. Freeze for up to 2 months. Thaw overnight in the refrigerator.
My Best Tips for Guaranteed Success
- Room Temperature Eggs & Milk: This helps them incorporate smoothly into the batter, creating a better texture.
- Don’t Overmix: Once you add the boiling water, just stir until combined. Overmixing can develop gluten and make the cake tough.
- Level Your Layers: If your cakes have a slight dome, use a long serrated knife to carefully slice off the top to make them flat. This prevents a wobbly stack.
- Ganache Consistency: If your ganache is too thin, let it cool longer. If it’s too thick, gently reheat it with a teaspoon of warm cream.
Presentation Ideas to Wow Your Guests
- Top with fresh raspberries or strawberries for a pop of color.
- Add a light dusting of cocoa powder or powdered sugar over the ganache.
- Pipe small swirls of whipped cream around the base of the cake.
- Serve each slice on a pool of raspberry coulis or caramel sauce.
- For a festive look, sprinkle edible gold flakes or pearls on top.
Lighter & Creative Variations to Try
Love the idea but want to switch it up? Here are six delicious twists:
- Gluten-Free Heavenly Velvet: Substitute the all-purpose flour with a 1:1 gluten-free baking blend. Ensure your cocoa powder is certified gluten-free.
- Dairy-Free Delight: Use your favorite non-dairy milk (like almond or oat), vegan butter to grease pans, and coconut cream instead of heavy cream for the ganache. Check that your chocolate chips are dairy-free.
- Mocha Madness: Add 1-2 tablespoons of instant coffee granules to the boiling water before adding it to the batter for a coffee-chocolate flavor.
- Orange Chocolate Bliss: Add the zest of one orange to the cake batter and a tablespoon of orange liqueur (like Cointreau) to the ganache for a sophisticated citrus twist.
- Nutty Coconut Crunch: Mix 1/2 cup of finely chopped toasted pecans or almonds into the coconut filling for added texture.
- Mini Layer Cakes: Bake the batter in a sheet pan. Use a round cutter to create small cake rounds. Assemble individual mini cakes in jars or on plates for a cute, portion-controlled dessert.
Common Mistakes to Avoid
Avoiding these simple pitfalls will ensure your cake is perfect every single time.
Mistake 1: Assembling with Warm Cake Layers
This is the biggest culprit for a messy, sliding cake. If the layers are even slightly warm, the heat will melt the coconut filling and make the ganache slide right off. The filling can become runny and soak into the cake, making it soggy. Always let your cakes cool completely on a wire rack. This can take a full hour. Rushing this step will undo all your hard work. Patience truly is a virtue in baking!
Mistake 2: Overbaking the Chocolate Layers
Dry cake is a sad cake. Because this batter is so thin, it bakes relatively quickly. The 25-30 minute window is a guide. Ovens vary, so start checking at 25 minutes. The cake is done when the top looks set and springs back lightly when touched, and a toothpick inserted in the center comes out with just a few moist crumbs attached, not wet batter. If you wait for a completely clean toothpick, the cake is already overbaked. Remember, it continues to cook a little from residual heat as it cools.
Mistake 3: Using Cold Ingredients for the Batter
Adding cold eggs or milk straight from the fridge to your batter can cause it to seize up or not blend smoothly. The oil may separate, and you could end up with an uneven texture. Take your eggs and milk out about 30 minutes before you start baking. Room-temperature ingredients emulsify better with the oil, creating a smoother, more homogeneous batter that rises evenly and yields a tender crumb. It’s a small habit that makes a big difference.
Mistake 4: Pouring Ganache That’s Too Hot or Too Cold
Ganache needs the right consistency to coat the cake beautifully. If you pour it immediately after mixing, while it’s very hot and liquid, it will be too thin. It will run completely off the sides and pool around the base, leaving the top bare. If you let it cool too long, it will thicken into a paste you can’t pour. The sweet spot is after about 5 minutes of cooling. It should be fluid but slightly thickened, like warm pudding. Do a test drip down the side of the bowl first.
Your Heavenly Velvet Cheesecake Questions, Answered
Can I make this cake ahead of time?
Absolutely! You have a few great options. You can bake the cake layers up to two days ahead. Let them cool completely, then wrap each layer tightly in plastic wrap and store at room temperature. You can also make the coconut filling a day ahead and keep it covered in the fridge. Assemble the cake and make the ganache the day you plan to serve it for the freshest look and texture. An assembled cake holds up beautifully in the fridge for a day.
My ganache turned out lumpy. What happened and how can I fix it?
Lumpy ganache usually means the cream wasn’t hot enough to fully melt the chocolate, or the chocolate was stirred too soon before it had time to soften. To fix it, you can gently reheat the mixture. Place the bowl over a pot of simmering water (a double boiler) and stir constantly over low heat until smooth. Alternatively, you can carefully microwave it in 10-second bursts, stirring in between. To prevent this next time, ensure your cream is steaming hot and pour it over the chocolate. Let it sit for a full 3-5 minutes before you start stirring.
Can I use a different size pan?
Yes, but it will change the baking time and number of layers. For two 9-inch pans, the layers will be a bit thinner. Bake for 20-25 minutes. If you only have one pan, you can bake the batter in batches, but make sure to clean, re-grease, and re-flour the pan each time. For a single, tall layer, use a 9×13 inch pan. The baking time will be longer, likely 30-35 minutes. You would then cut the single large cake into three rectangular sections to layer.
Is the coconut filling supposed to be very sweet?
Yes, the coconut filling is intentionally quite sweet. It uses sweetened shredded coconut and sweetened condensed milk, so it has a pronounced sugary flavor. This sweetness creates a wonderful contrast with the less-sweet, slightly bitter dark chocolate cake and the semi-sweet ganache. If you prefer a less sweet filling, you can use unsweetened shredded coconut and maybe reduce the powdered sugar. Taste as you mix!
Why did my cake layers sink in the middle?
A sunken cake is often a sign of underbaking, opening the oven door too early, or too much leavening (baking powder/soda). Make sure your oven is fully preheated and you don’t open the door during the first 20 minutes of baking. The rush of cold air can cause a rising cake to collapse. Also, double-check your measurements for baking powder and soda. Using a tablespoon instead of a teaspoon is a common error that can cause the cake to rise too fast and then fall.
Can I use pre-made frosting instead of ganache?
You can, but the taste and experience will be different. A rich chocolate buttercream or even a store-bought chocolate frosting would work. However, the silky, glossy, adult elegance of a ganache is a big part of this cake’s charm. It’s also surprisingly easy to make! If you’re short on time, a high-quality canned frosting is a fine shortcut. Let the cake chill well after frosting it to help it set.
How do I get clean slices without squishing the cake?
The secret is a hot, clean knife. Run a long, thin-bladed knife under very hot water. Wipe it completely dry with a towel. Make a smooth, single cut through the cake, applying gentle pressure—no sawing motion. For the next slice, repeat: heat, dry, cut. This melts through the ganache and softens the cake slightly, giving you a clean, crumb-free slice every time. It’s a game-changer for serving beautiful dessert.
My cake is very moist, almost soggy. What went wrong?
Excessive moisture usually points to underbaking or assembling with warm layers (as the filling soaks in). Ensure you bake until a toothpick has just a few crumbs. Also, guarantee those layers are stone-cold. Another possibility is accurate measuring. If you accidentally added too much liquid (like an extra splash of milk or water), it could throw off the balance. Always use measuring cups for liquids and the spoon-and-level method for flour.
Can I add alcohol to this recipe?
For a grown-up twist, absolutely! You can add 1-2 tablespoons of your favorite liqueur to the ganache instead of a teaspoon of cream. Kahlúa (coffee), Grand Marnier (orange), or even a good bourbon pair wonderfully with chocolate. You could also brush the cooled cake layers with a thin syrup of simple sugar and liqueur before adding the filling to add moisture and flavor.
What’s the best way to toast coconut for a garnish?
Toasting coconut is easy and adds amazing flavor and crunch. Spread sweetened shredded coconut in a thin layer on a dry baking sheet. Bake at 325°F for 5-10 minutes, stirring every couple of minutes. Watch it closely! It goes from golden to burnt very quickly. You can also do this in a dry skillet on the stove over medium-low heat, stirring constantly. Let it cool completely before sprinkling on the cake.
Go Ahead, Be the Family Baking Hero
There you have it! Every tip, trick, and secret I’ve learned from making this Heavenly Velvet cake countless times. It might look like a gourmet bakery creation, but I promise, it’s totally within your reach. The process is as joyful as the result. So, gather your ingredients, put on some music, and treat yourself and your loved ones to this unforgettable dessert. Don’t forget to take a picture of your masterpiece—you’ll want to remember it! Happy baking, and enjoy every delicious, velvety bite.
Heavenly Velvet Cheesecake
Ingredients
Equipment
Method
- Preheat the oven to 350°F (175°C) and prepare three 8-inch round cake pans.
- In a large mixing bowl, whisk together the dry ingredients: flour, sugar, cocoa powder, baking powder, baking soda, and salt.
- Add the wet ingredients: eggs, milk, oil, and vanilla. Beat together until well mixed.
- Slowly pour in the boiling water and stir until the batter is smooth and thin.
- Divide the batter evenly among the prepared pans and bake for 25 to 30 minutes. Let cool for 10 minutes in the pans then invert onto a wire rack and cool completely.
- In a medium bowl, combine shredded coconut, sweetened condensed milk, and powdered sugar. Stir until well mixed and set aside.
- On a serving plate, place one cake layer and spread half of the coconut filling on top. Add another layer and repeat.
- Place the final layer on top and set aside.
- To make the ganache, heat the heavy cream until just simmering and pour over the chocolate chips. Let sit for 3-4 minutes, then stir until smooth.
- Pour the ganache over the top of the assembled cake, letting it drip down the sides.
- Chill the cake in the refrigerator for at least 30 minutes before slicing and serving.