The Quest for the Perfect Chocolate Chip Cookie is Over
Let’s be honest. We’ve all been there, standing in the kitchen with a tray of flat, crunchy, or just-meh cookies, wondering where it all went wrong. I’ve baked more failed batches than I care to admit! But after years of tinkering—and a few legendary tips from my grandma—I finally cracked the code. This recipe is my gold standard, my go-to, the cookie that makes friends ask for the recipe every single time. Get ready to bake the BEST chocolate chip cookies of your life.
A Sweet Slice of Cookie History
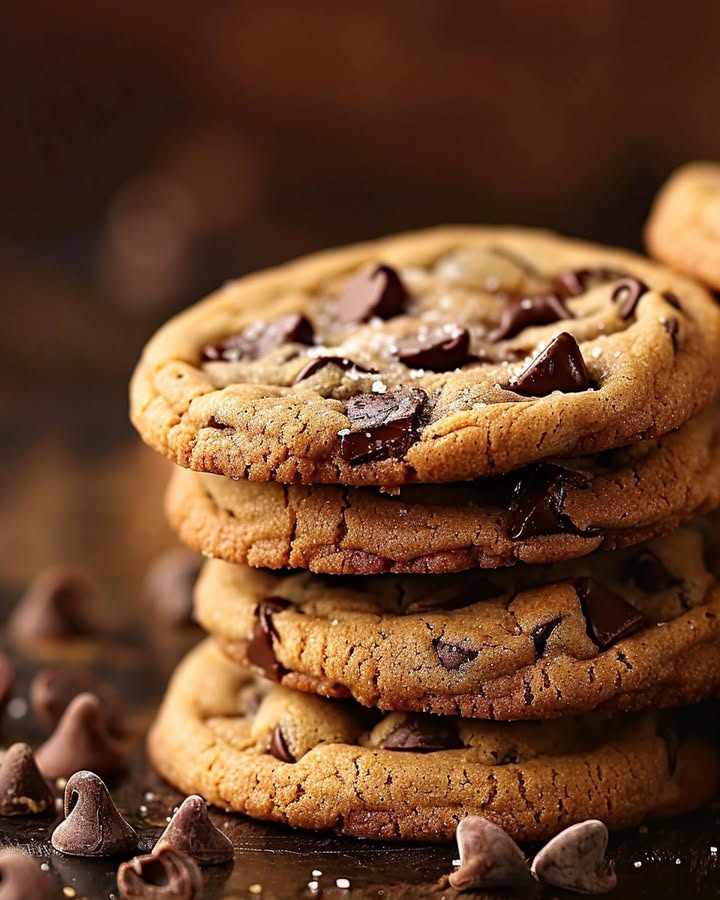
The chocolate chip cookie wasn’t born from a grand culinary plan. It was a happy accident! In the 1930s, Ruth Wakefield, owner of the Toll House Inn, ran out of baker’s chocolate for her Butter Drop Do cookies. She roughly chopped a bar of Nestlé semisweet chocolate, expecting it to melt evenly. It didn’t! Those little chunks held their shape, creating the first-ever “Toll House Cookie.” Today, we have endless versions, from thin-and-crispy to thick-and-cakey. This recipe aims for that perfect middle ground: crisp edges, a chewy-crunchy rim, and a gloriously soft, gooey center.
Why You Will Absolutely Love This Recipe
This isn’t just another cookie recipe. It’s a carefully crafted blueprint for success. You’ll love it because it’s unfailingly reliable. The melted butter trick means no waiting for butter to soften. The mix of baking soda and powder gives the perfect lift. And that sprinkle of flaky salt at the end? It’s a game-changer that makes the chocolate taste even richer. These cookies are simple enough for a weeknight treat but impressive enough for any party. They’re the ultimate crowd-pleaser.
When to Bake These Famous Chocolate Chip Cookies
This recipe is your new culinary Swiss Army knife. Bake them for a cozy family movie night, filling the house with that irresistible warm vanilla and chocolate smell. They’re perfect for school bake sales (they travel well!) or as a heartfelt homemade gift in a pretty jar. Need to impress new neighbors or bring a dish to a potluck? A plate of these warm, sea salt-topped cookies is a guaranteed way to make friends. Honestly, any day that ends with “y” is a good day for these cookies.
Gathering Your Chocolate Chip Cookie Ingredients
Great cookies start with great ingredients. Here’s what you’ll need:
- 1 1/4 cups (165g) all-purpose flour, spooned and leveled
- 1/2 tsp baking soda
- 1/2 tsp baking powder
- 3/4 tsp kosher salt (Diamond Crystal is best here)
- 1/2 cup (110g) unsalted butter, melted and cooled
- 1/2 cup (100g) light brown sugar, packed
- 1/3 cup (75g) granulated sugar
- 2 tsp vanilla extract
- 1 large egg
- 1 1/2 cups (240g) semisweet chocolate chips (I love Trader Joe’s or Ghirardelli)
- Flaky sea salt, for finishing (like Maldon)
Easy Ingredient Substitutions
Don’t have something? No panic! Here are some easy swaps:
- Butter: If you only have salted butter, simply omit the kosher salt in the dry ingredients.
- Sugars: Dark brown sugar can replace light brown for a deeper molasses flavor. For less sweetness, you can slightly reduce the granulated sugar.
- Flour: For slightly denser, chewier cookies, you can use bread flour. For a gluten-free version, use a 1:1 gluten-free flour blend.
- Chocolate: Chopped chocolate bars create lovely puddles, while milk or dark chips work perfectly too. Use what you love!
Creating Your Masterpiece: Step-by-Step
Step 1: Prep and Mix Dry Ingredients
First, preheat your oven to 350°F (175°C). This ensures it’s perfectly hot when your dough is ready. Line a large baking sheet with parchment paper. This prevents sticking and makes cleanup a dream. In a medium bowl, take your flour, baking soda, baking powder, and kosher salt. Whisk them together until they are one uniform, pale mixture. This aerates the flour and evenly distributes the leaveners. Setting this aside lets you focus on the fun, buttery part. Pro tip: Use a fork or small whisk if you don’t have a large one. The goal is just to combine everything well.
Step 2: Create the Sugary Butter Paste
Now, grab a large mixing bowl. Add your melted (and cooled!) butter, brown sugar, and granulated sugar. The melted butter is our secret for a chewy texture with those lovely crispy edges. Using a whisk, go to town! Whisk vigorously for a good 1-2 minutes. You’ll see the mixture transform from separated grains into a thick, glossy, paste-like consistency. This step is crucial—it helps dissolve the sugars and starts building the cookie’s structure. The smell is already heavenly.
Step 3: Incorporate Egg and Vanilla
Crack in your large egg and add the two teaspoons of vanilla extract. Vanilla is the flavor backbone of a great cookie, so don’t skimp! Whisk again until the mixture is completely smooth, creamy, and has lightened slightly in color. It should ribbon off the whisk. This emulsifies the wet ingredients, ensuring your cookies bake up evenly. You’re now just one step away from chocolate chip glory.
Step 4: Gently Combine with Dry Ingredients
Pour your bowl of dry ingredients into the wet mixture. Put the whisk away and grab a sturdy rubber spatula. This is where finesse matters. Gently fold the dough, scraping from the bottom up. Stop folding when you still see a few streaks of flour. Now, dump in all those glorious chocolate chips. Continue to fold gently until the chips are evenly scattered and no white flour remains. Do not over mix! Overworking the dough leads to tough cookies. A few lumps are just fine. Chef’s tip: Reserve a small handful of chips to press on top of the baked cookies for a beautiful, bakery-style look.
Step 5: Scoop and Bake to Perfection
Use a large cookie scoop (about 2 oz or 1/4 cup) to portion the dough. Place 5 scoops on your prepared sheet, giving them plenty of room to spread. For perfect cookies, I bake 5 at a time. Bake for 12-15 minutes. 12 minutes gives you an ultra-gooey center. 15 minutes yields a more set, well-done cookie. You’ll know they’re ready when you see a gorgeous golden-brown ring around the edge, but the center still looks pale, puffed, and slightly underdone. They set as they cool! If they spread more than you like, take a fork and gently nudge the edges into a round shape right when they come out of the oven.
Step 6: The Grand Finale: Salt and Cool
As soon as the cookies come out of the oven, this is your moment. Immediately press a few extra chocolate chips into the top of each warm cookie. Then, give each one a delicate, magical sprinkle of flaky sea salt. This contrast is everything. Let the cookies cool on the baking sheet for 5 minutes. They need this time to firm up enough to move. Then, transfer them to a wire rack to cool completely, or at least for 20 minutes. I know it’s hard, but this waiting time lets the centers set into that perfect chewy texture.
Your Cookie Baking Timeline
- Prep Time: 15 minutes
- Cook Time: 12-15 minutes per batch
- Cooling Time: 20 minutes
- Total Time: About 50 minutes
The One Chef’s Secret You Need
Here’s my grandma’s best-kept secret: Let the melted butter cool completely before you mix it with the sugars. If the butter is too hot, it can cook the egg and create a greasy dough. I melt it, then let it sit on the counter for 10-15 minutes. It should be warm to the touch, not hot. This simple patience makes all the difference between a good cookie and the BEST chocolate chip cookie.
A Little Cookie Science
Did you know the type of sugar directly changes your cookie’s texture? Brown sugar contains molasses, which attracts and holds moisture. This is what gives our cookies that wonderfully soft, chewy center. Granulated sugar, on the other hand, spreads and caramelizes, creating those delightful crisp edges. Using both, as we do here, gives you the best of both textural worlds!
Essential Baking Tools
You don’t need fancy gear, but these basics help:
- Large baking sheet
- Parchment paper or a silicone baking mat
- Large and medium mixing bowls
- Whisk and rubber spatula
- Large cookie scoop (2 oz / 1/4 cup) or a measuring cup
- Wire cooling rack
How to Keep Your Cookies Delicious
Once your cookies are completely cool, store them in an airtight container at room temperature. They will stay soft and delicious for up to 6 days.
Want to know my trick for extra-soft cookies? Place a single slice of plain white bread in the container with them. The cookies will draw moisture from the bread, staying chewy for days. Just replace the bread when it gets hard.
You can also freeze the baked cookies for up to 3 months. Or, even better, freeze the portioned dough balls on a tray, then toss them in a freezer bag. You can bake frozen dough balls straight from the freezer, just add 1-2 minutes to the bake time for fresh cookies anytime!
Pro Tips for Cookie Success
- Weigh your flour. It’s the most accurate way. If you don’t have a scale, spoon the flour lightly into your cup and level it off. Don’t scoop from the bag!
- Use room temperature eggs. It helps them blend smoothly into the butter and sugar.
- Don’t skip the sea salt finish. It’s not just for looks. It cuts the sweetness and makes the chocolate flavor pop.
- Bake one test cookie first. This helps you nail the timing for your specific oven.
Presentation Ideas That Wow
Make your cookie plate special! Stack them high on a vintage cake stand. For a gift, layer them in a clear cellophane bag tied with a ribbon. Serve them slightly warm with a cold glass of milk or a scoop of vanilla ice cream for an epic cookie sundae. At a party, create a “cookie bar” with small bowls of sprinkles, extra sea salt, and caramel sauce for dipping.
6 Fun Chocolate Chip Cookie Variations
Love this base recipe? Try these easy twists:
- Brown Butter Cookies: Cook the butter until it turns golden brown and smells nutty. Let it cool, then proceed. Adds a deep, toffee-like flavor.
- M&M Cookie: Replace half the chocolate chips with colorful M&Ms for a festive, kid-friendly treat.
- Peanut Butter Chocolate Chip: Add 1/2 cup of creamy peanut butter to the wet ingredients. Use peanut butter chips instead of chocolate, or do a mix.
- Oatmeal Chocolate Chip: Replace 1/2 cup of the flour with old-fashioned rolled oats for a heartier, chewy texture.
- Sea Salt Dark Chocolate: Use all high-quality dark chocolate chips (70% cacao) and an extra pinch of flaky salt. Sophisticated and rich.
- Everything Cookie: Add 1/2 cup of crispy rice cereal and 1/2 cup of toasted coconut flakes to the dough along with the chips. It’s a texture party!
Common Mistakes to Avoid
Mistake 1: Measuring Flour Incorrectly
This is the number one reason cookies turn out cakey or dry. Scooping flour directly from the bag with your measuring cup packs it down. You end up with way too much flour. Too much flour makes a stiff dough that doesn’t spread properly. Always use the “spoon and level” method. Gently spoon the flour into your measuring cup. Then, use the flat edge of a knife to level it off. For absolute precision, use a kitchen scale.
Mistake 2: Using Hot, Just-Melted Butter
We melt the butter for texture, but patience is key. If you pour hot butter into your sugars, it can partially cook the egg when you add it. This results in a weird, grainy texture. It can also cause your cookies to overspread and become greasy. Let the melted butter cool on the counter for about 10 minutes. It should be lukewarm, not hot, when you mix it. Your patience will be rewarded with perfect texture.
Mistake 3: Overmixing the Dough
Once you add the flour, your goal is to mix *just until combined*. Overmixing develops the gluten in the flour. This makes cookies tough and dense instead of tender and soft. When you add the dry ingredients, use a folding motion with a spatula. Stop as soon as you see no more dry flour streaks. A few small lumps are perfectly fine. A tender hand makes a tender cookie.
Mistake 4: Overbaking the Cookies
Cookies keep baking on the hot tray after you take them out of the oven. If you wait until they look “done” in the center, they’ll be hard and dry once cooled. The key is to pull them out when the edges are set and golden brown, but the centers still look soft, puffy, and under-baked. They might even look a bit doughy. Trust the process! They will set up beautifully as they cool, giving you that perfect soft center.
Mistake 5: Using Tiny Chocolate Chips or Skimping
Small, waxy chips don’t deliver big chocolate flavor or those lovely melty pockets. And using less than the recipe calls for makes a boring cookie. Invest in good-quality, standard-sized semisweet chips or chop a chocolate bar. Use the full amount! The dough-to-chip ratio is sacred. For a pro look, press a few extra chips on top of the warm cookies when they come out of the oven.
Your Cookie Questions, Answered
Can I make the cookie dough ahead of time?
Absolutely! In fact, chilling the dough can lead to even better flavor. After mixing, cover the bowl tightly and refrigerate for at least 1 hour or up to 72 hours. This allows the flour to fully hydrate and the flavors to deepen. Just let the dough sit at room temperature for 10-15 minutes before scooping if it’s very firm. You can also scoop the dough balls first, freeze them on a tray, and then store them in a freezer bag for up to 3 months. Bake straight from frozen, adding a minute or two to the bake time.
Why did my cookies spread too much and become flat?
Flat cookies usually have a few common causes. Your butter may have been too warm when mixed. Your baking sheet might have been too warm (always use a cool sheet for each batch). You may have used too little flour, often from not measuring it correctly. Or, your baking soda or powder could be old and lost its lifting power. Check the dates on your leaveners! Make sure your oven is fully preheated, and try chilling the dough for 30 minutes before baking to prevent excessive spread.
Why are my cookies too cakey or puffy?
A cakey texture usually means there’s too much flour in the dough. Double-check your measuring method. Using too much baking powder can also cause excessive puffiness. Another culprit is overmixing after adding the flour, which develops too much gluten. Finally, if you used cold eggs or chilled the dough for a very long time, it can slow the spread and lead to a thicker, puffier cookie. For this recipe, following the measured ingredients and mixing steps exactly should give you the perfect chewy result.
Can I use salted butter instead of unsalted?
Yes, you can use salted butter in a pinch. The main reason we use unsalted butter is to control the exact amount of salt in the recipe. Different brands of salted butter have different salt levels. If you use salted butter, simply omit the 3/4 teaspoon of kosher salt you would add to the dry ingredients. The small amount of salt in the butter will be enough. Your cookies will still be delicious, but for consistent, bakery-quality results every time, unsalted butter is the way to go.
What’s the best kind of chocolate to use?
This is a matter of taste, but quality matters! I highly recommend a good brand of semisweet chocolate chips like Ghirardelli or Guittard. They have better cocoa butter content and melt beautifully. I recommend brands like Guittard, Ghirardelli, or Trader Joe’s semi-sweet chips. You can also use chopped chocolate bars from a good brand. Different chocolates will slightly change the flavor, so use one you enjoy eating on its own.
My cookies are too hard. What did I do wrong?
Hard cookies are typically a sign of overbaking or overmixing. Remember, cookies firm up as they cool. If you bake them until they look fully set in the oven, they will be hard once cooled. Next time, pull them out earlier when the centers look soft. Overmixing the dough also develops gluten, leading to a tougher texture. Using all granulated sugar (instead of a mix with brown sugar) can also create a harder, crisper cookie because there’s no molasses to retain moisture.
Can I use salted butter instead of unsalted?
Yes, you can. The recipe uses unsalted butter so you can control the exact amount of salt. If you only have salted butter, simply omit the 3/4 teaspoon of kosher salt that you add to the dry ingredients. The salt in the butter will provide enough seasoning. The cookies will still be delicious, though the salt level might be slightly different.
How do I get my cookies to be soft and chewy in the middle?
The secrets to a soft, chewy center are brown sugar, correct baking time, and proper cooling. Brown sugar’s molasses provides moisture. Pulling the cookies out when the center is still puffed and pale ensures they stay soft. Finally, letting them cool on the baking sheet for 5 minutes allows them to set without overcooking. Don’t skip the storage trick with the bread slice, either—it keeps them chewy for days.
Is it necessary to use both baking soda and baking powder?
In this recipe, yes! They work as a team to create the ideal texture. Baking soda helps the cookies spread and promotes browning. Baking powder gives them a little lift and airiness. Using both gives you the perfect combination—a cookie that spreads just enough but also has a tender, slightly puffiness in the center. It’s a key part of the recipe’s balance.
Can I double or halve this chocolate chip cookie recipe?
You can easily double or halve this recipe with great results. If you double it, just make sure you have a very large bowl for mixing, or mix in two batches. For halving, a medium bowl will work fine. Be extra careful when halving the egg. Crack a large egg into a small bowl, whisk it lightly, and use approximately half (about 1.5 tablespoons). The bake time will remain roughly the same for the same-sized cookies.
What’s the best way to freeze cookie dough?
Freezing dough is a genius move! Scoop the dough into balls as if you were going to bake them. Place them on a parchment-lined tray and freeze until solid (about 2 hours). Then, transfer the frozen dough balls to a labeled freezer bag. They’ll keep for 3 months. To bake, place frozen dough balls on a prepared sheet. You don’t need to thaw them. Just add 1-3 minutes to the bake time. This means you can have fresh, warm cookies anytime!
Go Forth and Bake Joy
There you have it—my heart, soul, and a lot of trial and error baked into one perfect recipe. These chocolate chip cookies are more than just a dessert. They’re a warm hug, a shared smile, a little piece of homemade happiness. I promise, once you try this method, you’ll never go back to the back of a chip bag again. So preheat that oven, melt that butter, and get ready for your kitchen to smell like pure joy. Happy baking!
Cajun Chicken Joes
Ingredients
Equipment
Method
- Preheat your oven to 350°F (175°C) and line a large baking sheet with parchment paper.
- In a medium bowl, whisk together flour, baking soda, baking powder, and kosher salt until well combined.
- In a large mixing bowl, combine melted butter, brown sugar, and granulated sugar; whisk vigorously for 1-2 minutes until smooth and glossy.
- Add the egg and vanilla extract to the sugar mixture; whisk until fully combined.
- Gently fold the dry ingredients into the wet mixture until just combined, ensuring some flour streaks remain.
- Incorporate the chocolate chips, folding carefully until evenly distributed; do not overmix.
- Use a large cookie scoop to portion the dough onto the prepared baking sheet; leave space between scoops.
- Bake cookies for 12-15 minutes, until edges are golden brown but centers are still soft.
- Once out of the oven, press a few extra chocolate chips into the tops and sprinkle with flaky sea salt.
- Let cookies cool on the baking sheet for 5 minutes before transferring to a wire rack to cool completely.