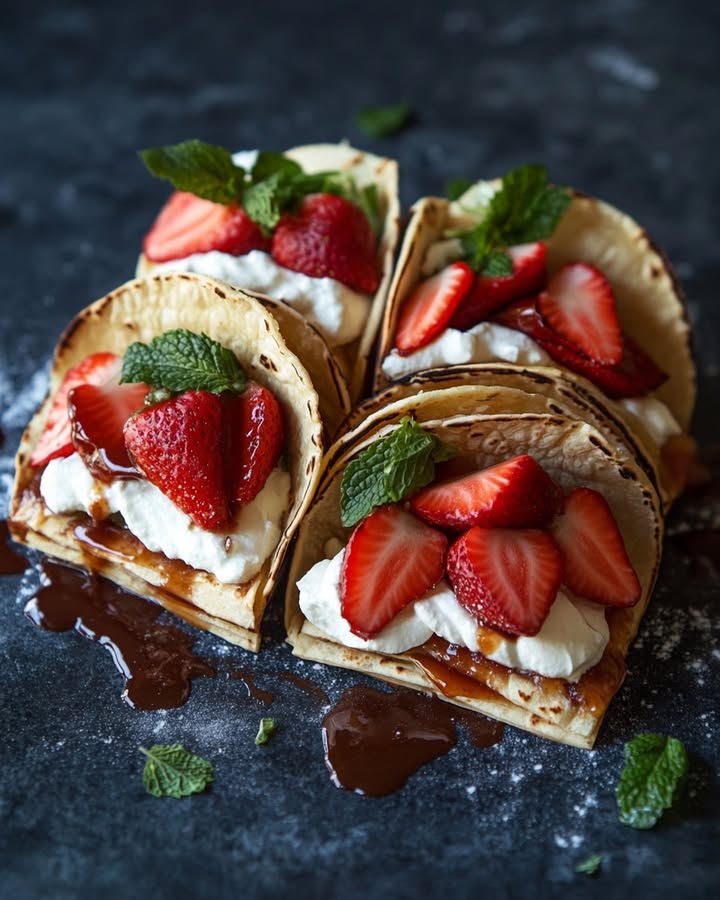
Cheesecake Tacos: The Dessert Mashup Your Party Needs
I have a confession. My family is obsessed with Taco Tuesday. So much so, that one birthday, my daughter asked, “Can we have tacos… but for dessert?” That simple, silly question sparked a kitchen experiment that’s now a legendary request at our house. We’re talking about Cheesecake Tacos, friends. Imagine the buttery, cinnamon-kissed crunch of a graham cracker taco shell, stuffed with the creamiest, dreamiest cheesecake filling you can pipe, and topped with a sweet, glossy strawberry topping. It’s playful, it’s incredibly delicious, and it’s about to be your new favorite way to serve dessert.
From a Silly Question to a Sweet Sensation
The story of this recipe is pure kitchen fun. While tacos have deep roots in Mexican culture and cheesecake dates back to ancient Greece, this fusion is a purely modern, American-born delight. It lives in the wonderful world of “dessert nachos” and “churro ice cream sandwiches.” I tested versions with pre-made taco shells (too savory!), with just sugar on the shells (not enough flavor!), until we landed on the graham cracker coating. That was the “aha!” moment. It gives you that classic cheesecake crust feel in every single bite of the taco shell. It bridges the gap between the familiar and the fantastically fun.
Why This Cheesecake Taco Recipe is a Guaranteed Hit
You’ll fall in love with this recipe for so many reasons. First, the wow factor is off the charts. People see them and their faces light up. Second, they’re surprisingly simple to make. The shells are just doctored-up tortillas! Third, the mix of textures is pure magic: crispy shell, creamy, fluffy filling, and juicy strawberry topping. It’s a full sensory experience that’s both handheld and elegant. Perfect for anyone who loves a dessert that’s as fun to eat as it is to make.
When to Whip Up These Sweet Tacos
These aren’t just for birthdays! They’re the ultimate party trick. Think:
- Summer BBQs & Potlucks: A stunning alternative to a heavy pie.
- Kids’ Parties & Sleepovers: Let them assemble their own!
- Girls’ Night or Bridal/Baby Showers: Dainty, delicious, and perfect for sharing.
- Cinco de Mayo or Taco Tuesday Dessert: The grand finale your meal deserves.
- Just Because You Want a Smile: Honestly, a Wednesday is reason enough.
Gathering Your Cheesecake Taco Ingredients
Let’s get everything ready! You likely have most of this in your pantry.
For the Amazing Graham Cracker Shells:
- 7 (9-inch) flour tortillas (the soft, burrito-size ones)
- 1 cup graham cracker crumbs (store-bought or crush your own)
- 1 tablespoon granulated sugar
- 1/4 cup butter, melted
For the Dreamy Cheesecake Filling:
- 8 ounces cream cheese, at room temperature
- 3 tablespoons cheesecake-flavor instant pudding mix (the dry powder)
- 1 cup heavy whipping cream, divided
- 1/4 cup powdered sugar
- 1 teaspoon pure vanilla extract
For the Simple Strawberry Topping:
- 1 cup chopped fresh strawberries
- 1/4 cup strawberry glaze (often found by the strawberries)
Easy Ingredient Swaps & Substitutions
No problem! This recipe is very flexible.
- No Strawberry Glaze? Use 1/2 cup strawberry pie filling or jam, warmed slightly.
- Different Fruit? Blueberries, raspberries, or a mix are fantastic. Use a matching glaze or just a drizzle of honey.
- No Pudding Mix? Increase powdered sugar to 1/2 cup and add a tiny squeeze of lemon juice for tang.
- Dairy-Free? Use plant-based cream cheese, coconut cream, and vegan butter.
Crafting Your Cheesecake Tacos: Step-by-Step
Step 1: Preheat and Prep
Start by getting your oven nice and hot. Set it to 400°F (200°C). This high heat is crucial for getting those shells crispy, not chewy. While it heats, grab a muffin tin. You’ll be using it in a clever way, so flip it upside down. The spaces between the cups are going to be our shell holders.
Step 2: Create the Taco Shell Blanks
Take your soft flour tortillas. Using a 3-inch round cookie cutter (a glass works in a pinch!), cut out 3 circles from each tortilla. Don’t waste the scraps—save them for a quick cinnamon sugar treat! Now, take a fork and gently prick each circle 6-7 times on each side. This little step is a pro tip to stop them from puffing up like pillows in the oven. You want crispy tacos, not tortilla balloons.
Step 3: The Graham Cracker Magic Coat
In a shallow bowl or plate, mix the graham cracker crumbs and that tablespoon of sugar. The sugar helps with browning and adds a lovely sweetness. Brush one side of a tortilla circle with the melted butter. Then, press it butter-side-down into the crumbs. Brush the top side with more butter, flip, and coat it. You want a beautiful, even, sandy coating on both sides. This is what makes the shell taste like cheesecake crust.
Step 4: Shape and Bake to Perfection
Carefully fold each coated circle in half. It will be pliable. Now, slide each folded shell into the space between two cups on your upside-down muffin tin. This holds the perfect taco shape while they bake. Pop the whole tin into the hot oven. Bake for about 11 minutes. Watch for the edges to turn a gorgeous golden brown. The smell of toasted graham crackers will fill your kitchen. Let them cool completely in the tin. They’ll crisp up as they cool.
Step 5: Whip Up the Fluffy Filling
While the shells cool, make the filling. In a large bowl, beat the room-temperature cream cheese until it’s completely smooth—no lumps! Add the dry pudding mix, 1/4 cup of the heavy cream, powdered sugar, and vanilla. Beat it all together until combined. Now, pour in the remaining 3/4 cup of heavy cream. Beat on medium-high speed for 2-3 minutes. Watch it transform into a thick, luscious, pipeable cloud. Chef’s tip: Chilling your bowl and beaters helps the cream whip up even faster and fluffier.
Step 6: Fill, Top, and Serve with Joy
Spoon your magnificent filling into a piping bag fitted with a star tip (like a Wilton 1M). If you don’t have one, just use a zip-top bag with the corner snipped off. Pipe generously into each cooled shell. For the topping, gently mix the chopped strawberries with the glaze in a small bowl. Spoon this bright, glossy topping over the creamy filling. Serve immediately and get ready for the happy sighs.
Your Cheesecake Taco Timeline
Here’s a quick look at the time commitment for this dessert adventure:
- Prep Time: 25 minutes (includes cutting, coating, and making filling)
- Cook Time: 11 minutes
- Cooling Time: 15-20 minutes (essential for crisp shells)
- Total Time: About 50 minutes
- Servings: Makes about 21 delicious tacos
My #1 Secret for the Best Cheesecake Tacos
My biggest secret? Let the filling CHILL before piping. After you make it, pop the bowl in the fridge for 20-30 minutes. This firms it up just enough so it holds a beautiful, high swirl in the shell and doesn’t droop. A cool, sturdy filling against a warm-weather crispy shell is the texture contrast of dreams.
A Fun Fact About Your Ingredients
Ever wonder about graham crackers? They were invented in the 1830s by a Presbyterian minister, Sylvester Graham. He believed a plain diet—including his unsweetened, whole wheat “Graham bread”—would curb unhealthy urges. I think he’d be equal parts shocked and delighted to see his creation coated in butter and sugar, holding cheesecake! Dessert history is full of fun twists.
Tools You’ll Need for Cheesecake Tacos
You don’t need fancy gear! Here’s your list:
- Standard 12-cup muffin tin
- 3-inch round cookie cutter or a glass
- Pastry brush (for the butter)
- Mixing bowls and electric mixer (hand or stand)
- Piping bag with a star tip (optional but pretty)
- Fork (for poking those shells!)
Storing Your Sweet Creation
These are truly best served fresh. The shells are at their peak crispness right after cooling. If you have leftovers, you need to store components separately. Place any unfilled taco shells in an airtight container at room temperature. They’ll stay crispy for 1-2 days.
The cheesecake filling should be kept in a sealed container in the refrigerator. It will stay fresh for up to 3 days. The strawberry topping is best used the same day but can be refrigerated for 1-2 days.
To serve leftovers, re-crisp the shells in a 350°F oven for 3-4 minutes, let them cool, then fill just before eating. I don’t recommend freezing the assembled tacos, as the shells will become soggy upon thawing.
Tips & Tricks for Taco Success
Room Temp is Key: Soft cream cheese blends smoothly without lumps.
Watch the Oven: All ovens vary. Check at 9 minutes to prevent burning.
Go Seasonal: Swap strawberries for spiced apples in fall or peaches in summer.
Kid Helper Alert: Let kids sprinkle the graham cracker crumbs or add the topping!
Presentation Ideas to Impress
- Stand them up in a bed of more graham cracker crumbs on a platter.
- Drizzle with extra strawberry glaze, chocolate sauce, or caramel.
- Add a tiny mint leaf on top for a pop of color.
- Serve on a tiered dessert stand for a real “wow” moment.
6 Delicious Cheesecake Taco Variations
1. Chocolate Dream: Add 2 tbsp cocoa powder to the filling. Use chocolate graham crackers for the shell and top with chocolate shavings.
2. Lemon Berry Bliss: Add 2 tbsp lemon juice and zest to the filling. Top with a mix of blueberries and raspberries.
3. Salted Caramel Pretzel: Use crushed pretzels instead of graham crackers on the shell. Fill with plain filling and drizzle with salted caramel sauce.
4. Piña Colada: Add 1/4 cup crushed pineapple (drained) and a tbsp of coconut extract to the filling. Top with toasted coconut.
5. Cookies & Cream: Use crushed Oreo cookies (filling and all) for the shell coating. Fold mini chocolate chips into the filling.
6. Pumpkin Spice (Fall Favorite): Add 1/3 cup pumpkin puree and 1 tsp pumpkin pie spice to the filling. Top with whipped cream and a sprinkle of cinnamon.
Common Mistakes to Avoid with Cheesecake Tacos
Mistake 1: Using Cold Cream Cheese
Cold cream cheese straight from the fridge will never get smooth. You’ll end up with a lumpy, grainy filling no matter how long you beat it. Tiny bits of cold cream cheese will hide in your bowl. Always plan ahead. Let the cream cheese sit on the counter for at least 30 minutes. It should feel soft to the touch. This ensures a velvety, perfectly smooth cheesecake filling every single time.
Mistake 2: Skipping the Fork Pokes
It seems like such a small, forgettable step. But those little fork holes are your secret weapon against puffing. Without them, steam gets trapped inside the tortilla as it bakes. This causes it to balloon up in the middle. You’ll get a round, hollow chip instead of a crispy taco shell with a perfect cavity for filling. Just take three seconds per side. Poke, poke, poke. It makes all the difference in the final shape.
Mistake 3: Filling the Shells While They’re Warm
The shells smell incredible when they come out of the oven. You’ll want to fill them right away. Please resist! A warm shell will instantly start to melt and wilt the delicate cheesecake filling. The result is a soggy, sad taco that falls apart in your hand. Patience is key. Let the shells cool completely in the muffin tin. They will continue to crisp up as they cool. A cool, crisp shell is the only safe home for your fluffy filling.
Mistake 4: Overbaking or Underbaking the Shells
Baking time is crucial. Underbaked shells will be chewy and bendy, not crisp. Overbaked shells will taste bitter and burn. Since oven temperatures can vary, start checking at the 9-minute mark. Look for a light golden brown color around the edges. The shells will also feel firmer to the touch. Remember, they crisp up more as they cool. It’s better to pull them out a minute early than a minute late. Trust the visual cue of golden edges.
Your Cheesecake Taco Questions, Answered
Can I make these cheesecake tacos ahead of time?
You can definitely prepare the components ahead of time! This is a great party strategy. Bake and completely cool the taco shells. Store them in an airtight container at room temperature for up to a day. Make the cheesecake filling and keep it covered in the fridge. Chop your strawberries, but wait to mix them with the glaze until just before serving to keep them fresh. When you’re ready to serve, pipe the cold filling into the crisp shells and add the topping. This keeps everything perfect.
What can I use if I don’t have a muffin tin for shaping?
No muffin tin? No problem! You have a few options. You can drape the folded shells over the bars of your oven rack, but watch them closely. You can also shape them by hanging them over the edge of a baking sheet or a loaf pan. Another method is to ball up some foil into two long logs and place them on a baking sheet, resting the folded shells against them. The goal is simply to create a space that holds the shell open in a taco shape while it bakes. Get creative with what you have!
Can I use corn tortillas instead of flour tortillas?
I don’t recommend it for this specific recipe. Corn tortillas have a different texture and flavor. They are more likely to crack when folded, even after warming. They also have a stronger, savory corn taste that competes with the sweet graham cracker and cheesecake flavors. Flour tortillas are more pliable, neutral in taste, and get beautifully crisp in the oven. They provide the perfect blank canvas for the sweet, buttery coating and rich filling.
Is the instant pudding mix absolutely necessary?
It’s not strictly necessary, but it does three wonderful things. First, it adds a familiar, sweet-tangy cheesecake flavor. Second, it helps stabilize the whipped cream filling, so it holds its shape longer. Third, it gives the filling a lovely, creamy body. If you don’t have it, you can substitute with 1/2 cup of powdered sugar total and a tiny squeeze of lemon juice. The texture might be slightly less firm, so chill it well before piping. But it will still be delicious.
My filling is too runny. How can I fix it?
A runny filling usually has two causes. First, your heavy cream or cream cheese might have been too warm when you whipped it. Second, you might have added all the liquid at once. To fix it, place the whole bowl of runny filling in the refrigerator for 30-60 minutes. Then, whip it again with your mixer. The cold helps it thicken up. If it’s still too soft, you can very gently fold in an extra tablespoon of the dry pudding mix to help absorb moisture and stiffen it.
Can I use a different fruit topping?
Absolutely! This is where you can get creative. Any soft, pie-friendly fruit works wonderfully. Try blueberries with a blueberry glaze or pie filling. Sliced peaches with a little caramel sauce is divine. A mix of raspberries and blackberries is beautiful and tangy. In the fall, sautéed apples with cinnamon are amazing. You can even skip the glaze and just use macerated fruit—toss chopped fruit with a tablespoon of sugar and let it sit until juicy. The possibilities are endless.
How do I get perfectly round tortilla circles?
If you don’t have a cookie cutter, look for a glass or a jar with a mouth that’s about 3 inches across. A standard wide-mouth canning jar ring works perfectly. Press it firmly into the tortilla and twist slightly. For the least amount of waste, start cutting from the edge of the tortilla. Try to nestle the circles close together. You can gather the scraps, re-roll them gently, and cut more circles, though they may not be as perfectly round. Those odd-shaped pieces make great chef’s snacks with cinnamon sugar!
Are cheesecake tacos served cold or at room temperature?
They are best served with the elements at different temperatures! The shell should be crisp and at room temperature. The cheesecake filling should be cool and creamy, straight from the fridge. The fruit topping can be cool or room temperature. This combination of textures and temperatures is what makes each bite so interesting. Never serve an assembled taco that has been sitting out for hours, as the shell will lose its crunch. Assemble just before you’re ready to eat and enjoy.
Can I make a healthier version of this dessert?
Yes, you can make some lighter swaps. Use low-fat cream cheese and a light or sugar-free instant pudding mix. For the shells, you can use a low-carb tortilla and spray them with cooking spray instead of butter before coating with crumbs. Use a sugar substitute in the graham cracker mix. For the topping, simply use fresh berries without the glaze, or sweeten them with a little honey or a sugar-free syrup. The filling will be less rich, but still tasty and fun.
What’s the best way to pipe the filling into the shells?
If you have a piping bag with a star tip, it’s easy and looks gorgeous. Hold the bag perpendicular to the shell, with the tip in the center of the shell’s cavity. Squeeze steadily and lift the tip slightly as you fill, moving from the center out to one edge, then back to the center and out to the other edge. If you don’t have a bag, a zip-top plastic bag is the next best thing. Spoon the filling into a corner, snip off about a 1/2-inch piece of the corner, and squeeze. You can also just spoon it in neatly for a more rustic look.
The Final Bite on Cheesecake Tacos
So there you have it—the story, the secrets, and the steps to the most fun dessert at the party. These Cheesecake Tacos prove that playing with your food is not just allowed, it’s encouraged. They bring together the comfort of cheesecake with the playful joy of a taco night. Whether you’re making them for a crowd or just as a special weekend treat, they are guaranteed to create smiles. So preheat that oven, soften that cream cheese, and get ready for a dessert that’s as memorable as it is delicious. Let me know how your taco night turns out!
Caramel Oreo Delight
Ingredients
Equipment
Method
- Preheat oven to 400°F (200°C) and prepare a muffin tin by flipping it upside down.
- Cut out 3 circles from each tortilla using a 3-inch round cookie cutter.
- Prick each circle multiple times with a fork to prevent puffing.
- Mix graham cracker crumbs and sugar in a shallow bowl. Brush one side of each tortilla circle with melted butter and coat it in the crumbs.
- Fold each coated circle in half and place them in the muffin tin spaces to shape them.
- Bake for about 11 minutes until golden brown. Let cool completely in the tin.
- Beat the cream cheese in a bowl until smooth, then mix in the dry pudding mix, 1/4 cup of heavy cream, powdered sugar, and vanilla.
- Add the remaining heavy cream and beat on medium-high speed for 2-3 minutes until thick and fluffy.
- Fill a piping bag with the cheesecake filling and pipe into cooled taco shells.
- Mix strawberries with the glaze and spoon over the filled tacos. Serve immediately.