Why You’ll Love These Garlic Parmesan Cheeseburger Bombs
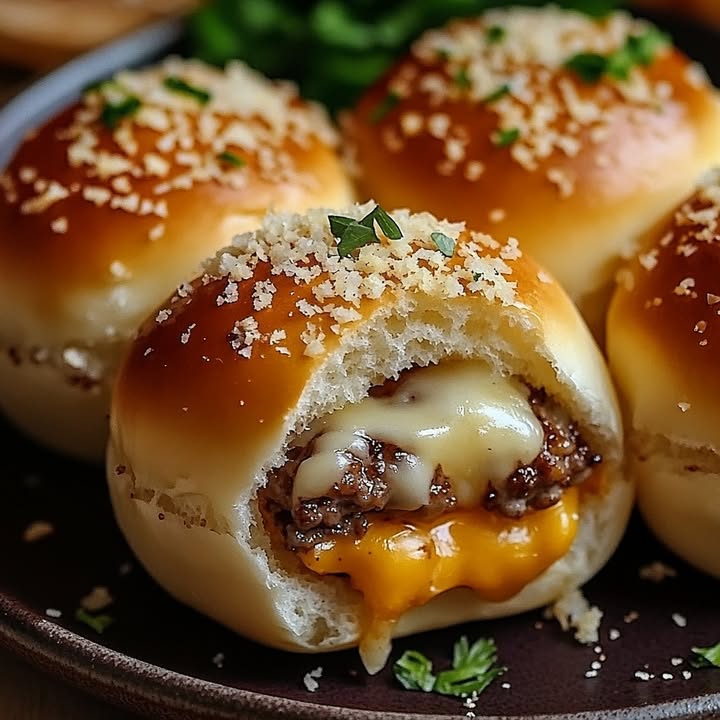
Picture this: a soft, golden ball of dough wrapped around juicy beef, gooey cheddar, and topped with garlic and parmesan. It’s like a cheeseburger decided to go undercover as a pastry and became way cooler in the process. I stumbled upon this recipe during a lazy Sunday afternoon when I wanted to impress my family without spending hours in the kitchen. Trust me, these Garlic Parmesan Cheeseburger Bombs are a crowd-pleaser. They’re easy to make, fun to eat, and taste so good that your guests will beg for seconds.
A Little Background on This Cheesy Delight
Growing up, I always loved cheeseburgers but never thought they could get an upgrade until I discovered stuffed bread recipes. The idea of wrapping savory fillings in dough has been around for ages, especially in Mediterranean and Middle Eastern cuisines. Think calzones or empanadas—just imagine those flavors combined with classic American cheeseburger ingredients. When I first made these bombs, I was skeptical. Would they hold together? Would they taste as amazing as I imagined? Spoiler alert: they did. And now, this dish is a staple at our family gatherings.
Why You’ll Fall Head Over Heels for This Recipe
These Garlic Parmesan Cheeseburger Bombs are a flavor explosion. Juicy beef, melty cheddar, and aromatic garlic come together in every bite. Plus, they’re versatile—you can tweak the spices or add toppings to suit your taste. What makes them stand out is how simple they are to prepare. Even if you’re not a pro in the kitchen, you can whip these up with ease. And because they’re halal-friendly, they’re perfect for sharing with everyone.
Perfect Occasions to Make These Bombs
Whether it’s game night, a backyard BBQ, or just a casual dinner with friends, these cheeseburger bombs fit right in. They’re also a hit at potlucks or holiday parties. Kids love them, adults rave about them, and they’re great for feeding a crowd. Plus, they’re handheld, which means no plates or forks needed—just grab and enjoy!
Ingredients for Garlic Parmesan Cheeseburger Bombs
Here’s what you’ll need to create these mouthwatering treats:
- 500 g of halal ground beef
- 1 finely chopped onion
- 100 g of grated cheddar cheese
- 1 pack of pre-made pizza dough (or homemade if you’re feeling fancy)
- 2 cloves of minced garlic
- 50 g of grated parmesan cheese
- 1 egg (for egg wash)
- Salt and pepper to taste
Substitution Options
Not a fan of beef? Swap it out for lamb, chicken, or even plant-based meat alternatives. If you’re dairy-free, try vegan cheese instead of cheddar and skip the parmesan. For the dough, gluten-free pizza dough works just fine. Want more heat? Add diced jalapeños or red pepper flakes to the filling.
Step 1: Preparing the Filling
Start by browning the ground beef in a skillet over medium heat. Break it into small pieces with a wooden spoon while cooking. Once it’s no longer pink, stir in the chopped onion and cook until softened. Season generously with salt, pepper, and any other spices you love. Remove from heat and let it cool slightly before mixing in half of the grated cheddar. This step ensures the filling stays moist and flavorful. Pro tip: Don’t rush the cooling process—it prevents the dough from tearing later.
Step 2: Assembling the Bombs
Preheat your oven to 375°F (190°C). Roll out the pizza dough and cut it into equal-sized circles using a cookie cutter or glass rim. Place a spoonful of the beef mixture in the center of each circle, then top with a pinch of cheddar. Fold the edges of the dough over the filling and pinch them tightly to seal. Arrange the bombs seam-side down on a baking sheet lined with parchment paper. Brush each bomb with an egg wash for that beautiful golden finish.
Step 3: Adding the Finishing Touches
Sprinkle minced garlic and grated parmesan generously over the tops of the bombs. This combo adds a rich, savory aroma that will have everyone drooling before they even hit the table. Bake the bombs for 20–25 minutes, or until the dough is puffed and golden brown. As they bake, your kitchen will fill with the irresistible scent of garlic and melted cheese—a true sensory experience.
Timing
This recipe is quick and straightforward. Prep time takes about 20 minutes, including browning the beef and assembling the bombs. Cooking time is roughly 25 minutes, and there’s no resting time required. From start to finish, you’ll have these bombs ready in under an hour.
Chef’s Secret
For extra juiciness, mix a splash of Worcestershire sauce into the beef mixture. It adds depth and enhances the umami flavor without overpowering the dish.
Extra Info
Fun fact: Cheddar cheese originated in England and was named after the village of Cheddar in Somerset. Today, it’s one of the most popular cheeses worldwide, making it the perfect choice for recipes like these cheeseburger bombs.
Necessary Equipment
You won’t need anything fancy here. A skillet, rolling pin, cookie cutter or glass, baking sheet, and parchment paper are all you need. If you don’t have a rolling pin, a clean wine bottle works too!
Storage Tips
Leftovers? Lucky you! Store the cooled bombs in an airtight container in the fridge for up to three days. To reheat, pop them in the oven at 350°F (175°C) for about 10 minutes to keep the dough crisp. Microwaving works in a pinch, but the texture might soften slightly.
If you want to freeze them, do so before baking. Place the assembled bombs on a tray, freeze until solid, then transfer to a freezer bag. When ready to serve, bake directly from frozen, adding a few extra minutes to the cooking time.
For long-term storage, label the bags with the date to ensure freshness. These bombs are freezer-friendly for up to three months.
Tips and Advice
To take these bombs to the next level, serve them with dipping sauces like ranch, marinara, or spicy aioli. Another trick is to use freshly grated cheese instead of pre-shredded—it melts better and tastes creamier.
Presentation Ideas
Serve the bombs on a rustic wooden board for a cozy vibe, or arrange them on a platter surrounded by fresh herbs like parsley or basil for a pop of color. Garnish with extra parmesan shavings for a gourmet touch.
Healthier Alternatives
Looking to lighten up the recipe? Here are six variations:
- Lean Beef Option: Use 90% lean ground beef to reduce fat content.
- Veggie-Filled: Add finely chopped spinach or zucchini to the beef mixture for extra nutrients.
- Whole Wheat Dough: Swap regular pizza dough for whole wheat to boost fiber intake.
- Low-Carb Style: Use almond flour-based dough or wrap the filling in lettuce leaves.
- Vegan Version: Replace beef with lentils or chickpeas and use dairy-free cheese.
- Herb-Infused: Mix dried oregano or thyme into the dough for added flavor without extra calories.
Common Mistakes to Avoid
Mistake 1: Overstuffing the Bombs
Overloading the dough with filling can cause it to burst open during baking. Stick to about 1–2 tablespoons of filling per bomb to ensure they stay intact. Pro tip: Seal the edges firmly and press gently to secure.
Mistake 2: Skipping the Egg Wash
The egg wash gives the bombs their signature golden glow. Without it, they may look pale and unappetizing. Always brush lightly but evenly for best results.
Mistake 3: Undercooking the Beef
Raw beef inside the bombs is a big no-no. Make sure the beef is fully cooked before assembling. Breaking it into small pieces helps it cook evenly.
FAQ
Can I make these ahead of time?
Absolutely! Assemble the bombs, cover them, and refrigerate for up to 24 hours before baking. They’re perfect for meal prep.
Are these suitable for vegetarians?
With a few tweaks, yes! Substitute the beef with plant-based protein and use vegan cheese for a vegetarian version.
How do I prevent the dough from sticking?
Use parchment paper or lightly grease the baking sheet. Dusting your hands with flour while handling the dough also helps.
What’s the best way to reheat leftovers?
Reheat in the oven at 350°F (175°C) for 10 minutes to maintain the dough’s texture. Avoid microwaving if possible.
Can I use store-bought garlic butter instead of fresh garlic?
Yes, but fresh garlic offers a brighter flavor. If using garlic butter, spread it sparingly to avoid overpowering the dish.
Do I have to use cheddar cheese?
Nope! Feel free to experiment with mozzarella, Monterey Jack, or even blue cheese for a different twist.
Why is my dough tough?
Overworking the dough can make it tough. Handle it gently and avoid rolling it too thin.
Can I bake these in a muffin tin?
Yes! Grease the tin well and place one bomb in each cup. This method helps them hold their shape.
How many servings does this recipe make?
This recipe yields about 12–15 bombs, depending on the size of your dough circles.
What sides pair well with these bombs?
A crisp green salad, roasted veggies, or sweet potato fries complement the richness of the bombs beautifully.
Final Thoughts
There you have it—your guide to mastering Garlic Parmesan Cheeseburger Bombs. Whether you’re hosting a party or simply craving something indulgent, this recipe delivers. With its irresistible flavors and easy prep, it’s bound to become a favorite. So grab your ingredients, roll up your sleeves, and get ready to wow your taste buds. Happy cooking!
Garlic Parmesan Cheeseburger Bombs
Ingredients
Equipment
Method
- Brown the ground beef in a skillet over medium heat, breaking it into small pieces while cooking.
- Stir in the chopped onion and cook until softened; season with salt and pepper.
- Remove from heat and mix in half of the grated cheddar; let it cool slightly.
- Preheat your oven to 375°F (190°C).
- Roll out the pizza dough and cut it into equal-sized circles.
- Place a spoonful of the beef mixture in the center of each circle and top with a pinch of cheddar.
- Fold the edges of the dough over the filling and pinch them tightly to seal.
- Arrange the bombs seam-side down on a baking sheet lined with parchment paper.
- Brush each bomb with an egg wash.
- Sprinkle minced garlic and grated parmesan on top.
- Bake for 20–25 minutes until puffed and golden brown.