Who Says Leftovers Can’t Be Luxurious? Meet Your New Favorite Snack!
Have you ever stared at last night’s roast chicken and mashed potatoes, wondering how to give them a delicious second act? I know I have, especially on busy weeknights. That’s how these incredible Chicken and Potato Croquettes came to be in my kitchen. They are the ultimate comfort food hack—crispy, golden, and packed with flavor. They turn simple leftovers into something my whole family fights over. Trust me, once you try these, you might just start planning extra chicken and potatoes just to make them!
A Little Story Behind These Crispy Bites
Croquettes are a global comfort food, found from Spain to Japan. The idea is genius: bind leftovers, coat them, and fry them into a perfect bite. My version is a cozy, American-friendly take. I remember the first batch I made for a football Sunday. My husband thought I’d spent hours in the kitchen. His shocked face when I said it was mostly leftovers was priceless! This recipe honors the traditional “waste not, want not” spirit but makes it utterly irresistible for a modern, fun meal.
Why You’ll Absolutely Adore This Recipe
You will love this recipe because it’s a triple threat: easy, affordable, and downright delicious. It solves the leftover dilemma in the most satisfying way. The outside fries up to a shatteringly crisp golden brown, while the inside stays creamy and savory. They are perfect for little hands and big appetites alike. Plus, you can prep them ahead of time. It’s a recipe that makes you look like a kitchen superstar with minimal effort.
The Best Times to Whip Up These Croquettes
These croquettes are the life of the party, no matter the party! They are a superstar appetizer for game day gatherings or potlucks. I love serving them as a fun dinner with a simple side salad. They’re also fantastic for kid-approved lunches or a cozy “breakfast-for-dinner” option with a fried egg on top. Anytime you need a guaranteed crowd-pleaser, this is your recipe.
Gathering Your Ingredients
Here’s what you’ll need to create this magic. The beauty is in its simplicity!
- 2 cups cooked chicken, shredded
- 2 cups mashed potatoes
- 1/2 cup breadcrumbs plus extra for coating
- 1/4 cup grated Parmesan cheese
- 1 egg, beaten
- 1 tablespoon chopped parsley
- Salt and pepper, to taste
- Vegetable oil, for frying
No Stress Substitutions
Don’t have an ingredient? No problem! Cooking should be flexible.
- Chicken: Leftover turkey or even canned, drained tuna works great.
- Breadcrumbs: Use panko for extra crunch, or crushed crackers.
- Parmesan: Any hard, grated cheese like Pecorino Romano or Asiago.
- Parsley: Try chives, dill, or a pinch of dried Italian seasoning.
- Frying: For a lighter version, bake at 400°F (200°C) for 20-25 minutes, flipping halfway.
Let’s Get Cooking: Your Step-by-Step Guide
Step 1
Grab a large mixing bowl. Add your shredded chicken, mashed potatoes, breadcrumbs, Parmesan, and parsley. Now, season generously with salt and pepper. I love using my clean hands for this part. Squish and mix everything together until it’s fully combined. You’ll see the mixture change into a uniform, slightly sticky dough. The smell of the Parmesan and parsley is already amazing. Pro tip: If your mixture feels too wet to hold shape, add a tablespoon more breadcrumbs. If it’s too dry, a tiny splash of milk or broth helps.
Step 2
Time to shape! Scoop about two tablespoons of the mixture into your hands. Roll it into a ball, then gently form it into a small oval or round patty. Place them on a plate or baking sheet. Aim for even sizes so they cook at the same rate. This is a fun step to get kids involved. Seeing the little golden logs lined up is so satisfying.
Step 3
Now, set up your coating station. Place the beaten egg in one shallow bowl and extra breadcrumbs in another. Take each croquette and give it a gentle dip in the egg, letting the excess drip off. Then, roll it in the breadcrumbs until it’s fully coated. Press lightly so the crumbs adhere. This double layer is what creates that perfect, crispy shell. A crisp shell is the secret to a great croquette.
Step 4
Pour about 1/2 inch of vegetable oil into a large, heavy-bottomed pan. Heat it over medium heat. To test if it’s ready, drop a tiny breadcrumb in; it should sizzle gently. Carefully add a few croquettes, but don’t crowd the pan. Fry for 3-4 minutes per side. Watch them turn a deep, gorgeous golden brown. The sizzle and the aroma will make your mouth water. Chef’s tip: Keep the oil at a steady heat. Too hot, and they brown too fast while staying cold inside. Too cool, and they get oily.
Step 5
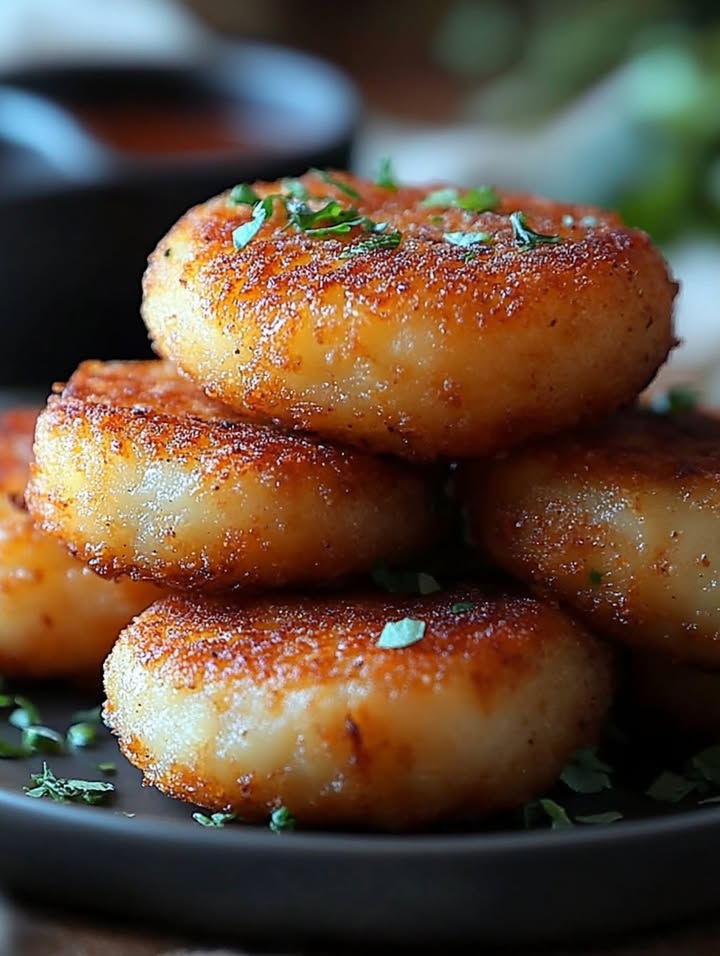
Once beautifully golden, use a slotted spoon to transfer the croquettes to a plate lined with paper towels. This drains any excess oil. Let them rest for just a minute. This quick rest helps the interior set so they don’t fall apart when you bite in. Serve them warm and watch them disappear. They are fantastic with a dollop of ranch, marinara, or even a spicy aioli for dipping!
Your Croquette Timeline
Good food doesn’t have to take all day.
- Prep Time: 15 minutes
- Cooking Time: 10-12 minutes (per batch)
- Total Time: About 30 minutes
My Secret for the Crispiest Croquettes
Here is my little secret: chill the shaped croquettes for 20 minutes before coating and frying. This firms up the mixture, so they hold their shape perfectly in the hot oil. It also prevents the coating from sliding off. It’s a simple trick that makes a huge difference in getting that professional, crisp finish every single time.
A Fun Fact for Your Next Dinner Party Chat
Did you know the word “croquette” comes from the French verb “croquer,” which means “to crunch”? It’s the perfect name! These little bites are all about that satisfying crispy sound with every bite. It’s a texture people have loved for centuries, proving that a great crunch is always in style.
What You’ll Need in Your Kitchen
No fancy gadgets required!
- Large mixing bowl
- Two shallow bowls (for egg and breadcrumbs)
- Large, heavy-bottomed skillet or frying pan
- Slotted spoon or spatula
- Plate lined with paper towels
Storing Your Delicious Creations
If you have any leftovers (a rare event in my house!), let them cool completely first. Don’t cover them while they’re warm, as that creates steam and makes them soggy. Once cool, they can be stored in an airtight container in the fridge.
They will keep well in the refrigerator for up to 3 days. For longer storage, they freeze beautifully. Arrange the uncooked, coated croquettes on a baking sheet and freeze until solid. Then transfer them to a freezer bag. They can be fried directly from frozen, just add a couple extra minutes to the cooking time.
To reheat, the oven or air fryer is your best friend. Reheat at 375°F (190°C) for about 10-15 minutes, or until hot and crispy again. This method helps revive the crunch much better than a microwave.
My Best Tips for Croquette Success
- Use cold mashed potatoes. They bind the mixture better than warm ones.
- Season the mixture well. Taste a tiny bit before shaping to check for salt.
- Keep your oil temperature consistent. Use a thermometer if you have one; aim for 350-375°F (175-190°C).
- Let the oil heat back up between batches for even cooking.
Make Them Look as Good as They Taste
Presentation is the final touch of love!
- Serve on a wooden board with small bowls of different dipping sauces.
- Skewer mini croquettes with toothpicks for easy party eating.
- Plate them over a bed of fresh greens for a lovely color contrast.
- Sprinkle with a little extra chopped parsley or Parmesan right after frying.
Mix It Up! 6 Tasty Variations to Try
Love the base recipe? Here are some fun twists to keep things exciting.
- Buffalo Chicken Croquettes: Mix 1/4 cup of buffalo sauce into the chicken mixture. Serve with blue cheese dressing for dipping. The spicy, tangy kick is a game-day winner.
- Cheesy Jalapeño Popper Style: Add 1/2 cup of shredded cheddar and 2 finely chopped jalapeños (seeds removed) to the mix. The gooey cheese and mild heat are irresistible.
- Thanksgiving Leftover Croquettes: Swap chicken for shredded turkey and add a spoonful of stuffing and a pinch of sage. It’s a full holiday meal in one bite.
- Mediterranean Twist: Use lamb or beef instead of chicken. Add a teaspoon of dried mint and oregano. Serve with tzatziki sauce for a fresh, herby flavor.
- Corn and Zucchini Veggie Croquettes: Skip the meat! Add 1/2 cup of cooked corn and 1/2 cup of grated, squeezed-dry zucchini. They are light, sweet, and perfect for vegetarians.
- Sweet Potato and Black Bean: Use mashed sweet potatoes and 1 cup of mashed black beans instead of chicken and white potatoes. Season with cumin and chili powder for a southwestern flair.
Common Mistakes to Avoid
Mistake 1: Using Runny Mashed Potatoes
This is the biggest culprit for croquettes that fall apart. If your mashed potatoes are too wet or creamy, your mixture will be a sticky mess. It won’t hold its shape in the hot oil. Always start with thick, cold mashed potatoes. If they seem loose, mix in an extra tablespoon or two of breadcrumbs to absorb the moisture. Your mixture should be moldable, not soupy.
Mistake 2: Skipping the Double Coating
Some people try to save a step by just mixing breadcrumbs into the batter. This gives you a soft exterior, not a crisp one. The egg wash acts as a glue for the outer layer of crumbs. Taking the time to properly dip in egg, then coat in crumbs, is non-negotiable. It creates that delightful crunchy shell that makes a croquette so special. Don’t rush this step.
Mistake 3: Frying at the Wrong Temperature
Frying in oil that’s too cool makes the croquettes absorb oil like a sponge. They become greasy and heavy. Frying in oil that’s too hot burns the outside before the inside heats through. Look for a steady, gentle sizzle when you add the croquette. A kitchen thermometer is a great help here. Aim for 350-375°F. If you see smoke, your oil is way too hot.
Mistake 4: Overcrowding the Pan
It’s tempting to cook them all at once, but patience is key. Adding too many croquettes drops the oil temperature quickly. This leads to uneven cooking and oily food. Fry in small batches, giving each piece enough space to float freely. This keeps the oil hot and ensures every croquette gets that perfect, even golden-brown color on all sides.
Your Croquette Questions, Answered
Can I bake these croquettes instead of frying?
Absolutely, you can bake them for a lighter option. Preheat your oven to 400°F (200°C). Place the coated croquettes on a baking sheet lined with parchment paper. Lightly spray or brush them with oil. This helps them brown. Bake for 20-25 minutes, flipping them halfway through the cooking time. They won’t get quite as uniformly crispy as frying, but they will be delicious and much lower in fat. It’s a great method for everyday meals.
What kind of breadcrumbs work best?
Plain, fine, dry breadcrumbs are perfect for mixing into the filling. For the outer coating, you have options. Fine breadcrumbs give a classic, even crunch. Panko breadcrumbs create a lighter, flakier, and extra-crispy texture that many people love. You can even use crushed plain crackers or cornflakes for a different flavor and crunch. I often use panko for the coating because I adore that airy, shattering crisp it provides.
How can I tell when the oil is hot enough?
The easiest test is the “breadcrumb test.” Tear off a tiny piece of bread or a few breadcrumbs and drop it into the oil. If it sinks to the bottom with little activity, the oil is too cold. If it immediately sizzles, floats, and turns golden brown within 30-45 seconds, the oil is just right. If it burns or darkens instantly, the oil is too hot. You want a steady, active sizzle when you add the food, not a violent splatter.
Can I use canned chicken?
Yes, canned chicken works in a pinch! Make sure to drain it very, very well. You might even want to pat it dry with a paper towel. Because canned chicken can have a softer texture and a saltier taste, adjust your added salt carefully. It’s a fantastic pantry-staple solution for when you need to whip up a quick snack or meal without any planning ahead.
How do I keep them warm for a party?
The best way is to keep them in a warm oven. After frying and draining, place them on a wire rack set over a baking sheet. Put them in an oven set to the “warm” setting or as low as it will go, usually around 200°F (95°C). This keeps them warm and, most importantly, keeps the underside crispy. Don’t cover them with foil, as the trapped steam will make them soggy. They can hold this way for about 30 minutes.
What are the best dipping sauces?
These croquettes are a blank canvas for so many sauces! My family’s favorites are: Ranch dressing (a classic), marinara sauce (like a mozzarella stick), honey mustard (sweet and tangy), and a spicy aioli (mix mayo with garlic and sriracha). For a fancy touch, try a quick lemony herb mayo or a smoky barbecue sauce. Offering a couple of choices lets everyone customize their bite.
Can I make them gluten-free?
Easily! For the breadcrumbs inside the mixture, use certified gluten-free breadcrumbs or crushed gluten-free crackers. For the coating, use the same gluten-free crumbs or a gluten-free panko-style product. Always double-check that your Parmesan cheese and any other packaged ingredients are labeled gluten-free, as some brands use anti-caking agents that contain wheat. The recipe works perfectly with these swaps.
Why did my croquettes fall apart while frying?
This usually happens for one of three reasons. First, the mixture was too wet (see Mistake 1). Second, the oil wasn’t hot enough, so they sat and soaked instead of sealing quickly. Third, they were moved or flipped too early. When you first add them to the oil, let them cook undisturbed for at least 2 minutes. This allows a firm crust to form. Then you can gently flip them. A proper crust is their armor.
Can I prepare these ahead of time?
You can prepare them several hours or even a day in advance! Assemble the croquettes through the coating step (Step 3). Then, instead of frying, place them in a single layer on a plate or baking sheet. Cover tightly with plastic wrap and refrigerate. The chilling actually helps them firm up. When you’re ready, fry them directly from the fridge. You may need to add an extra 30-60 seconds to the cooking time since they start cold.
Are they kid-friendly?
They are a huge hit with kids! The familiar flavors of chicken and potatoes in a fun, handheld, dippable form is a total win. You can even get them involved in the shaping and coating process. For picky eaters, you can keep the seasoning simple. Serve them with ketchup or their favorite dip. It’s a great way to use leftovers and get them to eat a homemade snack they’ll love.
Go Forth and Create Crispy Magic!
So there you have it. Your guide to turning humble leftovers into something truly extraordinary. These Chicken and Potato Croquettes are more than just a recipe. They are a reminder that a little creativity in the kitchen brings big joy to the table. They’ve saved my dinner plans and wowed my guests more times than I can count. I hope they become a beloved, reliable favorite in your home too. Now, go raid your fridge and get frying. Your crispy, golden reward awaits!
Cajun Garlic Pasta
Ingredients
Equipment
Method
- In a large mixing bowl, combine shredded chicken, mashed potatoes, breadcrumbs, Parmesan, and parsley. Season with salt and pepper and mix until combined.
- Scoop about two tablespoons of the mixture into your hands, shape into ovals or patties, and place on a plate.
- Set up a coating station with beaten egg and extra breadcrumbs. Dip each croquette in the egg and coat with breadcrumbs.
- Heat 1/2 inch of vegetable oil in a large skillet over medium heat. Fry the croquettes for 3-4 minutes per side until golden brown.
- Use a slotted spoon to transfer the croquettes to a plate lined with paper towels to drain excess oil. Serve warm.