The Ultimate Maple Pecan Cheesecake Bites: A Bite-Sized Blast of Fall
You know that feeling when you crave cheesecake but don’t want to commit to a giant slice? Or when you need a dessert that’s as pretty as it is delicious for a party? That’s where my Maple Pecan Cheesecake Bites come in! I perfected this recipe after one too many autumn potlucks. I wanted to bring something that screamed “cozy sweater weather” in one delightful mouthful. These little gems are the answer. They combine the rich, creamy dreaminess of cheesecake with the warm, nutty sweetness of maple and toasted pecans. Trust me, your family will beg you to make them all season long!
From Big Pie to Perfect Bite: A Cheesecake Story
Cheesecake has been around since ancient Greece, but the creamy, baked version we adore is an American classic. The magic of the mini cheesecake, though, is a more recent win for home bakers. It solves the classic problem: no slicing mess, perfect portion control, and they look fantastic on a platter. I gave this tradition a cozy twist by folding in pure maple syrup. Maple isn’t just for pancakes! Its deep, caramel-like notes pair perfectly with the buttery crunch of pecans. It’s a flavor combo that feels both rustic and elegant. This modern take lets everyone enjoy a complete “cheesecake experience” in just a few blissful bites.
Here’s Why You’ll Fall in Love With This Recipe
Why will this become your new favorite dessert? Let me count the ways! First, they are incredibly easy to make. No water bath, no cracks to stress over. Second, the flavor is out of this world. The maple isn’t just in the filling; it’s in the crust and the gooey topping for a triple punch of goodness. Third, they are the ultimate crowd-pleaser. One batch makes a dozen, so you can easily double it for a big group. And finally, they make you look like a pastry pro with minimal effort. What’s not to love?
Perfect Occasions for Your Cheesecake Bites
These bites are almost too versatile! I love making them for Thanksgiving as a lighter dessert option after a huge meal. They’re also perfect for holiday cookie exchanges (they always stand out!), book club meetings, baby showers, or just a Tuesday night when you deserve a treat. Pack them in a cute box, and they become a wonderful homemade gift for neighbors, teachers, or friends. They truly shine at any autumnal or winter gathering where you want to spread a little sweet, homemade joy.
Gathering Your Ingredients for Maple Pecan Cheesecake Bites
Using simple, quality ingredients makes all the difference here. Let’s get your mise en place ready!
- For the Crust: 3/4 cup graham cracker crumbs, 1/4 cup ground pecans, 2 tablespoons brown sugar, 2 tablespoons pure maple syrup, 2 tablespoons unsalted butter (melted), 1 teaspoon vanilla extract.
- For the Cheesecake Filling: 16 ounces (2 blocks) cream cheese (softened), 1 large egg, 2 tablespoons sour cream, 1/4 cup pure maple syrup, 1/2 cup light brown sugar, 1 teaspoon vanilla extract, 2 tablespoons cornstarch.
- For the Topping: 1 cup chopped pecans, 2/3 cup pure maple syrup.
Smart Swaps: Substitution Options
No worries if you’re missing an item or have dietary needs! Here are some easy swaps:
- Graham Cracker Crumbs: Try crushed digestive biscuits, ginger snaps, or even vanilla wafers for a different crust flavor.
- Pecans: Walnuts are a great nutty alternative. For a nut-free version, simply omit them from the crust and use extra graham crumbs. Skip the topping or use toasted oats or a sprinkle of cinnamon sugar.
- Pure Maple Syrup: Please try to use the real stuff! The flavor is unparalleled. In a pinch, a good maple-flavored syrup can work, but the taste won’t be as rich.
- Sour Cream: Plain Greek yogurt or full-fat plain yogurt works beautifully.
- For a Vegan Version: Use vegan cream cheese, a flax egg, vegan butter, and ensure your sugar is certified vegan.
Let’s Get Baking: Your Step-by-Step Guide
Put on some music, and let’s make your kitchen smell amazing. Here’s exactly how to build these perfect mini cheesecakes.
Step 1: Prepare the Crust
First, let’s create that crunchy, flavorful foundation. In a medium bowl, combine the graham cracker crumbs, ground pecans, and brown sugar. Pour in the melted butter, maple syrup, and vanilla. Stir it all together with a fork until the mixture looks like wet sand and holds together when you pinch it. That sticky-sweet maple aroma will start to fill your kitchen already! Pro tip: If your mixture seems too dry, add just a half teaspoon more of melted butter or maple syrup. You want it to be packable.
Step 2: Bake the Crust
Now, grab your mini muffin pan. I highly recommend using paper liners for easy removal. Use a small spoon or a tamper to firmly press about a tablespoon of the crust mixture into the bottom of each cup. Really pack it down so it forms a solid base. Pop the pan into your preheated 350°F (175°C) oven for just 10-12 minutes. This short bake sets the crust and gives it a deeper, toasty flavor. Once done, let the pan cool on a rack while you make the filling. The crust will firm up as it cools.
Step 3: Make the Filling
This is where the magic happens! In a large bowl, beat your softened cream cheese with an electric mixer until it’s completely smooth and creamy. No lumps allowed! Then, add in the egg, sour cream, maple syrup, brown sugar, vanilla, and cornstarch. Beat on medium-low speed just until everything is perfectly blended and silky. Chef’s tip: Don’t overbeat! Once you add the egg, mixing too much can incorporate extra air, which might cause the tops to puff and crack while baking. Just mix until you no longer see any streaks.
Step 4: Assemble and Bake the Filling
Lower your oven temperature to 325°F (165°C). Carefully spoon or pipe the luscious cheesecake filling over your cooled crusts, filling each cup almost to the top. Slide the pan back into the oven. Bake for 17-20 minutes. The edges will look set, but the very centers should still have a slight, gentle jiggle when you tap the pan. This is crucial for a creamy texture! Once baked, let them cool completely in the pan on a wire rack. Patience is key here—they need to firm up.
Step 5: Make the Topping
While the bites cool, whip up that irresistible maple pecan topping. In a small bowl, simply stir together the chopped pecans and the 2/3 cup of maple syrup. That’s it! The syrup will thicken slightly as it sits, creating a glossy, sticky coating on the pecans. For an extra layer of flavor, you can toast your pecans in a dry skillet for a few minutes before chopping them. It makes the nutty flavor sing!
Step 6: Assemble the Cheesecake Bites
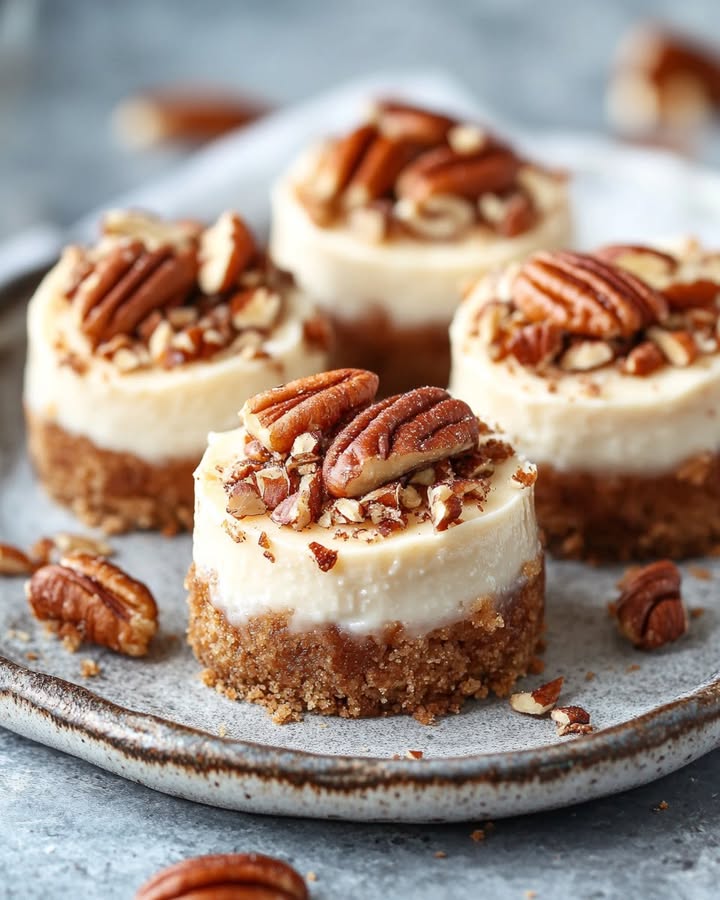
The grand finale! Once your cheesecake bites are completely cool, it’s time to dress them up. Use a spoon to place a generous amount of the maple pecan mixture on top of each bite. Let that beautiful syrup drizzle down the sides. The contrast of the creamy white filling, golden crust, and shiny brown topping is simply gorgeous.
Step 7: Serve and Enjoy!
You did it! Gently lift the cheesecake bites from the pan (the liners make this a breeze). Arrange them on a lovely plate or cake stand. These Maple Pecan Cheesecake Bites are best enjoyed at room temperature or slightly chilled. Pour yourself a coffee or a glass of milk, and savor every decadent bite. Be prepared for recipe requests!
Your Maple Cheesecake Bites Timeline
Good things take a little time, but this recipe is wonderfully efficient.
- Prep Time: 20 minutes (active fun in the kitchen)
- Cook Time: 30 minutes (total baking for crust and filling)
- Cooling Time: 1 hour (the hardest part—waiting!)
- Total Time: About 1 hour 50 minutes
- Servings: 12 perfect mini cheesecake bites
The Chef’s Secret for Perfect Mini Cheesecakes
My absolute best trick is all about temperature. Make sure your cream cheese, egg, and sour cream are all at true room temperature before you start the filling. This is non-negotiable! Room-temperature ingredients blend together smoothly and easily, preventing lumps and avoiding overmixing. This simple step is the secret to the creamiest, dreamiest, crack-free cheesecake filling every single time.
A Sweet & Syrupy Fact
Did you know it takes about 40 gallons of sap from a sugar maple tree to make just one gallon
Necessary Equipment for Success
You don’t need fancy tools! Here’s what I use:
- Mini muffin pan (for 12 bites)
- Mini muffin paper liners (lifesavers for easy cleanup and serving)
- Two mixing bowls (one medium, one large)
- Electric hand mixer or stand mixer
- Measuring cups and spoons
- Spatula
- Wire cooling rack
Keeping Your Bites Fresh: Storage Tips
These cheesecake bites store beautifully, making them a fantastic make-ahead dessert. Once assembled and topped, place them in a single layer in an airtight container. They will keep happily in the refrigerator for 3-4 days. The crust may soften slightly over time, but the flavor will still be fantastic.
For longer storage, you can freeze them! Place the un-topped and cooled cheesecake bites on a baking sheet and flash-freeze until solid. Then, transfer them to a freezer-safe bag or container. They can be frozen for up to 2 months. Thaw overnight in the fridge and add the fresh maple pecan topping right before serving for the best texture.
I do not recommend storing them at room temperature for more than a couple of hours due to the dairy content. Always keep them chilled until just before you’re ready to enjoy them.
Tips and Advice from My Kitchen to Yours
- Softening Cream Cheese Fast: Forgot to take the cream cheese out? Remove the foil packaging and microwave a block on a plate for 15-20 seconds. It should be soft but not melty.
- Even Crusts: Use a small, flat-bottomed shot glass or the back of a measuring spoon to press the crust down firmly and evenly in each cup.
- Clean Sides: For super neat bites, wipe any filling drips from the tops of the muffin liners before baking with a damp paper towel.
- Toasting Nuts: Toasting the pecans for the topping in a dry skillet for 5-7 minutes until fragrant adds a huge depth of flavor. Just let them cool before chopping.
Presentation Ideas to Wow Your Guests
- Dust the platter with a light sprinkle of cinnamon or cocoa powder before arranging the bites.
- Place each bite in a gold or patterned mini cupcake liner for a festive touch.
- Drizzle a little extra maple syrup in a zig-zag pattern over the plated bites just before serving.
- Serve on a bed of faux fall leaves or with a few real, clean pecan halves scattered around.
- Package them in a clear gift box tied with a ribbon for a thoughtful homemade present.
Mix It Up! 6 Delicious Recipe Variations
Love this base recipe? Try these fun twists!
- Chocolate Maple Bliss: Add 1/2 cup of melted and cooled semi-sweet chocolate to the filling. Use chocolate graham crackers for the crust.
- Pumpkin Spice Infusion: Fold 1/3 cup of pumpkin puree and a teaspoon of pumpkin pie spice into the cheesecake filling for a fall classic.
- Salted Caramel Swirl: Drop a small dollop of store-bought or homemade salted caramel sauce onto each filled cup. Use a toothpick to swirl it gently before baking.
- Gingersnap Crunch: Swap the graham crackers for crushed gingersnap cookies. The spicy snap pairs amazingly with maple.
- Bourbon Maple Glaze: Add a teaspoon of bourbon to the maple pecan topping for a grown-up kick. So good for holiday parties!
- Lighter Greek Yogurt Bites: Replace half the cream cheese with thick, full-fat Greek yogurt. The result is a slightly tangier, lighter filling that’s still creamy.
Common Mistakes to Avoid for Perfect Bites
Mistake 1: Using Cold Ingredients
This is the number one cause of lumpy cheesecake filling. Cold cream cheese will never blend smoothly with other ingredients, no matter how long you mix. You’ll end up with tiny bits of cream cheese throughout. Always plan ahead and let your dairy ingredients sit on the counter for at least an hour before you start baking. Your filling will be glossy and lump-free.
Mistake 2: Overbaking the Filling
It’s tempting to bake until the tops are completely firm, but that leads to dry, dense cheesecake. The key to creamy perfection is that slight jiggle in the center. Remember, the bites will continue to set up as they cool. Pull them from the oven when the edges look puffed and set, but the middle still moves a bit like Jell-O when you gently shake the pan.
Mistake 3: Skipping the Cornstarch
You might think you can leave out the cornstarch, but it plays a vital role. It acts as a stabilizer, helping the filling set properly without needing super high heat. This prevents cracks and gives you that perfect, sliceable-yet-creamy texture. Don’t skip it! If you’re out, all-purpose flour can work in a pinch, but cornstarch is preferred.
Mistake 4: Adding the Topping Too Soon
Patience is a virtue with cheesecake. If you spoon that sticky maple pecan topping onto warm cheesecake bites, it will sink in, making the tops soggy and melting the beautiful layers. You must let the bites cool completely on a rack first. Wait until they are at room temperature or even chilled from the fridge before adding the final crowning glory.
Frequently Asked Questions (FAQ)
Can I make this recipe in a regular muffin pan?
Absolutely! You can make larger cheesecake “cupcakes” in a standard muffin pan lined with paper liners. You will need to roughly double the amount of crust mixture per cup and increase the baking time for the filling. Start checking at 22-25 minutes for the jiggle test. The recipe will yield about 6-8 regular-sized cheesecakes instead of 12 mini bites.
Why did my cheesecake bites crack on top?
Cracks usually happen from overmixing or overbaking. When you beat too much air into the filling, that air expands in the oven and then collapses, causing cracks. Also, baking them too long at too high a temperature makes them dry out and pull apart. To avoid this, mix the filling just until combined after adding the egg, and always bake at the lower temperature (325°F) until just set with a wobbly center.
Can I use imitation maple syrup?
I strongly recommend using 100% pure maple syrup for the best flavor. Imitation “pancake syrup” is mostly corn syrup with artificial flavors and colors. It won’t give you that rich, deep, caramel-like maple taste that makes these bites so special. The pure syrup is the star of the show, so it’s worth the splurge for this recipe.
How far in advance can I make these?
These are a fantastic make-ahead dessert. You can bake and cool the cheesecake bites (without the topping) up to 2 days in advance. Keep them covered in the fridge. Make the maple pecan topping separately and store it in a jar in the fridge. Assemble them by adding the topping an hour or two before your event for the best presentation and texture.
Can I make these gluten-free?
Yes, very easily! Simply ensure your graham cracker crumbs are from a certified gluten-free brand, or use another gluten-free cookie crumb like gluten-free shortbread or ginger snaps. All the other main ingredients are naturally gluten-free, but always double-check labels on things like vanilla extract and cornstarch to be safe.
My filling sunk in the middle after baking. What happened?
A slight dip in the center is normal, but a dramatic sink usually means the filling was underbaked, or there was too much moisture. Make sure you are using full-fat, brick-style cream cheese, not the spreadable kind in a tub. Also, ensure you are adding the cornstarch, as it helps stabilize the structure. Finally, do the jiggle test—the very center should be jiggly, but not liquid.
Are these too sweet?
The beauty of this recipe is the balance. The cheesecake filling itself is rich and creamy with a subtle sweetness from the brown sugar and maple. The tang from the cream cheese and sour cream cuts through the sweetness. The topping is definitely sweet, but it’s a concentrated layer on top of the less-sweet filling. If you’re concerned, you can slightly reduce the brown sugar in the filling by a tablespoon or two.
What’s the best way to get them out of the pan?
Paper liners are your best friend! I never skip them. They make removal foolproof and keep the bites looking neat. If you don’t use liners, you must generously grease the muffin cups and run a thin knife around the edge of each cheesecake after they are completely cool. Even then, removal can be tricky, so I highly recommend the liners for stress-free serving.
Can I use a different nut?
Of course! While pecans are classic with maple, walnuts are a wonderful substitute with a slightly more earthy flavor. You could also use chopped hazelnuts or almonds. For a nut-free version, just leave the nuts out of the crust and replace them with more graham crumbs. For the topping, consider using toasted coconut flakes or a simple maple glaze instead.
Do I need to refrigerate leftovers?
Yes, you must store any leftovers in the refrigerator. Because these contain dairy (cream cheese, sour cream), they are perishable and should not be left at room temperature for more than 2 hours. Keep them in an airtight container in the fridge for 3-4 days for the best quality and food safety.
Well, my friend, you are now fully equipped to create a batch of these unforgettable Maple Pecan Cheesecake Bites. They are more than just a dessert; they’re little bites of comfort and celebration. Whether you’re baking them for a special occasion or just a cozy night in, I know they’ll bring smiles. Don’t forget to share them (or maybe just keep a few hidden for yourself!). Happy baking, and enjoy every sweet, nutty, creamy bite!
Maple Pecan Cheesecake Bites
Ingredients
Equipment
Method
- Preheat the oven to 350°F (175°C).
- In a medium bowl, combine graham cracker crumbs, ground pecans, and brown sugar.
- Add melted butter, maple syrup, and vanilla, stirring until the mixture resembles wet sand.
- Pack about a tablespoon of the crust into each cup of a mini muffin pan lined with paper liners.
- Bake for 10-12 minutes, then cool on a rack.
- Lower the oven temperature to 325°F (165°C).
- In a large bowl, beat softened cream cheese until smooth, then add egg, sour cream, maple syrup, brown sugar, vanilla, and cornstarch. Mix until blended.
- Spoon the cheesecake filling into the cooled crusts, filling each almost to the top.
- Bake for 17-20 minutes, until the edges are set with a slight jiggle in the center, then let cool completely.
- For the topping, stir together chopped pecans and maple syrup in a small bowl.
- Once cool, add the maple pecan topping generously to each cheesecake bite.
- Serve and enjoy!