The Ultimate Cheesy Taco Delight: More Than Just a Taco!
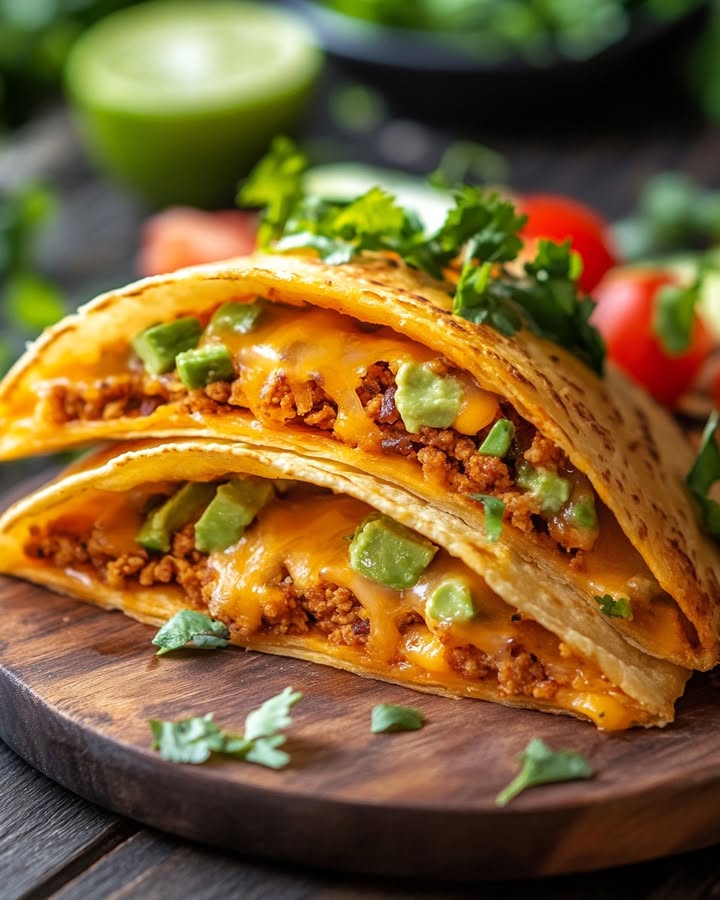
Let me tell you about the day my kitchen smelled like a fiesta. My kids were begging for tacos, but I wanted something extra special. So, I decided to create a version where the cheese wasn’t just a topping—it was baked right inside a crispy shell with the savory beef. The result? These Loaded Cheesy Pocket Tacos. They’re not your average Tuesday night taco. They’re a fun, handheld feast bursting with flavor from every corner. Think of them as a taco’s best friend who brought all the party snacks.
A Little Story Behind Our Cheesy Pocket Creation
Tacos have a wonderful history, from traditional Mexican street food to the crispy shells we know in the U.S. My version is a playful, modern take. I love the idea of a “pocket”—it holds everything together so neatly! The inspiration came from wanting a taco that was hearty enough for a main dish but still fun to eat with fingers. It mixes the classic taco seasoning we all love with a double cheese punch for maximum comfort food joy.
Why You’ll Absolutely Love This Cheesy Taco Recipe
This recipe is a winner for so many reasons. First, the flavor is incredible. Savory beef, melted cheddar and mozzarella, and fresh toppings create a perfect balance. Second, it’s surprisingly simple. If you can brown meat and bake shells, you can make this. Third, it’s a crowd-pleaser. Kids love the cheesy pockets, adults love the robust taste, and everyone loves how satisfying it is. It’s a guaranteed hit that makes you look like a kitchen superstar.
Perfect Occasions for Your Cheesy Taco Delight
This dish shines at so many events! It’s perfect for family game nights, casual weekend dinners, or even a fun-themed party. I’ve served them at potlucks where they were the first thing to disappear. They’re also great for feeding a hungry teen crowd after sports. Honestly, any time you want a meal that’s both delicious and delightfully messy in the best way, these tacos are your answer.
What You’ll Need for Your Cheesy Taco Delight
Gathering your ingredients is the first step to flavor success. Here’s everything you’ll need:
- 1 lb ground beef
- 1/2 cup onion, chopped
- 2 cloves garlic, minced
- 1 packet taco seasoning
- 1 cup shredded cheddar cheese
- 1 cup shredded mozzarella cheese
- 4 large taco shells
- 1 cup diced tomatoes
- 1 cup shredded lettuce
- 1/2 cup sliced black olives
- 1/2 cup guacamole
- 1/2 cup sour cream
Swapping Things Out: Easy Substitutions
Don’t have something? No worries! Cooking is about creativity.
- Ground Beef: Swap with ground turkey or chicken for a lighter option.
- Cheese: Use pepper jack for a spicy kick or a Mexican blend for convenience.
- Taco Shells: Soft tortillas work too! Just fold them into pockets.
- Toppings: Use pickled jalapeños instead of olives, or salsa instead of diced tomatoes.
Crafting Your Loaded Cheesy Pocket Tacos
Follow these steps for the most delicious results. Enjoy the process!
Step 1: Get Your Ooven Ready
Start by preheating your oven to 375°F (190°C). This ensures it’s hot and ready when your stuffed tacos need to bake. A properly preheated oven is key for getting that perfect, crispy shell and bubbly cheese. While it warms up, you can get all your other ingredients lined up on the counter. Pro tip: Use an oven thermometer if you’re unsure about your oven’s true temperature. It makes a big difference!
Step 2: Build Your Flavor Base
In a large skillet, cook the ground beef, chopped onion, and minced garlic over medium heat. Watch as the beef turns from pink to a lovely brown and the onions become soft and translucent. The aroma of garlic and onion cooking with beef is just heavenly. Once cooked, drain any excess fat to keep your mixture from being greasy. This creates a clean, flavorful base for all your seasonings.
Step 3: Season the Beef
Now, stir in your packet of taco seasoning. Follow the package instructions, usually adding a bit of water and simmering. This step transforms your plain beef into that iconic, spicy-savory taco flavor we all crave. The mixture will thicken and become wonderfully fragrant. Make sure to stir it well so every bit of beef gets coated in that delicious seasoning.
Step 4: The Cheesy Magic Moment
This is my favorite part! Add the shredded cheddar and mozzarella cheeses to the hot beef mixture. Stir gently as the cheeses melt, creating a glorious, gooey, cheesy beef filling. The mozzarella adds a creamy melt, while the cheddar brings its sharp, tangy flavor. You’ll see it all come together into one cohesive, irresistible filling. Chef’s tip: Let the mixture cool slightly before stuffing shells to prevent them from getting soggy too fast.
Step 5: Stuff Those Shells
Carefully spoon the cheesy beef mixture into each taco shell. Pack them well, but don’t overfill to the point of bursting. You want a generous pocket that can still hold its shape. I like to use a spoon and my fingers to gently press the filling in. Place each stuffed shell on a baking sheet, standing them up like little boats ready for their oven voyage.
Step 6: Bake to Perfection
Slide your baking sheet into the preheated oven. Bake for 10-12 minutes. You’ll see the shells turn a deeper golden brown and become extra crisp. The cheese inside will become bubbly and fabulous. That combination of a crispy shell with a molten cheesy center is what makes these pocket tacos so special. Keep an eye on them so they don’t over-brown.
Step 7: The Grand Finale of Toppings
Remove your tacos from the oven. Now, top them with the fresh, colorful toppings! Add diced tomatoes, shredded lettuce, black olives, guacamole, and sour cream. This creates a beautiful contrast of temperatures and textures—hot and crispy meets cool and creamy. It’s like decorating your own little edible masterpiece.
Step 8: Serve and Celebrate
Serve these loaded beauties immediately. That’s when the shells are at their crispiest and the cheese is at its most luscious. Gather everyone around and enjoy the happy, messy, delicious moment. These Loaded Cheesy Pocket Tacos are meant to be eaten with joy and maybe a few napkins!
Timing Your Cheesy Taco Delight
Here’s a quick breakdown of the time investment:
- Prep Time: 15 minutes
- Cooking Time: 20 minutes (including baking)
- Total Time: About 35 minutes
It’s a meal you can make on a busy weeknight without stress.
My Chef’s Secret for the Best Tacos
My secret trick is to lightly toast the empty taco shells in the oven for 2-3 minutes before filling them. This gives them an extra-sturdy base that resists sogginess from the hot filling. It’s a small step that makes a huge difference in the final crunch!
A Fun Fact About Your Ingredients
That packet of taco seasoning is a flavor powerhouse! It typically contains a blend of chili powder, cumin, paprika, and oregano. Cumin, in particular, is a key spice that gives that warm, earthy flavor we associate with tacos. It’s been used for thousands of years, so you’re adding a bit of ancient history to your modern dinner!
Equipment You’ll Need
You don’t need fancy tools. Just gather:
- A large skillet
- A baking sheet
- A cutting board and knife
- Spoons for mixing and filling
- Measuring cups (or just eyeball it like I sometimes do!)
Storing Your Leftover Cheesy Taco Delight
For the best quality, eat these tacos right away. The shells lose their crispiness over time. If you have leftover filling, store it separately in an airtight container in the refrigerator. It will keep well for up to 3 days. Reheat it in a skillet or microwave for a quick taco fix.
You can store the assembled but unbaked tacos for a short time. Prep them, but don’t add fresh toppings. Cover the baking sheet and refrigerate for up to an hour before baking. This is great for planning ahead for a party.
Never freeze assembled tacos. The shells will become mushy. However, the cooked beef and cheese filling freezes beautifully for up to 2 months. Thaw it in the fridge and reheat when you’re ready for another taco night. For information on general food shelf life and safety, trusted resources are always helpful.
Tips and Advice for Success
- Use lean ground beef to minimize the fat you need to drain.
- Shred your own cheese from a block. It melts better than pre-shredded because it doesn’t have anti-caking agents.
- Let the baked tacos cool for just a minute before adding cold toppings like guacamole and sour cream.
- Have all your topping ingredients chopped and ready before you start cooking. It makes assembly a breeze.
Presentation Tips to Impress
Make your table look festive!
- Serve on a bright, colorful platter.
- Place toppings in individual small bowls so everyone can customize.
- Add a sprinkle of fresh cilantro or lime wedges on the side for a fresh pop.
- For a party, set up a “taco station” with the baked pockets and all the toppings.
Healthier & Fun Variations to Try
Love this idea? Try these twists!
- Southwest Chicken Pocket Tacos: Use shredded seasoned chicken instead of beef. Add corn and black beans to the filling.
- Vegetarian Black Bean Delight: Replace beef with seasoned black beans and rice. Keep all the cheese and toppings!
- Spicy Pepper Jack Pockets: Use only pepper jack cheese for a kick. Add diced jalapeños to the beef mixture.
- Low-Carb Lettuce Wraps: Skip the shell. Use large lettuce leaves as your “pocket” and fill them with the cheesy beef.
- Breakfast Tacos: Fill shells with scrambled eggs, cheese, and cooked sausage. Top with salsa and sour cream.
- Seafood Taco Twist: Use seasoned shrimp or fish instead of beef. Top with a lime-cilantro crema.
If you enjoy these hearty, cheesy dishes, you might also love our Creamy Garlic Butter Chicken and Rice Skillet for another comforting meal. For a lighter but flavor-packed option, our Spicy Honey Lime Chicken Thighs are a winner. One-pot wonders are always a hit, like this One Pot Lemon Herb Chicken and Orzo. And for a wholesome bowl meal, try this Mediterranean Chicken and Couscous Bowl.
Common Mistakes to Avoid
Mistake 1: Using Wet Filling in Cold Shells
Adding the hot, cheesy beef mixture to cold, room-temperature shells can make them soggy fast. The moisture from the filling softens the shell before it even hits the oven. To avoid this, let your filling cool for a few minutes after mixing in the cheese. Or, use my chef’s secret: give the empty shells a quick pre-toast in the oven to strengthen them.
Mistake 2: Overstuffing the Taco Shells
We want them loaded, but not bursting! If you pack too much filling, the shell can crack open during baking. The filling might spill out and burn on the baking sheet. Aim for a generous mound that stays within the natural curve of the shell. A little room at the top is good for adding fresh toppings later.
Mistake 3: Skipping the Fat Drain
Not draining the excess fat after cooking the beef can lead to a greasy filling. This grease can also drip in the oven and smoke. Always drain your cooked beef and onion mixture in the skillet. Use a spoon to press it against the side of the pan, or carefully tilt the pan and let the fat run out.
Mistake 4: Baking on a Flat Sheet Without Support
If you just lay the stuffed shells flat on a baking sheet, they can tip over, spill, or bake unevenly. To keep them upright, you can nestle them against each other. Or, create little foil supports to hold them in place. This ensures even crisping and keeps your precious filling inside.
Mistake 5: Adding Cold Toppings Too Early
Putting cold guacamole and sour cream on the tacos right out of the oven can make them melt quickly and run everywhere. It also cools the hot taco too fast. Let the baked pockets sit for just 2-3 minutes. This slight cooling helps the shell set and prevents the cold toppings from instantly wilting.
This Loaded Cheesy Pocket Taco recipe is just one of many fantastic main dish ideas you can explore for any night of the week.
Frequently Asked Questions
Can I make these tacos ahead of time?
You can prepare the beef and cheese filling ahead of time. Store it in the fridge for up to two days. When ready to eat, reheat the filling, stuff your shells, and bake. I don’t recommend assembling the full tacos and then storing them before baking. The shells will absorb moisture from the filling and get soft. For the best crispiness, bake them fresh. The toppings should always be added fresh right after baking.
What can I use instead of taco seasoning packets?
You can easily make your own taco seasoning! It’s simple and lets you control the flavor. A basic mix includes: 1 tbsp chili powder, 1 1/2 tsp cumin, 1 tsp paprika, 1 tsp salt, 1/2 tsp garlic powder, 1/2 tsp onion powder, and a pinch of oregano. Mix this with your cooked beef and add about 1/4 cup of water. Simmer until thickened. Homemade seasoning often tastes fresher and is less salty than some packets.
My shells cracked while baking. What went wrong?
Cracking usually happens from overstuffing or from shells that were already slightly dry or brittle before baking. Make sure not to pack the filling too tightly. Also, check your shells before using them. If they seem fragile, handle them gently. Baking them for the exact time (10-12 mins) is key. Over-baking can also make them too hard and prone to cracking. A slight crack isn’t a disaster—it just means extra flavor might escape!
Can I use soft tortillas instead of hard shells?
Absolutely! Soft tortillas make a great alternative. You would fold them like a quesadilla or burrito pocket instead of standing them up. After filling, you can bake them on a sheet, or even pan-fry them for a crisp exterior. The result will be more like a cheesy stuffed soft taco. It’s delicious, just a different texture experience. Both are wonderful options.
How do I keep the tacos crispy for longer after baking?
The crispiness is best right after baking. To prolong it, avoid adding wet toppings directly onto the shell for too long. Eat them promptly. If you must store them, keep the components separate. The baked shell itself, without filling, can stay crisp in a dry place. But once filled and topped, they will soften. It’s the nature of the dish, so enjoy them fresh!
Is there a way to make this recipe spicier?
Yes, there are many ways to add heat! You can use a spicy taco seasoning packet. Add diced jalapeños or serrano peppers to the beef while it cooks. Mix in some cayenne pepper or hot sauce with the seasoning. Use pepper jack cheese instead of mozzarella. Top them with a spicy salsa or crema. Adjust the heat level to your family’s taste. Start small and add more as you like.
Can I use a different type of meat?
Ground turkey or chicken are excellent lighter substitutes. They cook the same way. Just be sure to season them well as they can be milder than beef. You could also use seasoned shredded chicken or pork. Even plant-based ground “meat” crumbles work well for a vegetarian version. The key is to have a well-seasoned, flavorful base for the cheese to cling to.
What are the best cheeses to use for melting?
Cheddar and mozzarella are great for this recipe. Cheddar gives strong flavor, mozzarella gives superb melt. Other good melting cheeses include Monterey Jack, Colby, or a pre-mixed Mexican cheese blend. Avoid very hard cheeses like Parmesan as a main melting cheese. They don’t melt into the same creamy texture. You can sprinkle them on top for extra flavor after baking.
How can I make this recipe more kid-friendly?
Kids love these tacos! To make them even more kid-friendly, use a mild taco seasoning. You can skip the onions or garlic if your kids are picky. Let them choose their own toppings from a selection. Sometimes, kids just want cheese and meat inside! You can also make smaller pockets using smaller taco shells or even cut soft tortillas into mini sizes.
Do I have to bake them? Can I just microwave them?
Baking is crucial for the crispy shell and integrated hot filling. Microwaving will heat the filling, but it will leave the shell soggy and soft. It won’t have that delightful contrast of textures. If you’re in a huge rush, you could microwave the filling separately and then add it to room-temperature shells. But for the true Cheesy Taco Delight experience, the oven step is worth it.
Your New Go-To Taco Night Recipe
I hope you fall in love with these Loaded Cheesy Pocket Tacos as much as my family did. They turn a simple taco into a fun, hearty, and utterly satisfying meal. The mix of crispy shell, molten cheese, savory beef, and fresh toppings is just magic. It’s a recipe that feels special but is easy enough for any night. Give it a try, add your own twist, and most importantly, enjoy the delicious mess! Happy cooking!
Cheesy Taco Delight
Ingredients
Equipment
Method
- Preheat oven to 375°F (190°C).
- In a large skillet, cook the ground beef, chopped onion, and minced garlic over medium heat until the beef is browned and the onions are translucent.
- Drain any excess fat from the beef mixture.
- Stir in the taco seasoning and follow package instructions to simmer.
- Add the shredded cheddar and mozzarella cheeses to the hot beef mixture and stir until melted.
- Spoon the cheesy beef mixture into each taco shell, packing them well.
- Place the stuffed taco shells on a baking sheet and bake for 10-12 minutes until golden and crispy.
- Remove from the oven and top the tacos with diced tomatoes, shredded lettuce, black olives, guacamole, and sour cream.
- Serve immediately and enjoy!