The Ultimate Celebration Cake: A Love Letter to Cheesecake with Strawberries and Cream
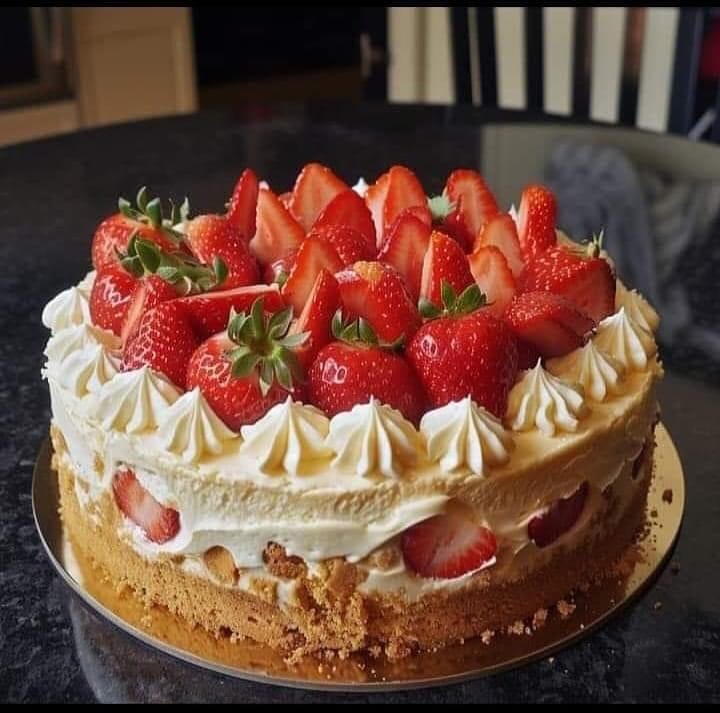
Have you ever had a dessert so good it made you close your eyes for a second? That’s my goal with this recipe. This Cheesecake with Strawberries and Cream isn’t just a cake. It’s an experience. Imagine a fluffy vanilla cake, a rich and creamy cheesecake layer, fresh strawberry filling, and luscious cream cheese frosting all in one bite. It’s the dessert you make when you want to say “I love you” with sugar and butter.
A Little Slice of History
Cheesecake itself is ancient, dating back to Greece. The classic American version is baked and dense. The strawberry shortcake is a summer picnic hero. This recipe is my modern mash-up of those two beloved classics. I wanted a show-stopping layer cake that combined the best parts of my favorites. After a few (delicious) trials, this masterpiece was born for my daughter’s graduation. It was the star of the party, and everyone begged for the recipe. Now, it’s my go-to for every big celebration.
Why This Recipe Will Steal Your Heart
This cake is special for so many reasons. The textures are magical. You get the soft crumb of the cake, the smooth, dense cheesecake, the jammy strawberries, and the fluffy frosting. It’s a symphony in your mouth! It also looks incredibly impressive but is built from simple, familiar components. Each layer can be made ahead, so you’re not stuck in the kitchen all day. Most importantly, the flavor is pure joy. It’s sweet, tangy, fruity, and utterly irresistible.
When to Bake This Beautiful Cake
This cake is meant for moments you want to remember. It’s perfect for:
- Birthdays: Swap the strawberries for the birthday person’s favorite fruit.
- Anniversaries or Valentine’s Day (it’s pink and full of love!).
- Mother’s Day or Father’s Day brunch.
- Summer cookouts and potlucks.
- Just because it’s Tuesday and you deserve a treat!
The Dream Team: Gather Your Ingredients
Here is everything you’ll need. I promise it’s all worth it!
For the Cake Layers:
- 2 1/2 cups of all-purpose flour
- 2 1/2 tsp. baking powder
- 1 cup (2 sticks) of unsalted butter, softened
- 2 cups of granulated sugar
- 4 large eggs
- 1 tsp. pure vanilla extract
- 1 cup of whole milk
For the Cheesecake Layer:
- 16 oz (two 8-oz blocks) full-fat cream cheese, softened
- 1 cup of granulated sugar
- 3 large eggs
- 1 tsp. pure vanilla extract
For the Strawberry Filling:
- 2 cups fresh strawberries, hulled and chopped
- 1/4 cup granulated sugar
- 1 tsp. cornstarch
- 1 tbsp. fresh lemon juice
For the Cream Cheese Frosting:
- 8 oz (one 8-oz block) full-fat cream cheese, softened
- 1/2 cup (1 stick) unsalted butter, softened
- 4 cups of powdered sugar
- 1 tsp. pure vanilla extract
- 2-3 tbsp. heavy cream or milk
Ingredient Swaps and Substitutions
No worries if you’re missing something! Here are some easy swaps:
- Flour: For a slightly denser cake, you can use cake flour.
- Dairy: You can use a neutral-flavored oil for the butter in the cake, but the flavor will change. For milk, any percent works.
- Fruit: Raspberries, blueberries, or a mix of berries work wonderfully instead of strawberries.
- Frosting: If you want a less sweet option, you can lightly sweeten whipped cream with powdered sugar and vanilla.
Let’s Bake! Step-by-Step Instructions
Step 1: Preheat and Prep
First, get your oven nice and hot at 350°F (175°C). This ensures even baking. Grease your cake pans and your springform pan for the cheesecake. I like to line the bottoms with parchment paper for an easy release. There’s nothing sadder than a beautiful layer stuck in the pan! Pro tip: A light coating of baking spray with flour works wonders.
Step 2: Bake the Cheesecake Layer
In a big bowl, beat the softened cream cheese until it’s completely smooth. No lumps allowed! Gradually beat in the sugar. Then, add the eggs one at a time, mixing well after each. Stir in the vanilla. Pour this creamy, pale yellow mixture into your prepared springform pan. Bake it for 40-45 minutes until the center is just set but still has a slight jiggle. Let it cool completely, then pop it in the fridge. This chilling step is non-negotiable for easy handling later!
Step 3: Make the Fluffy Cake Layers
Now, for the vanilla cake! In a medium bowl, whisk together your flour and baking powder. In your large mixing bowl, beat the softened butter and sugar until it’s light and fluffy. This should take about 3-4 minutes. The mixture will turn almost white. Add the eggs one at a time, then the vanilla. The kitchen will start to smell amazing. Now, alternate adding the flour mixture and the milk, starting and ending with the flour. Mix just until combined. Divide the thick, pale batter between your cake pans. Bake for 25-30 minutes until a toothpick comes out clean. Let them cool in the pans for 10 minutes, then turn them out onto a rack.
Step 4: Create the Strawberry Filling
While things are baking and cooling, let’s make the star filling. In a small saucepan, toss your chopped, vibrant red strawberries with the sugar, cornstarch, and lemon juice. The lemon juice brightens everything up. Cook this over medium heat, stirring often. The berries will break down and release their juices, and the mixture will bubble and thicken into a gorgeous, glossy jam. This takes about 8-10 minutes. Let it cool completely before assembling. Chef’s tip: For extra strawberry punch, stir in a few finely chopped fresh berries after it cools.
Step 5: Whip Up the Frosting
Time for the glue that holds this masterpiece together! In your clean mixing bowl, beat the softened cream cheese and butter together until perfectly smooth and combined. Gradually add the powdered sugar, about one cup at a time. The mixture will become thick and luscious. Beat in the vanilla. Finally, add the heavy cream, one tablespoon at a time, until you reach a spreadable consistency. You want it firm enough to hold the layers but soft enough to swoop beautifully.
Step 6: The Grand Assembly
This is the fun part! Place your first cake layer on your serving plate. Spread a thin layer of frosting over it—this is called a crumb coat. Carefully place your chilled cheesecake layer on top. Spread another layer of frosting over the cheesecake. Gently place the second cake layer on top. Now, frost the top and sides of the entire cake with the remaining frosting. Don’t worry about being perfect! Finally, create a little well or border on the top of the cake and pour in your cooled strawberry filling. Let it cascade over the edges a bit. It looks stunning and tastes even better.
Your Time Investment
This is a project cake, but the steps are simple. Here’s the breakdown:
- Prep Time: 45 minutes (gathering, measuring, mixing)
- Cook Time: 1 hour 15 minutes (total baking for all components)
- Cooling/Chilling Time: 4 hours (very important!)
- Total Time: About 6 hours
The Secret to Perfect Layers
Chef’s Secret: For absolutely clean slices, use a long, sharp knife dipped in very hot water. Wipe the blade dry between each cut. The heat slices through the cheesecake layer like a dream, giving you picture-perfect pieces with defined layers.
A Sweet Berry Fact
Did you know strawberries are the only fruit that wear their seeds on the outside? One average berry has about 200 tiny seeds! They’re also packed with vitamin C. So, you can absolutely tell yourself this cake has a healthy element.
Tools You’ll Need
- Stand mixer or handheld electric mixer
- Two 9-inch round cake pans
- One 9-inch springform pan
- Mixing bowls (various sizes)
- Whisk and rubber spatulas
- Measuring cups and spoons
- Small saucepan
- Cooling racks
- Offset spatula for frosting (makes it much easier!)
How to Store Your Masterpiece
Because this cake has a dairy-based cheesecake layer and fresh fruit, it must be stored in the refrigerator. Cover it loosely with plastic wrap or place it in a tall cake carrier. It will keep beautifully for up to 4 days.
For longer storage, you can freeze the unfrosted cake layers and the cheesecake layer separately. Wrap them tightly in plastic wrap and then foil. Thaw overnight in the fridge before assembling.
The strawberry filling is best made fresh, but you can make it a day ahead and store it covered in the fridge. Let any leftover frosted cake sit at room temperature for about 20 minutes before serving. This takes the chill off and lets all the flavors shine.
Tips and Advice for Success
- Room Temperature is Key: Always bring your cream cheese, butter, eggs, and milk to room temperature before starting. This ensures a smooth, lump-free batter and frosting.
- Don’t Overmix: Once you add the flour to the cake batter, mix just until you no longer see dry flour. Overmixing leads to a tough cake.
- Chill the Cheesecake: I can’t stress this enough. A well-chilled cheesecake layer is firm and much easier to handle when stacking.
Presentation Ideas to Wow Your Guests
- Garnish the top with a ring of whole fresh strawberries and a dusting of powdered sugar.
- Pipe extra frosting rosettes or dollops around the edge of the strawberry filling.
- Add a few mint leaves for a pop of green color.
- Serve each slice with a small pitcher of extra strawberry sauce on the side for drizzling.
- For a fun twist, use chocolate shavings or crushed graham crackers on the sides of the frosting.
Delicious Recipe Variations
Love the idea but want to switch it up? Try these six fantastic spins:
- Lemon Blueberry Bliss: Add 1 tbsp lemon zest to the cake batter. Use blueberries instead of strawberries for the filling. It’s bright and tangy.
- Chocolate Raspberry Dream: Swap 1/2 cup of cake flour for cocoa powder. Use raspberries in the filling. A chocolate lover’s paradise.
- Tropical Escape: Add 1 cup of toasted coconut to the cake batter. Use a mango and passion fruit filling instead of strawberry. Top with more toasted coconut.
- Cookies and Cream: Fold 1 cup of crushed Oreo cookies into the cake batter. Use a chocolate cream cheese frosting and skip the fruit filling.
- Pumpkin Spice Layer Cake: Add pumpkin pie spice to the cake batter. Make a pumpkin cheesecake layer by adding 1 cup of pumpkin puree and spices. Use a caramel drizzle instead of fruit.
- Mini Layer Cakes: Bake all the components in cupcake tins (adjust times). Assemble individual mini cakes in jars or as cupcakes for easy, personal servings.
Common Mistakes to Avoid
Mistake 1: Using Cold Ingredients
This is the biggest culprit for lumpy batter and frosting. Cold cream cheese and butter won’t blend smoothly with sugar. You’ll end up with tiny lumps that won’t bake out. Always plan ahead. Take your dairy and eggs out of the fridge at least an hour before you start baking. They should feel cool to the touch but not cold.
Mistake 2: Not Chilling the Cheesecake Enough
Impatience can ruin your layers. If the cheesecake layer is still warm or even just cool, it will be too soft. It can squish out the sides when you frost it or even crack. It needs to be firm and cold from the refrigerator. I always bake my cheesecake the day before. A full overnight chill is your best friend here.
Mistake 3: Overbaking the Cake Layers
A dry cake is a sad cake. Overbaking happens when you rely solely on the timer and don’t check the cake yourself. Ovens vary. Start checking at the 25-minute mark. Insert a toothpick into the center of the cake. It should come out with a few moist crumbs attached, not completely clean. The cake will also pull away slightly from the edges of the pan.
Mistake 4: Assembling with Warm Components
Warm cake or warm strawberry filling will melt your frosting into a runny mess. It will slide right off and make the layers soggy. Every single component must be completely cooled to room temperature before you start stacking. The cheesecake layer must be chilled. This ensures clean, stable layers and a beautiful final look.
Mistake 5: Over-Thinning the Frosting
It’s easy to add too much liquid to your cream cheese frosting. You want it spreadable, but not runny. If it’s too thin, it won’t hold the weight of the layers and will ooze out. Always add your cream or milk one tiny tablespoon at a time. Stop when it’s smooth and holds a peak. If it gets too soft, you can chill it for 20 minutes or add a bit more powdered sugar.
Your Questions, Answered
Can I use frozen strawberries for the filling?
Yes, you absolutely can! Frozen strawberries work perfectly well. There’s no need to thaw them first. Just add them frozen to the saucepan. You may need to cook the filling for a few extra minutes to cook off the extra liquid that gets released. The flavor is still fantastic, and it’s a great way to make this cake year-round.
Why did my cheesecake layer crack?
Cracking is common and usually happens from a temperature shock or overbaking. To prevent it, avoid opening the oven door during baking. Don’t overbeat the batter once the eggs are added, as this adds too much air. Most importantly, let the cheesecake cool gradually in the turned-off oven with the door cracked open for an hour after baking. Even if it cracks a little, don’t worry! The frosting will cover it completely.
Can I make any part of this cake ahead of time?
You can and should! This is a great make-ahead dessert. The cake layers can be baked, cooled, wrapped tightly in plastic wrap, and frozen for up to a month. The cheesecake layer can be baked and refrigerated for up to 3 days before assembling. The strawberry filling can be made 2 days ahead and kept in the fridge. The frosting can be made 1-2 days ahead and stored in an airtight container in the fridge. Let it come to room temperature and re-whip briefly before using.
What’s the best way to get clean slices?
Use my hot knife trick! Run a long, sharp knife under very hot tap water. Dry it off with a clean towel. Make your cut through the cake in one smooth, confident motion. The heat will glide through the cold cheesecake and frosting without dragging. Wipe the blade clean and reheat it for every single slice. It takes a moment longer, but the presentation is worth it.
My frosting is too runny. How can I fix it?
Don’t panic. Pop the entire bowl of frosting into the refrigerator for 20-30 minutes. The cold will firm up the butter and cream cheese. After chilling, give it a good mix with your mixer. If it’s still too soft, you can gradually add a little more powdered sugar, about a quarter cup at a time, until it reaches the right consistency. Be careful not to add too much, or it can become overly sweet.
Can I use a different size pan?
You can, but you’ll need to adjust the baking times. If you use 8-inch pans, the layers will be thicker and will need a few more minutes to bake through. The batter might also make a third thin layer. Using a 9×13 pan will turn this into a simpler sheet cake. Bake the cake until a tester comes out clean, and bake the cheesecake in a similar-sized pan until set. Just keep a close eye on the oven.
Is there a way to make this less sweet?
The cream cheese frosting is quite sweet, which balances the tang of the cheesecake and berries. To reduce sweetness, you can slightly reduce the sugar in the frosting by 1/2 to 1 cup. You can also use a lightly sweetened whipped cream instead of frosting. For the cake and cheesecake layers, I don’t recommend reducing the sugar, as it affects texture and browning.
How do I know when the cheesecake is done baking?
The cheesecake is done when the edges are set and puffed, but the center still has a slight wobble. It should look dry on top. If you gently jiggle the pan, about a 2-inch circle in the very center should jiggle like Jell-O. It will firm up as it cools. Overbaking is the main cause of cracking and a dry texture, so err on the side of underdone.
Can I use low-fat cream cheese?
I strongly recommend against it for this recipe. Full-fat cream cheese has the right structure and moisture content for both the cheesecake layer and the frosting. Low-fat versions have more water and stabilizers, which can lead to a runny frosting and a less creamy, more rubbery cheesecake texture. For the best results and flavor, stick with the regular blocks of cream cheese.
What can I do with leftover strawberry filling?
Leftover strawberry filling is a gift! It’s incredible swirled into plain yogurt or oatmeal. You can spoon it over pancakes, waffles, or ice cream. Use it as a topping for cheesecake bites or mix it into a milkshake. It will keep in a sealed container in the fridge for about a week. You can also freeze it for up to 3 months.
Ready, Set, Bake!
There you have it! Everything you need to create this unforgettable Cheesecake with Strawberries and Cream. Yes, it has a few steps. But each one is simple, and the final result is pure magic. The look on your friends’ and family’s faces when you bring out this layered beauty is the best reward. So put on your apron, gather your ingredients, and get ready to bake a memory. You’ve got this. Now go preheat that oven!
Cherry Chocolate Cookies
Ingredients
Equipment
Method
- Preheat your oven to 350°F (175°C) and prepare the cake and springform pans.
- For the cheesecake layer, beat the cream cheese until smooth, add sugar, then eggs one at a time, stir in vanilla, and bake for 40-45 minutes.
- For the cake layers, whisk flour and baking powder; then beat butter and sugar until fluffy, add eggs one at a time, alternate adding flour and milk, and bake for 25-30 minutes.
- For the strawberry filling, cook strawberries, sugar, cornstarch, and lemon juice in a saucepan for 8-10 minutes until thickened.
- For the cream cheese frosting, beat cream cheese and butter until smooth, add powdered sugar gradually and then vanilla, adding cream until spreadable consistency is reached.
- Assemble the cake by layering: cake layer, frosting crumb coat, cheesecake layer, more frosting, second cake layer, and finish frosting the entire cake, topping with strawberry filling.