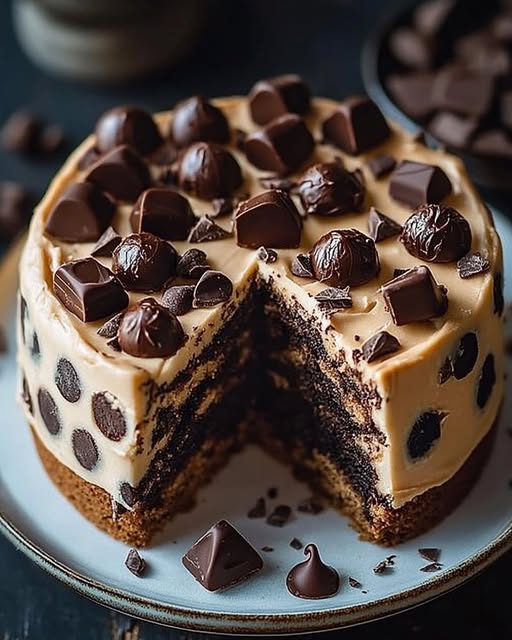
Alright, let’s talk about a dessert that makes my kids stop playing video games and come running to the kitchen. I’m not even kidding. It’s the ultimate marriage of two incredible worlds: rich, fudgy chocolate cake and the edible, spoon-licking joy of cookie dough, all wrapped up in a creamy, frozen cloud. This isn’t just a cake; it’s an experience. The Gâteau Glacé à la Pâte de Cookie aux Pépites de Chocolat—or as we call it at home, the Ultimate Frozen Cookie Dough Cake—is a show-stopper. I first made it for my sister’s birthday, and let’s just say it stole the show from the actual birthday candles. The combination of textures and temperatures is pure magic.
A Little Slice of (Cookie Dough) History
The love for raw cookie dough is almost universal. We’ve all snuck a pinch from the mixing bowl, haven’t we? This recipe cleverly turns that “forbidden” treat into the star of a sophisticated dessert. It takes inspiration from classic icebox cakes but audaciously stuffs them with bites of safe-to-eat, eggless cookie dough. It’s the perfect blend of nostalgic comfort and modern indulgence. My version uses a super-moist boiled-water chocolate cake base—a classic “pudding cake” method that guarantees a tender crumb. The frozen “glace” layer is a nod to ice cream cakes, but so much easier because it’s no-churn! It’s tradition and innovation, all in one deliciously cold slice.
Why You’ll Fall in Love With This Cookie Dough Cake
This frozen cookie dough cake recipe is a winner for so many reasons. First, it’s incredibly forgiving and doesn’t require any fancy decorating skills. It’s assembled in layers, and the freezer does most of the work to make it look fabulous. Second, the flavors are out of this world. You get the deep, dark notes of chocolate cake, the sweet, vanilla-speckled crunch of the cookie dough bites, and the smooth, creamy ice cream-like filling. Finally, you can make it way ahead of time! This is a busy host’s best friend. Just pull it from the freezer, add a quick swirl of whipped cream, and you look like a pastry pro.
Perfect Occasions for This Frozen Wonder
This cake is your secret weapon for any gathering. It’s a guaranteed hit at summer barbecues and pool parties because it’s refreshingly cold. It’s the perfect birthday cake for the cookie dough lover in your life. I love bringing it to potlucks because it travels so well in its pan—just keep it in a cooler. Holiday celebrations? Add some red and green sprinkles to the top, and you have a festive centerpiece. Honestly, any day that ends with “y” is a good day for this cookie dough cake.
What You’ll Need: The Ingredients List
Gather these simple ingredients to create something spectacular. I’ve separated them by component so you can tackle the recipe one delicious part at a time.
For the Chocolate Cake:
- 1 cup all-purpose flour
- 1 cup granulated sugar
- 1/4 cup + 1/8 cup (6 tablespoons) dark cocoa powder (like Hershey’s Special Dark)
- 1 tsp baking soda
- 1 large egg
- 1/2 cup buttermilk
- 1/2 cup vegetable oil
- 3/4 tsp pure vanilla extract
- 1/2 cup boiling water
For the Eggless Cookie Dough:
- 6 tbsp unsalted butter, softened
- 1/2 cup packed light brown sugar
- 1 tsp pure vanilla extract
- 1 cup heat-treated all-purpose flour*
- 1-2 tsp milk
- 1/2 cup mini chocolate chips
For the ‘Glace’ (Ice Cream) Filling:
- 8 oz (225g) cream cheese, softened
- 1/2 cup packed light brown sugar
- 1/8 cup (2 tbsp) milk
- 2 tsp pure vanilla extract
- 8 oz (225g) Cool Whip, thawed (or homemade stabilized whipped cream)
- 1/2 cup mini chocolate chips
For Decorating:
- 4-8 oz (115-225g) Cool Whip for frosting
- Mini chocolate chips for topping
- Chocolate sauce, for drizzling (optional)
*To heat-treat flour: Spread flour on a baking sheet. Bake at 350°F for 5-7 minutes, let cool completely. This makes it safe to eat raw.
No Problem! Handy Ingredient Substitutions
Out of something? No worries, here are easy swaps for your cookie dough cake.
- Buttermilk: Make your own! Mix 1/2 cup milk with 1 1/2 tsp lemon juice or vinegar. Let sit 5 minutes.
- Cool Whip: Use an equal amount of freshly whipped heavy cream stabilized with a tablespoon of powdered sugar.
- Vegetable Oil: Any neutral oil works, like canola or avocado oil.
- Mini Chocolate Chips: Standard-sized chips will work, but minis distribute better in the delicate filling.
- Cream Cheese: Use full-fat for best texture. Low-fat can make the filling runny.
Let’s Build This Cookie Dough Masterpiece!
Follow these steps for a stress-free and fun baking session. Put on some music, and let’s get started.
Step 1: Bake the Chocolate Cake Layers
First, preheat your oven to 300°F (150°C). Grease and line two 8-inch round cake pans with parchment paper. In a large bowl, whisk together the flour, sugar, cocoa, and baking soda. The mixture will look like a dark, sandy beach. Add in the egg, buttermilk, oil, and vanilla. Stir until it becomes a beautiful, shiny, thick batter. Now, carefully stir in the boiling water. The batter will become very thin and liquid—this is exactly right! It’s the secret to a supremely moist cake. Pour it evenly into the pans and bake for 25-30 minutes, until a toothpick comes out clean. Let them cool completely in the pans, then level the tops with a serrated knife.
Pro tip: The boiling water “blooms” the cocoa, intensifying the chocolate flavor. Don’t skip it!
Step 2: Make the Eggless Cookie Dough Bites
While the cakes cool, let’s make the fun part. In a medium bowl, beat the softened butter and brown sugar with a hand mixer until it’s creamy and fluffy, about 2 minutes. Beat in the vanilla. Add your heat-treated flour and mix on low until crumbly. Add milk, one teaspoon at a time, until the dough comes together when pinched. It should be soft but not sticky. Fold in the mini chocolate chips. Use a small scoop or your hands to form tiny dough balls, about the size of blueberries. Place them on a plate and pop them in the fridge to firm up. This stops them from melting into the filling later.
Step 3: Whip Up the No-Churn ‘Glace’ Filling
Time for the creamy cloud! In a large bowl, beat the softened cream cheese and brown sugar until completely smooth—no lumps allowed. Scrape down the bowl. Beat in the milk and vanilla. The mixture should be silky. Now, take your thawed Cool Whip and gently fold it into the cream cheese mixture using a rubber spatula. Use a gentle motion to keep it light and airy. Finally, fold in the 1/2 cup of mini chocolate chips and your chilled cookie dough balls. Try to distribute them evenly without over-mixing.
Step 4: Assemble and Freeze Your Cake
Line an 8-inch or 9-inch springform pan with parchment paper for easy removal. Place your first layer of cooled chocolate cake in the bottom. Spread half of the cookie dough glace filling over it in an even layer. Gently tap the pan on the counter to remove air bubbles. Place the pan in the freezer for 30 minutes to let that layer set. This is crucial for clean layers! Take it out, add the second cake layer, and top with the remaining filling, smoothing the top. Cover the pan with plastic wrap and freeze the whole cake for at least 6 hours, preferably overnight, until it’s rock solid.
Step 5: The Grand Finale – Decorate and Serve!
The moment has arrived! Take your frozen cake out of the freezer about 10-15 minutes before serving. Run a warm knife around the edge of the springform pan and release the ring. If you want to frost it, spread a thin layer of the extra Cool Whip over the top and sides. Sprinkle generously with more mini chocolate chips. For a decadent touch, drizzle warm chocolate sauce over each slice as you serve. Use a hot, sharp knife to cut clean slices. The contrast of the cold cake, the soft filling with chewy cookie dough bites, and the fudgy cake is simply unreal.
Chef’s tip: For stunning layers, freeze after adding *each* component. Patience is the secret ingredient!
Timing is Everything: Your Game Plan
This frozen cookie dough cake is a make-ahead dream. Here’s how to plan your time.
- Prep Time: 35 minutes (active hands-on work)
- Cook Time: 25 minutes (for the cake layers)
- Setting/Freezing Time: Minimum 6 hours (overnight is best)
- Total Time (including freezing): About 7 hours
- Servings: 10-12 happy people
- Calories: Approximately 572 kcal per generous slice
My Top Secret for the Best Cookie Dough Cake
The absolute best trick? Toasting your own flour for the cookie dough. While you can sometimes buy heat-treated flour, doing it yourself is simple and ensures safety. But beyond safety, it adds a subtle, nutty, toasted flavor to your cookie dough bites that you just don’t get otherwise. It makes them taste more like baked cookies, even though they’re raw. Just toast, cool completely, and use as directed. Trust me, it’s a tiny step that makes a huge difference in flavor complexity.
A Fun Fact About Our Star Ingredient
Did you know the chocolate chip cookie was invented by accident? In the 1930s, Ruth Wakefield of the Toll House Inn ran out of baker’s chocolate for her cookies. She chopped up a bar of Nestlé semi-sweet chocolate, expecting it to melt into the dough. It didn’t, and the chocolate chip cookie was born! Our cookie dough cake pays a delicious, frozen homage to that happy accident.
Gear You’ll Need in Your Kitchen
You don’t need any special equipment! Just your basics:
- Two 8-inch round cake pans
- One 8-inch or 9-inch springform pan (a must for easy release!)
- Mixing bowls (various sizes)
- Hand mixer or stand mixer
- Rubber spatula
- Parchment paper
- Wire cooling rack
- Measuring cups and spoons
How to Store Your Frozen Cookie Dough Cake
Long-Term Freezing: This cake is meant to live in the freezer! Once fully assembled and frozen solid, you can wrap the entire springform pan (or the cake itself if removed) tightly in a double layer of plastic wrap, then a layer of aluminum foil. It will keep perfectly for up to 2 months. This makes it perfect for planning ahead for big events.
Short-Term & Serving: After decorating, you can keep it in the freezer, uncovered for up to an hour if the frosting is set. For longer, loosely tent it with foil to protect the decorations. Once cut, cover the cut edge with plastic wrap pressed directly against the cake to prevent freezer burn and drying out.
Thawing (Don’t!): The beauty of this dessert is its frozen, ice-cream-cake-like texture. You do not want to thaw it completely. Let it sit on the counter for just 10-15 minutes before slicing to soften slightly for a clean cut. Serve it cold and firm!
Tips & Advice for Flawless Results
- Ensure all cold ingredients (cream cheese, butter) are truly softened to room temp for smooth mixing.
- Don’t overmix the ‘glace’ filling after adding the Cool Whip. Fold gently to keep it airy.
- When leveling the cakes, save the scraps! They make amazing trifle layers or ice cream toppings.
- For cleaner slices, dip your knife in hot water and wipe it dry between each cut.
Presentation Ideas to Wow Your Guests
- Serve on a chilled platter or cake stand.
- Drizzle plates with chocolate and caramel sauce before placing the slice.
- Top each slice with a single, perfect cookie dough ball and a mint sprig.
- For a party, cut into small “cookie dough cake bites” and serve in mini cupcake liners.
Healthier Twists on the Cookie Dough Cake
Want to lighten it up? Here are six tasty variations.
- Gluten-Free Delight: Use a 1:1 gluten-free flour blend for both the cake and the cookie dough. Ensure your chocolate chips are GF-certified.
- Dairy-Free Dream: Swap buttermilk for almond milk + vinegar, use vegan butter and cream cheese, and opt for coconut whipped topping. Choose dairy-free chocolate chips.
- Lower-S Sugar Fix: Reduce sugar in the cake by 1/4 cup. In the filling, use a brown sugar substitute designed for baking. The cookie dough will be less sweet but still tasty.
- Protein Power-Up: Add a scoop of vanilla or chocolate protein powder to the cookie dough, reducing the flour slightly. You may need an extra splash of milk.
- Nutty Adventure: Add 1/4 cup of finely chopped toasted walnuts or pecans to the cookie dough for added crunch and healthy fats.
- Fruit Fusion: Layer a thin spread of tart raspberry or strawberry jam between the cake and the filling for a sweet-and-creamy contrast.
Common Mistakes to Avoid
Steer clear of these pitfalls for a perfect cookie dough cake every time.
Mistake 1: Using Cold Cream Cheese and Butter
This is the #1 reason for lumpy filling and dense cookie dough. Cold cream cheese will never blend smoothly with the sugar, leaving you with unpleasant chunks in your creamy layer. Similarly, cold butter won’t cream properly with the brown sugar for the dough. Always plan ahead. Take your cream cheese and butter out of the fridge at least an hour before you start baking. They should be soft to the touch but not melted.
Mistake 2: Skipping the Freezing Between Layers
It’s tempting to just stack everything and be done. But if you don’t freeze the first layer of filling before adding the second cake, you’ll end up with a squished, messy cake. The weight will push the filling out the sides. The 30-minute freeze after the first filling layer sets it firmly. This gives you a stable base to build on and creates those beautiful, distinct layers in your final slice.
Mistake 3: Overmixing the ‘Glace’ Filling
Once you add the Cool Whip or whipped cream, you need to switch from beating to folding. Using the mixer or stirring too vigorously will deflate the air in the whipped topping. This results in a dense, heavy filling instead of a light, fluffy, ice-cream-like texture. Use a large rubber spatula and fold gently, turning the bowl, until just combined. A few streaks are okay.
Mistake 4: Not Using a Springform Pan
Trying to get a frozen, layered cake out of a regular cake pan is a nightmare. You’ll likely damage the cake or the layers. A springform pan with its removable sides is non-negotiable for this recipe. Line the bottom with parchment for extra insurance. It makes release and serving effortless and stress-free.
Your Cookie Dough Cake Questions, Answered
Can I make this cookie dough cake ahead of time?
Absolutely! That’s one of its best features. You can make the entire cake, wrap it well, and freeze it for up to 2 months. This makes it a fantastic dessert for parties and holidays. You can also bake the cake layers up to 2 days in advance. Wrap them tightly in plastic wrap once cool and store at room temperature. The cookie dough balls can be made a week ahead and kept in a sealed container in the fridge. Just assemble and freeze when you’re ready.
What can I use instead of Cool Whip?
You can definitely use homemade whipped cream. To stabilize it so it holds up in the freezer, whip 1 1/2 cups of heavy cream with 3 tablespoons of powdered sugar and 1 teaspoon of vanilla until stiff peaks form. Use this in place of the 8 oz of Cool Whip in the filling. For the decorative top, whip another cup of cream as needed. The texture will be slightly less stable but richer and more natural in flavor.
Is the flour in the cookie dough safe to eat raw?
Regular, uncooked flour can carry bacteria like E. coli, so it’s not considered safe to eat raw. That’s why this recipe calls for heat-treated flour. You can easily do this at home by spreading your flour on a baking sheet and baking it at 350°F for 5-7 minutes. Let it cool completely before using. This process kills any potential bacteria, making your edible cookie dough perfectly safe to enjoy. Some stores also sell pre-pasteurized flour.
My cake layers sunk in the middle. What happened?
A sunken cake usually means too much leavening or underbaking. First, make sure your baking soda is fresh (test it with a little vinegar—it should bubble vigorously). Second, ensure your oven temperature is accurate with an oven thermometer. Third, don’t open the oven door during the first 20 minutes of baking. Finally, test for doneness properly. The cakes are done when a toothpick inserted in the center comes out with a few moist crumbs, not completely wet batter. Even if they sink a bit, they’ll still taste great once layered!
Can I use a boxed cake mix for the chocolate layers?
Yes, you can! For a shortcut, use your favorite chocolate cake mix. Bake it according to package directions for two 8-inch rounds. Let the cakes cool completely and level them. The texture might be slightly different, but it will still be delicious. This is a great time-saver if you’re in a pinch. Just don’t forget to make the eggless cookie dough and no-churn filling from scratch—they’re the real stars.
How do I get clean slices from a frozen cake?
The key is a hot, sharp knife. Run a long, sharp chef’s knife or serrated knife under very hot tap water. Dry it completely with a towel. Press down firmly and slowly to cut through the frozen cake. Wipe the blade clean and reheat it under the water for each subsequent slice. This melts through the frozen layers just enough to give you a beautiful, clean cut without crushing the cake.
Why is my ‘glace’ filling too soft or runny?
A runny filling typically has three causes: 1) The cream cheese wasn’t full-fat or was too soft/borderline melted. 2) The Cool Whip or whipped cream was overfolded and deflated. 3) The cake wasn’t frozen long enough between layers or before serving. Make sure to use full-fat, properly softened (not warm) cream cheese. Fold gently. And always respect the freezing times—patience is crucial for structure.
Can I add other mix-ins to the filling?
Of course! Get creative. Try adding 1/2 cup of crushed Oreos, butterscotch chips, or toasted coconut along with the chocolate chips and cookie dough. Chopped-up candy bars like Snickers or peanut butter cups would also be amazing. Just keep the total volume of add-ins about the same so you don’t overwhelm the creamy base. This is your chance to personalize your cookie dough cake.
How long can the decorated cake sit out before serving?
Because it’s a frozen dessert, you don’t want it to sit out too long. After removing it from the freezer and decorating, you can let it stand at room temperature for about 15-20 minutes before slicing. This slightly softens it for easier cutting. Any longer than that, and the layers may start to melt and lose their distinct texture. Serve it proudly and then get it back into the freezer for any leftovers.
Can I make this in a different pan, like a 9×13?
You can adapt it! For a 9×13 pan, you might want to make 1.5 times the cake recipe to have enough layers, or just use one thicker cake layer on the bottom. Spread all of the cookie dough filling over the single cake layer in the pan. Freeze, then decorate. It will be more like a giant cookie dough ice cream bar, which is also fantastic. Cut into squares for easy serving at a large gathering.
Time to Dig In!
There you have it—the ultimate guide to a dessert that’s guaranteed to bring smiles. This Frozen Cookie Dough Cake is more than just a recipe; it’s a memory maker. It combines the simple joy of baking with the wow-factor of a professional dessert. So gather your ingredients, embrace the freezing time, and get ready for the compliments to roll in. Whether it’s for a special occasion or just a sweet weekend treat, this cake is pure, unadulterated happiness on a plate. Now, go preheat that oven and treat yourself to something truly spectacular. Happy baking!
Cookie Dough Cake
Ingredients
Equipment
Method
- Preheat oven to 300°F (150°C). Grease and line two 8-inch round cake pans with parchment paper.
- In a large bowl, whisk together flour, sugar, cocoa, and baking soda.
- Add egg, buttermilk, oil, and vanilla. Stir until a thick batter forms.
- Carefully stir in boiling water until thin. Pour evenly into pans and bake for 25-30 minutes until set. Cool completely and level the tops.
- In a medium bowl, beat softened butter and brown sugar until creamy. Beat in vanilla.
- Add heat-treated flour and mix until crumbly, then add milk a teaspoon at a time until the dough holds together. Fold in mini chocolate chips and chill dough until firm.
- Beat softened cream cheese and brown sugar until smooth. Fold in milk and vanilla, then gently fold in Cool Whip and chocolate chips.
- In a lined springform pan, layer the chocolate cake, half of the filling, and freeze for 30 minutes.
- Add the second cake layer, remaining filling, cover, and freeze for at least 6 hours (overnight is best).
- Before serving, remove from freezer for 10-15 minutes. Frost with Cool Whip, top with mini chocolate chips, and drizzle with chocolate sauce if desired.