The Ultimate Moist Coffee Cake: A Slice of Pure Joy
You know that moment when you take a bite of cake and it just feels like a hug from the inside? That’s this Moist Coffee Cake for you. Forget dry, crumbly disappointments. This cake is a dreamy, syrup-soaked, cocoa-infused cloud topped with creamy caramel magic. I perfected this recipe after my last family reunion, where my usual cake vanished in minutes, and my aunt whispered, “Don’t ever change a thing.” So, I’m not changing a thing. I’m sharing it with you, exactly as is.
A Little Story Behind This Sweet Sensation
This cake has roots in those classic, soaked syrup cakes you find in many cultures, like a tres leches or a poke cake. My version is a love letter to my two favorite things: deep, dark cocoa and a good, strong cup of coffee. I wanted a dessert that wasn’t just a treat but an experience. The syrup, flavored with coffee and vanilla, seeps into every pore of the warm cake. Then, the topping—oh, the topping! It’s like the billowy, sweet hat on an already fabulous outfit. It’s traditional comfort food with a seriously indulgent twist.
Why You’ll Fall Head Over Heels for This Recipe
Let me count the ways! First, the texture. The word “moist” is right there in the title, and it delivers. The syrup guarantees every single bite is tender and luscious. Second, it’s a make-ahead marvel. In fact, it gets better after a night in the fridge. This is perfect for us busy folks. Third, the flavor combo is unbeatable. Rich chocolate, hint of coffee, sweet vanilla, and salted caramel notes from the topping—it’s a party in your mouth. It’s also incredibly forgiving and straightforward, no fancy techniques required!
Perfect Occasions for This Stunning Cake
This isn’t just a “Tuesday night” cake (though I fully support that). This is your secret weapon. Bring it to potlucks and watch people swarm the dessert table. It’s a superstar at birthday parties, book club meetings, and holiday brunches. I love serving it after a big family dinner—it’s the grand, sweet finale that makes everyone smile. It’s also the perfect gift for a neighbor or a friend who needs a little pick-me-up. A slice of this cake says, “I care about you,” in the sweetest way possible.
Gathering Your Ingredients
Here’s your shopping list for this delightful Moist Coffee Cake. Measuring in cups and spoons makes it easy!
For the Cake:
- 6 large eggs
- 1 3/4 cups (400 ml) granulated sugar
- 1/2 cup (120 ml) unsweetened cocoa powder
- 3/4 cup + 4 tbsp (200 ml) warm water
- 1/2 cup (120 ml) neutral oil (like vegetable or canola)
- 2 cups + 2 tbsp (500 ml) cake flour
- 3/4 teaspoon (4 ml) salt
- 4 teaspoons (20 ml) baking powder
For the Syrup:
- 1 1/2 cups water
- 1 1/2 cups granulated sugar
- 1 tablespoon (15 ml) instant coffee powder
- 2 teaspoons (10 ml) pure vanilla extract
For the Topping:
- 3/4 cup (175 ml) heavy whipping cream, very cold
- 1 can (approx. 13.4 oz) dulce de leche (caramelized condensed milk)
- Crumbled chocolate flakes or shavings for decoration
Handy Substitution Options
Out of something? No panic! Here are some easy swaps:
- Cake Flour: For every cup of cake flour, use 1 cup minus 2 tbsp of all-purpose flour mixed with 2 tbsp of cornstarch.
- Oil: Melted, cooled butter can be used for a richer flavor.
- Cocoa Powder: Use natural or Dutch-processed cocoa; both work beautifully here.
- Instant Coffee: You can use 1/4 cup of strongly brewed, cooled coffee in the syrup instead of powder.
- Dulce de Leche: Make your own by simmering a sealed can of sweetened condensed milk in water for 2-3 hours (let it cool completely before opening!).
- Whipped Cream Topping: For a lighter version, use stabilized whipped cream or even a layer of sweetened mascarpone cheese.
Let’s Bake! Step-by-Step Instructions
Step 1: Prepare the Cake Base
First, preheat your oven to 180°C (350°F). Grease your favorite 9×13 inch baking pan generously. Now, let’s get cracking—literally! Grab your eggs and sugar. In a large bowl, use a hand mixer or stand mixer to beat them together. You want to go for a good 5-7 minutes until the mixture is pale, thick, and leaves ribbons when you lift the beaters. This aerates the batter, giving our cake that lovely light crumb. In a separate jug, whisk your cocoa powder with the warm water and oil. It will look like a glossy, dark chocolate soup. Pour this delicious liquid into the egg mixture and beat until just combined.
Pro tip: Sift your cake flour, baking powder, and salt right over the wet ingredients. This prevents lumps and ensures even leavening. Gently fold everything together with a spatula until no dry streaks remain. The batter will be thin and pourable – that’s perfect! Pour it into your waiting pan and smooth the top.
Step 2: Bake to Perfection
Slide the pan into the center of your preheated oven. Now, the hardest part: the wait! Resist the urge to open the oven door for at least 25 minutes. You want the cake to rise steadily. It’s ready when the top springs back lightly to the touch and a toothpick inserted into the center comes out with just a few moist crumbs, about 30-35 minutes. Your kitchen will smell like a chocolate factory – enjoy it!
Pro tip: Ovens can vary. Start checking at the 30-minute mark. If the top is browning too quickly, you can loosely tent it with aluminum foil.
Step 3: Create the Dreamy Coffee Syrup
While the cake is baking, let’s make the magic syrup. In a saucepan, combine the water, sugar, and instant coffee powder. Stir over medium heat just until the sugar dissolves completely. You don’t need to boil it vigorously. Once clear, remove it from the heat and stir in the glorious vanilla extract. Set it aside to cool slightly. This syrup is the lifeblood of our moist coffee cake.
Step 4: The Soaking Ritual
As soon as the cake comes out of the oven, take a fork and poke holes all over the top. Don’t be shy! Go right to the bottom. Now, slowly and evenly pour that warm coffee syrup all over the hot cake. You’ll hear it sizzle and see it disappear into the cake. This is the moment of transformation. Let the cake sit in the pan until it reaches room temperature, then transfer the whole pan to the refrigerator. Let it chill completely, for at least 4 hours or, even better, overnight.
Chef’s Tip: Poke the holes while the cake is piping hot. The syrup absorbs much more easily into the warm, tender crumb.
Step 5: Whip Up the Caramel Cloud Topping
Time for the grand finale! Take your very cold heavy cream and beat it in a chilled bowl until you have stiff peaks. In another bowl, give your can of dulce de leche a good stir to loosen it up. Now, gently fold the whipped cream into the dulce de leche. You want to keep as much air in as possible, so be gentle. This creates a light, moussey, incredibly flavorful frosting.
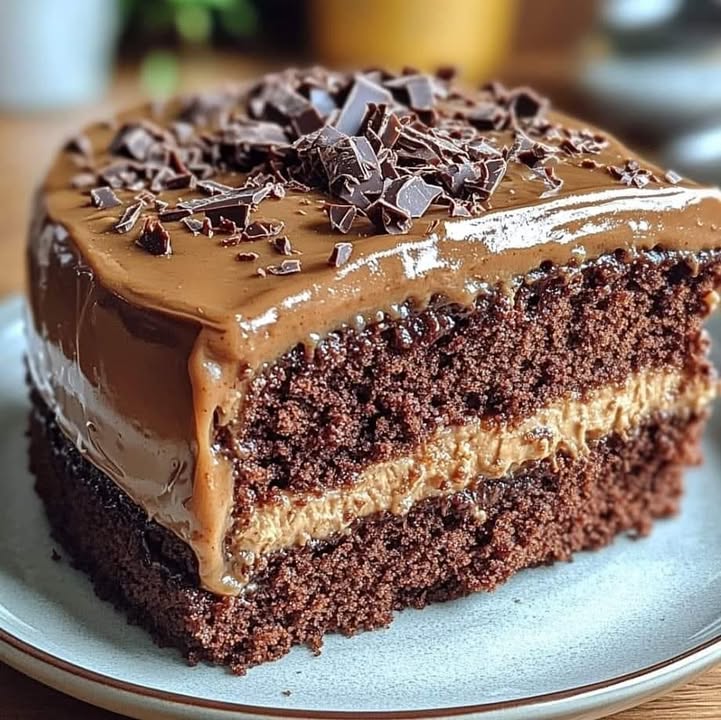
Step 6: Assemble and Decorate
Pull your completely cold, syrup-soaked cake from the fridge. Spread the caramel cream topping evenly over the entire surface. Grab your chocolate flakes—you can use store-bought or shave a chocolate bar with a vegetable peeler—and sprinkle them generously on top. The contrast of creamy white and dark chocolate is simply stunning. Your masterpiece is ready!
Timing is Everything
Let’s break down the clock for this Moist Coffee Cake:
- Prep Time: 20 minutes
- Baking Time: 30-35 minutes
- Soaking & Chilling Time: 4 hours minimum (overnight is ideal)
- Topping & Decorating Time: 15 minutes
- Total Time (including chilling): About 5 hours
The Chef’s Secret
Here’s my little secret: don’t skip the chilling step. I know it’s tempting to frost and eat it right away. But letting the cake soak up all that syrup in the fridge is non-negotiable. It allows the flavors to marry and the texture to set into that perfect, melt-in-your-mouth consistency. This patience pays off in every single bite.
A Fun Fact for Your Next Dinner Party
Did you know that “coffee cake” doesn’t always contain coffee? The name traditionally refers to a cake meant to be eaten *with* coffee. Our version, however, is a delightful double-whammy—it has coffee *in* it and is absolutely perfect alongside a cup. It’s a cake that truly lives up to its name!
Necessary Equipment
You don’t need any fancy gadgets for this recipe. Here’s what will help:
- 9×13 inch baking pan
- Mixing bowls (large and medium)
- Hand mixer or stand mixer
- Whisk and spatula
- Saucepan for the syrup
- Measuring cups and spoons
- Toothpick or cake tester
Storing Your Masterpiece
Because this cake is soaked in syrup and topped with a dairy-based cream, it must be stored in the refrigerator. Cover the pan tightly with plastic wrap or transfer slices to an airtight container.
It will keep beautifully for up to 4-5 days. In fact, many fans (myself included) think it tastes even better on days two and three as the flavors continue to deepen.
I do not recommend freezing the fully assembled cake, as the whipped cream topping doesn’t freeze and thaw well. You can, however, freeze the un-frosted, syrup-soaked cake base on its own for up to a month. Thaw in the fridge overnight before adding the fresh topping.
Tips & Advice for Guaranteed Success
- Room Temp Eggs: Using room temperature eggs will help them whip up to a greater volume, giving you a lighter cake.
- Sift Dry Ingredients: Always sift cocoa powder and flour to avoid lumps in your batter.
- Cold Cream: For the topping, ensure your whipping cream and mixing bowl are very cold. This helps it whip up faster and hold its shape.
- Test for Doneness: Ovens vary. Use the toothpick test as your guide, not just the timer.
Presentation Tips to Wow Your Guests
- Serve each slice on a pretty plate with a dusting of cocoa powder or a drizzle of extra dulce de leche.
- Garnish with a few whole coffee beans on top for a sophisticated touch.
- Pair each serving with a small cup of espresso or a dollop of lightly sweetened whipped cream on the side.
- Cut into small squares for a party or larger rectangles for a family-style dessert.
Healthier & Fun Variations
Want to mix it up? Here are six delicious twists on this Moist Coffee Cake:
- Decaf Delight: Use decaffeinated instant coffee powder in the syrup for a family-friendly version that keeps the flavor.
- Nutty Crunch: Add 1/2 cup of finely chopped toasted pecans or walnuts to the cake batter for added texture.
- Spiced Version: Stir 1 teaspoon of cinnamon or a pinch of cayenne pepper into the cocoa mixture for a warm, spicy kick.
- Orange Zest: Add the zest of one orange to the cake batter and use orange juice in place of some water in the syrup for a chocolate-orange combo.
- Mocha Madness: Fold 1/2 cup of mini chocolate chips into the cake batter before baking for extra bursts of chocolate.
- Lighter Topping: Substitute the whipped cream and dulce de leche with a layer of sweetened Greek yogurt blended with a little vanilla for a protein-packed, tangy twist.
Common Mistakes to Avoid
Mistake 1: Not Whipping Eggs and Sugar Enough
This step is crucial for structure. If you don’t beat the eggs and sugar until they are pale, thick, and ribbon-like, your cake might be dense and heavy. It needs that air incorporated for a light texture. Set a timer for a full 5-7 minutes of beating on medium-high speed. You’ll see the mixture transform in color and volume.
Mistake 2: Overmixing After Adding Flour
Once you add the dry ingredients, switch from beating to folding. Overmixing develops the gluten in the flour, which can make the cake tough and chewy instead of tender. Use a spatula and fold gently just until you no longer see dry flour. A few small lumps are okay.
Mistake 3: Pouring Cold Syrup on a Cooled Cake
The syrup needs to be warm (not boiling hot) and the cake needs to be straight out of the oven. A hot cake is more porous and will eagerly drink up the syrup. If the cake cools first, it sets, and the syrup will just pool on top or make the top soggy without penetrating.
Mistake 4: Skipping the Full Chill Time
Impatience is the enemy here! Applying the creamy topping to a cake that’s still slightly warm is a recipe for a melted, runny mess. The cake needs to be completely cold to support the topping. Let it chill for at least 4 hours, preferably overnight. This also allows the syrup to distribute evenly.
Mistake 5: Using Warm Whipping Cream
Whipped cream only holds its peaks when everything is cold. If your cream, bowl, or beaters are warm, you’ll end up with soupy liquid butter instead of fluffy peaks. Chill your bowl and beaters in the freezer for 10 minutes before you start. Use cream straight from the fridge.
Frequently Asked Questions
Can I use all-purpose flour instead of cake flour?
Yes, you absolutely can! Cake flour has a lower protein content, which gives a more tender crumb. To make a good substitute, for every cup of cake flour the recipe calls for, use 1 cup of all-purpose flour MINUS 2 tablespoons, and then ADD 2 tablespoons of cornstarch back in. Sift this mixture together a few times to distribute the cornstarch evenly before using it in the recipe. Your cake will still be deliciously moist.
My syrup crystallized/hardened. What did I do wrong?
This usually happens if you let the syrup boil for too long or stir it too much after the sugar has dissolved. The goal is to simply heat the mixture until the sugar and coffee granules are fully dissolved into the water. Once you see a clear liquid, you can take it off the heat and stir in the vanilla. There’s no need to cook it further. If it hardens, you can gently reheat it with a splash of extra water to dissolve the crystals again.
Can I make this cake a day or two in advance?
You can, and I often do! This is one of the best make-ahead desserts. Bake the cake, poke the holes, and pour the syrup over it. Let it cool, then cover the pan tightly and refrigerate it for up to two days before you plan to serve it. Make the whipped caramel topping fresh on the day you’re serving it. Spread it on just a few hours before your guests arrive for the best texture.
What can I use if I don’t have dulce de leche?
No dulce de leche? No problem. You have a couple of great options. One, you can make your own by slowly simmering a sealed can of sweetened condensed milk in water for 2-3 hours (let it cool completely in the water before opening!). Two, you can use a good-quality store-bought caramel sauce or spread. Just note that a runny sauce might make the topping a bit softer, so you might need to whip your cream to very stiff peaks to compensate.
Why did my cake sink in the middle after baking?
A sunken cake is often due to a few common issues. First, check your baking powder. Is it fresh? Old leavening agents lose their power. Second, you might have opened the oven door too early. The rush of cold air can cause a rising cake to collapse. Wait until at least the 25-minute mark. Third, the cake might actually be underbaked in the center. Use the toothpick test to be sure it’s fully cooked through.
Can I freeze this coffee cake?
You can freeze the syrup-soaked cake before adding the whipped topping. Wrap the cooled, soaked cake tightly in plastic wrap and then foil, and freeze for up to a month. Thaw overnight in the refrigerator. The whipped cream and dulce de leche topping does not freeze well, as it can separate and become grainy when thawed. Always make and add the topping fresh after thawing the cake base.
Is there a way to make this less sweet?
The cake itself has a balanced sweetness, but the syrup and topping are intentionally indulgent. To tone it down slightly, you could reduce the sugar in the syrup by 1/4 cup. For the topping, you could fold the whipped cream into a lighter whipped cream cheese instead of all dulce de leche, or simply use less of the caramel spread mixed in. The chocolate flakes on top also add sweetness, so you can skip them or use unsweetened cocoa powder for dusting instead.
What’s the best way to cut this cake cleanly?
For picture-perfect slices, use a long, thin knife dipped in hot water and wiped clean between each cut. The heat helps slice smoothly through the creamy topping without dragging it and making a mess. This little trick gives you beautiful, clean edges every single time.
Can I use brewed coffee instead of instant powder in the syrup?
Yes, you can substitute the water and instant coffee powder with an equal amount (1 1/2 cups) of strongly brewed, cooled coffee. Simply mix it with the sugar in the saucepan and proceed. The flavor will be a bit more nuanced and less intense than instant powder, but still wonderfully coffee-flavored.
My whipped cream turned into butter! How do I fix this?
Oh no, you’ve over-whipped it! This happens if you walk away for just a moment too long. Unfortunately, you can’t really fix it back into whipped cream. Your best bet is to start over with new, cold cream. To prevent this, whip on medium speed and watch it closely. Stop as soon as the beaters leave firm, distinct peaks that hold their shape. It goes from perfect to butter in seconds.
Your New Go-To Celebration Cake
And there you have it—my foolproof, absolutely heavenly Moist Coffee Cake. It’s a recipe born from love, tested by my family’s eager forks, and guaranteed to bring smiles. It might look like a few steps, but each one is simple and leads to something truly spectacular. So, preheat that oven, gather your ingredients, and get ready to make a dessert that people will beg you to make again and again. Don’t forget to pour yourself a cup of coffee to enjoy with the first slice. You’ve earned it!
Creamy Beef Rigatoni
Ingredients
Equipment
Method
- Preheat your oven to 180°C (350°F) and grease a 9x13 inch baking pan.
- In a large bowl, beat eggs and sugar together until pale, thick, and ribbons form (5-7 minutes).
- In a separate jug, whisk cocoa powder with warm water and oil, then combine with the egg mixture.
- Sift cake flour, baking powder, and salt over the wet ingredients and fold gently until no dry streaks remain.
- Pour the batter into the prepared pan and smooth the top.
- Bake for 30-35 minutes until the cake springs back and a toothpick comes out with moist crumbs.
- While the cake bakes, make the syrup by dissolving sugar and coffee powder in water over medium heat, then stir in vanilla.
- Poke holes in the hot cake, then slowly pour the warm syrup over it.
- Let the cake cool to room temperature, then refrigerate for at least 4 hours or overnight.
- Whip the cold heavy cream until stiff peaks form, then fold into the loosened dulce de leche.
- Spread the topping over the chilled cake and decorate with chocolate flakes.
- Serve and enjoy!