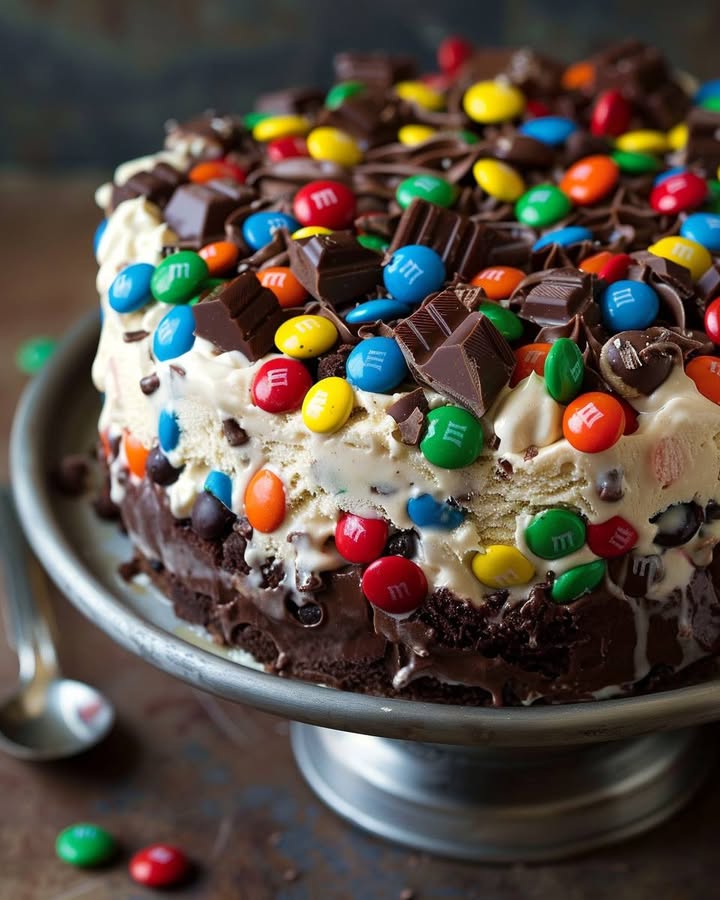
Decadent Chocolate M&Ms & Chip Cookie Dough Ice Cream Cake: A Dream Come True!
Have you ever had one of those moments where you can’t decide between a chewy cookie, a slice of fudgy cake, or a scoop of ice cream? I had that exact debate at my last family picnic. My niece wanted an ice cream cake, my son was begging for chocolate chip cookies, and I was craving something with layers of deep, dark chocolate. So, I decided to solve the problem in the best way I know how: by creating this spectacular, over-the-top dessert that has everyone fighting for the last slice. This ice cream cake isn’t just a treat; it’s an experience.
From Simple Treats to a Grand Dessert Marvel
Ice cream cakes have been a staple of American birthday parties for generations. They remind us of joy, celebration, and pure indulgence. This recipe takes that classic concept and layers it with homemade love. Instead of store-bought layers, we build from scratch with rich chocolate cake and edible cookie dough. It’s a modern twist on a nostalgic favorite, combining the best textures and flavors into one stunning centerpiece. It’s the dessert you make when “good enough” just won’t do.
Why You’ll Fall in Love With This Ice Cream Cake
This recipe is a guaranteed crowd-pleaser for so many reasons. First, it’s wonderfully customizable. Love M&Ms? Add more! Prefer nuts? Toss some in! Second, the contrast of textures is pure magic. You get the soft crumb of the cake, the creamy chill of the ice cream layer, and the delightful chew of the cookie dough all in one bite. Finally, it’s a make-ahead dream. You do the work once, freeze it, and have an incredible dessert ready to impress for days.
Perfect Occasions for Your Showstopper Cake
This cake is more than just a dessert; it’s the star of the show. It’s perfect for summer barbecues where you need a cool, sweet finish. It’s a must-have for birthdays, especially for those who can’t choose between cake and ice cream. Bring it to a potluck and watch it disappear first. Honestly, any day that ends with a “Y” is a good enough reason to make this celebratory treat for your loved ones.
Gathering Your Ingredients for Success
Let’s gather everything you’ll need. Having your ingredients prepped and ready makes the whole process a breeze.
For the Chocolate Cake:
- 1 cup all-purpose flour
- 1 cup granulated sugar
- 1/4 cup + 1/8 cup Hershey’s Special Dark Cocoa powder
- 1 teaspoon baking soda
- 1 large egg
- 1/2 cup buttermilk
- 1/2 cup vegetable oil
- 3/4 teaspoon vanilla extract
- 1/2 cup boiling water
For the Eggless Cookie Dough:
- 6 tablespoons unsalted butter, softened
- 1/2 cup packed brown sugar
- 1 teaspoon vanilla extract
- 1 cup heat-treated all-purpose flour*
- 1-2 teaspoons milk
- 1/2 cup mini chocolate chips
For the Ice Cream Layer:
- 8 ounces cream cheese, softened
- 1/2 cup packed brown sugar
- 1/8 cup milk
- 2 teaspoons vanilla extract
- 8 ounces Cool Whip (thawed) or homemade whipped cream
- 1/2 cup mini chocolate chips
For Assembly and Decoration:
- 4-8 ounces Cool Whip for icing
- Additional mini chocolate chips
- Chocolate sauce (optional)
- M&Ms
Easy Ingredient Swaps and Substitutions
No buttermilk? Make your own by adding 1/2 tablespoon of vinegar or lemon juice to 1/2 cup of regular milk. Let it sit for 5 minutes. Out of Hershey’s Special Dark Cocoa? Regular unsweetened cocoa powder works just fine. For a healthier twist, you can use a boxed sugar-free chocolate cake mix. To make the cookie dough gluten-free, use a 1:1 gluten-free flour blend that you have heat-treated. You can also swap the mini chocolate chips for chopped nuts or rainbow sprinkles for a different look and taste.
Step-by-Step Creation of Your Masterpiece
Follow these steps and you’ll have a flawless dessert. Take your time and enjoy the process!
Step 1: Bake the Deep, Dark Chocolate Cake Layers
Start by preheating your oven to 350°F (175°C). Grease two 9-inch round cake pans well. In a large bowl, whisk together the flour, sugar, dark cocoa powder, and baking soda. The cocoa will smell rich and inviting. Add in the egg, buttermilk, oil, and vanilla. Beat this mixture on medium speed for a full 2 minutes. The batter will become smooth and glossy. Now, carefully stir in the boiling water. The batter will become very thin, but that’s perfect! It creates an incredibly moist cake. Divide the thin batter evenly between your prepared pans. Pro tip: A kitchen scale ensures perfectly even layers. Bake for 30-35 minutes. A toothpick inserted should come out with a few moist crumbs. Let the cakes cool in the pans for 10 minutes before turning them out onto wire racks to cool completely.
Step 2: Whip Up the Safe-to-Eat Cookie Dough
While the cakes cool, make the edible cookie dough. In a medium bowl, beat the softened butter and brown sugar together until light and fluffy. This takes about 2 minutes. Mix in the vanilla extract. Gradually add your heat-treated flour. The dough will be dry and crumbly at first. Add milk, one teaspoon at a time, until the dough comes together and is soft but not sticky. Gently fold in the 1/2 cup of mini chocolate chips. Set this bowl aside. Chef’s tip: To heat-treat flour, spread it on a baking sheet and bake at 350°F for 5-7 minutes. Let it cool completely before using. This kills any potential bacteria, making the dough safe to eat raw.
Step 3: Create the Dreamy, Creamy Ice Cream Filling
This no-churn ice cream layer is pure genius. In a large bowl, beat the softened cream cheese until completely smooth. No lumps allowed! Add the brown sugar, milk, and vanilla, and beat again until everything is creamy and well combined. Now, take your thawed Cool Whip. Gently fold it into the cream cheese mixture. Use a spatula and sweeping motions to keep it light and airy. Finally, fold in another 1/2 cup of mini chocolate chips. Your filling should be thick, creamy, and speckled with chocolate. Cover the bowl and pop it in the fridge while you assemble.
Step 4: The Fun Part! Assembling the Ice Cream Cake
Place one completely cooled chocolate cake layer on your serving plate or cake stand. Take half of your cookie dough and crumble or press it in an even layer over the cake. It’s okay if it’s not perfect. Next, scoop half of your creamy ice cream mixture on top. Use an offset spatula to gently spread it to the edges, covering the cookie dough completely. Carefully place the second cake layer on top. Repeat the layers with the remaining cookie dough and ice cream filling. Smooth the top as best you can.
Step 5: Frost and Decorate With Pizzazz
Now for the finishing touches! Use the remaining Cool Whip to frost the top and sides of the entire cake. You can make it smooth or create pretty swirls with your spatula. Immediately, decorate the top with a generous handful of mini chocolate chips and as many colorful M&Ms as your heart desires. Drizzle with chocolate sauce for an extra-decadent look. The colors will make it irresistible.
Step 6: The Final Freeze and the Big Reveal
This is the hardest step: waiting. You must freeze the cake for at least 6 hours, but overnight is best. This allows all the layers to set firmly so you get a clean slice. When ready to serve, let it sit on the counter for just 5-10 minutes to slightly soften for easier cutting. Use a sharp knife dipped in hot water and wiped dry for the cleanest slices. Serve immediately and listen for the happy sighs!
Your Recipe Timetable
Here’s a quick breakdown of your time investment. Most of it is hands-off freezing, which is great for planning.
- Prep Time: 45 minutes (active fun in the kitchen)
- Cook Time: 35 minutes (for the cake layers)
- Additional Time: 6+ hours (crucial freezing time)
- Total Time: 7 hours 20 minutes (mostly inactive)
- Servings: 12 happy people
A Chef’s Secret for the Best Texture
My number one secret is to ensure every component is completely cool before assembling. If your cake layers are even slightly warm, they will melt the creamy ice cream filling and create a soupy mess in the middle. Patience here is the key to perfect, distinct layers. Let those cakes cool on the rack for a good hour.
A Sweet Bit of Extra Info
The combination of chocolate and cookie dough in ice cream form became a national sensation in the 1990s. This cake is a loving homage to that era of indulgence. Using heat-treated flour for edible cookie dough is a modern kitchen trick that allows us to enjoy that classic, nostalgic flavor safely, which is a wonderful upgrade from the recipes of the past.
Kitchen Tools You’ll Need
You likely have most of this equipment already. Here’s your checklist:
- Two 9-inch round cake pans
- Mixing bowls (large, medium)
- Electric hand mixer or stand mixer
- Whisk and spatulas
- Wire cooling racks
- Measuring cups and spoons
- Offset spatula (helpful for frosting)
- Serving plate or cake stand
Storing Your Ice Cream Cake
After the initial feast, you’ll need to store any leftovers properly. Keep the cake tightly covered in the freezer. I recommend placing toothpicks around the top to hold up plastic wrap so it doesn’t stick to your beautiful decorations. You can also store it in a large, airtight container if you have one big enough.
The cake will keep its best quality for up to 1 week in the freezer. The textures may begin to change slightly after that, but it will still be delicious. The chocolate cake layer stays wonderfully soft even when frozen solid because of all that moisture.
To serve leftovers, simply take the cake out, slice what you need, and return the rest to the freezer immediately. There’s no need to thaw the whole cake again unless you prefer a softer texture for serving.
Pro Tips and Advice for Guaranteed Success
- Softened is key: Make sure your butter, cream cheese, and Cool Whip are properly softened or thawed. This prevents lumpy fillings and ensures a smooth, creamy texture.
- Don’t skip heat-treating the flour. It’s a simple step for safety and peace of mind.
- If your ice cream filling seems too soft to spread after mixing, just pop the bowl in the freezer for 15-20 minutes to firm up slightly.
- For a cleaner cut, use a long, sharp knife and dip it in a tall glass of hot water. Wipe it dry between each slice.
Presentation Ideas to Wow Your Guests
Make your cake the center of attention with these fun ideas:
- Drizzle not just chocolate, but also caramel sauce over the top for a “turtle” effect.
- Place the cake on a cake stand and surround the base with more M&Ms or whole chocolate chip cookies.
- For a birthday, write a message with more M&Ms on top before freezing.
- Serve each slice on a chilled plate with an extra dollop of whipped cream on the side.
Healthier and Delicious Recipe Variations
Love the idea but want to lighten it up? Try these six tasty twists.
- Lighter Cake Base: Use a boxed angel food cake mix for the layers. It’s naturally lower in fat and creates a light, airy contrast to the rich fillings.
- Greek Yogurt Cream: Substitute the cream cheese in the ice cream layer with an equal amount of full-fat plain Greek yogurt. You’ll get a tangy, protein-packed filling that’s still creamy.
- Sugar-Free Swap: Use sugar-free cake mix, sugar-free chocolate chips, and a sugar-free whipped topping. Sweeten the cookie dough with a monk fruit or stevia-based brown sugar substitute.
- Nutty Delight: Replace the mini chocolate chips in the cookie dough and ice cream layer with chopped toasted pecans or walnuts. You get a wonderful crunch and healthy fats.
- Fruit Fusion: Add a layer of sliced strawberries or mashed raspberries between the cake and the ice cream layer. It adds freshness and a pop of color.
- Peanut Butter Paradise: Swirl 1/2 cup of creamy peanut butter into the ice cream filling. Use peanut butter chips instead of chocolate chips and garnish with chopped Reese’s Peanut Butter Cups.
Common Mistakes to Avoid
Steer clear of these pitfalls for a perfect cake every time.
Mistake 1: Using Warm Cake Layers
Assembling the cake with layers that are even slightly warm is the biggest error. The heat will immediately melt the creamy ice cream filling. This causes the layers to slide and creates a soggy, messy interior. Your beautiful cake can collapse. Always let your cakes cool completely on a wire rack. This can take over an hour. Patience is your best ingredient here.
Mistake 2: Forgetting to Heat-Treat the Flour
Regular all-purpose flour is not safe to eat raw due to potential bacteria like E. coli. Skipping the heat-treating step in the edible cookie dough is a food safety risk. It’s a simple fix. Just spread the flour on a baking sheet and bake it at 350°F for 5-7 minutes. Let it cool before using. This quick step ensures your delicious dough is safe for everyone to enjoy without worry.
Mistake 3: Overmixing the Ice Cream Filling
When you fold the Cool Whip into the cream cheese mixture, be gentle. If you use the mixer or stir too vigorously, you will deflate the whipped topping. This results in a dense, heavy filling instead of a light and fluffy ice cream-like layer. Use a large spatula and fold with broad, sweeping motions from the bottom up. Mix just until no white streaks remain.
Mistake 4: Not Freezing Long Enough
Trying to slice and serve the cake after only 2 or 3 hours in the freezer leads to disaster. The layers won’t be set, and your slice will look like a delicious puddle on the plate. The minimum freeze time is 6 hours, but overnight is truly ideal. This gives all the components time to firm up together, guaranteeing you get a picture-perfect, clean slice that holds its shape.
Mistake 5: Using Regular-Sized Chocolate Chips
It might seem like a small thing, but mini chocolate chips are important for texture. Regular-sized chips can be too hard and distracting when frozen in the ice cream layer or cookie dough. Mini chips distribute the chocolate flavor more evenly and provide a better mouthfeel. They are easier to bite through when frozen. Trust the recipe on this one and stick with the mini version.
Frequently Asked Questions
Can I make this cake ahead of time?
Absolutely! That’s one of its best features. You can bake the cake layers and make the cookie dough a day or two in advance. Store the cooled cakes wrapped at room temperature and the cookie dough in the fridge. Then, assemble and freeze the complete cake the day before your event. It needs that full overnight freeze anyway, so advanced prep is a perfect plan.
What can I use instead of Cool Whip?
You can definitely use homemade whipped cream. Chill a metal bowl and beaters. Whip 2 cups of heavy whipping cream with 1/4 cup of powdered sugar and 1 teaspoon of vanilla until stiff peaks form. Use this in place of the 8 ounces of Cool Whip in the filling. For the frosting, whip another 1-2 cups of cream with sugar to frost the outside. Just note, fresh whipped cream can get a bit icier when frozen long-term compared to stabilized toppings.
How do I properly heat-treat flour?
It’s very simple. Preheat your oven to 350°F. Spread the exact amount of flour you need for the cookie dough (1 cup) evenly on a dry baking sheet. Bake it for 5-7 minutes. You just want to heat it to 160°F to kill bacteria, not cook or brown it. Let the flour cool completely on the sheet before using it in your dough. You can also do this in the microwave: place flour in a microwave-safe bowl and heat in 30-second intervals, stirring between, until it reaches 160°F.
Can I use a different type of cake?
Yes, you can get creative. A classic yellow cake or even a funfetti cake would be delightful. Brownies can also be used for an ultra-rich, fudgy base. Just make sure whatever base you use is completely cooled and is sturdy enough to hold the heavy layers on top. A very delicate sponge might get soggy or squished.
My ice cream filling is too runny. What do I do?
This usually happens if the cream cheese wasn’t full-fat, was too soft, or the Cool Whip was over-thawed and watery. Don’t panic. Place the entire bowl of filling in the freezer for 20-30 minutes. Stir it every 10 minutes. It will firm up enough to spread. For next time, use brick-style full-fat cream cheese and make sure your Cool Whip is thawed but still very cold and firm, not liquidy.
How long can I store leftovers?
Store the cake, well-wrapped, in the freezer for up to 1 week for the best texture and flavor. After a week, it’s still safe to eat, but the whipped cream layers may start to form ice crystals and the cake may dry out slightly. It will still taste good, but the perfect texture is within that first week.
Do I have to use two cake pans? Can I bake one tall cake and slice it?
Using two pans is highly recommended. Baking one thick layer often results in a dome and an uneven bake. Slicing a tall cake horizontally can be tricky and messy. Two separate layers are easier to manage, cool faster, and give you a more professional result with less fuss. If you only have one pan, bake the cake, let it cool, then carefully slice it in half horizontally with a serrated knife.
Can I add other mix-ins?
Please do! This cake is a fantastic canvas. Consider adding crushed Oreos to the ice cream layer for a cookies-and-cream twist. Try adding toffee bits or chopped pretzels for salty-sweet crunch. Swirl in some peanut butter or fruit jam. The recipe is very forgiving, so have fun and make it your own with your favorite candy bars or cookies.
Is there a way to make this without an electric mixer?
You can, but it will require some elbow grease. For the cake, you can whisk vigorously by hand for the 2-minute beating time. For the cookie dough and cream cheese filling, make sure your butter and cream cheese are very, very soft. You can then mash and mix them with a sturdy wooden spoon or spatula until smooth. It’s more work, but definitely achievable if you’re mixing-motorless.
Why did my cake layers sink in the middle?
Sinking usually means there was too much leavening (baking soda), the oven door was opened too early, or the cake wasn’t baked long enough. Ensure your baking soda is fresh. Don’t open the oven door during the first 25 minutes of baking. Test for doneness only when the top looks set and springs back slightly when touched. An underbaked center will collapse as it cools.
A Final Slice of Encouragement
This Decadent Chocolate M&Ms & Chip Cookie Dough Ice Cream Cake is a labor of love that pays off in enormous smiles and happy bellies. It looks like you spent days in a professional bakery, but the steps are simple and fun. Whether it’s for a special birthday or just a regular Tuesday that needs brightening, this cake delivers pure joy. So put on your apron, gather your ingredients, and get ready to create some unforgettable sweet memories. You’ve got this!
Creamy Garlic Beef
Ingredients
Equipment
Method
- Preheat your oven to 350°F (175°C) and grease two 9-inch round cake pans.
- In a large bowl, whisk together flour, sugar, cocoa powder, and baking soda.
- Add egg, buttermilk, vegetable oil, and vanilla to the dry ingredients and mix on medium speed for 2 minutes.
- Stir in boiling water until the batter becomes thin, then pour it into the prepared pans.
- Bake for 30-35 minutes or until a toothpick comes out with a few moist crumbs.
- Allow the cakes to cool in the pans for 10 minutes before transferring to wire racks to cool completely.
- While the cakes cool, make the cookie dough by beating butter and brown sugar until fluffy.
- Mix in vanilla and gradually add heat-treated flour, adjusting with milk until soft but not sticky.
- Gently fold in mini chocolate chips.
- For the ice cream filling, beat softened cream cheese until smooth, then add brown sugar, milk, and vanilla.
- Fold in Cool Whip and mini chocolate chips until combined.
- Assemble the cake by placing one cake layer on a plate, spreading half of the cookie dough on top, then half of the ice cream filling.
- Place the second cake layer on top, repeating the layers with remaining cookie dough and ice cream filling.
- Frost the cake with remaining Cool Whip and decorate with mini chocolate chips and M&Ms.
- Freeze the cake for at least 6 hours, preferably overnight, before serving.