Can a dessert truly be an explosion? Let me tell you, the first time I made this Lemon Meringue Cheesecake Explosion for a friend’s birthday, the reaction was exactly that. One bite in, and my friend’s eyes widened with pure joy. It was the perfect pop of lemony sunshine mixed with creamy, dreamy cheesecake and a cloud-like toasted meringue top. It’s a showstopper that looks fancy but is friendlier to make than you think. I love making it when I need a guaranteed “wow” from my family.
The Story Behind This Happy Accident
I have always adored classic lemon meringue pie and the rich comfort of New York-style cheesecake. One rainy afternoon, I decided to combine my two favorite desserts. I wanted the sharp zing of lemon to cut through the dense creaminess. I also wanted that gorgeous, toasted meringue from the pie. The first try was good, but the meringue wept. The second try, I changed the order. Baking the cheesecake first, then adding the meringue for a final bake, was the key. Now, it’s my signature dessert. It’s a modern twist on two very classic, beloved American treats.
Why You Will Fall in Love With This Cheesecake
This recipe is a total crowd-pleaser for so many reasons. First, the taste is just magical. You get the tangy lemon, the smooth cheesecake, and the sweet, toasty meringue all at once. Second, while it looks like you spent all day in a fancy bakery, it’s mostly simple mixing and baking. The steps are clear and easy to follow. It’s the kind of recipe that makes you feel like a superstar baker without the stress. Plus, it’s perfect for making ahead, which I love for busy weeks.
Perfect Times to Make This Sweet Masterpiece
This cheesecake isn’t just for dessert; it’s for making memories. It’s perfect for summer barbecues, where its lemony freshness is a hit. It shines on holiday tables, especially Easter and Mother’s Day, bringing a bright, happy color. I always make it for milestone birthdays or celebratory dinners. It’s also a wonderful “just because” treat to share with neighbors or coworkers. Any day becomes more special with a slice of this sunshine.
Gathering Your Ingredients
Using quality, room-temperature ingredients is the secret to a smooth filling. Here’s what you’ll need:
- For the Crust: 2 cups graham cracker crumbs, ⅓ cup melted butter
- For the Filling: 3 (8 oz) packages cream cheese (softened), 1 cup granulated sugar, 1 teaspoon lemon zest, 3 large eggs, ⅓ cup fresh lemon juice, 1 cup sour cream, ¼ cup heavy cream
- For the Meringue: 4 large egg whites, ½ cup granulated sugar
Simple Ingredient Swaps
Don’t have something on hand? No worries! Here are easy swaps:
- Graham Cracker Crumbs: Use gluten-free graham crumbs, crushed digestive biscuits, or even vanilla wafer crumbs.
- Lemon Juice: Fresh is best, but bottled lemon juice works in a pinch. The zest is essential for real lemon flavor, though!
- Sour Cream: Full-fat plain Greek yogurt is a great substitute with a similar tang.
- Heavy Cream: You can use additional sour cream or full-fat yogurt instead.
Let’s Make the Lemon Meringue Cheesecake Explosion!
Get ready for some fun in the kitchen. Follow these steps for a perfect dessert every time.
Step 1: Building the Buttery Base
First, preheat your oven to 325°F (163°C). Grab a small bowl and mix the graham cracker crumbs with the melted, golden butter. The mix should look like wet sand and hold together when you pinch it. Press this mixture firmly and evenly into the bottom of a greased 9-inch springform pan. I like to use the bottom of a flat glass or measuring cup to get it really compact. This creates a solid, delicious foundation for our creamy filling. Pro tip: Press some of the crumbs a little up the sides to contain the filling beautifully.
Step 2: Creating the Lemony Creamy Filling
Now for the star! In a large bowl, beat the softened cream cheese with the sugar and bright yellow lemon zest. Beat it for a good 2-3 minutes until it’s completely smooth and no lumps remain. The smell of lemon will start to fill your kitchen. Add the eggs one at a time, mixing well after each one. This prevents the batter from curdling. Finally, gently mix in the fresh lemon juice, sour cream, and heavy cream until the batter is silky and uniform. Pour this glorious, pale yellow filling over your waiting crust.
Step 3: The First Gentle Bake
Carefully place the pan in the center of your preheated oven. Bake for 55 to 60 minutes. You’re looking for the edges to be set and puffed, but the center should still have a slight, gentle jiggle when you lightly tap the pan. It will look underdone, but that’s perfect! It will firm up as it cools. Overbaking is the enemy of a creamy cheesecake. Chef’s tip: Place a pan of hot water on the rack below to add steam and prevent cracking.
Step 4: Whipping Up the Fluffy Cloud
While the cheesecake bakes, make the meringue. Ensure your bowl and beaters are spotlessly clean and dry. Any trace of fat can stop the egg whites from fluffing up. Beat the egg whites on medium-high speed until soft peaks form. Then, very gradually, add the sugar while the mixer runs. Keep beating until the meringue is glossy, thick, and forms stiff peaks that hold their shape. This glossy white cloud is ready to top our cheesecake.
Step 5: Topping and Toasting to Golden Perfection
Once the cheesecake is out of the oven (center still jiggly), carefully spread the meringue over the top. Make sure to spread it all the way to the edges to seal it. This creates a beautiful dome. Use the back of a spoon to create pretty peaks and swirls. Return the whole thing to the oven for 10-15 more minutes. Watch it closely! You want the meringue tips to turn a beautiful, toasted golden brown.
Step 6: The Crucial Chill for Perfect Slices
This is the hardest part—waiting! Let the cheesecake cool completely on a wire rack. Then, without removing the springform ring, cover it loosely and place it in the refrigerator. Chill for at least 4 hours, but overnight is truly best. This long chill allows the flavors to marry and the texture to become perfectly sliceable. When you’re ready, run a thin knife around the edge, unclasp the ring, and prepare for compliments!
Your Time Investment
This recipe is about patience for perfect results.
- Prep Time: 20 minutes
- Bake Time: 70-75 minutes
- Cooling & Chilling Time: At least 4 hours (preferably overnight)
- Total Time: About 5 hours 30 minutes (mostly hands-off)
- Servings: 12 happy people
My Secret for Foolproof Meringue
My number one secret is using room temperature egg whites. They whip up much higher and smoother than cold ones. To quickly bring them to room temp, place the separated whites in a clean bowl and let them sit on the counter for 20-30 minutes before you start.
A Fun Fact About Meringue
Did you know the word “meringue” first appeared in an English cookbook in 1706? It’s believed to have been invented in a Swiss village called Meiringen. Whether that’s true or not, we can all be grateful for this magical mix of egg whites and sugar that turns into edible clouds!
Equipment You’ll Need
You don’t need fancy tools, just a few basics:
- 9-inch springform pan
- Electric mixer (stand or hand-held)
- Large and small mixing bowls
- Measuring cups and spoons
- Zester or fine grater
- Spatula
- Wire cooling rack
Storing Your Lemon Meringue Cheesecake Explosion
Proper storage keeps your dessert tasting fresh. After the initial chill and serving, any leftovers should be covered tightly. You can use the springform pan lid, plastic wrap, or place it in a large airtight container.
It will keep beautifully in the refrigerator for up to 4-5 days. The meringue may soften a little after the first day, but the flavor will still be incredible. I find the lemon flavor actually gets better on day two!
You can also freeze this cheesecake for longer storage. Freeze it whole or in individual slices on a parchment-lined tray before wrapping tightly in plastic and foil. It will keep for up to 2 months. Thaw overnight in the refrigerator before serving.
Helpful Tips for Success
- Room Temp is Key: Let your cream cheese, eggs, and sour cream sit out for an hour. This prevents a lumpy batter.
- Don’t Overmix: Once you add the eggs, mix just until combined. Over-beating adds too much air, which can cause cracks.
- Fresh Lemon Zest: Never skip the zest! The oils in the yellow peel hold the strongest, brightest lemon flavor.
- Clean Bowl for Meringue: Wipe your mixing bowl and beaters with a little lemon juice or vinegar to ensure no grease is present.
How to Present Your Masterpiece
Make it look as good as it tastes!
- Garnish with thin lemon slices, twists, or a sprinkle of extra lemon zest right before serving.
- A few fresh raspberries or blueberries add a lovely pop of color and a complementary tartness.
- Dust a little powdered sugar over the golden meringue peaks for a snowy, elegant effect.
- Serve on simple, white plates to let the beautiful colors of the dessert really stand out.
Try These Delicious Variations!
Love this recipe? Mix it up with one of these fun twists:
- Berry Swirl: Swirl ½ cup of raspberry or strawberry puree into the cheesecake batter before baking for a fruity ribbon.
- Gingery Snap: Use crushed gingersnap cookies instead of graham crackers for a warm, spicy crust that pairs wonderfully with lemon.
- Tropical Twist: Substitute lime zest and juice for the lemon and add ½ cup of toasted coconut to the crust for a tropical getaway.
- Blueberry Lemon: Fold 1 cup of fresh or frozen blueberries into the cheesecake batter for bursts of berry in every bite.
- Lemon Curd Layer: After chilling, spread a thin, glossy layer of store-bought or homemade lemon curd over the cheesecake before adding the meringue for an extra punch.
- Individual Servings: Make mini cheesecakes in a muffin tin lined with liners. Adjust the bake time to about 20 minutes.
Common Mistakes to Avoid
Mistake 1: Using Cold Ingredients for the Filling
This is the biggest culprit for a lumpy cheesecake batter. Straight-from-the-fridge cream cheese and eggs don’t blend smoothly. They can cause over-mixing, which adds too much air. This air expands in the oven and leads to cracks. Always plan ahead. Let your dairy and eggs sit on the counter for at least an hour. The cream cheese should be so soft that your finger leaves an indent easily.
Mistake 2: Overbaking the Cheesecake
A perfectly baked cheesecake should look a little underdone in the middle. If you wait for the center to be completely firm like a cake, it will be dry and overcooked once chilled. The residual heat will continue to cook it as it cools. The cheesecake is done when the outer edges are puffed and set, but a small area in the center (about the size of a lemon) still jiggles like Jell-O when you gently shake the pan.
Mistake 3: Adding Sugar to Egg Whites Too Fast
If you dump all the sugar into the egg whites at once, it can deflate them and make the meringue grainy. The sugar needs time to dissolve into the protein structure. Start beating the whites until they are frothy and soft peaks form. Then, add the sugar slowly, about one tablespoon at a time, while the mixer is running. This creates a stable, glossy meringue that holds its shape beautifully when toasted.
Mistake 4: Not Sealing the Meringue to the Edges
When you spread the meringue on the hot cheesecake, you must take it all the way to the crust. If you leave a gap, the cheesecake filling is exposed. In the oven, the meringue can pull away from the edges as it bakes. This looks messy and can cause the filling to weep. Use a spatula to carefully spread and seal the meringue right to the very edge of the pan, creating a complete seal over the creamy layer.
Mistake 5: Skipping the Long Chill
It’s so tempting to cut into your beautiful creation right away. But a warm cheesecake is a messy, fragile cheesecake. The chilling time is not just to make it cold. It’s a crucial step for the structure to set. This allows for those perfect, clean slices that hold their shape on the plate. For the absolute best texture and flavor, let it chill overnight in the fridge. Your patience will be rewarded.
Answers to Your Lemon Meringue Cheesecake Questions
Can I make this cheesecake ahead of time?
Absolutely, and I highly recommend it! This cheesecake actually tastes better the next day. The flavors have more time to blend and mellow together. You can bake and chill it completely 1-2 days before you plan to serve it. Keep it covered in the refrigerator until you’re ready to slice. This makes it a fantastic, stress-free dessert for parties and holidays. You get all the work done early.
Why did my cheesecake crack on top?
Cracks usually happen from a sudden temperature change or over-mixing. Taking the cheesecake from a hot oven to a cold counter can shock it. To prevent this, turn the oven off when the cheesecake is done. Then, crack the oven door open with a wooden spoon and let it cool gradually inside for about an hour. Also, avoid over-beating the batter after adding the eggs, as this adds too much air that expands and cracks the surface.
Can I use bottled lemon juice instead of fresh?
You can in a pinch, but fresh lemon juice is always best for the brightest flavor. Bottled juice often has a dull, slightly metallic taste. For a dessert where lemon is the star, fresh juice makes a big difference. Plus, you need fresh lemons anyway to get that wonderful zest! The zest contains the aromatic oils that give the real, punchy lemon flavor you want in this explosion of taste.
How do I know when the meringue is done?
The meringue is done when it has lovely toasted brown peaks and looks dry. It should not look wet or shiny in spots. The browning usually takes 10-15 minutes in a 325°F oven. Keep a close eye on it during the last 5 minutes, as it can go from perfect to burnt quickly. If you have a kitchen torch, you can also use that to toast the meringue after the cheesecake has chilled, which gives you more control.
My meringue started weeping or beading. What happened?
Weeping (little droplets of syrup) or beading (small brown droplets) can happen if the sugar isn’t fully dissolved or if the humidity is very high. To avoid weeping, make sure you add the sugar slowly to the egg whites and beat until the sugar is completely dissolved. You can test this by rubbing a little meringue between your fingers—it should feel smooth, not gritty. On humid days, it’s just a bit trickier, but the taste is still fantastic!
Is there a way to make this gluten-free?
Yes, it’s very easy! Simply use certified gluten-free graham cracker crumbs for the crust. All the other main ingredients in the filling and meringue are naturally gluten-free. Just double-check any labels on pre-packaged items like sour cream to ensure no gluten-containing additives were used. This simple swap means everyone can enjoy a slice of this amazing dessert.
Can I freeze the finished cheesecake?
You can! Freeze it after it has been fully chilled. Wrap the whole cheesecake (or individual slices) very tightly in plastic wrap, then in foil to prevent freezer burn. It will keep well for up to 2 months. Thaw it overnight in the refrigerator before serving. The texture might be slightly less perfect than fresh, but it will still be delicious. The meringue will soften, but the flavor remains.
What’s the best way to get clean slices?
Use a long, thin, sharp knife. For the cleanest cuts, run the knife under very hot water and wipe it dry with a clean towel before each slice. The heat helps the knife glide through the cold, dense cheesecake and sticky meringue without dragging or making a mess. This method gives you professional-looking, beautiful slices every single time.
Can I make this without a springform pan?
A springform pan is really best because the removable sides make it easy to serve. If you don’t have one, you can use a regular 9-inch cake pan. You’ll need to line the bottom with parchment paper so you can lift the whole cheesecake out. Be very careful when loosening the edges with a knife. It’s a bit more challenging, but it can be done in a pinch.
The center of my cheesecake is still very runny after chilling. What should I do?
If the center is soupy after the full chill time, it likely needed more baking initially. Unfortunately, you can’t fix it after it’s chilled. The best thing to do is embrace it! Scoop it into bowls like a lemon meringue cheesecake pudding. It will still taste incredible. Next time, bake it a few minutes longer until the jiggle area in the center is very small, about the size of a quarter.
And there you have it! My go-to recipe for a dessert that never fails to impress. This Lemon Meringue Cheesecake Explosion brings together the best parts of two classics. It gives you that sunny lemon zing, the rich, creamy comfort of cheesecake, and the playful, sweet crunch of toasted meringue. Don’t be intimidated by the layers. Just take your time, follow the tips, and most importantly, enjoy the process. The happy smiles you get when you serve it are the best reward. Now, go preheat that oven and create your own delicious explosion!
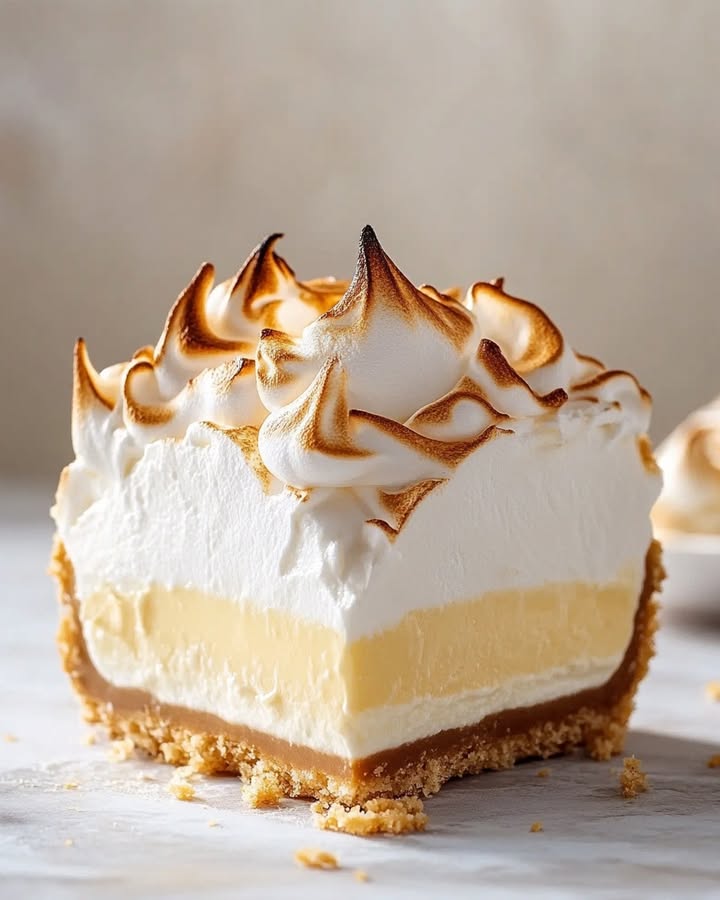
Creamy Lemon Meringue Cheesecake
Ingredients
Equipment
Method
- Preheat your oven to 325°F (163°C).
- Mix the graham cracker crumbs with melted butter until it resembles wet sand, then press it into a greased 9-inch springform pan.
- In a large bowl, beat softened cream cheese, sugar, and lemon zest until smooth.
- Add the eggs one at a time, mixing well after each addition.
- Mix in fresh lemon juice, sour cream, and heavy cream until uniform; pour over the crust.
- Bake for 55-60 minutes until the edges are set but the center has a slight jiggle.
- While the cheesecake bakes, beat egg whites until soft peaks form; add sugar gradually and beat until stiff peaks form.
- Spread meringue over the hot cheesecake, sealing edges; bake for an additional 10-15 minutes until meringue is golden.
- Cool completely on a wire rack, then chill in the refrigerator for at least 4 hours or overnight.