Creamy Yogurt Cake: The Easy Treat You’ll Make Again and Again
Have you ever had one of those days where you just need cake? Not a fussy, six-layer project, but a simple, cozy slice of something homemade. That’s me, probably right now, waving a spatula at you. My go-to is this magical Creamy Yogurt Cake. It’s the recipe I scribbled on a card years ago, and it has never, ever let me down. The secret? The humble yogurt cup that becomes your measuring tool for the most tender, moist cake imaginable.
A Little History Behind This Humble Cake
This style of cake is a staple in many French kitchens, often called a “gâteau au yaourt.” Traditionally, kids would make it using the empty yogurt pot to measure all the other ingredients! It was a first baking lesson, forgiving and fun. My version is a slight twist on that classic, focusing on that incredible, creamy texture that makes it feel so special. It’s a beautiful blend of simple home baking and a truly luxurious bite.
Why You’ll Fall in Love With This Creamy Yogurt Cake
This isn’t just any cake. First, it’s incredibly easy. You basically mix everything in one bowl. Second, the yogurt gives it a delightful tang and makes it so moist it stays soft for days. Third, it’s a blank canvas! You can enjoy it plain, dusted with sugar, or dressed up with fruit or glaze. It’s the reliable friend of the dessert world.
Perfect Occasions for Your Homemade Cake
This cake fits everywhere! It’s perfect for a casual weekend treat with coffee. It’s brilliant for a last-minute potluck because it’s so quick. I love it for a simple after-school snack for the kids. It also makes a lovely, light dessert after a big family dinner. Honestly, any time is a good time for this creamy delight.
What You’ll Need: Your Simple Ingredient List
Here’s what you’ll need to make this easy yogurt cake. The beauty is in the simplicity!
- 3 plain yogurts (use the 5-6 oz cups, and keep the cup for measuring!)
- 2 large eggs
- 200g (about 1 cup) granulated sugar
- 250g (about 2 cups) all-purpose flour
- 1 packet (2 ¼ tsp) baking powder
- 100ml (about ½ cup) vegetable oil
- 1 teaspoon vanilla extract
No Yogurt? No Problem! Handy Substitutions
Out of something? Don’t worry, you can still make your cake.
- Yogurt: Use Greek yogurt for an even richer texture. Sour cream or buttermilk also work wonderfully.
- Oil: A mild-flavored oil like canola or melted, cooled butter works just fine.
- Flour: For a slightly denser cake, you can use 1 cup all-purpose and 1 cup whole wheat flour.
- Vanilla: The seeds from a vanilla bean or a tablespoon of rum or lemon zest add lovely flavor.
Let’s Bake! Your Step-by-Step Guide to Creamy Yogurt Cake
Step 1: Get Your Oven Ready
First things first, preheat your oven to 350°F (180°C). This gives your oven time to reach the perfect, steady temperature. Grab your favorite cake pan—a loaf pan, a round pan, or a square one all work. Grease it well with butter or non-stick spray and dust it with a little flour, tapping out the excess. This little ritual is like tucking your cake into a non-stick bed, promising a clean release later.
Step 2: Whisk the Eggs and Sugar Into a Cloud
In a large mixing bowl, crack in your two eggs. Pour in all the sugar. Now, take a whisk and beat them together with some energy! You’re not just mixing; you’re incorporating air. Do this for a good 2-3 minutes until the mixture turns pale yellow, gets a bit thicker, and looks lovely and foamy. This step adds lightness to your creamy yogurt cake batter.
Step 3: Bring in the Creamy Team
Time for the star: spoon in all three yogurts. The white swirls into the yellow eggs beautifully. Next, add the flour, baking powder, oil, and that teaspoon of fragrant vanilla. Switch to a spatula or spoon and gently fold everything together. Stop as soon as you no longer see streaks of dry flour. The batter will be thick, creamy, and oh-so-smooth. Pro tip: Don’t overmix here. A few small lumps are totally fine and keep the cake tender.
Step 4: Prep for the Oven
Pour that gorgeous, smooth batter into your prepared pan. Use your spatula to scrape out every last bit – you don’t want to waste any! Gently smooth the top so it bakes evenly. You’ll see little air bubbles popping on the surface; that’s a good sign! The scent of vanilla and sweet batter is already filling your kitchen.
Step 5: The Bake-Off
Place your cake pan in the center of your preheated oven. Now, be patient! Let the magic happen for 35 to 40 minutes. Avoid the temptation to open the oven door too early. You’ll know it’s done when the top is a deep, golden brown and a toothpick poked straight into the middle comes out clean, with maybe just a crumb or two. Chef’s tip: If the top is browning too fast, you can loosely tent it with a piece of aluminum foil for the last 10 minutes.
Step 6: The Crucial Cool-Down
This is the hardest part: waiting. Let the cake cool in its pan on a wire rack for about 15 minutes. This allows it to set and firm up a bit. Then, run a knife around the edges to loosen it, and carefully turn it out onto the rack to cool completely. A warm cake is fragile, so this patience prevents a cake-breakdown – literally!
Your Creamy Yogurt Cake Timeline
This cake respects your busy life. From start to finish, you’re looking at:
- Prep Time: A quick 10 minutes
- Cook Time: 35-40 minutes of hands-off baking
- Cooling Time: At least 30 minutes (try to wait!)
- Total Time: About 50 minutes active time
- Servings: 8 generous slices
The One Secret I Always Use
My absolute trick is to add a tiny pinch of salt to the batter, even if the recipe doesn’t call for it. It doesn’t make the cake salty at all. Instead, it makes all the other flavors – the vanilla, the sweetness, the creamy yogurt – pop and taste more like themselves. It’s the magic behind a truly balanced cake.
A Fun Yogurt Fact
Did you know yogurt has been used in baking for centuries? Before commercial leavening was common, bakers used the natural acidity in yogurt and buttermilk to react with baking soda, helping cakes rise. So when you bake with yogurt, you’re connecting with a very old, very smart kitchen tradition!
Grab Your Tools
You don’t need any fancy equipment for this easy cake. Just gather:
- One large mixing bowl
- A whisk and a spatula
- Measuring cups and spoons
- A 9-inch round or 8-inch square cake pan (or a loaf pan)
- A wire cooling rack
- Toothpick or cake tester
How to Keep Your Cake Fresh and Creamy
Once your cake is completely cool, the best way to store it is right on the counter. Place it under a cake dome or in an airtight container. The moisture from the yogurt will keep it incredibly soft for up to 3 days. No need for the fridge, which can actually dry it out!
If you need to keep it longer, you can freeze it. Wrap the whole cake or individual slices tightly in plastic wrap, then in aluminum foil. It will keep in the freezer for up to 2 months. Thaw it overnight at room temperature when you’re ready for a treat.
If you’ve glazed your cake, it’s still fine at room temperature for a day or two. Just make sure your container isn’t too tight against the glaze, as it might stick.
My Best Tips for Cake Success
- Use room temperature eggs and yogurt. They blend into the batter much more smoothly.
- When measuring flour, fluff it up in the bag, spoon it into your measuring cup, and level it off. Don’t scoop directly with the cup, as this packs in too much flour.
- Let the cake cool in the pan for a bit before removing it. This prevents it from breaking apart.
- For an extra special touch, poke small holes in the warm cake and brush it with a simple syrup or a bit of fruit juice.
Making It Look Beautiful
Presentation is easy and fun! A simple dusting of powdered sugar through a fine-mesh sieve looks elegant. For a zingy twist, whip up a quick lemon glaze with powdered sugar and lemon juice. Serve each slice with a few fresh berries on the side. Or, for a rustic look, just slice it thick and serve it right on the plate–its golden crust is beautiful on its own.
6 Delicious Ways to Mix Up Your Yogurt Cake
This recipe is your perfect starting point. Here are six fun twists:
- Lemon Zest Delight: Add the zest of two lemons to the batter. The bright citrus flavor cuts through the creaminess perfectly.
- Berry Burst Cake: Toss a cup of fresh or frozen blueberries (or raspberries) in a tablespoon of flour, then gently fold them into the batter before baking.
- Chocolate Chip Joy: Who can resist? Fold in ¾ cup of semi-sweet or dark chocolate chips for a classic crowd-pleaser.
- Almond Vanilla Dream: Replace ½ teaspoon of the vanilla with pure almond extract and sprinkle sliced almonds on top before baking.
- Whole Grain Goodness: Swap half the all-purpose flour for whole wheat pastry flour. It adds a lovely nutty flavor and more fiber.
- Coconut Cream Cake: Use coconut yogurt and replace the oil with melted coconut oil. Fold in ½ cup of shredded coconut for a tropical treat.
Common Mistakes to Avoid for the Best Cake
Mistake 1: Overmixing the Batter
This is the biggest trap! Once you add the flour, mixing too much develops the gluten in the flour. This can make your cake tough and rubbery instead of soft and tender. Mix just until you see no more dry flour streaks. A few small lumps in the batter are completely fine and will bake out.
Mistake 2: Using Cold Ingredients
Cold eggs and yogurt straight from the fridge don’t blend well with the sugar and oil. This can lead to a curdled-looking batter that doesn’t emulsify properly. Your cake might not rise as well. Simply take your eggs and yogurt out about 30 minutes before you start baking. This small step makes a huge difference in creating a smooth, homogenous batter.
Mistake 3: Not Testing for Doneness Correctly
Relying only on the clock or a dark top can fool you. Ovens vary, and a dark top doesn’t always mean the middle is cooked. Always use the toothpick test. Insert it into the very center of the cake. If it comes out with wet batter, it needs more time. If it comes out with a few moist crumbs attached, it’s perfect. A completely clean toothpick is also a good sign.
Mistake 4: Skipping the Pan Prep
Buttering and flouring your pan is non-negotiable for this moist cake. Just a quick spray of oil often isn’t enough. The cake loves to stick. Take 30 seconds to grease every corner of the pan with butter or baking spray, then add a tablespoon of flour. Shake and tilt the pan until it’s coated, then tap out the excess. Your cake will slide out beautifully every single time.
Your Creamy Yogurt Cake Questions, Answered
Can I use flavored yogurt instead of plain?
You can, but be careful. Flavored yogurts often contain extra sugar and additives. If you use a flavored yogurt like vanilla or lemon, you might want to slightly reduce the granulated sugar in the recipe by a tablespoon or two. The cake will still be delicious, but the flavor will be whatever yogurt you choose.
My cake is dense. What did I do wrong?
A dense cake usually has two common causes. First, you might have overmeasured the flour. Always spoon and level your flour for accuracy. Second, you might have overmixed the batter after adding the flour. Remember, gentle folding is key. Also, check that your baking powder is fresh and not expired, as old leavener won’t make the cake rise properly.
Can I make this cake without eggs?
You can try an egg substitute, though the texture will change a bit. For one egg, you can use ¼ cup of applesauce or mashed banana. For two eggs, a commercial egg replacer (like Bob’s Red Mill) mixed with water often works well. The cake might be slightly more dense, but it will still taste great and be moist from the yogurt.
Why did the top of my cake crack?
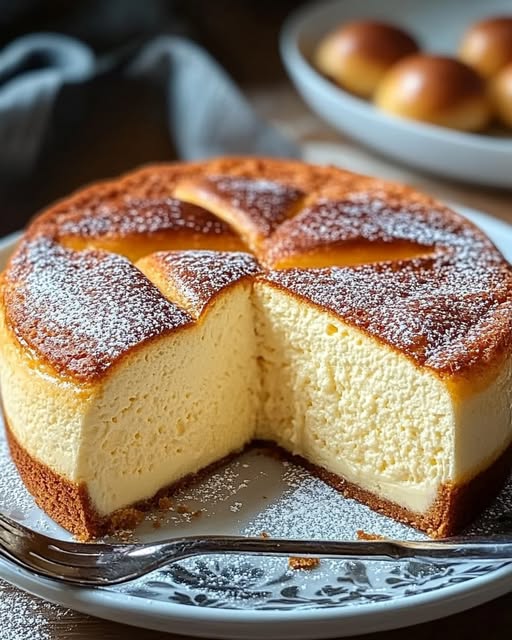
A crack on top is completely normal and even desirable for many simple cakes like this one! It often happens when the cake rises quickly in a hot oven. It doesn’t mean you did anything wrong. In fact, many bakers love that rustic, cracked top. It shows you have a nicely risen, homemade cake.
How can I tell if my cake is baked through without a toothpick?
If you don’t have a toothpick, use a thin, sharp knife or even a dry spaghetti noodle! Gently press the top of the cake with your fingertip. If it springs back and doesn’t leave an indent, it’s likely done. Also, you’ll see the cake pulling away slightly from the edges of the pan when it’s ready.
Can I double this recipe?
Absolutely! This recipe doubles very easily. Just make sure you use a much larger baking pan, like a 9×13 inch rectangular pan or a bundt pan. Your baking time will be longer, likely around 45-55 minutes. Always start checking for doneness at the 40-minute mark with the toothpick test.
What’s the best way to add fruit to this cake?
For fresh fruit like berries or chopped peaches, toss them in a little bit of flour first. This light coating helps prevent them from sinking straight to the bottom of the cake during baking. Then, gently fold them into the finished batter just before you pour it into the pan.
Can I make this cake in a different pan, like a bundt pan?
Yes, a bundt pan works wonderfully for this creamy yogurt cake! Make sure you grease and flour the bundt pan VERY thoroughly, getting into all the nooks and crannies. The baking time might be a little less because of the center tube. Start checking for doneness at the 30-minute mark.
Is there a way to make this recipe lower in sugar?
You can reduce the sugar slightly, but it will affect texture and moisture. I wouldn’t recommend cutting more than ¼ of the total amount. You can also try using a natural sugar substitute that measures 1:1 like erythritol or monk fruit blend. The cake might bake a little faster, so keep an eye on it.
My cake stuck to the pan! Can I save it?
Don’t panic! Let the cake cool completely in the pan. Then, carefully run a thin, flexible knife or an offset spatula around every edge again. Place a plate or cooling rack on top, and confidently flip the whole thing over. Sometimes a few gentle taps on the bottom of the pan will release it. If pieces break, you can use them for a pretty trifle or cake parfait.
Ready, Set, Bake!
And there you have it – my absolute favorite, no-fail recipe for a Creamy Yogurt Cake. It’s the cake that feels like a hug, the one you can make without thinking, and the one that always makes people ask for the recipe. I hope it becomes a trusted friend in your kitchen, just like it is in mine. Now, go preheat that oven and treat yourself to a slice of simple, creamy goodness. Happy baking!
Creamy Yogurt Cake
Ingredients
Equipment
Method
- Preheat your oven to 350°F (180°C) and grease your cake pan with butter or non-stick spray, dusting with flour.
- In a large mixing bowl, whisk the eggs and sugar until pale yellow and foamy (about 2-3 minutes).
- Spoon in the three yogurts, and then add the flour, baking powder, oil, and vanilla. Gently fold until just combined.
- Pour the batter into the prepared pan, smoothing the top.
- Bake in the center of the oven for 35-40 minutes, or until golden brown and a toothpick comes out clean.
- Allow the cake to cool in the pan on a wire rack for about 15 minutes, then carefully turn it out to cool completely.