The Ultimate Chocolate Coffee Cake: A Symphony of Flavors in Every Slice
Have you ever had a cake so good it makes you pause mid-forkful just to savor the moment? That’s this cake. It all started when I needed a showstopper for my best friend’s birthday. I wanted rich chocolate, a kick of coffee, and something that looked stunning without needing fancy frosting skills. After a few (delicious) test runs, this Chocolate and Coffee “Naked” Cake was born. The way the bitter cocoa, deep coffee, and sweet peanut butter ganache dance together? Pure magic. Your kitchen will smell like your favorite café, and your friends will beg for the recipe.
From Humble Beans to a Glorious Cake
Chocolate and coffee are one of those legendary pairings, like peanut butter and jelly. Coffee’s roasty notes have a wonderful way of making chocolate taste even more chocolatey. While layer cakes are a classic, the “naked” cake trend—where the sides are left unfrosted to show the beautiful layers—is perfect for home bakers. It feels rustic and elegant at the same time. This recipe takes that modern look and fills it with classic, comforting flavors. It’s a bit of tradition and a bit of today, all on one beautiful plate.
Why You’ll Adore This Chocolate Coffee Cake
First, it’s absolutely decadent but not overly sweet. The brown sugar and bitter cocoa create a deep, complex base. Second, the textures are a dream: tender cake layers, silky coffee buttercream, and that fluffy peanut-coffee ganache. And third, it’s a real centerpiece. It looks like you spent all day in a professional bakery, but the steps are straightforward. It’s the kind of recipe that builds your baking confidence and wins you major compliments.
Perfect Occasions for Your Chocolate Masterpiece
This isn’t your everyday snack cake (though I won’t tell if you make it just because). It’s perfect for celebrations where you want to impress.
- Birthdays & Anniversaries: It feels special and celebratory.
- Dinner Parties: A slice with a cup of coffee is the perfect grand finale.
- Holiday Gatherings: It’s a rich, festive alternative to traditional pies.
- Potlucks: Be prepared to be the most popular person there.
Gathering Your Ingredients
Here’s what you’ll need to create this 20 cm layered delight. I find measuring everything out before I start (the French call it *mise en place*) makes the baking process so much smoother and more enjoyable.
For the Chocolate Coffee Cake Layers:
- Milk: 400 cc (about 1 2/3 cups)
- Cream: 100 cc (about 6.5 tbsp)
- Butter: 400 g (about 1 3/4 cups), unsalted
- Brown Sugar: 360 g (about 1 3/4 cups, packed)
- Semi-bitter Chocolate: 300 g, finely chopped
- Eggs: 6 large, at room temperature
- Flour 0000 (or cake flour): 480 g (about 4 cups)
- Baking Powder: 30 g (about 2 tbsp)
- Bitter Cocoa Powder: 70 g (about 3/4 cup)
- Instant Coffee: 1 tablespoon
For the Coffee Buttercream:
- Butter: 190 g (about 3/4 cup + 2 tbsp), softened
- Powdered (Impalpable) Sugar: 380 g (about 3 cups)
- Instant Coffee: 3 to 4 tbsp, to taste
For the Coffee Peanut Ganache:
- Cream: 150 cc (about 2/3 cup)
- White Chocolate: 450 g, finely chopped
- Butter: 30 g (about 2 tbsp), softened
- Peanut Paste (or butter): 150 g (about 1/2 cup)
- Instant Coffee Paste: 1 tbsp dissolved in a tiny bit of hot water
To Decorate: Chocolate curls, made with a potato peeler from a chocolate bar.
Handy Ingredient Substitutions
Don’t panic if you’re missing something! Here are some easy swaps:
- Cake Flour: For every cup of all-purpose flour, take out 2 tablespoons and replace it with 2 tablespoons of cornstarch. Sift together.
- Peanut Paste: Any nut butter works! Almond or hazelnut butter would be divine.
- Instant Coffee: For a stronger kick, use 1-2 shots of cooled espresso in both the cake and cream.
- White Chocolate: You can use milk or dark chocolate, but it will change the flavor and color of the ganache beautifully.
Crafting Your Chocolate Coffee Cake: Step-by-Step
Step 1: Create the Chocolate Base
Grab a medium saucepan. Combine the milk, cream, butter, and brown sugar. Warm it over medium heat. You want to stir it until the butter melts and the sugar dissolves. Let it come just to a gentle boil—you’ll see little bubbles around the edge. Immediately take it off the heat. Have your finely chopped semi-bitter chocolate waiting in a large bowl. Pour the hot cream mixture over it. The heat will melt the chocolate into a glossy, luxurious pool. Stir gently until it’s completely smooth and combined.
Step 2: Bring in the Eggs and Dry Friends
Let the chocolate mixture cool for about 5-10 minutes. You don’t want to scramble the eggs! Then, whisk in the eggs, one at a time, making sure each is fully incorporated before adding the next. In a separate bowl, sift together your flour, baking powder, and bitter cocoa. This sifting step is crucial—it adds air and prevents lumps. Now, gently fold the dry ingredients into the wet chocolate mixture. Do this in two or three additions. Just mix until no flour streaks remain. The batter will be thin but rich and fragrant.
Step 3: Bake to Perfection
Preheat your oven to 170°C (340°F). Line four 20 cm (8-inch) cake pans with parchment paper. If you only have one or two pans, that’s okay! Just bake in batches, keeping the unused batter at room temperature. Divide the batter evenly between the pans. Bake for about 15 minutes. The top should look set, and a toothpick inserted in the center should come out with just a few moist crumbs, not wet batter. Pro tip: Rotate your pans halfway through for even baking. Let the cakes cool in their pans for 10 minutes, then turn them out onto a wire rack to cool completely.
Step 4: Whip Up the Coffee Buttercream
While the cakes cool, make your buttercream. Beat the softened butter in a bowl with an electric mixer for 3-4 minutes. You want it to become very pale, fluffy, and almost white. This adds volume. Gradually add the sifted powdered sugar, beating on low at first to avoid a cloud of sugar, then on high. Dissolve your instant coffee in a teaspoon of hot water to make a thick paste. Let it cool for a minute, then add it to the buttercream. Beat again until it’s all unified, creamy, and has a lovely light brown color. Set it aside at room temperature.
Step 5: Master the Peanut Coffee Ganache
This ganache is the secret weapon! Heat the cream in a small saucepan until it just starts to simmer. Place your finely chopped white chocolate in a heatproof bowl. Pour the hot cream over it, making sure all the chocolate is submerged. Let it sit for a minute, then stir from the center outwards until it’s a smooth, shiny ganache. Whisk in the soft butter until it melts. Then, add the peanut paste and your coffee paste. Whisk vigorously until everything is perfectly smooth and homogenous. Pop it in the fridge for 1 to 1.5 hours. It needs to be cold but not solid.
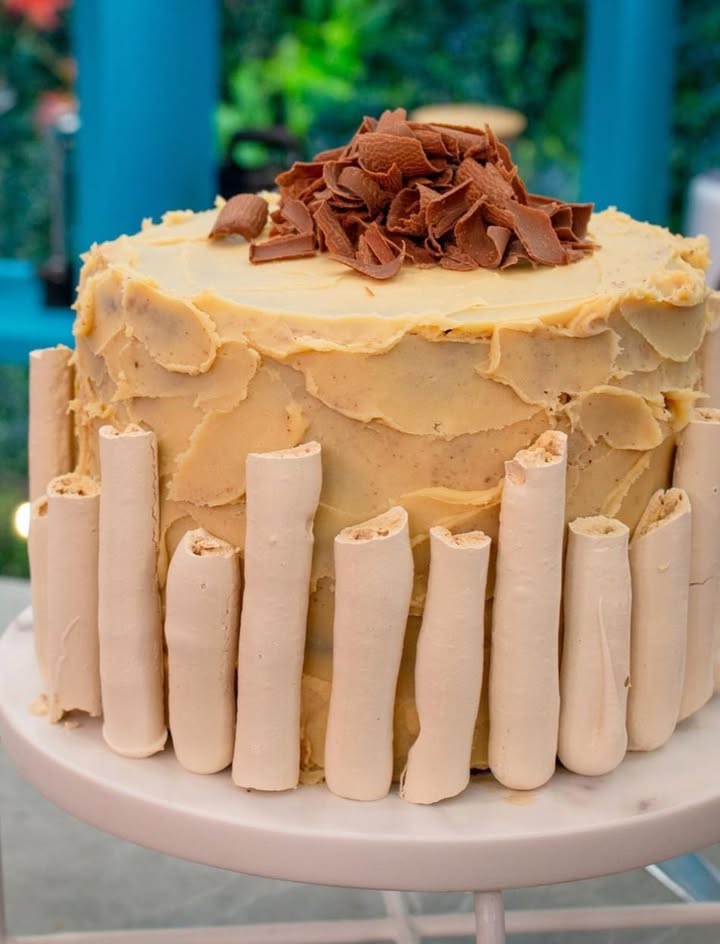
Step 6: Assemble Your Beautiful Naked Cake
Take the chilled ganache out of the fridge. Whip it with an electric mixer for a minute or two until it lightens in color and becomes spreadable, like a fluffy mousse. Now, assemble. Place your first cake layer on a plate or cake stand. Spread a generous layer of coffee buttercream on top. Add the next layer and spread it with a layer of the whipped peanut coffee ganache. Repeat, alternating creams, ending with a cake layer on top. Use any remaining buttercream to create decorative swirls on top. Finish with a glorious pile of chocolate curls made by scraping a potato peeler down the side of a chocolate bar. Chef’s tip: Use a bench scraper or offset spatula to gently smooth the sides, letting the layers peek through for that perfect ‘naked’ look.
Your Chocolate Coffee Cake Timeline
Plan ahead for the best results! This cake benefits from a little rest before serving.
- Prep Time: 45 minutes
- Baking Time: 15 minutes per batch (about 30-45 minutes total if baking in shifts)
- Cooling Time: 1 hour (crucial for easy handling!)
- Ganache Chilling: 1.5 hours
- Assembly & Decorating: 20 minutes
- Total Time (start to finish): About 4 hours, including cooling and chilling.
A Secret from My Kitchen to Yours
My biggest secret? Let the cakes cool COMPLETELY. I know it’s tempting to frost a slightly warm cake, but patience is key here. If the cakes are even a little warm, the buttercream and ganache will melt, slide, and make a mess. The cake will also be more fragile and can tear. I pop my cooled layers in the fridge for 20 minutes before assembling. A cold cake is a stable cake, making your assembly neat and clean.
A Sweet Bit of Extra Info
Did you know using coffee in chocolate baking is a classic chef’s trick? The caffeine in coffee doesn’t just add flavor; it can actually enhance our perception of chocolate’s bitterness and richness, making the whole dessert taste more intensely chocolatey. You’re not just adding a coffee flavor, you’re using a little kitchen science to make the chocolate sing louder!
Essential Equipment for Your Bake
You don’t need anything too fancy:
- Four 20 cm (8-inch) round cake pans
- Parchment paper
- Medium saucepan and mixing bowls
- Electric hand mixer or stand mixer
- Wire cooling racks
- Spatulas (both rubber and offset metal are handy)
- Potato peeler for chocolate curls
- Piping bag and star tip (optional, for decoration)
Storing Your Chocolate Coffee Cake Creation
Because of the buttercream and ganache, this cake should be stored in the refrigerator. Cover it loosely with a cake dome or place it in a large airtight container to protect it from absorbing other fridge odors. It will keep beautifully for up to 4-5 days.
If you need to store it longer, you can freeze the assembled, undecorated cake. Wrap the whole cake tightly in a layer of plastic wrap, then a layer of aluminum foil. Freeze for up to 2 months. Thaw it overnight in the refrigerator before adding any final decoration (like fresh chocolate curls) and serving.
You can also freeze the individual, unfrosted cake layers! Wrap each cooled layer separately and freeze. This is a fantastic time-saver. Thaw them at room temperature before you’re ready to make your creams and assemble.
Tips and Advice for Guaranteed Success
- Room Temperature is Key: Using room temperature eggs and butter for the buttercream helps everything emulsify smoothly without curdling.
- Chop Chocolate Finely: The smaller the chocolate pieces, the quicker and more evenly they will melt with the hot liquid.
- Test for Doneness: Ovens vary. Start checking the cakes at 12 minutes. They are done when the top springs back lightly to the touch.
- Level Your Layers: If your cakes have a slight dome, use a serrated knife to gently slice off the top to create a flat, even surface. This makes stacking much easier.
Presentation Ideas to Wow Your Guests
- Place the cake on a beautiful cake stand and sprinkle a dusting of cocoa powder around the plate.
- Instead of all chocolate curls on top, add a sprinkle of crushed, roasted peanuts for extra texture.
- Serve each slice with a small dollop of lightly sweetened whipped cream and a single coffee bean on the side.
- For a festive touch, decorate the base of the cake with a ring of whole coffee beans or chocolate-covered espresso beans.
Healthier & Fun Variations to Try
Feel like mixing it up? Here are six delicious twists on the classic chocolate coffee cake:
- Gluten-Free Chocolate Coffee Cake: Substitute the all-purpose flour with a 1:1 gluten-free baking blend. Ensure your baking powder is gluten-free too.
- Dairy-Free Delight: Use plant-based milk, cream, and butter. Choose a high-quality dairy-free chocolate. Coconut oil can sometimes stand in for butter in the cake batter.
- Mocha Orange Cake: Add the zest of one orange to the cake batter and a tablespoon of orange liqueur (like Cointreau) to the coffee buttercream for a bright, citrusy note.
- Salted Caramel Chocolate Cake: Swap the peanut ganache for a salted caramel filling. Drizzle extra caramel over the assembled cake for a sticky, sweet-and-salty treat.
- Mini Chocolate Coffee Cakes: Bake the batter in a cupcake tin (fill halfway) for about 12-15 minutes. Frost each mini cake with the buttercream and ganache for individual portions.
- Ultimate Dark Chocolate Cake: Use all dark chocolate (70%+) in the cake and ganache, and reduce the sugar slightly for an intensely rich, grown-up dessert.
Common Mistakes to Avoid for Your Chocolate Cake
Mistake 1: Not Sifting the Dry Ingredients
It’s easy to skip the sifting, but it really matters here. Cocoa powder and baking powder love to clump. If you don’t sift, you risk having pockets of bitter cocoa or uneven leavening in your cake. This can lead to dense spots or a strange texture. Simply whisk your flour, cocoa, and baking powder through a fine-mesh sieve right into your mixing bowl. It takes one extra minute but makes your batter beautifully smooth.
Mistake 2: Adding Eggs to Hot Chocolate
If your chocolate and cream mixture is too hot, you’ll cook the eggs on contact. This creates little bits of scrambled egg in your batter and can ruin the texture. Always let the hot mixture cool for 5-10 minutes after melting the chocolate. It should feel warm to the touch, not hot. Test it by dipping your finger in—you should be able to hold it there comfortably.
Mistake 3: Overbeating the Cake Batter
Once you add the flour, you need to be gentle. Overmixing develops the gluten in the flour, which can make your cake layers tough and chewy instead of tender and soft. Fold the dry ingredients in with a spatula using broad, gentle strokes. Stop as soon as you no longer see streaks of dry flour. A few small lumps are better than an overworked batter.
Mistake 4: Frosting a Warm Cake
This is the number one reason for a cake disaster! Warm cake layers will melt the butter in your creams, causing them to slide off and soak into the cake. Your beautiful layers will become a soggy mess. Let the layers cool completely on a wire rack. For extra security, wrap them in plastic and chill them in the fridge for 20-30 minutes before you start assembling. A cold cake is much easier to handle and frost.
Your Chocolate Coffee Cake Questions, Answered
Can I make this cake in advance?
Absolutely! In fact, I recommend it. You can bake the cake layers up to two days ahead. Let them cool completely, then wrap each one tightly in plastic wrap and store at room temperature. The buttercream can be made a day ahead and kept covered in the fridge—just let it come to room temperature and re-whip it before using. You can even assemble the whole cake the day before. Keep it covered in the fridge and let it sit out for 30 minutes before serving to take the chill off.
My ganache is too runny/too hard. What did I do wrong?
Ganache consistency depends on temperature and ratios. If it’s too runny after chilling, it may not have been cold enough before whipping. Pop it back in the fridge for another 30 minutes. If it’s rock hard, it’s been chilled too long. Let it sit on the counter for 15-20 minutes to soften slightly before attempting to whip it. The perfect whipping consistency is like a firm, spreadable peanut butter.
I don’t have four cake pans. Can I still make this?
Yes, of course! Just bake in batches. Keep your remaining batter at room temperature while the first cakes are baking. Wash, re-line, and cool your pans before reusing them for the next batch. The batter will be fine sitting out for the 30-45 minutes it takes to bake in shifts.
Can I use brewed coffee instead of instant?
You can, but you’ll need to adjust. For the cake, replace the 1 tbsp instant coffee with 2-3 tablespoons of very strong, cooled brewed coffee or espresso. For the buttercream and ganache, it’s trickier because liquid can break the emulsion. It’s best to reduce brewed coffee in a pan until it’s a thick syrup (about 1-2 tablespoons worth) and let it cool before adding.
What can I use instead of peanut paste?
Any nut or seed butter will work wonderfully. Almond butter, cashew butter, or even sunflower seed butter for a nut-free option are all great. The flavor will change, but it will still be delicious. You could also omit it entirely for a plain white chocolate coffee ganache.
How do I get clean slices of cake?
Use a long, thin, sharp knife. Run it under very hot water, wipe it dry with a towel, and make your cut. The heat helps the knife glide smoothly through the cold buttercream and ganache, giving you a perfect, clean slice. Wipe and re-heat the knife between each slice.
Why is my buttercream gritty?
Grittiness comes from undissolved powdered sugar. Always sift your powdered sugar before adding it to the butter. Also, make sure your butter is properly softened so it can fully incorporate the sugar. Beat it for a full 3-5 minutes after adding all the sugar—this helps dissolve the crystals.
Can I make this into a sheet cake or cupcakes?
For a sheet cake, pour all the batter into a greased 9×13 inch pan and bake at the same temperature. It will take longer, likely 30-40 minutes. For cupcakes, fill lined cups halfway and bake for 18-22 minutes. You’ll get about 24-30 cupcakes. The frosting amounts should be enough for either variation.
My cake layers are dry. What happened?
Dry cake usually means overbaking. Ovens can run hot. Invest in an oven thermometer to check the true temperature. Also, start checking for doneness a few minutes before the recipe suggests. The cakes continue to cook a bit as they cool in the pan, so take them out when a toothpick has a few moist crumbs attached.
Is there a non-alcoholic way to enhance the coffee flavor?
Definitely! Using a high-quality instant espresso powder will give you the strongest coffee punch without any alcohol. You can also add a tiny pinch of cinnamon or nutmeg to the cake batter; these spices complement coffee flavor beautifully and make it taste richer and more complex.
The Final Slice
This Chocolate and Coffee Cake is more than a dessert. It’s a project of love, a celebration of timeless flavors, and a guaranteed way to create a happy memory around your table. Don’t be intimidated by the layers. Take your time, enjoy the process of watching simple ingredients transform, and get ready for the applause. Trust me, that first bite of rich cake, fluffy ganache, and smooth buttercream makes every minute worth it. Now, go preheat that oven and get baking. Your masterpiece awaits!
Crispy Fried Chicken
Ingredients
Equipment
Method
- Combine the milk, cream, butter, and brown sugar in a medium saucepan and warm until the butter melts and sugar dissolves. Bring to a gentle boil and remove from heat.
- Pour the hot mixture over finely chopped chocolate and stir until smooth.
- Let the mixture cool for 5-10 minutes, then whisk in eggs one at a time.
- Sift flour, baking powder, and cocoa together in a separate bowl and fold it into the chocolate mixture.
- Preheat the oven to 170°C (340°F) and line four 20 cm (8-inch) cake pans with parchment paper. Divide batter evenly among pans.
- Bake for about 15 minutes or until a toothpick comes out with a few moist crumbs. Cool in pans for 10 minutes, then transfer to wire racks.
- To make the buttercream, beat softened butter until pale, then gradually add powdered sugar and beaten coffee until creamy and well combined.
- For the ganache, heat the cream until simmering. Pour over chopped white chocolate and stir until smooth. Add butter, peanut paste, and coffee paste; mix until well combined.
- Chill the ganache in the fridge for 1 to 1.5 hours until it thickens.
- Assemble the cake by alternating layers of coffee buttercream and peanut coffee ganache, finishing with a layer of cake on top. Decorate with any remaining buttercream and chocolate curls.