Why This Crispy Garlic Chicken Recipe Will Win Your Heart
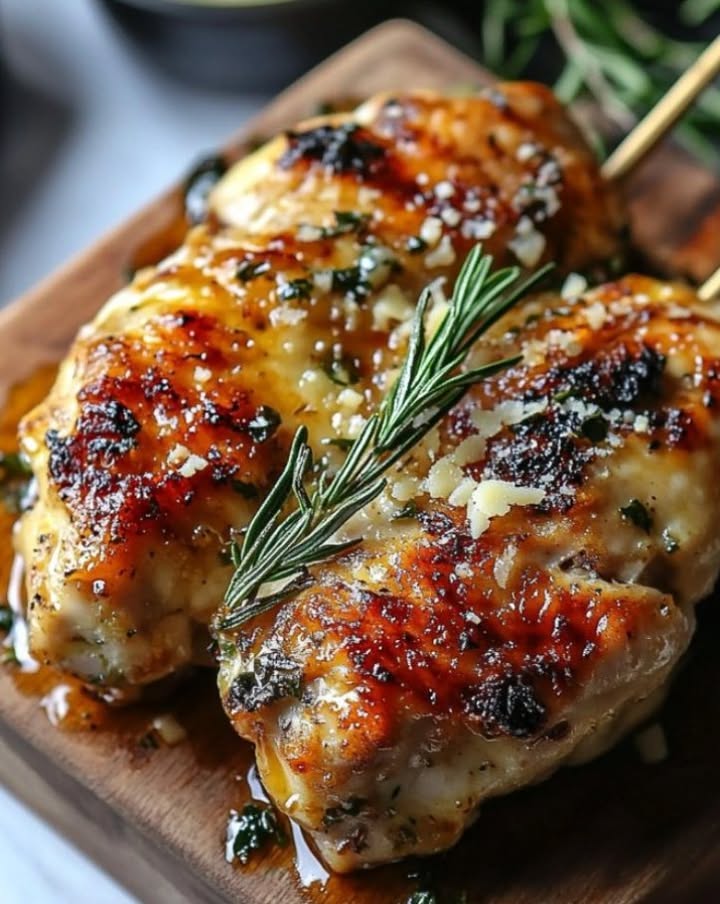
There’s something magical about the smell of garlic and Parmesan wafting through the kitchen. It reminds me of cozy family dinners where everyone fights over the last piece of chicken. I first made this **Crispy Garlic Chicken** on a Friday night when my friends unexpectedly dropped by. With just a few pantry staples, I whipped up this dish, and it was an instant hit. The golden crust, the juicy chicken inside, and that garlicky aroma? Pure comfort food magic. If you’re looking for a recipe that’s simple yet impressive, this is it.
A Little Backstory About Crispy Garlic Chicken
This dish has roots in classic Italian-American cooking, where garlic and Parmesan are like best friends—always together, always delicious. While traditional recipes might involve frying, I’ve modernized it with a healthier oven-baked twist. My version still delivers that irresistible crunch without all the mess or extra oil. Over the years, I’ve tweaked it to perfection, adding fresh parsley for color and freshness. Every time I make it, someone asks for the recipe. Trust me, your dinner guests will be begging for seconds.
Why You’ll Love This Recipe
What’s not to love? This **Crispy Garlic Chicken** checks all the boxes: crispy, cheesy, garlicky goodness that’s easy to make. The prep is quick, the ingredients are simple, and the flavors are bold. Plus, it’s versatile enough to pair with almost any side dish. Whether you’re a busy mom, a college student, or just someone who loves good food, this recipe is foolproof. And let’s be honest—there’s nothing quite like biting into a perfectly cooked piece of chicken with a satisfying crunch.
Perfect Occasions to Make This Dish
Need a crowd-pleaser for game day? This is it. Hosting a dinner party? Serve this, and watch your friends rave. It’s also perfect for weeknight dinners because it’s so easy to throw together. I even make it for holidays like Easter or Christmas when I want something special but not overly complicated. Honestly, any day is a good day for **Crispy Garlic Chicken**.
Ingredients You’ll Need
Here’s what you’ll need to make this mouthwatering dish:
- 4 boneless, skinless chicken breasts
- 1/2 cup melted butter
- 4 cloves garlic, minced
- 1 cup panko breadcrumbs
- 1 cup grated Parmesan cheese
- 2 tablespoons fresh parsley, chopped
- Salt and pepper to taste
Substitution Options
Not everyone has the same pantry staples, so here are some swaps:
- Chicken: Use chicken thighs if you prefer dark meat.
- Panko: Regular breadcrumbs work too, though they won’t be as crispy.
- Parmesan: Grated Romano cheese is a great alternative.
- Fresh parsley: Swap with dried parsley (use half the amount).
- Butter: Olive oil can replace melted butter for a lighter option.
Let’s Get Cooking!
Step 1: Preheat and Prep
Start by preheating your oven to 375°F (190°C). Line a baking sheet with parchment paper—it’s a lifesaver for easy cleanup. Grab two bowls: one for the butter-garlic mixture and another for the crunchy coating. Melt your butter and stir in the minced garlic. The smell alone will get your stomach growling. Pro tip: Use fresh garlic instead of pre-minced for maximum flavor.
Step 2: Mix the Coating
In the second bowl, combine the panko breadcrumbs, Parmesan, parsley, salt, and pepper. Mix well until everything is evenly distributed. Panko gives the chicken that addictive crunch, while the Parmesan adds a rich, nutty flavor. I love how the parsley adds a pop of green against the golden crumbs—it makes the dish look gourmet.
Step 3: Coat the Chicken
Now comes the fun part. Dip each chicken breast into the butter-garlic mixture, making sure it’s fully coated. Then, press it into the breadcrumb mixture, patting gently to help the coating stick. Place the coated chicken on the prepared baking sheet. Repeat until all four pieces are ready. Chef’s tip: For extra crispiness, drizzle a little more melted butter over the tops before baking.
Step 4: Bake to Perfection
Pop the tray into the oven and bake for 25–30 minutes. Keep an eye on it—you’ll know it’s done when the chicken is golden brown and reaches an internal temperature of 165°F (74°C). The aroma will fill your kitchen, and you’ll have to resist sneaking a bite right off the tray. Trust me, it’s worth the wait.
Timing Breakdown
- Prep Time: 15 minutes
- Cooking Time: 30 minutes
- Total Time: 45 minutes
Chef’s Secret
For an extra layer of flavor, add a pinch of red pepper flakes to the breadcrumb mixture. It gives the dish a subtle kick that pairs beautifully with the garlic and Parmesan. Just don’t tell anyone—it’s our little secret.
Fun Fact About Garlic
Did you know garlic has been used for centuries not only as a flavor enhancer but also for its health benefits? Ancient Egyptians even worshipped it! So while you’re enjoying this **Crispy Garlic Chicken**, you’re also doing your body a favor. How’s that for a win-win?
Necessary Equipment
You don’t need fancy gadgets for this recipe. Here’s what you’ll need:
- Baking sheet
- Parchment paper
- Two mixing bowls
- Tongs or a fork for dipping
- Meat thermometer (optional but recommended)
Storage Tips
Got leftovers? Lucky you! Store them in an airtight container in the fridge for up to 3 days. Reheat in the oven at 350°F (175°C) for 10–15 minutes to keep the crust crispy. Microwaving works in a pinch, but it softens the coating.
If you’ve made a big batch, freezing is an option. Wrap each piece individually in plastic wrap, then place them in a freezer-safe bag. They’ll stay good for up to 3 months. Thaw overnight in the fridge before reheating.
Finally, never store raw and cooked chicken together. Cross-contamination is a no-no. Always use separate containers and utensils.
Tips and Advice
Want to take this recipe to the next level? Here are a few pointers:
- Pat the chicken dry with paper towels before coating. Moisture is the enemy of crispiness.
- Double-coat the chicken for an extra-thick crust. Dip it twice in the butter and breadcrumb mixtures.
- Use freshly grated Parmesan instead of pre-grated for better texture and flavor.
Presentation Ideas
Serve this dish on a platter garnished with lemon wedges and fresh parsley sprigs. A sprinkle of flaky sea salt on top adds elegance. Pair it with roasted vegetables or a simple green salad for a complete meal. Presentation matters, even if you’re just feeding your family!
Healthier Alternatives
Love the recipe but want to lighten it up? Try these variations:
- Air Fryer Version: Cook at 375°F for 12–15 minutes. Less oil, same crunch.
- Gluten-Free Option: Swap panko for gluten-free breadcrumbs.
- Low-Fat Twist: Use Greek yogurt mixed with garlic instead of butter.
- Veggie Swap: Coat zucchini slices instead of chicken for a vegetarian option.
- Herb Boost: Add dried oregano or thyme to the breadcrumb mix for extra flavor.
- Spicy Kick: Add cayenne pepper or chili flakes to the coating mix.
Common Mistakes to Avoid
Mistake 1: Skipping the Pat Dry Step
Wet chicken equals soggy coating. Always pat the chicken dry with paper towels before dipping it in the butter mixture. This ensures the coating sticks and gets crispy. Pro tip: Let the chicken sit uncovered in the fridge for 10 minutes after patting it dry. This helps the surface dry even more.
Mistake 2: Overcrowding the Baking Sheet
Placing the chicken pieces too close together traps steam, preventing them from getting crispy. Leave space between each piece for proper airflow. If needed, use two baking sheets.
Mistake 3: Underseasoning
Don’t be shy with the salt and pepper! Season both the chicken and the breadcrumb mixture generously. Taste as you go—your palate knows best.
FAQs About Crispy Garlic Chicken
Can I use chicken thighs instead of breasts?
Absolutely! Chicken thighs are juicier and cook slightly faster. Adjust the cooking time accordingly.
Do I have to use parchment paper?
No, but it makes cleanup easier. You can grease the baking sheet directly if you prefer.
Can I make this recipe ahead of time?
Yes! Bread the chicken up to a day in advance and store it in the fridge. Bake just before serving.
Is this dish kid-friendly?
Totally! Kids love the crispy texture and cheesy flavor. You can reduce the garlic if they’re picky.
What sides pair well with this dish?
Roasted veggies, mashed potatoes, or a fresh salad are all great choices. The dish is versatile!
Can I freeze the leftovers?
Yes, wrap them tightly and freeze for up to 3 months. Reheat in the oven for best results.
How do I know when the chicken is done?
Use a meat thermometer. The internal temperature should reach 165°F (74°C). If you don’t have one, cut into the thickest part—the juices should run clear.
Can I use dried herbs instead of fresh?
Sure, but use half the amount since dried herbs are more potent.
What’s the difference between panko and regular breadcrumbs?
Panko is lighter and crispier. If you don’t have it, regular breadcrumbs work, but the texture won’t be as airy.
Can I add other spices to the coating?
Definitely! Paprika, onion powder, or Italian seasoning are great additions.
Final Thoughts
This **Crispy Garlic Chicken** is a winner for so many reasons. It’s easy to make, packed with flavor, and sure to impress anyone lucky enough to try it. Whether you’re cooking for your family, hosting friends, or just treating yourself, this dish is a guaranteed crowd-pleaser. So grab your ingredients, preheat that oven, and get ready to fall in love with this recipe. Trust me, once you try it, it’ll become a regular in your meal rotation.
Crispy Garlic Chicken
Ingredients
Equipment
Method
- Preheat your oven to 375°F (190°C) and line a baking sheet with parchment paper.
- In one bowl, melt the butter and stir in the minced garlic.
- In a second bowl, mix the panko breadcrumbs, Parmesan, parsley, salt, and pepper.
- Dip each chicken breast into the butter-garlic mixture, then coat with the breadcrumb mixture.
- Place the coated chicken on the prepared baking sheet and drizzle with more melted butter for extra crispiness.
- Bake in the oven for 25–30 minutes or until golden brown and the internal temperature reaches 165°F (74°C).