Garlic Cheese Bread: The Ultimate Crowd-Pleaser
Picture this: It’s five minutes before your guests arrive. You need something warm, cheesy, and guaranteed to make everyone smile. That’s when this garlic cheese bread saves the day! I’ve made this for book clubs, game nights, and even just for my family on a cozy Tuesday. It never, ever fails. The moment you pull it from the oven, all golden and bubbling, you become the hero of the party. Let’s get started on this foolproof recipe!
A Brief History of a Party Staple
While the exact origin is a bit fuzzy, the idea of stuffing bread with garlic and cheese is pure global comfort food genius. Think of Italian bruschetta’s cousin who moved in with fondue! My version is inspired by those easy, shareable appetizers you find at casual gatherings. It’s a modern take meant for tearing apart with friends. I first tried a version at a neighbor’s potluck. It disappeared in minutes. I knew I had to create my own “never-fail” recipe, and after many happy (and tasty) tests, this is it.
Why You’ll Fall in Love With This Garlic Cheese Bread
You’ll love this recipe because it’s simple magic. It transforms a humble baguette into a gooey, crispy, flavor-packed centerpiece. The prep is minimal—no fancy skills needed. It’s incredibly forgiving. The aroma of roasting garlic and melting cheese will make your kitchen smell like a dream. Best of all, it makes people happy. It’s the edible version of a warm hug.
Perfect Occasions for This Delicious Bread
This bread is your secret weapon for any get-together! It’s perfect for casual Friday night drinks, a pre-dinner appetizer for a steak dinner, holiday parties where you need easy finger food, or a comforting snack for movie night. I even serve it with a big salad for a simple, satisfying supper. It turns any moment into a special, shared experience.
What You’ll Need: The Ingredients
- 1 baguette (standard size)
- 150 g (about 1 1/2 cups) shredded cheese (mozzarella, cheddar, or a blend)
- 4 cloves of garlic
- 100 g (about 7 tablespoons) softened unsalted butter
- 1 bunch of fresh parsley
- Salt and black pepper to taste
- Red pepper flakes (optional, for a kick)
No Problem! Handy Substitutions
Out of something? Don’t worry! Use what you have. No fresh parsley? Try 2 teaspoons of dried parsley or fresh chives. For the cheese, Gruyère, Monterey Jack, or even a pre-shredded Italian mix work wonderfully. Vegan? Swap the butter for a plant-based spread and use your favorite melty vegan cheese. The recipe is very friendly to changes.
Creating Your Garlic Cheese Masterpiece
Step 1
First, preheat your oven to 180°C (350°F). Line a baking sheet with parchment paper. This little step is a game-changer for easy cleanup. While the oven warms up, let’s prepare our flavor base. You’ll smell the magic starting right now.
Step 2
Peel and finely mince your garlic cloves. In a small bowl, combine the softened butter, minced garlic, a good pinch of salt, and a few cracks of black pepper. Finely chop your fresh parsley. Its bright green color and fresh smell will cut through the richness beautifully. Stir it all into the butter until it’s a vibrant, speckled spread. Pro tip: Letting your butter sit at room temperature for 30 minutes makes this mixing step effortless.
Step 3
Take your baguette. Using a serrated knife, make slices about 1 inch thick. Cut almost, but not completely, through the bottom crust. You want the loaf to stay connected like a fan or an accordion. This holds all the cheesy goodness inside while allowing every piece to get its fair share of butter and garlic.
Step 4
Now for the fun, messy part! Using a butter knife or a small spoon, generously spread the garlic butter between every single slice. Don’t be shy. Next, tuck shreds or small pieces of your chosen cheese into each crevice. If you like a little heat, sprinkle some red pepper flakes in with the cheese. The colorful layers start to look absolutely irresistible.
Step 5
Wrap the entire loaf snugly in aluminum foil. This creates a steamy environment that melts the cheese perfectly and warms the bread through. Place it on your prepared baking sheet and bake for 15 minutes. Then, carefully open the foil to expose the top. Return it to the oven for another 5 minutes. This final blast gives you that gorgeous, golden-brown, crispy top.
Step 6
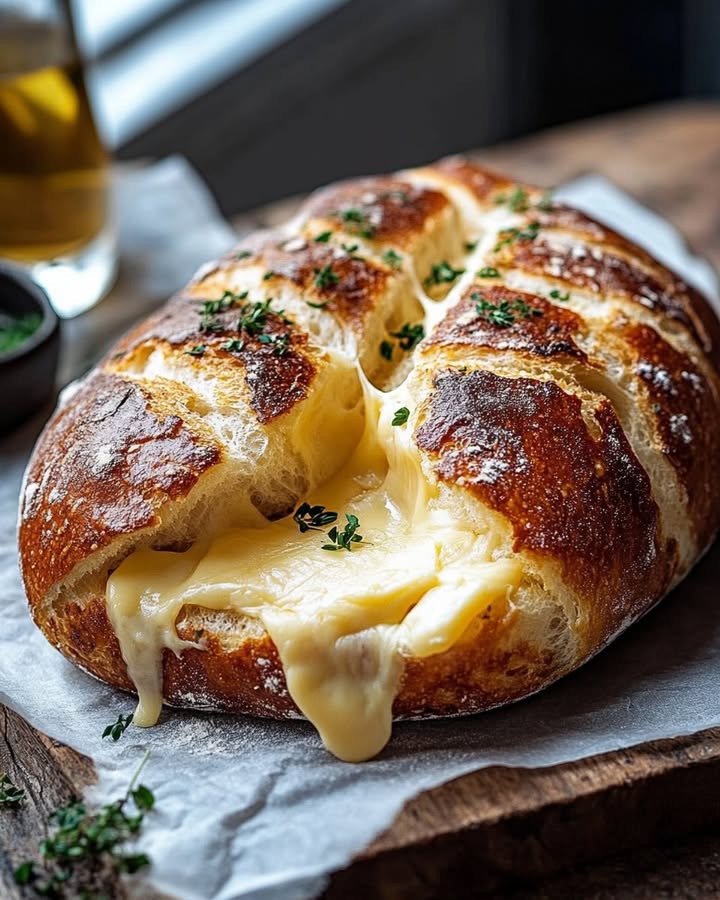
Take the bread out of the oven. Let it sit for just 2-3 minutes. This short rest lets the cheese set slightly so it doesn’t all ooze out when you cut it. Then, place it on a board or platter. Let everyone tear off their own piece. The sight of that stretchy, melted cheese and the sound of the crisp crust are pure joy. Serve immediately!
Chef’s tip: For an extra flavor boost, mix a tablespoon of grated Parmesan cheese into your garlic butter.
Timing is Everything
This recipe is beautifully quick. You’ll need about 15 minutes for prepping and assembling all the ingredients. The active cooking time in the oven is 20 minutes total. Don’t forget that crucial 2-3 minute rest before serving. From start to finish, you’re looking at under 40 minutes for a show-stopping appetizer.
My Secret for the Best Flavor
My secret is roasting the garlic first. If you have an extra 30 minutes, drizzle whole garlic cloves with olive oil, wrap them in foil, and roast at 200°C (400°F) until soft and caramelized. Mash this sweet, mellow roasted garlic into your butter instead of using raw. The flavor becomes deep, rich, and absolutely incredible.
A Fun Fact About Your Main Ingredient
That baguette you’re using has a fun history! By French law, a traditional baguette can only contain four ingredients: flour, water, yeast, and salt. This simplicity is what gives it that wonderful crisp crust and chewy interior, making it the perfect sturdy vessel for all our delicious fillings.
Kitchen Tools You’ll Need
- Serrated bread knife
- Cutting board
- Mixing bowl
- Butter knife or small spoon
- Baking sheet
- Parchment paper
- Aluminum foil
Storing Your Garlic Cheese Bread
This bread is truly best eaten right away. The contrast between the crispy crust and the soft, warm interior is at its peak just after baking.
If you have leftovers, let them cool completely. Wrap the bread tightly in foil or place it in an airtight container. Store it in the refrigerator for up to 2 days.
To reheat, place the foil-wrapped bread in a 180°C (350°F) oven for about 10 minutes. Opening the foil for the last few minutes will help re-crisp the crust. Avoid the microwave, as it will make the bread soggy.
Tips and Advice for Success
- Use real butter for the best flavor. Margarine won’t give you the same rich taste.
- Shred your own cheese from a block. Pre-shredded cheese has anti-caking agents that can make the melt less smooth.
- If your baguette is very hard, you can sprinkle it lightly with water before wrapping it in foil to help steam it soft.
- For a party, you can prep the bread up to the end of Step 4 a few hours ahead. Keep it covered in the fridge until you’re ready to bake.
Presentation Ideas to Impress
- Serve the whole loaf on a rustic wooden board with the knife tucked beside it.
- Garnish the board with fresh herb sprigs and a small bowl of warm marinara sauce for dipping.
- For individual servings, you can slice the bread all the way through before baking and bake the pieces separately on the sheet for easy grabbing.
Healthier & Fun Variations to Try
Want to mix it up? Here are six tasty twists on the classic:
1. The Herb Garden: Add fresh chopped rosemary, thyme, and oregano to the garlic butter for a fragrant, Provencal twist.
2. Everything Bagel Style: Before baking, brush the top with a little egg wash and sprinkle generously with everything bagel seasoning.
3. Sun-Dried Tomato & Pesto: Swap half the butter for basil pesto and add chopped sun-dried tomatoes with the cheese.
4. Bacon & Cheddar: Mix cooked, crumbled bacon into the butter and use sharp cheddar cheese for a hearty, smoky version.
5. Lightened-Up: Use a whole-grain baguette, reduce the butter by half, and use part-skim mozzarella. The flavor is still fantastic.
6. Sweet and Savory: Use brie cheese and add a drizzle of honey and a sprinkle of chopped walnuts before the final bake.
Common Mistakes to Avoid
Mistake 1: Not Softening the Butter
Using cold, hard butter straight from the fridge is a common error. It’s impossible to mix smoothly with the garlic and herbs. You’ll tear the bread trying to spread it. To avoid this, take your butter out about 30-60 minutes before you start cooking. You should be able to press a finger into it easily.
Mistake 2: Slicing All the Way Through the Bread
If you cut the baguette completely into separate slices, you lose the classic “pull-apart” effect. The cheese can melt out onto the pan, and it’s harder to serve. Always use your serrated knife to slice deeply, but stop just before you hit the bottom crust. This keeps everything connected and neat.
Mistake 3: Skipping the Foil Wrap
Baking the bread uncovered the whole time is a mistake. The top will burn before the inside gets hot and the cheese melts. The foil wrap acts like a little steam oven. It gently heats everything through perfectly. Then, you remove it to get that perfect, crispy finish.
Mistake 4: Using Only One Type of Cheese
Sticking to just mild mozzarella can sometimes lack depth of flavor. For a more interesting taste, try a blend. Mixing a melty cheese like mozzarella with a sharper cheese like cheddar or Gruyère creates a much more complex and delicious result.
Your Garlic Cheese Bread Questions, Answered
Can I make this garlic cheese bread ahead of time?
Yes, you can prepare it a few hours in advance. Assemble the bread completely—butter, cheese, and all. Wrap it tightly in plastic wrap or foil and store it in the refrigerator. When your guests arrive, just put the foil-wrapped bread directly into the preheated oven. You may need to add 2-3 extra minutes to the baking time since it’s starting from cold.
What’s the best cheese to use for optimal melt?
For the classic, stretchy “cheese pull,” low-moisture mozzarella is the champion. It melts smoothly and gets wonderfully gooey. For more flavor, combine it with other good melters like Monterey Jack, young Gouda, or mild cheddar. Avoid very hard, aged cheeses like Parmesan by themselves, as they won’t melt well.
My baguette is very hard. Can I still use it?
An overly hard or stale baguette can still work! The steam from being wrapped in foil will soften it during baking. For an extra boost, you can lightly sprinkle or brush the outside of the loaf with water before applying the butter and wrapping it in foil. This creates more steam inside the packet.
How do I prevent the bottom from getting soggy?
A soggy bottom usually happens if there’s too much butter dripping down or if the bread sits on a cold, condensing surface after baking. To avoid this, make sure your baking sheet is lined with parchment paper. Also, after baking, transfer the bread from the baking sheet to a wire cooling rack for that brief resting period. This lets air circulate.
Can I use garlic powder instead of fresh garlic?
You can, but the flavor profile will be different. Fresh garlic gives a brighter, more pungent kick. Garlic powder is mellower and more concentrated. If you substitute, use about 1 to 1.5 teaspoons of garlic powder for the 4 fresh cloves. Mix it directly into the softened butter.
Is it possible to make this recipe vegan?
Absolutely! Use a high-quality vegan butter or olive oil spread. For the cheese, choose a brand of vegan mozzarella or cheddar shreds that is known for melting well. The method remains exactly the same. You’ll still get that delicious, garlicky, shareable appetizer everyone can enjoy.
What can I serve with this bread besides marinara?
This bread is a versatile partner! Try it with a warm cheese fondue for double the cheese fun. A cool, creamy ranch dressing or garlic aioli makes a great dip. For something different, serve it with a bowl of rich tomato soup or a robust bean salad. It’s also fantastic all on its own.
Why did my cheese not melt properly?
This can happen with certain pre-shredded cheeses that have starch coatings. It can also occur if the cheese is packed in too tightly, preventing heat circulation. For best results, shred your own cheese from a block. Also, don’t over-stuff the slices; a moderate amount of loosely packed cheese melts best.
Can I cook this on a grill?
You can! It’s a great way to keep the kitchen cool in summer. Prepare the bread as directed. Wrap it tightly in a double layer of heavy-duty foil. Place it on a medium-hot grill, close the lid, and cook for about 15-20 minutes, checking occasionally. Unwrap for the last few minutes to crisp up.
How do I adjust the recipe for a gluten-free diet?
Use your favorite gluten-free baguette. Be aware that GF breads can be more delicate, so handle them gently when slicing. The baking method remains identical. You might need to check a bit earlier, as some gluten-free breads brown faster. The result will be just as delicious for those with dietary needs.
Go Forth and Bake!
There you have it—your new favorite party trick. This garlic cheese bread is more than a recipe. It’s a promise of good times, laughter, and full bellies. It’s the dish that gets requested every single time I have people over. I hope it brings as much joy to your table as it has to mine. Now, preheat that oven and get ready for the compliments to roll in. Happy baking and even happier eating!
Decadent Seafood Bisque
Ingredients
Equipment
Method
- Preheat your oven to 180°C (350°F) and line a baking sheet with parchment paper.
- Peel and finely mince the garlic cloves, then combine with butter, salt, and black pepper in a bowl.
- Finely chop the fresh parsley and stir into the butter mixture until well mixed.
- Slice the baguette about 1 inch thick, stopping just before cutting through the bottom crust.
- Spread the garlic butter generously between each slice and tuck cheese into each crevice.
- Wrap the loaf in aluminum foil and bake for 15 minutes, then uncover and return to the oven for an additional 5 minutes.
- Let the bread rest for 2-3 minutes before serving.