Wow Your Crowd with This Amazing 7-Layer Dip
Have you ever opened your fridge before a party and thought, “I have nothing to serve!”? I’ve been there more times than I care to admit. That’s why this 7-Layer Dip is my culinary secret weapon. It’s the first dish to disappear at every gathering I host. My kids call it “the rainbow chip bowl,” and honestly, watching friends gather around it, chips in hand, laughing and scooping, is one of my greatest kitchen joys. Let me show you how to make this legendary, no-fuss appetizer.
The Story Behind the Stack: A Party Legend
While its exact origin is a bit fuzzy (like a good party memory!), the 7-Layer Dip is a true Tex-Mex creation. It likely sprang from the creative minds of home cooks in the 1970s or 80s, looking for a big, shareable dish. It takes the fantastic flavors of tacos and nachos—the creamy, the cheesy, the fresh, the savory—and layers them into one stunning, scoopable masterpiece. My version stays true to the classic but with a little extra zip from fresh garlic and lime in the guacamole. It’s a modern take on a potluck superstar.
Why You’ll Absolutely Adore This Easy Mexican Casserole-Style Dip
You’re going to love this recipe for so many reasons! First, it’s incredibly simple. There’s no cooking involved, just assembly. Second, it’s a total crowd-pleaser that appeals to all ages. Third, it’s visually stunning—those colorful layers are a feast for the eyes before you even take a bite. It’s like building an Easy Mexican Casserole in dip form, where every spoonful is a perfect bite. It’s my go-to for stress-free entertaining that always gets rave reviews.
Perfect Occasions for Your Famous 7-Layer Dip
This dip is the life of the party, literally! Here are my favorite times to make it:
- Game Day Gatherings: It’s essential football food.
- Potlucks: Easy to transport and always a hit.
- Family Movie Nights: A fun, hands-on snack.
- Summer BBQs: A cool, refreshing counterpart to grilled meats.
- Last-Minute Get-Togethers: You can whip it up in 15 minutes flat!
Gathering Your Ingredients
Here’s everything you need for this flavor fiesta. I promise it’s all easy to find!
- 2 ripe avocados, peeled and mashed
- Juice of 1 lime
- 1 garlic clove, minced
- Salt to taste
- 1 cup sour cream
- 1 packet taco seasoning mix
- 1 cup salsa (I like a medium chunky style)
- 1 cup shredded cheddar cheese
- 1 cup chopped lettuce (iceberg or romaine for crunch)
- 1 cup diced tomatoes
- 1 cup sliced black olives
- ½ cup chopped green onions
- Tortilla chips, for serving!
No Stress Substitutions
Don’t have something? No problem! Cooking should be flexible.
- Sour Cream: Plain Greek yogurt is a fantastic, tangy swap.
- Cheddar Cheese: Try a Mexican blend or pepper jack for more kick.
- Black Olives: Sliced jalapeños add a great spicy twist.
- Fresh Garlic: A ¼ teaspoon of garlic powder works in a pinch.
- Salsa: Use pico de gallo for a chunkier, fresher texture.
Let’s Build Your Masterpiece: Step-by-Step Instructions
Grab a clear glass dish or a pretty serving platter. Let’s make some magic!
Step 1: The Creamy Guacamole Base
In a medium bowl, scoop out your ripe avocados. Add the fresh lime juice right away—this keeps the avocado gorgeously green. Mash it with a fork until it’s mostly smooth but with a few little chunks for texture. Stir in the minced garlic and a good pinch of salt. The smell is incredible! Now, spread this vibrant green layer evenly on the bottom of your dish. Pro tip: Press plastic wrap directly on the surface of this layer if you’re making it ahead, to prevent browning.
Step 2: The Zesty Sour Cream Layer
In a separate bowl, plop your sour cream. Sprinkle the entire packet of taco seasoning over it. Now, stir, stir, stir until it’s a uniform, pretty orangey-pink color and every bit is flavored. This layer adds that signature “taco” taste. Gently spread this over your avocado layer. I use the back of a spoon and start from the center, moving outwards to avoid mixing the layers.
Step 3: The Salsa Sizzle
Here comes the color and moisture! Spoon your salsa over the sour cream. I like to drain it just a tiny bit in a mesh strainer so the dip isn’t too runny. Spread it gently with a spoon. You’ll see the red of the tomatoes and peppers start to peek through, making the dip look even more inviting.
Step 4: The Cheesy Blanket
Time for the cheese! Take your cup of shredded cheddar and sprinkle it evenly over the salsa. This creates a delicious barrier that helps keep the crunchy lettuce on top from getting soggy. The yellow cheese against the red salsa is just beautiful. It’s like the cozy, melty heart of the dip.
Step 5: The Crisp Lettuce Layer
Take your finely chopped lettuce and scatter it over the cheese. This adds a wonderful fresh crunch. Make sure your lettuce is very dry after washing, so it stays crisp. This green layer makes the dip feel fresh and balanced, not too heavy.
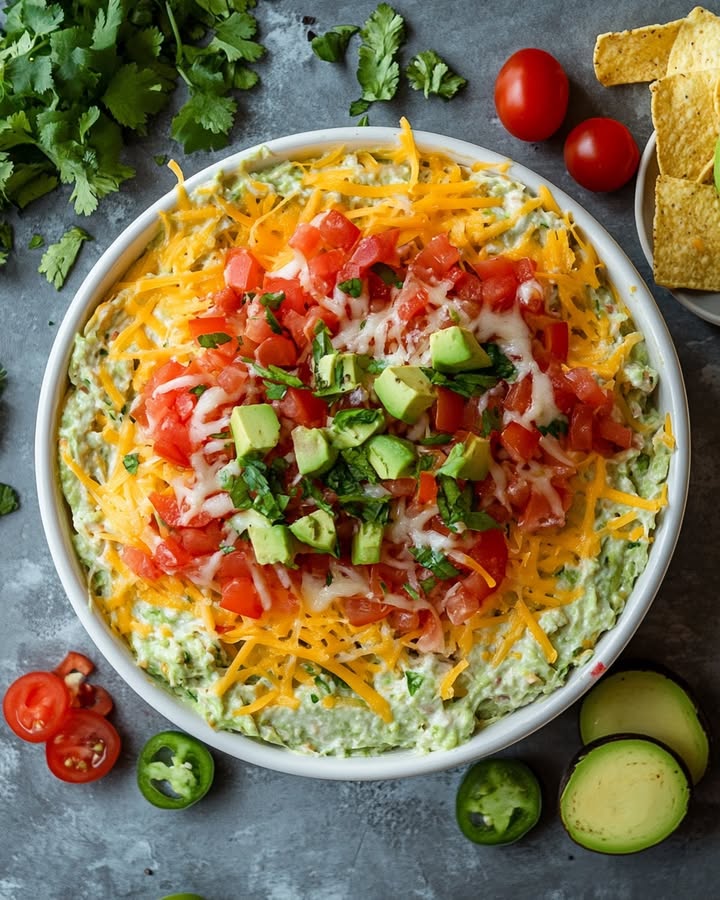
Step 6: The Vibrant Fresh Toppings
Now for the grand finale! Sprinkle the diced tomatoes, sliced black olives, and chopped green onions over the lettuce. Distribute them evenly so every scoop gets a bit of everything. Look at those colors! The red, black, and green make the dip look like a party confetti explosion. It’s pure joy in a dish.
Step 7: Dig In and Enjoy!
Your masterpiece is complete! Place a big bowl of sturdy tortilla chips next to it. I prefer the restaurant-style ones that can hold a hefty scoop. Gather your friends and family, and watch them dive in. The combination of cool, creamy, crispy, and cheesy is simply unbeatable. Chef’s tip: For the best texture and flavor, let the dip chill in the fridge for about 30 minutes before serving. This lets the flavors mingle!
Quick Timing Breakdown
This is why I love this recipe—it’s so fast!
- Prep Time: 15 minutes
- Cooking Time: 0 minutes
- Chilling Time (Recommended): 30 minutes
- Total Time: About 45 minutes
- Servings: 8 hungry people
My Chef’s Secret for the Best Easy Mexican Casserole Dip
My secret weapon? Toasting my own taco seasoning. If I have an extra minute, I skip the packet and mix 1 tablespoon chili powder, 1¼ teaspoons cumin, 1 teaspoon each of paprika and garlic powder, ½ teaspoon each of onion powder and oregano, and a pinch of cayenne. It tastes fresher and you control the salt. It makes a noticeable difference!
A Fun Dip Fact
Did you know the avocado (our first layer!) is technically a berry? It’s called a single-seeded berry. They were first cultivated in south-central Mexico over 5,000 years ago. So when you’re scooping that guacamole layer, you’re enjoying a piece of ancient history!
What You’ll Need to Make It
You don’t need any fancy gadgets!
- A medium mixing bowl
- A fork for mashing
- A spoon for spreading
- A 9×9 inch dish or a similar-sized shallow serving platter (clear glass is fun!)
- A cutting board and knife
How to Store Your Leftover Dip
Cover the dish tightly with plastic wrap or transfer the dip to an airtight container. It will keep in the refrigerator for up to 2 days. The layers will soften and mix a bit, but it will still taste delicious.
I do not recommend freezing this dip. The dairy and fresh vegetables don’t thaw well. They become watery and lose their delightful texture. It’s best enjoyed fresh or within a couple of days.
If you want to prep ahead, you can make the guacamole and sour cream layers separately, store them in their own containers, and assemble the whole dip an hour before your event. This keeps everything looking and tasting its absolute best.
Tips and Advice for Dip Success
- Drain your salsa: A quick drain prevents a soggy dip.
- Dry your lettuce: Use a salad spinner or paper towels. Crunch is key!
- Use ripe avocados: They should give slightly to gentle pressure.
- Get creative with layers: Add a base layer of refried beans for an 8-layer dip!
- Serve it cold: The contrast between the cool dip and the room-temperature chip is perfect.
Presentation Ideas to Impress
- Use a clear trifle dish to show off every beautiful layer.
- Serve with a variety of dippers: tortilla chips, bell pepper strips, cucumber rounds, or pita chips.
- Garnish the top with a little extra sprinkle of cheese and a cilantro sprig.
- For individual servings, layer the dip in small mason jars or clear cups.
Healthier & Creative Variations
Want to mix it up? Try these tasty twists on the classic Easy Mexican Casserole dip idea.
- Protein-Packed Dip: Add a layer of seasoned ground turkey or beef between the beans and sour cream for a heartier appetizer.
- Bean Bonanza: Start with a seasoned layer of warm refried beans (black or pinto) for extra fiber and creaminess.
- Southwestern Style: Add a layer of corn (roasted is amazing!) and use a corn salsa for a sweet, smoky flavor.
- Seafood Fiesta: Create a coastal version by mixing lump crab meat with a little mayo and Old Bay seasoning as a special layer.
- Veggie-Lover’s Dream: Swap the meat layer for sautéed zucchini, onions, and bell peppers for a lighter option.
- Breakfast Dip: Layer scrambled eggs, cheese, salsa, and avocado for an epic brunch dip served with hash browns.
Common Mistakes to Avoid
Mistake 1: Using Watery Ingredients
This is the biggest culprit for a sad, soupy dip. If your salsa or tomatoes are too juicy, that liquid will seep down and make the sour cream runny and the guacamole brown faster. Always drain your salsa in a mesh strainer for a few minutes before using. Also, seed your tomatoes before dicing them to remove excess moisture. A dry lettuce chop is non-negotiable too!
Mistake 2: Mashing the Avocado into Paste
Over-mashing your avocados can make the base layer gluey and dense. You want it to be creamy but with some small, delicate chunks for texture. Use a fork and stop when it’s just combined. Those little bits of avocado make the dip feel homemade and luxurious. It should spread easily but not look like baby food.
Mistake 3: Spreading Layers and Mixing Them
The beauty of this dish is in the distinct, colorful stripes. If you’re not careful, you can drag the sour cream into the guacamole or mix the salsa into the cheese. To keep layers clean, always spread from the center outward using gentle pressure. Let the weight of the ingredient do the work. If you mess up a little, just smooth it over—it will still taste great!
Mistake 4: Skipping the Chill Time
I know you want to eat it right away! But serving the dip immediately after assembly means the flavors haven’t had a chance to get to know each other. The layers will also be softer and more prone to mixing. Giving it just 30 minutes in the fridge firms everything up. It makes the dip easier to scoop and the taste more harmonious.
Frequently Asked Questions
Can I make this 7-layer dip ahead of time?
Yes, you can prepare it up to a day in advance, but with one smart trick. Assemble the guacamole, sour cream, salsa, and cheese layers. Cover it tightly and refrigerate. Then, add the lettuce, tomatoes, olives, and green onions right before you serve. This keeps the fresh toppings crisp and vibrant. If you assemble it all ahead, the lettuce will wilt and the tomatoes may make things watery.
How long does leftover dip last in the fridge?
Your leftover dip will stay tasty in the refrigerator for about 2 days. Keep it covered tightly with plastic wrap or in an airtight container. Be aware that the layers will blend together more as it sits, and the lettuce will lose its crunch. It’s still perfectly safe and delicious to eat, even if it’s not as pretty. Stir it up and use it as a topping for tacos or nachos!
What can I use instead of sour cream?
Plain Greek yogurt is my favorite substitute. It has a similar tangy flavor and thick texture. It’s also higher in protein. You could also use a lighter sour cream or a dairy-free alternative made from cashews or coconut. Just make sure whatever you use is thick, so your layer holds up and doesn’t make the dip runny.
Can I add a layer of refried beans?
Absolutely! Adding refried beans turns this into a fantastic 8-layer dip and makes it even more hearty. Simply spread a can of seasoned refried beans (I like to warm them first so they spread easily) as the very first layer on the bottom of your dish. Then, follow with the guacamole and the rest of the steps. It’s a super popular variation.
What are the best chips to serve with this dip?
You need a strong chip that can act like a little shovel! I recommend sturdy restaurant-style white or yellow corn tortilla chips. They have the structure to hold a generous scoop without breaking. Avoid very thin, delicate chips. For a fun twist, try scoop-shaped chips like Fritos Scoops, or offer veggie sticks like bell peppers and jicama for a lighter option.
My guacamole layer turns brown. How can I prevent this?
The lime juice in the mixture is your first defense. Make sure you mix it in thoroughly. For ultimate protection, after you spread the guacamole layer, take a piece of plastic wrap and press it directly onto the surface of the guacamole, sealing out all the air. When you’re ready to add the next layer, just peel it off. Your avocado will stay bright green for hours.
Can I use a different type of cheese?
Of course! While cheddar is classic, feel free to get creative. A pre-shredded Mexican blend is convenient and flavorful. Pepper jack cheese will add a nice kick. For a milder taste, try Monterey Jack. If you want to go non-dairy, there are many great melting vegan cheeses available now. The key is to use a cheese that shreds well and complements the other flavors.
Is there a way to make this dip spicier?
There are so many easy ways to turn up the heat! Use a hot salsa instead of mild. Add a teaspoon of chopped canned chipotles in adobo to the sour cream mixture. Sprinkle some sliced fresh jalapeños or a dash of cayenne pepper on top with the other veggies. You can even use a spicy taco seasoning packet. Adjust the heat to match your crowd’s preference.
Can I make this a warm layered dip?
Yes, a warm version is delicious! Start by spreading warm refried beans in the bottom of an oven-safe dish. Top with the guacamole and sour cream layers. Then, add the salsa and a generous amount of cheese. Bake at 350°F for about 20 minutes, until bubbly. Let it cool slightly, then add the cold, fresh toppings like lettuce, tomato, and olives. It’s like nachos in dip form!
This makes a lot. Can I halve the recipe?
You can easily cut all the ingredients in half to make a smaller batch for a family snack. Use an 8×8 inch dish or a pie plate. Follow all the same steps. The assembly will be quicker, and you’ll have less leftovers (unless you have my family, who would eat a double batch!). The layering process is exactly the same, just on a smaller scale.
Your New Go-To Party Recipe
And there you have it—everything you need to create the most talked-about dish at your next gathering. This 7-Layer Dip is more than just a recipe; it’s a tool for bringing people together, for creating laughter and shared moments around the table. It’s proof that the best food doesn’t have to be complicated. So grab your ingredients, layer them with love, and get ready for the compliments to roll in. Now, who’s ready for a chip?
Easy Mexican Casserole
Ingredients
Equipment
Method
- In a medium bowl, mash the avocados with lime juice, garlic, and salt until mostly smooth.
- Spread the guacamole layer evenly in a clear glass dish or serving platter.
- In another bowl, mix sour cream with taco seasoning until well combined, then spread over the guacamole layer.
- Spoon the salsa over the sour cream layer and gently spread it.
- Sprinkle the shredded cheddar cheese evenly over the salsa.
- Scatter the chopped lettuce over the cheese layer.
- Top with diced tomatoes, sliced black olives, and chopped green onions for the final layer.
- Serve with sturdy tortilla chips for dipping.
Nutrition
Notes
Use a salad spinner to dry your lettuce and keep it crisp.
For a spicier kick, consider using jalapeños or a hot salsa.
You can prepare this dish up to a day in advance, but add fresh toppings just before serving to maintain their crunch. Enjoy the fun of building this beautiful dip as a part of your next gathering!