Unlock a Taste of the Tropics: Your New Favorite Cake is Here!
Can you smell the ocean breeze? One bite of this Pineapple Coconut Dream Cake will whisk you away to a sun-drenched beach. I first made this for a gloomy winter potluck, desperate for a taste of summer. The second it hit the table, the room lit up. Friends and family couldn’t stop asking for the recipe. It’s that magical blend of sweet, tangy, and creamy that makes everyone smile.
A Slice of Paradise: Where This Dream Cake Came From
This cake is a proud member of the “dump cake” family. These recipes are beloved for their easy, mix-everything-in-one-bowl style. They became super popular in mid-century America for their convenience and amazing taste. My version puts a tropical spin on the classic. It blends the convenience of a box mix with the fresh flavor of real pineapple. It’s a modern take on a cozy tradition, perfect for today’s busy home bakers who still want to create something special.
Why Your Family Will Beg for This Pineapple Coconut Dream Cake
You will absolutely adore this recipe! First, it’s incredibly simple. No layers to fuss with, no fancy decorating skills needed. Second, the flavor is unreal. The pineapple keeps the cake incredibly moist for days. The fluffy vanilla pudding and toasty coconut on top create the perfect texture party. It’s a guaranteed crowd-pleaser that looks like you spent hours in the kitchen. Spoiler alert: you barely did!
When to Serve Your Tropical Masterpiece
This cake is your secret weapon for so many events. It’s a star at summer barbecues and pool parties. It brings sunshine to holiday dinners in December. I love it for baby showers or bridal luncheons—it just feels celebratory. Honestly, a quiet Tuesday night deserves a slice of paradise too. Any day is better with this cake!
Gathering Your Sunshine: Ingredients List
Here’s everything you’ll need to make this dream come true:
- 1 box (about 15.25 oz) yellow cake mix
- 1 can (20 oz) crushed pineapple in juice (do not drain!)
- 1 cup sweetened shredded coconut
- 1 package (3.4 oz) instant vanilla pudding mix
- 1 cup whole milk
- 1/2 cup (1 stick) unsalted butter, melted
- 3 large eggs
- 1 teaspoon pure vanilla extract
No Stress Swaps: Handy Substitution Options
Don’t panic if you’re missing an item! Here are some easy swaps:
- Cake Mix: Use a vanilla or butter recipe cake mix if you can’t find yellow.
- Pineapple: In a pinch, use 1 ½ cups of unsweetened applesauce for moisture, but you’ll lose the tropical tang.
- Milk: Any milk you have on hand will work—2%, almond, or oat milk are all fine.
- Coconut: Use unsweetened shredded coconut for a less sweet topping, or toasted coconut flakes for extra crunch.
Baking Your Tropical Escape: Step-by-Step Instructions
Step 1: Preheat & Prep Your Pan
First, get your oven warming up to 350°F (175°C). This ensures it’s perfectly hot when your batter is ready. Grab your trusty 9×13-inch baking dish. Give it a good coat of butter or non-stick spray, then dust it lightly with flour. This little ritual is your insurance policy for a cake that pops right out. You’ll hear a satisfying *shhhhk* sound when it’s properly greased. Pro tip: Do this first so it’s ready the moment your batter is mixed!
Step 2: Create the Dreamy Cake Batter
Now for the fun part! In a large bowl, combine the yellow cake mix, eggs, melted butter, and vanilla. The melted butter will smell rich and nutty as you pour it in. Stir until just combined—a few lumps are totally okay. Next, open the can of crushed pineapple. Pour in the entire contents, juice and all. The sweet, tangy scent is instant vacation vibes. Mix it all together until you have a beautifully thick, speckled batter.
Step 3: Bake to Golden Perfection
Pour that glorious batter into your prepared pan. Use a spatula to gently spread it into all the corners. Slide the pan into your preheated oven. Your kitchen will soon fill with the warm, sugary smell of baking cake. Set your timer for 30 minutes. The cake is done when the top is a lovely golden brown and a toothpick poked in the center comes out clean. Pro tip: Avoid opening the oven door too early, as it can make the cake sink!
Step 4: Let the Cake Cool Completely
This step is crucial, but hard! Place the cake, still in its pan, on a wire rack. Let the steam escape and the structure set. Rushing this will cause your pudding topping to melt into a sad puddle. I know it’s tempting to dive right in. Use this time to clean up and prepare the topping. A fully cooled cake ensures beautiful, clean layers of flavor.
Step 5: Whip Up the Creamy Pudding Topping
Once the cake is cool, make the cloud-like topping. In a medium bowl, pour in the instant vanilla pudding mix. Slowly whisk in the cold milk. You’ll see it start to thicken almost magically within a minute or two. Keep whisking until it’s smooth and holds soft peaks. This creamy layer is the “dream” in the dream cake, adding a cool, velvety texture against the moist crumb.
Step 6: Assemble and Chill Your Creation
Take a big dollop of that thickened pudding and plop it right onto the center of the cooled cake. Use a spoon or offset spatula to spread it evenly to the edges. Now, take handfuls of the sweetened shredded coconut and sprinkle it generously over the entire pudding layer. The fluffy white coconut looks like fresh snow on a creamy landscape. Finally, cover the cake and pop it in the fridge for at least one hour. This chill time lets all the flavors become best friends.
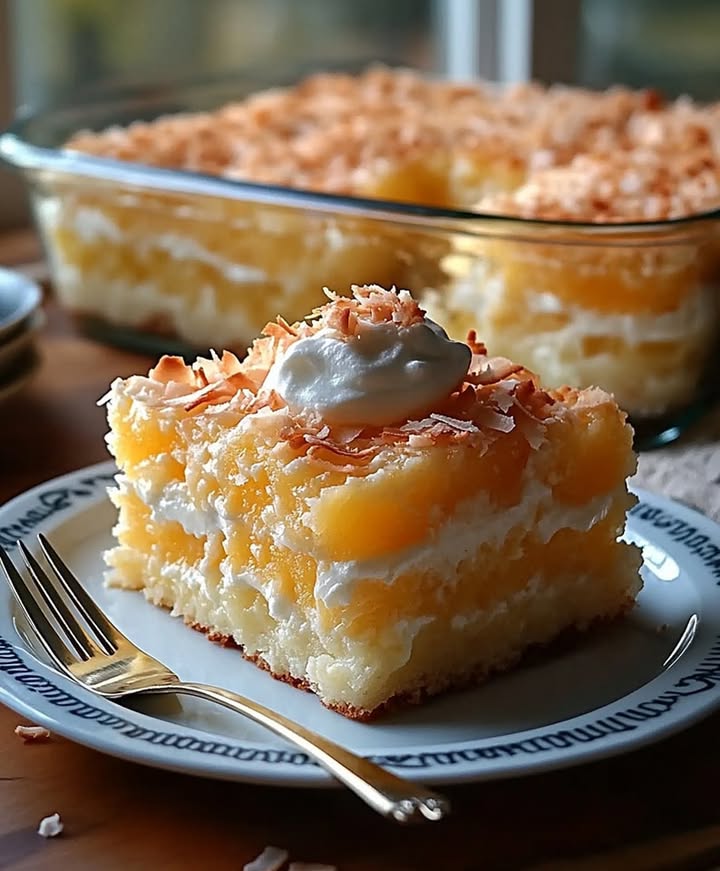
Step 7: The Grand Finale: Slice and Serve!
The waiting is over! Take the cake from the fridge. Use a sharp knife to cut clean slices. Wipe the knife between cuts for perfect edges. Plate each piece and watch the layers shine: golden cake, creamy pudding, snowy coconut. Serve it up and get ready for the compliments. The first forkful is pure, blissful tropical escape. Chef’s tip: For extra flair, garnish each plate with a tiny cocktail umbrella or a thin slice of fresh pineapple!
Your Cake Timeline: Prep, Cook, and Chill
Here’s a quick breakdown of how long this dream takes:
- Prep Time: 15 minutes (gathering and mixing is a breeze!)
- Cook Time: 30-35 minutes (for that perfect golden bake)
- Cooling Time: 1 hour (the hardest part, I know!)
- Chilling Time: 1 hour minimum (for flavor fusion)
- Total Time: About 2 hours and 45 minutes (mostly hands-off!)
My Little Secret for Coconut Perfection
Here’s my chef’s secret: toast your coconut before you sprinkle it on! Spread the shredded coconut on a baking sheet and pop it in a 325°F oven for 5-7 minutes. Watch it closely—it goes from golden to burnt quickly. This one extra step unlocks a deep, nutty flavor and adds a wonderful crunch. It takes the topping from great to absolutely unforgettable.
A Fun Pineapple Fact!
Did you know pineapples were once so rare and expensive in Europe that they became a symbol of wealth and hospitality? People would rent them as party centerpieces! Our can of crushed pineapple makes that luxury tropical flavor accessible to everyone. Every slice of this cake is a little taste of that historic celebration.
What You’ll Need in Your Kitchen
You don’t need any fancy gear for this recipe:
- 9×13-inch baking dish (glass or metal both work)
- Large mixing bowl
- Medium mixing bowl
- Whisk and spatula
- Measuring cups and spoons
- Wire cooling rack
- Can opener
Keeping Your Cake Fresh and Dreamy
Because this cake has a creamy pudding topping, it must be stored in the refrigerator. Cover the pan tightly with plastic wrap or transfer slices to an airtight container. It will stay fresh and delicious for up to 4 days.
The cold fridge actually helps the flavors blend even more on day two and three. The cake remains incredibly moist thanks to the pineapple. Just be sure to keep it covered so it doesn’t absorb any other fridge odors.
I do not recommend freezing this cake after the pudding and coconut have been added. The topping doesn’t freeze well. You can freeze the plain baked cake layer for up to a month, then thaw and add the topping fresh when ready to serve.
My Best Tips for Cake Success
- Room Temp Eggs: Use eggs at room temperature for a smoother, better-rising batter. Just place them in a bowl of warm water for 5 minutes if you forgot!
- Don’t Overmix: Stir the batter until ingredients are just combined. Overmixing can make the cake tough.
- Cool Completely: I can’t say it enough. A warm cake will melt your perfect pudding layer.
- Chill Well: That hour in the fridge is non-negotiable for the perfect sliceable texture.
Make it Look Fancy: Presentation Ideas
Turn this simple cake into a showstopper:
- Serve on a vibrant turquoise or yellow plate to enhance the tropical feel.
- Top each slice with a fresh pineapple chunk and a maraschino cherry.
- Dust the plate with a little powdered sugar or cocoa powder for contrast.
- For a party, cut into small squares and serve as “tropical dream bites.”
Dream a Little Dream: Healthier Recipe Twists
Love the idea but want to lighten it up? Try one of these tasty variations:
1. Sugar-Free Tropical Delight
Use a sugar-free yellow cake mix and sugar-free instant vanilla pudding. Swap the sweetened coconut for unsweetened shredded coconut. The result is a much lower-sugar dessert that still satisfies your tropical craving.
2. Gluten-Free Island Vacation
Simply replace the standard yellow cake mix with a gluten-free yellow cake mix. Ensure your pudding mix is also certified gluten-free. All other ingredients are naturally gluten-free, making this a safe treat for everyone.
3. Dairy-Free Paradise Cake
Use your favorite plant-based milk (like coconut milk!) for the pudding. Replace the melted butter with an equal amount of melted coconut oil. The coconut oil will add a lovely extra hint of tropical flavor.
4. Pineapple Coconut Dream Cupcakes
Turn this recipe into portable treats! Pour the batter into lined muffin tins. Bake for 18-22 minutes. Once cool, pipe or spread the pudding on top and sprinkle with coconut. Perfect for lunchboxes or parties.
5. Pina Colada Dream Cake
Add 1/2 teaspoon of rum extract to the cake batter. You could also mix a tablespoon of Malibu coconut rum into the pudding mixture for an authentic adult-only pina colada flavor. Garnish with a pineapple wedge.
6. Tropical Berry Blast Cake
After spreading the pudding, add a layer of fresh raspberries or diced strawberries over the cake. Then sprinkle the coconut on top. The berries add a beautiful pop of color and a tart freshness.
Common Mistakes to Avoid for a Perfect Cake
Mistake 1: Draining the Pineapple Juice
This is the biggest error! That juice in the can is liquid gold. It’s what makes the cake incredibly moist and flavorful. If you drain it, you’ll end up with a dry cake that lacks that wonderful pineapple punch. Always, always dump the entire contents of the can—fruit and juice—straight into your batter.
Mistake 2: Spreading Topping on a Warm Cake
We get it, you’re excited! But spreading the pudding on a cake that’s even slightly warm is a recipe for disaster. The heat will cause the pudding to liquefy and slide right off. It will also soak into the cake, making a soggy mess. Patience is key. Let the cake cool on a rack until the pan feels cool to the touch.
Mistake 3: Skipping the Chill Time
Don’t cheat the fridge time! This isn’t just to make the cake cold. The chilling period allows the pudding layer to set firmly. It also lets the coconut flavor infuse into the topping. If you cut it right away, the layers won’t be defined and the slices will be messy. That one-hour wait makes all the difference.
Mistake 4: Overbaking the Cake Layer
Since this cake is so moist from the pineapple, it can be tricky to tell when it’s done. Baking it too long will dry it out. Start checking at 30 minutes with a toothpick. If it comes out with a few moist crumbs clinging to it, it’s perfect. It doesn’t need to be 100% clean. The cake will continue to set as it cools.
Your Pineapple Coconut Dream Cake Questions, Answered!
Can I use fresh pineapple instead of canned?
You can, but it requires an extra step. You’ll need about 1 ¾ cups of finely chopped fresh pineapple. The big difference is the juice. Canned pineapple sits in its own sweet juice, which we use. With fresh, you may need to add about ½ cup of pineapple juice or even water to the batter to get the right consistency. The flavor will be brighter and less sweet, which is also delicious!
How far in advance can I make this cake?
You can bake the cake layer up to one day ahead. Let it cool completely, then wrap the whole pan tightly in plastic wrap and keep it at room temperature. The next day, make the pudding topping, assemble, and chill for at least an hour before serving. For best results, I recommend assembling the full cake no more than 24 hours before you plan to serve it.
My pudding topping is too runny. What did I do wrong?
This usually happens for three reasons. First, you may not have whisked it long enough. Instant pudding needs a full 1-2 minutes of vigorous whisking to thicken properly. Second, make sure you’re using INSTANT pudding, not “cook & serve.” Third, the milk might not have been cold enough. Always use very cold milk straight from the fridge for the best setting power.
Can I use a different flavor of pudding?
Absolutely! This is a great way to customize. Coconut cream pudding is an obvious and amazing choice for extra coconut flavor. Cheesecake flavor pudding is also divine. Lemon pudding would make a lovely tropical citrus twist. Just stick with the same size box (3.4 oz) of instant pudding for the right consistency.
Why is my cake very dense or gummy?
A dense cake often comes from overmixing the batter. When you combine the wet and dry ingredients, stir just until you no longer see dry streaks of cake mix. Overmixing develops the gluten in the flour, leading to a tougher texture. Also, double-check your oven temperature with an oven thermometer to ensure it’s baking at the correct heat.
Do I have to use sweetened coconut?
No, you don’t. Unsweetened shredded coconut works perfectly fine and will give you a less sweet final product. It’s a great option if you’re watching your sugar intake. You could also use toasted coconut flakes for a deeper flavor and more crunch. It’s all about your personal taste preference.
This cake is for a kid’s party. Any fun decoration ideas?
Kids will love this cake! You can use the coconut to make fun shapes. Press blue tinted coconut around the edges to look like ocean waves. Use fruit leather cut into fish shapes and place them on the “waves.” You could also arrange fresh fruit like pineapple chunks and strawberries in a happy face on top. Let their imaginations run wild!
Can I make this into a layered cake?
You can, but it requires a bit more planning. Bake the batter in two 8-inch round pans for about 25-28 minutes. Let them cool completely. Place one layer on a plate, spread a thin layer of pudding, then add the second layer. Frost the top and sides with the remaining pudding and cover with coconut. It makes a stunning birthday or celebration cake.
How do I prevent the coconut from getting soggy?
The coconut should stay pleasantly tender, not soggy, if you follow the recipe. The key is making sure the pudding has thickened completely before spreading it. If the pudding is too thin, it will soak into the coconut. Also, don’t assemble the cake in a very humid environment. Toasting the coconut first (my secret!) also helps it stay a bit more resilient.
Is there a way to make this cake without a box mix?
Yes, you can use a homemade yellow cake recipe. You’ll need a recipe that makes enough batter for a 9×13 pan. Simply replace about 1 ¼ cups of the liquid in your from-scratch recipe with the undrained canned crushed pineapple. You may need to reduce other liquids slightly. The rest of the assembly steps are exactly the same.
Go Ahead, Bring the Sunshine Indoors!
This Pineapple Coconut Dream Cake is more than just a dessert. It’s a mood-lifter, a crowd-happy, and a testament to how easy baking can be. It has never failed me, from casual family dinners to big holiday feasts. I hope it brings as much joy to your table as it has to mine. So preheat that oven, open that can of pineapple, and get ready for your own taste of paradise. Happy baking, my friend!
Garlic Butter Chicken
Ingredients
Equipment
Method
- Preheat your oven to 350°F (175°C) and prepare a 9x13-inch baking dish with butter or non-stick spray and a light dusting of flour.
- In a large bowl, combine the yellow cake mix, eggs, melted butter, and vanilla, stirring until just combined.
- Add the entire can of crushed pineapple (juice included) to the batter and mix until smooth.
- Pour the batter into the prepared baking pan and spread evenly before baking for 30-35 minutes until golden brown.
- Once baked, let the cake cool completely in the pan on a wire rack.
- In a medium bowl, whisk together the instant vanilla pudding mix and cold milk until thickened and smooth.
- Spread the thickened pudding evenly over the cooled cake and sprinkle sweetened shredded coconut on top.
- Cover the cake and refrigerate for at least one hour before serving.