Bring the Restaurant Home: Your Homemade On The Border Salsa
Have you ever found yourself scraping the bottom of that little salsa bowl at your favorite Mexican restaurant, wishing you could just take a whole vat of it home? Me too. That’s exactly why I became obsessed with cracking the code for that iconic On The Border salsa flavor. After many, many taste tests (a tough job, but someone had to do it!), my family declared this copycat version a roaring success. It’s zesty, fresh, and tastes like a fiesta in a bowl.
The Story Behind the Scoop
That bright red, slightly chunky salsa served with endless baskets of warm chips is a staple of the On The Border experience. While the exact recipe is a closely guarded secret, the magic lies in its perfect balance. It’s not too fiery, not too bland, but packed with tomato flavor and a hint of spice. My homemade version pays homage to that classic restaurant-style salsa. It blends the convenience of canned tomatoes with the fresh punch of lime, cilantro, and onion. The result is a salsa that’s both nostalgic and incredibly easy to make in your own kitchen.
Why This Salsa Recipe is a Keeper
You will absolutely love this recipe because it’s faster than driving to the restaurant! In about 15 minutes of active prep, you have a huge bowl of salsa ready to chill. The flavors are clean and customizable. Want more heat? Add it. Prefer it smokier? A quick roast does the trick. Plus, making it yourself means you control the ingredients—no preservatives, just fresh, good food. It’s a guaranteed crowd-pleaser for any gathering.
Perfect Occasions for This Zesty Dip
- Game Day Gatherings: It’s the ultimate chip dip for cheering on your team.
- Taco Tuesdays (or Any Day!): Elevate your homemade tacos, burritos, or quesadillas.
- Summer BBQs and Potlucks: A fresh, cool contrast to all the grilled meats.
- Movie Night In: Ditch the store-bought jar for this vibrant homemade version.
- Just Because: Sometimes, you just need a bowl of salsa in the fridge for snack attacks!
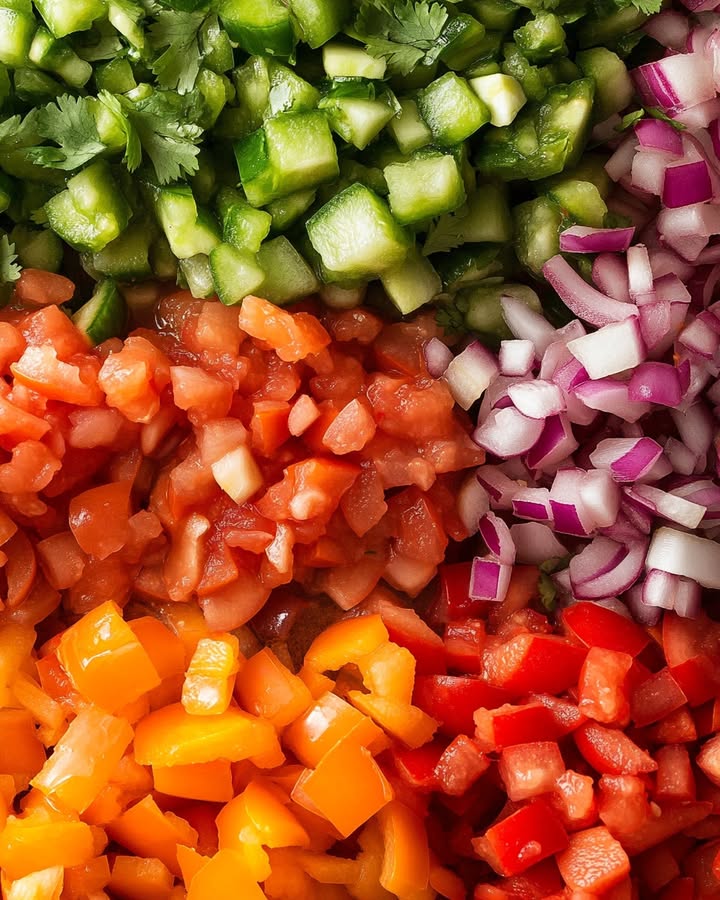
Gathering Your Salsa Ingredients
Here’s everything you need to create this flavor explosion:
- 2 large Roma Tomatoes, chopped
- 2 cans (14.5 oz each) Diced Tomatoes, plain
- 2 medium Jalapeños, seeded & chopped
- 2 tbsp Fresh Lime Juice
- 1 tbsp Cumin
- 2 tbsp Minced Garlic
- 1 large White Onion, chopped
- 2 tsp Salt, to taste
- 1/4 tsp Cayenne Pepper or Red Pepper Flakes
- 1/2 cup Fresh Cilantro, chopped
Easy Ingredient Swaps
No worries if you’re missing something! Cooking is all about flexibility.
- No fresh Roma tomatoes? Use an extra can of diced tomatoes. The canned ones provide most of the base.
- Out of fresh jalapeños? A tablespoon of pickled jalapeños from a jar will work in a pinch.
- Not a cilantro fan? You can simply leave it out. The salsa will still be delicious.
- Only have lime juice from a bottle? It’s okay for this recipe, but fresh lime adds a brighter zing.
- Don’t have cayenne? A dash of your favorite hot sauce can add that extra kick.
Let’s Make Some Homemade Salsa!
Get your blender ready—this is the fun part. Watching all those bright ingredients whirl together into the perfect dip is so satisfying.
Step 1: The Big Blend
Add all your ingredients to the blender in the order listed. This helps the blades grab everything evenly. Now, this is where you decide your salsa fate! For a smooth, restaurant-style texture, let the blender run for a good 30 seconds. If you love a chunkier salsa with little bits of tomato and onion, use the pulse button. Pulse 8-10 times until it’s just combined. You’ll see the vibrant red color form instantly.
Step 2: The Taste Test
This is the most important step. Grab a clean spoon and take a taste. Is it perfect? Does it need a little more salt to make the flavors pop? Maybe you want more heat. This is your chance to be the boss of your salsa. Pro tip: Add any extra seasonings in very small amounts, blend for just 5 seconds more, and taste again. It’s easy to add more, but impossible to take it out!
Step 3: The Flavor Chill
Pour your gorgeous salsa into a pretty serving bowl. Now, patience! Cover it and tuck it into the refrigerator for at least 30 minutes. This waiting time is magic. It lets the sharpness of the raw onion and garlic mellow. It allows the cumin and lime juice to get to know the tomatoes. The flavors marry and become so much deeper and better.
Step 4: The Grand Finale
It’s time! Pull your salsa from the fridge. Give it a quick stir. Grab your favorite tortilla chips—the sturdy ones are best for scooping. Dive in and enjoy that fresh, zesty, homemade goodness. Serve it with everything from scrambled eggs at breakfast to grilled fish at dinner. Chef’s tip: For a fancy touch, drizzle a little crema or sour cream on top and add a single cilantro leaf right before serving.
Your Salsa Countdown Clock
This recipe is wonderfully quick, with most of the time being hands-off chilling.
- Prep Time: 15 minutes (chopping and blending)
- Chill Time: 30 minutes (essential for flavor!)
- Total Time: 45 minutes
- Servings: About 6 hungry snackers
A Secret for Smoky Depth
My absolute favorite trick is to roast the fresh Roma tomatoes and jalapeños before blending. Just place them under your oven’s broiler for 5-7 minutes until the skins are lightly charred and blistered. Let them cool, then blend. This adds an incredible, smoky layer of flavor that makes the salsa taste like it came straight from a grill.
A Little Tomato Tale
Did you know the reason we use both fresh and canned tomatoes is science? Canned tomatoes are packed at the peak of ripeness. They give the salsa a consistent, rich tomato flavor year-round. The fresh Roma tomatoes add a brighter, juicier note and a bit of texture. Together, they create the perfect salsa base.
Tools You’ll Need
- A good blender or food processor
- A sharp knife and cutting board
- A measuring spoon set
- A rubber spatula (to get every last bit out!)
- A medium mixing or serving bowl with a lid
Keeping Your Salsa Fresh
Store any leftover salsa in an airtight container in the refrigerator. It will stay perfectly fresh and tasty for 5 to 7 days. The flavors often get even better on the second day.
I do not recommend freezing this salsa. The fresh ingredients like onion and cilantro don’t freeze well. They can become mushy and watery when thawed, ruining the perfect texture you worked so hard to create.
Always use a clean spoon to scoop out what you need. This prevents introducing bacteria from a used chip back into the container. Keeping it covered and cold is the key to a longer salsa life.
Pro Tips for Salsa Success
- Seed Carefully: For milder heat, scrape out ALL the white ribs and seeds from the jalapeños. For more heat, leave some in.
- Garlic Power: If you’re a garlic lover, try using freshly minced garlic instead of the jarred kind for a sharper, more aromatic kick.
- Cilantro Prep: To easily chop cilantro, bunch it up tightly and slice it thinly with a sharp knife. No need to pick every single tiny leaf off the stems—the tender stems have flavor too!
Making Your Dip Look Delicious
- Serve in a colorful Mexican-style pottery bowl.
- Create a dipping station with different chips: yellow corn, blue corn, and even plantain chips.
- Garnish the top with a whole sprig of cilantro or a thin lime wheel.
- For parties, serve individual small cups of salsa so guests can easily walk and munch.
Healthier & Fun Variations
Want to mix it up? Try one of these six tasty twists on the classic recipe.
- Roasted Veggie Salsa: Roast the Roma tomatoes, jalapeños, and the onion with a little oil before blending. This creates a deep, caramelized flavor and uses no extra additives.
- Fruit Salsa Fusion: Add 1/2 cup of finely chopped mango or pineapple to the blended mix. It adds a sweet and tangy twist that’s amazing with fish tacos.
- Extra Chunky Pico de Gallo Style: Skip the blender! Just dice all ingredients very finely and mix in a bowl. It’s a fresh, textured salad-like salsa.
- Black Bean & Corn Salsa: After blending the base, stir in a drained can of black beans and a cup of sweet corn (thawed if frozen). It turns the dip into a hearty side dish.
- Green Tomatillo Salsa Verde: Swap the red tomatoes for 1 pound of fresh tomatillos (husks removed). Blend them with the other ingredients for a tangy green salsa.
- Creamy Avocado Salsa: Blend in one ripe, pitted avocado with the other ingredients. It creates a luxuriously creamy, pale green dip that’s absolutely irresistible.
Common Mistakes to Avoid
Mistake 1: Skipping the Chill Time
I know you’re eager to dig in, but tasting your salsa right out of the blender is not the full experience. The flavors are still separate and sharp. The raw onion and garlic can be overpowering. Chilling for at least 30 minutes lets the ingredients relax and blend together beautifully. It makes a world of difference in taste. Plan ahead for this simple but crucial step.
Mistake 2: Over-blending into Salsa Soup
It’s easy to get blender-happy and puree everything into a smooth liquid. Unless you want a thin sauce, this is a misstep. For that perfect scoopable, slightly chunky texture, use the pulse function. Pulse a few times, check, then pulse again. You want to control the texture, not let the blender control you. Remember, you can always blend more, but you can’t un-blend.
Mistake 3: Not Adjusting the Seasoning
Following the recipe exactly is great, but everyone’s taste buds are different. Not tasting and adjusting at the end is a missed opportunity. Your tomatoes might be less sweet, or your lime extra juicy. Always do a final taste test. Add a pinch more salt if it tastes flat, or a dash more lime if it needs brightness. Make the salsa yours.
Mistake 4: Using Old or Dried Spices
That jar of ground cumin hiding in the back of your spice cabinet from two years ago? It has lost its punch. Fresh, fragrant spices are key in a simple recipe like this. If your cumin or cayenne pepper doesn’t smell like anything when you open the jar, it’s time for a new one. Good spices make your homemade salsa taste professional.
Your Salsa Questions, Answered
How long does this homemade salsa last in the fridge?
Stored properly in a sealed container, your homemade salsa will stay fresh and delicious for 5 to 7 days. Always check for any off smells or signs of spoilage before eating leftovers. The fresh ingredients mean it won’t last as long as store-bought versions with preservatives, but it tastes so much better you’ll probably finish it before then!
Can I make this salsa less spicy?
Absolutely! The main source of heat is the jalapeño pepper. For a mild salsa, remove all the white ribs and seeds from the jalapeños before chopping. You can even start with just one jalapeño. Also, go easy on or omit the cayenne pepper. You can always add more heat later, but you can’t take it out.
What’s the best way to get a really smooth salsa?
For an ultra-smooth, almost pureed texture, use a high-powered blender and let it run for a full 45 seconds to a minute. Make sure you add enough liquid (the juice from the canned tomatoes helps). If your blender is struggling, you can add a single tablespoon of water to help it along, but don’t add too much or you’ll thin it out.
Why do you use both canned and fresh tomatoes?
This is the secret to great flavor and texture year-round. Canned tomatoes are picked and packed at their peak ripeness. They give a consistent, deep tomato flavor. The fresh Roma tomatoes add a brighter, juicier note and a little bit of that fresh tomato texture. Together, they create a more complex and satisfying base than using just one type.
Can I use a food processor instead of a blender?
Yes, a food processor works perfectly. In fact, many people prefer it because it gives you more control over the chunkiness. Use the pulse function to get the exact texture you want. Just be careful not to over-process it if you’re aiming for a chunky style salsa.
What can I serve with this salsa besides tortilla chips?
Oh, so many things! This salsa is incredibly versatile. Use it as a topping for scrambled eggs or omelets. Spoon it over grilled chicken, fish, or steak. Use it as a topping for baked potatoes. Mix it into rice or quinoa for a flavor boost. It’s also perfect as a fresh topping for tacos, burritos, quesadillas, or nachos.
Is it necessary to seed the jalapeños?
It’s highly recommended if you want to control the heat level. Most of a pepper’s capsaicin (the compound that creates the burning sensation) is concentrated in the white ribs and seeds. By removing them, you get the lovely jalapeño flavor without as much intense heat. If you love spice, feel free to leave some or all of them in!
My salsa turned out watery. What did I do wrong?
This can happen if your fresh tomatoes were very juicy or if you over-blended. Next time, you can try draining the canned diced tomatoes slightly before adding them. For your fresh Romas, you can scoop out some of the watery seed pulp before chopping. If it’s already made, just drain off a little excess liquid from the top or stir in a tablespoon of tomato paste to thicken it.
Can I double or halve this recipe?
You sure can! This recipe is very easy to scale up or down. Just make sure your blender or food processor is big enough if you’re doubling it. You might need to blend in two batches. The chill time and flavor balance will remain the same, no matter the batch size.
I don’t have fresh cilantro. Can I use dried?
I really don’t recommend dried cilantro for this fresh salsa. Dried cilantro has a very different, almost dusty flavor that won’t give you the bright, herby pop you want. If you must use it, start with just 2 teaspoons (since dried herbs are more concentrated), but know the flavor will be different. It’s better to simply leave it out if you don’t have fresh.
Ready for Your Salsa Victory Lap
There you have it! Your guide to making incredible On The Border style salsa right at home. It’s simple, fresh, and always a hit. This recipe has saved me from many a last-minute snack panic and has become a staple in my fridge. I hope it brings as much joy and flavor to your table as it has to mine. Now go grab those chips, blend up a batch, and get dipping. Your taste buds will thank you!