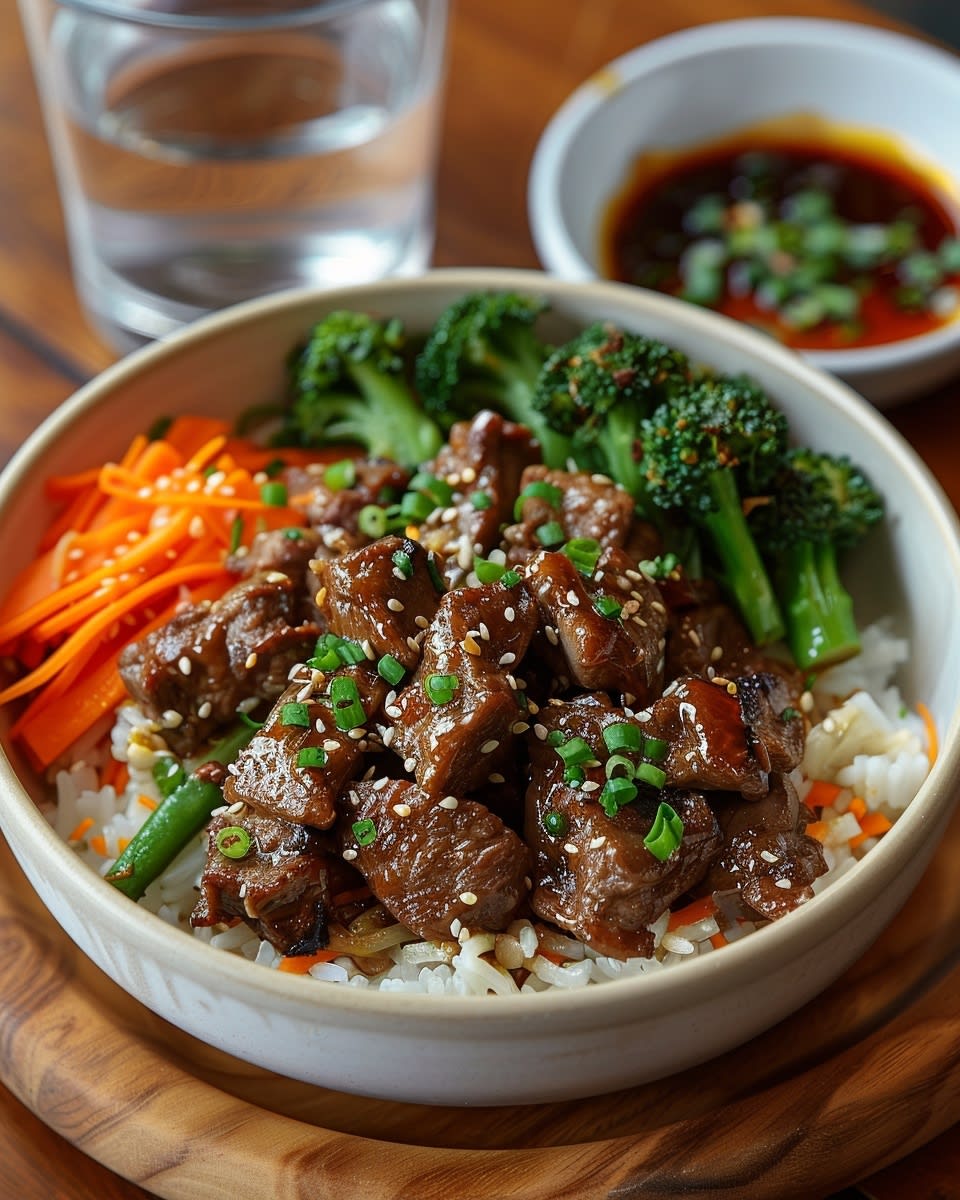
Why I’m Obsessed with This Honey Garlic Beef Rice Bowl
Last Tuesday, I stood in my kitchen at 6 PM with a rumbling stomach and zero motivation to cook anything fancy. You know that feeling, right? I needed something quick but also satisfying enough to make the effort worthwhile. That’s when I threw together this Honey Garlic Beef Rice Bowl, and let me tell you, it changed my entire weeknight dinner game. My kids actually put down their phones to ask for seconds. That’s when I knew I had stumbled onto something special.
This recipe has become my go-to solution for those nights when I want restaurant-quality food without leaving my house. The best part? It takes less time than waiting for takeout delivery. I’ve made this dish at least twenty times in the past few months, tweaking it here and there until I got it just right.
What makes this Honey Garlic Beef Rice Bowl different from other beef bowls you might find? It’s all about balance. The sweet honey plays perfectly against savory garlic and tender beef strips. The sauce clings to every grain of rice, creating this amazing flavor in each bite. I’ve served this to friends who claim they don’t cook, and even they’ve texted me photos of their successful attempts.
The beauty of this recipe lies in its flexibility too. You can prep the ingredients on Sunday and have dinner ready in fifteen minutes on a busy Wednesday. I often double the sauce recipe and keep extra in my fridge for up to a week. It works beautifully on chicken, pork, or even roasted vegetables if you want to mix things up.
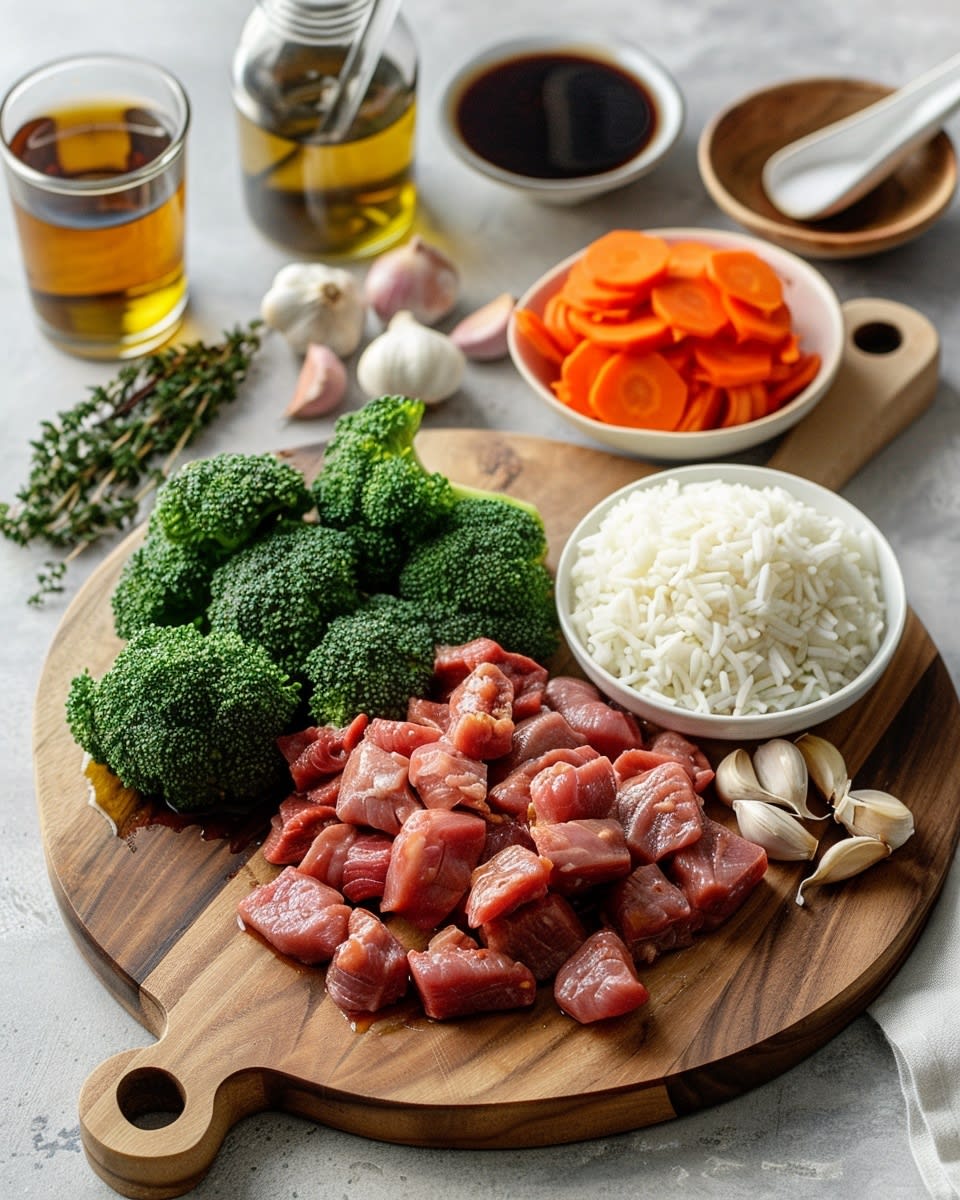
Everything You Need for Your Honey Garlic Beef Rice Bowl
Let me walk you through the ingredients list. I’m big on keeping things simple and accessible. You won’t find any weird specialty items that require a trip to three different stores. Most of these ingredients are probably sitting in your pantry or fridge right now.
For the Beef and Marinade:
- 1 pound of flank steak or sirloin – I prefer flank steak because it stays tender when sliced thin. Sirloin works great too if that’s what you have on hand.
- 3 tablespoons of soy sauce – This adds that salty, umami depth we’re looking for. Low sodium works fine if you’re watching your salt intake.
- 1 tablespoon of cornstarch – This is my secret weapon. It helps the beef stay tender and creates a slightly thick coating that holds the sauce beautifully.
- 1 teaspoon of sesame oil – Just a little bit adds so much flavor. Don’t skip this if you can help it.
For the Honey Garlic Sauce:
- 1/3 cup of honey – I use regular honey from my local farmer’s market, but any kind works. If your honey has crystallized, just warm it up for a few seconds.
- 6 cloves of fresh garlic, minced – Fresh garlic makes a huge difference here. I tried it with garlic powder once, and it just wasn’t the same.
- 2 tablespoons of soy sauce – Yes, more soy sauce. It balances the sweetness of the honey perfectly.
- 1 tablespoon of rice vinegar – This adds a subtle tang that brightens up the whole dish. Apple cider vinegar can substitute in a pinch.
- 1 teaspoon of fresh ginger, grated – The fresh ginger adds warmth and complexity. I keep ginger in my freezer and grate it while frozen.
- 1/4 teaspoon of red pepper flakes – Optional, but I love a tiny kick of heat. Adjust to your preference.
For the Bowl:
- 3 cups of cooked white or brown rice – I usually cook my rice in the morning or use leftover rice from another meal. Day-old rice actually works better.
- 2 tablespoons of cooking oil – Vegetable oil, canola oil, or avocado oil all work great for high-heat cooking.
- Green onions, sliced – For garnish and a fresh, sharp flavor on top.
- Sesame seeds – These add a nice crunch and make the dish look restaurant-worthy.
- Steamed broccoli or your favorite vegetables – I almost always add broccoli or snap peas for color and nutrition.
Ingredient Tips from My Kitchen:
I want to share a few things I’ve learned through trial and error. When shopping for beef, look for cuts with good marbling. Those thin white lines of fat keep the meat juicy and tender. Ask your butcher to slice it thin if you’re short on time or don’t feel confident with your knife skills.
The quality of your soy sauce matters more than you might think. I buy a mid-range Japanese or Chinese brand. It doesn’t need to be expensive, but those cheap bottles can taste harsh and overly salty.
For the honey, raw honey gives you the best flavor, but honestly, any honey works. I keep a squeeze bottle of honey in my pantry specifically for cooking. It makes measuring so much easier.
Fresh garlic is non-negotiable for me in this recipe. I tried the jarred minced garlic once when I was desperate, and the flavor just fell flat. Fresh garlic has this sharp, pungent quality that mellows into sweetness when you cook it. That transformation is key to getting the sauce right.
One more thing about the rice: this Honey Garlic Beef Rice Bowl is actually a fantastic way to use up leftover rice. Cold rice from the fridge works better than fresh rice because it’s less sticky. It heats up quickly and doesn’t turn mushy when you add the saucy beef on top.
I keep all these ingredients stocked in my kitchen now. Once you make this recipe, you’ll probably want to do the same. There’s something really comforting about knowing you can whip up this amazing dinner any night of the week without running to the store first.


Getting Your Beef Ready for the Perfect Honey Garlic Bowl
Now that we’ve got everything gathered, let’s talk about the most important part: actually preparing that beef. Here’s the thing—this step makes or breaks your entire dish. I learned this the hard way after serving my family some seriously tough, chewy beef during my first attempt. My husband politely chewed for about five minutes straight before I realized something had gone terribly wrong.
The secret to tender beef starts way before it hits the pan. First, you want to slice your beef against the grain. I know everyone says this, but let me explain what it actually means because I was confused about it for years. Look at your piece of meat closely. See those long lines running through it? Those are muscle fibers. You want to cut perpendicular to those lines, not parallel. When you slice against the grain, you’re shortening those muscle fibers, which makes each bite way more tender.
I like to pop my beef in the freezer for about 20 minutes before slicing. It firms up just enough to make cutting thin, even strips so much easier. You’re aiming for strips about 1/4 inch thick. Thinner is actually better here because the beef cooks super fast and absorbs more of that amazing marinade.
Once your beef is sliced, throw it in a bowl with the soy sauce, cornstarch, and sesame oil we talked about earlier. Use your hands to really work that marinade into every piece. I usually let this sit for at least 15 minutes, but if I’m being honest, sometimes I marinate it for just five minutes when I’m really hungry. It still turns out great. The cornstarch does something magical—it creates this velvety coating that keeps the moisture locked in while giving the outside a slight crisp.
Funny enough, this slicing technique works for so many other dishes too. I use the same method when I’m making garlic butter steak bites with potatoes, and the results are consistently tender every single time.
Cooking the Beef to Absolute Perfection
Alright, this is where things get exciting. Heat your largest skillet or wok over high heat. And I mean high heat. This was another mistake I made early on—I was too timid with the temperature, and my beef sort of steamed instead of getting that beautiful sear. You want to hear that satisfying sizzle the second the beef touches the pan.
Add your oil and let it get shimmery hot. You’ll know it’s ready when the oil starts to ripple slightly. Now here’s a tip that changed everything for me: don’t crowd the pan. I cook my beef in two batches, even though it’s tempting to dump it all in at once. When you overcrowd the pan, the temperature drops and you end up with gray, steamed beef instead of gorgeously caramelized pieces.
Spread the beef out in a single layer and resist the urge to move it around. Let it sit undisturbed for about 90 seconds. This gives the bottom time to develop that nice brown crust. Then flip or toss the pieces and cook for another minute or so. The beef should still have a little pink in the center because it’s going to cook more when we add the sauce. If you’re using quality cuts like the ones I mentioned for your honey garlic beef rice bowl recipe, they’ll stay incredibly tender even with the high heat.
Once your beef is cooked, transfer it to a clean plate. Don’t wipe out your pan though—all those browned bits stuck to the bottom are pure flavor gold.
Creating That Irresistible Honey Garlic Sauce
This is honestly the easiest part, which is kind of funny since the sauce is what makes this easy honey garlic beef rice bowl so addictive. I’ve had friends ask if there’s some complicated secret ingredient, and I love watching their faces when I tell them it’s literally just five simple things mixed together.
Turn your heat down to medium. In that same pan where you cooked the beef, add a tiny splash more oil if it looks dry. Toss in your minced garlic and grated ginger. The smell that hits you in about ten seconds is absolutely incredible. My whole house fills with this amazing aroma that has my family wandering into the kitchen asking when dinner will be ready.
Cook the garlic and ginger for maybe 30 seconds, stirring constantly. You want it fragrant but not brown. Burned garlic tastes bitter and will ruin your whole sauce, so watch it carefully. By the way, if you enjoy cooking with garlic as much as I do, you should check out this sheet pan lemon garlic chicken recipe—it’s another weeknight winner.
Now add your honey, soy sauce, and rice vinegar all at once. Stir everything together and let it come to a gentle bubble. This is where the magic happens. The sauce will start to reduce and thicken slightly. I usually let it cook for about two to three minutes, stirring occasionally.
Getting the Consistency Just Right
The texture of your homemade honey garlic beef bowl sauce depends entirely on personal preference. Some people like it thin and light, almost like a glaze. Others want it thick and sticky. I fall somewhere in the middle—I want it thick enough to coat the beef and rice without being goopy.
If your sauce seems too thin, here’s what I do: mix a tiny bit more cornstarch (maybe half a teaspoon) with a tablespoon of cold water in a small bowl. Stir it until there are no lumps. Drizzle this mixture into your bubbling sauce while whisking constantly. You’ll see it thicken up within seconds. Add just a little at a time because you can always add more but you can’t take it back.
On the flip side, if your sauce gets too thick (which happened to me once when I got distracted by a phone call), just splash in a tablespoon or two of water to thin it out. No big deal.
Here’s something I’ve experimented with: the balance of sweet to savory. The recipe I gave you hits that perfect middle ground that most people love. But my mother-in-law prefers things less sweet, so when she comes over, I use about a quarter cup of honey instead of a third. My kids, on the other hand, would drink this sauce straight if I let them, so sometimes I add an extra tablespoon of honey for them.
The tanginess from the rice vinegar can also be adjusted. I’ve made this with as little as half a tablespoon and as much as two tablespoons. More vinegar gives you a brighter, more complex flavor that cuts through the richness of the beef. Less vinegar lets the honey and garlic really shine.
Bringing It All Together
Once your sauce reaches the consistency you want, add that cooked beef back into the pan. Toss everything together so each piece gets coated in that gorgeous honey garlic sauce. Let it all cook together for just another minute or two. This final step allows the flavors to really marry together and lets the beef finish cooking through if needed.
I like to add my red pepper flakes during this stage if I’m using them. The heat distributes evenly, and cooking them briefly in the sauce mellows them out just a touch. You get warmth without overwhelming spice.
The beef should look glossy and inviting, with the sauce clinging to every piece. If you notice the sauce tightening up too much as it sits, don’t worry. Just add a splash of water and give it a quick stir. This sauce can go from perfect to overly thick pretty quickly as it cools, so I keep an eye on it.
Something I’ve noticed over the months of making this recipe is that the beef almost gets better if you make the sauce a little extra thick. When you spoon it over your rice, the rice absorbs some of that sauce, and having it slightly thicker means you still get plenty of flavor coating the beef. Similar to how I approach recipes like this one pot ground beef zucchini skillet, where the sauce needs to be substantial enough to flavor everything in the dish.
I’ve served this Asian beef rice bowl to at least a dozen different people at this point, and the reaction is always the same. Everyone takes that first bite, their eyes get a little wider, and they immediately ask for the recipe. That’s when I know I’ve nailed it. The beef stays tender, the sauce delivers that perfect sweet-savory punch, and everything comes together in a way that feels much fancier than the effort required.
One last thought on the beef preparation: if you’re working with a tougher cut or just want to guarantee maximum tenderness, you can use the same slicing and marinating technique I sometimes use for slow cooker BBQ pulled beef—really working that marinade in and giving it a bit more time to break down the fibers. But honestly, with the method I’ve shared here, even budget-friendly beef comes out restaurant-quality tender.


Assembling Your Honey Garlic Beef Rice Bowl Like a Pro
Okay, so you’ve got your glossy, sauce-coated beef sitting in the pan looking absolutely gorgeous. Now comes the fun part—building your bowl. I’m going to be honest with you, this step used to stress me out way more than it should have. I’d overthink the presentation, worry about making it look Instagram-worthy, and waste time arranging everything perfectly. Then one night my daughter reminded me we were just eating dinner at home, not running a photo shoot. She was right. That said, there is something really satisfying about a beautifully assembled bowl, even if it’s just for you on a Tuesday night.
Start with your rice base. I use about a cup to a cup and a half of rice per bowl, depending on how hungry everyone is. Sometimes I’ll warm the rice in the microwave for thirty seconds if it’s been sitting, but honestly, room temperature rice works just fine. Fluff it up with a fork first so it’s not all clumped together. I learned this from my friend who lived in Japan for a few years—she says the fluffing makes a surprising difference in how the sauce distributes.
Here’s where I add my vegetables, and this is totally customizable. I usually go with steamed broccoli because it’s easy and my kids will actually eat it. Sometimes I’ll throw in snap peas, shredded carrots, or even edamame. In the summer, I’ve used fresh cucumber slices for a cool, crunchy contrast to the warm beef. The vegetables don’t just add nutrition—they also break up the richness of the sauce and give you different textures in each bite.
I arrange the vegetables on one side of the rice rather than mixing them in. This gives you that restaurant bowl look where everything has its own section. Plus, it makes it easier for people to pick out what they don’t like. My son always pushes his broccoli to the side anyway, so this method saves him the effort of fishing it out.
Now spoon that beautiful honey garlic beef right over the top. I don’t hold back on the sauce either—make sure you get plenty of it spooned over the rice because that’s where so much of the flavor comes from. The rice will soak it up, and trust me, plain white rice transforms into something incredible when it absorbs that sweet and savory sauce.
For garnish, I always use sliced green onions and sesame seeds. The green onions add a sharp, fresh bite that cuts through the richness. I slice them thin on a diagonal because it looks prettier, but also because my kids complain less when the pieces are small. The sesame seeds add this subtle nutty flavor and a nice little crunch. I keep both white and black sesame seeds in my pantry and sometimes use both for visual contrast. It sounds fancy, but it literally takes two seconds to sprinkle them on top.
Sometimes I’ll add a drizzle of extra sesame oil or a sprinkle of red pepper flakes on top if I want more heat. A squeeze of fresh lime juice is also amazing if you want to brighten things up. I discovered this by accident when I had half a lime sitting in my fridge and decided to use it up. The citrus adds this whole other dimension that I wasn’t expecting.
Making Your Rice Bowl Even Better with Smart Additions
Once you’ve mastered the basic assembly, you can start playing around with different elements. I’ve gotten pretty creative with this over the months. One thing I tried recently was adding a fried egg on top. The runny yolk mixes with the sauce and creates this rich, silky coating that’s absolutely divine. My husband now requests the egg every single time.
Pickled vegetables are another game-changer. Quick-pickled cucumbers or radishes add acidity and crunch that really elevate the whole bowl. I make a simple pickle by tossing sliced vegetables with rice vinegar, a pinch of sugar, and salt. Let them sit for even just fifteen minutes while you cook the beef, and you’ve got this bright, tangy element that balances everything beautifully.
I’ve also experimented with different types of rice. Brown rice adds more fiber and a nuttier flavor. Jasmine rice is fragrant and slightly sticky in the best way. I even tried this with cauliflower rice once when I was doing a low-carb thing, and while it’s definitely not the same, it still tasted good. The sauce makes pretty much any grain or rice alternative work.
By the way, if you’re interested in understanding more about the nutritional content of different ingredients you’re using, checking resources about food composition can help you make informed choices about your meals, especially when you’re experimenting with different vegetables or protein sources.
One random thing I discovered—leftovers actually make amazing fried rice the next day. I chop up the beef into smaller pieces, scramble an egg in the pan, add the rice and beef, and toss everything together with a little extra soy sauce. It’s like getting two completely different meals from one recipe.
Presentation Tips That Actually Matter
Here’s the thing about presentation—it doesn’t have to be complicated to look good. I use wide, shallow bowls because they give you more surface area to arrange everything. Those deep narrow bowls just turn into a jumbled mess once you start eating anyway.
Color matters more than you’d think. The beef is brown, the sauce is dark, the rice is white. Without vegetables, it all looks kind of monotone. That’s why I make sure to include something green and maybe something orange or red. It’s not just about aesthetics either—eating a variety of colors usually means you’re getting different nutrients.
I’ve started keeping my garnishes in little bowls when I serve this family-style. Everyone can add their own green onions, sesame seeds, and chili flakes. My daughter loves piling on the sesame seeds, while my son picks off every visible piece of green onion. Letting people customize their own bowls means everyone’s happy, and I’m not playing short-order cook.
Temperature is something I pay attention to now too. Everything should be warm—not scorching hot, but warm enough that the flavors meld together nicely. If your rice is cold and your beef is hot, the contrast can be a bit jarring. Taking an extra minute to warm up your rice makes a difference.
Common Mistakes I’ve Made So You Don’t Have To
Through all my testing of this honey garlic beef and rice recipe, I’ve definitely messed up a few times. Once I added way too much cornstarch to the sauce, and it turned into this weird, gloopy consistency that looked like gravy. I had to thin it out with so much water that the flavor got diluted. Now I’m much more careful with my thickening agents.
Another time I forgot to slice the beef thin enough, and we ended up with these thick, chewy chunks that nobody wanted to eat. My kids asked for cereal instead, which is basically the ultimate cooking failure in my book. Thin slices are absolutely crucial—don’t skip that step or rush through it.
I also learned not to add the vegetables too early. I used to throw my broccoli right into the pan with the beef, thinking I’d save time. But the broccoli would get overcooked and mushy, and it would water down the sauce. Now I steam my vegetables separately and add them at the end. It takes an extra pot, but the texture is so much better that it’s worth it.
One more mistake—making this when I was absolutely starving and trying to rush through it. High heat cooking requires attention. The one time I walked away to help my kid with homework, I came back to find half the garlic burned and the sauce tasting bitter. Now I make sure I have ten uninterrupted minutes before I start cooking the beef and sauce.
Why This Bowl Works for Different Eating Styles
What I love about this recipe is how adaptable it is for different dietary needs and preferences. My sister is gluten-free, so when she visits, I just swap in tamari instead of regular soy sauce. The flavor is almost identical, and she can actually enjoy the meal without worrying.
For my friends who are watching their sugar intake, I’ve made this with less honey or even substituted some of it with a sugar-free sweetener. It’s not exactly the same, but it still delivers that sweet and savory balance we’re going for. You just might need to adjust the amount because artificial sweeteners can be much sweeter than honey.
The portion sizes are easy to adjust too. When I’m making this just for myself at lunch, I use maybe four ounces of beef and half a cup of rice. When my teenagers are home from college and eating like they’ve never seen food before, I’ll triple the recipe and still have people asking if there’s more.
This bowl also works great for meal prep, which I didn’t expect at first. I’ll cook a big batch of beef on Sunday, store it in the fridge, and reheat portions throughout the week. The beef actually gets more flavorful as it sits in that sauce. I keep the rice separate and assemble fresh bowls each day. It makes weekday lunches so much easier.
If you’re someone who enjoys exploring different beef preparations, you might want to check out more beef recipes to add to your regular rotation and expand your cooking repertoire.
Final Thoughts on Making This Bowl Your Own
The best part about this beef and rice bowl recipe is that once you understand the basic technique, you can riff on it endlessly. I’ve swapped the honey for maple syrup when I ran out. I’ve used ground beef instead of sliced steak when that’s what I had in the freezer. I’ve served it over noodles instead of rice. Every version has been delicious in its own way.
Don’t be afraid to trust your instincts and adjust things to your taste. If you think it needs more garlic, add more garlic. If the sauce is too sweet for you, cut back on the honey next time. Cooking should be fun and flexible, not stressful and rigid. This recipe is your starting point, but where you take it is completely up to you.
I hope this recipe becomes as much of a staple in your kitchen as it has in mine. There’s something really satisfying about having a go-to meal that’s quick, delicious, and makes everyone at your table happy. That’s what this Honey Garlic Beef Rice Bowl has become for me, and I think it’ll do the same for you.
Frequently Asked Questions About Honey Garlic Beef Rice Bowl
How long should I marinate the beef?
I typically marinate the beef for about 15 to 30 minutes, which is enough time for the flavors to penetrate and for the cornstarch to work its tenderizing magic. If you’re really pressed for time, even five minutes helps. On the flip side, you can marinate it for up to two hours in the fridge if you want to prep ahead. Just don’t go much longer than that with this particular marinade because the soy sauce can start to make the meat taste overly salty and cure it slightly.
Can I use a different type of meat?
Absolutely, this recipe is super flexible when it comes to protein. I’ve made it with chicken thighs, pork tenderloin, and even shrimp with great success. The cooking time might vary—chicken and pork take about the same time as beef, but shrimp cooks in just two to three minutes. Ground beef or turkey also works if you prefer that texture. Just brown the ground meat, drain any excess fat, and then add your sauce. The flavor profile stays delicious regardless of which protein you choose.
What are some good side dishes to serve with this rice bowl?
Honestly, this bowl is pretty complete on its own since it already has protein, rice, and vegetables. But when I’m feeding a crowd or want to make it more of a feast, I’ll add some simple sides. Asian cucumber salad is refreshing and takes five minutes to throw together. Spring rolls or potstickers make it feel more special. A simple miso soup on the side is lovely too. Sometimes I’ll just put out some edamame with sea salt for people to snack on while I’m finishing up the bowls.
Is there a vegetarian version of this recipe?
Yes, and I’ve made it several times when my vegetarian friends come over. Extra-firm tofu works beautifully—just press it well to remove excess moisture, cut it into cubes, and cook it the same way you would the beef. It gets crispy on the outside and soaks up the sauce wonderfully. Mushrooms are another great option, especially meaty varieties like portobello or king oyster mushrooms. You could also use tempeh or even chickpeas if you want something different. The sauce is so flavorful that it makes any protein taste amazing.
How can I make this dish spicier?
There are several ways to amp up the heat depending on your preference. The easiest is to increase the red pepper flakes in the sauce from a quarter teaspoon to a half or even a full teaspoon. I also sometimes add a tablespoon of sriracha or gochujang to the sauce for a different kind of heat with more depth. Fresh sliced Thai chilies mixed in at the end give you serious spice. A drizzle of chili oil on top before serving is another option. Start conservative though—you can always add more heat, but you can’t take it away once it’s in there.
Can I prepare this in advance?
This is actually a great make-ahead meal with a few considerations. You can slice and marinate the beef up to 24 hours ahead and keep it covered in the fridge. The sauce can be made three to four days in advance and stored in an airtight container. I don’t recommend cooking the beef more than a day ahead because it can get tough when reheated, though it’s still decent. If you’re meal prepping, I’d suggest cooking the beef the night before at most. Rice holds up great in the fridge for up to five days, so you can definitely cook a big batch on Sunday.
What are some variations of the honey garlic sauce?
Once you master the basic sauce, the variations are endless. I’ve made a spicy version with added sriracha and extra ginger that was incredible. A citrus version with orange juice and orange zest added brightness and worked especially well with chicken. You can make it more savory by adding a tablespoon of oyster sauce or hoisin sauce. Some people like adding a splash of mirin for more complexity. I’ve even made a sticky teriyaki-style version by reducing the vinegar and adding more soy sauce. Play around and find your favorite combination.
How do I store leftovers?
I store the beef and rice separately in airtight containers in the refrigerator. They’ll keep well for about three to four days. Keep the vegetables separate too if possible, as they can get soggy sitting in the sauce. When I’m ready to eat leftovers, I reheat the beef gently in a skillet with a splash of water to loosen the sauce. The rice can go in the microwave for a minute or two. Sometimes I’ll add a tiny bit more soy sauce or sesame oil when reheating to freshen up the flavors. The sauce thickens quite a bit in the fridge, so don’t be surprised if it looks different the next day.
Can I freeze this honey garlic beef?
The cooked beef freezes reasonably well for up to three months. I portion it into individual servings in freezer bags, squeeze out the air, and lay them flat to freeze. This makes them stack easily and thaw quickly. The texture changes slightly after freezing—it’s not quite as tender as fresh—but it’s still tasty and convenient. I don’t recommend freezing the assembled bowls because rice doesn’t freeze and reheat well in my experience. It gets mushy and weird. Just freeze the beef and sauce, and make fresh rice when you’re ready to eat.
What’s the best way to reheat this dish?
For the best results, I reheat the components separately. Put the beef in a skillet over medium heat with a tablespoon or two of water and stir gently until it’s heated through. This takes about three to four minutes and helps keep it from drying out. The rice goes in the microwave covered with a damp paper towel for about 90 seconds. This keeps it from drying out too. If you’re in a rush and need to reheat everything together, use medium-low heat and stir frequently, adding a bit of water as needed. It won’t be quite as good as fresh, but it’s still a solid meal.
Ingredients
Equipment
Method
- Coupez le boeuf contre le grain en fines lanières (environ 1/4 de pouce d'épaisseur).
- Dans un bol, mélangez le boeuf avec la sauce soja, la fécule de maïs et l'huile de sésame ; mélangez et laissez reposer pendant au moins 15 minutes.
- Chauffez une grande poêle ou un wok à feu vif et ajoutez l'huile de cuisson.
- Cuisinez le boeuf par batches, sans surcharger la poêle, pendant 1,5 minute d'un côté puis retournez pour cuire pendant encore une minute, en laissant un peu de rose au centre.
- Transférez le boeuf cuit sur une assiette, en gardant les jus de la poêle.
- Dans la même poêle, ajoutez l'ail haché et le gingembre râpé ; faites cuire pendant 30 secondes jusqu'à ce que l'arôme soit libéré.
- Ajoutez le miel, la sauce soja et le vinaigre de riz ; remuez et laissez mijoter pendant 2-3 minutes jusqu'à ce que le mélange épaississe légèrement.
- Ajustez l'épaisseur si nécessaire avec de la fécule de maïs et de l'eau ou de l'eau seule.
- Remettez le boeuf dans la poêle et mélangez pour enrober le saucisse ; faites cuire ensemble pendant une minute supplémentaire.
- Servez sur du riz, garni d'oignons verts et de graines de sésame, et ajoutez des légumes cuits à la vapeur.